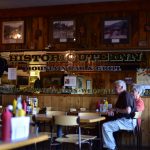
Take a Walk
A Quest into the Wild
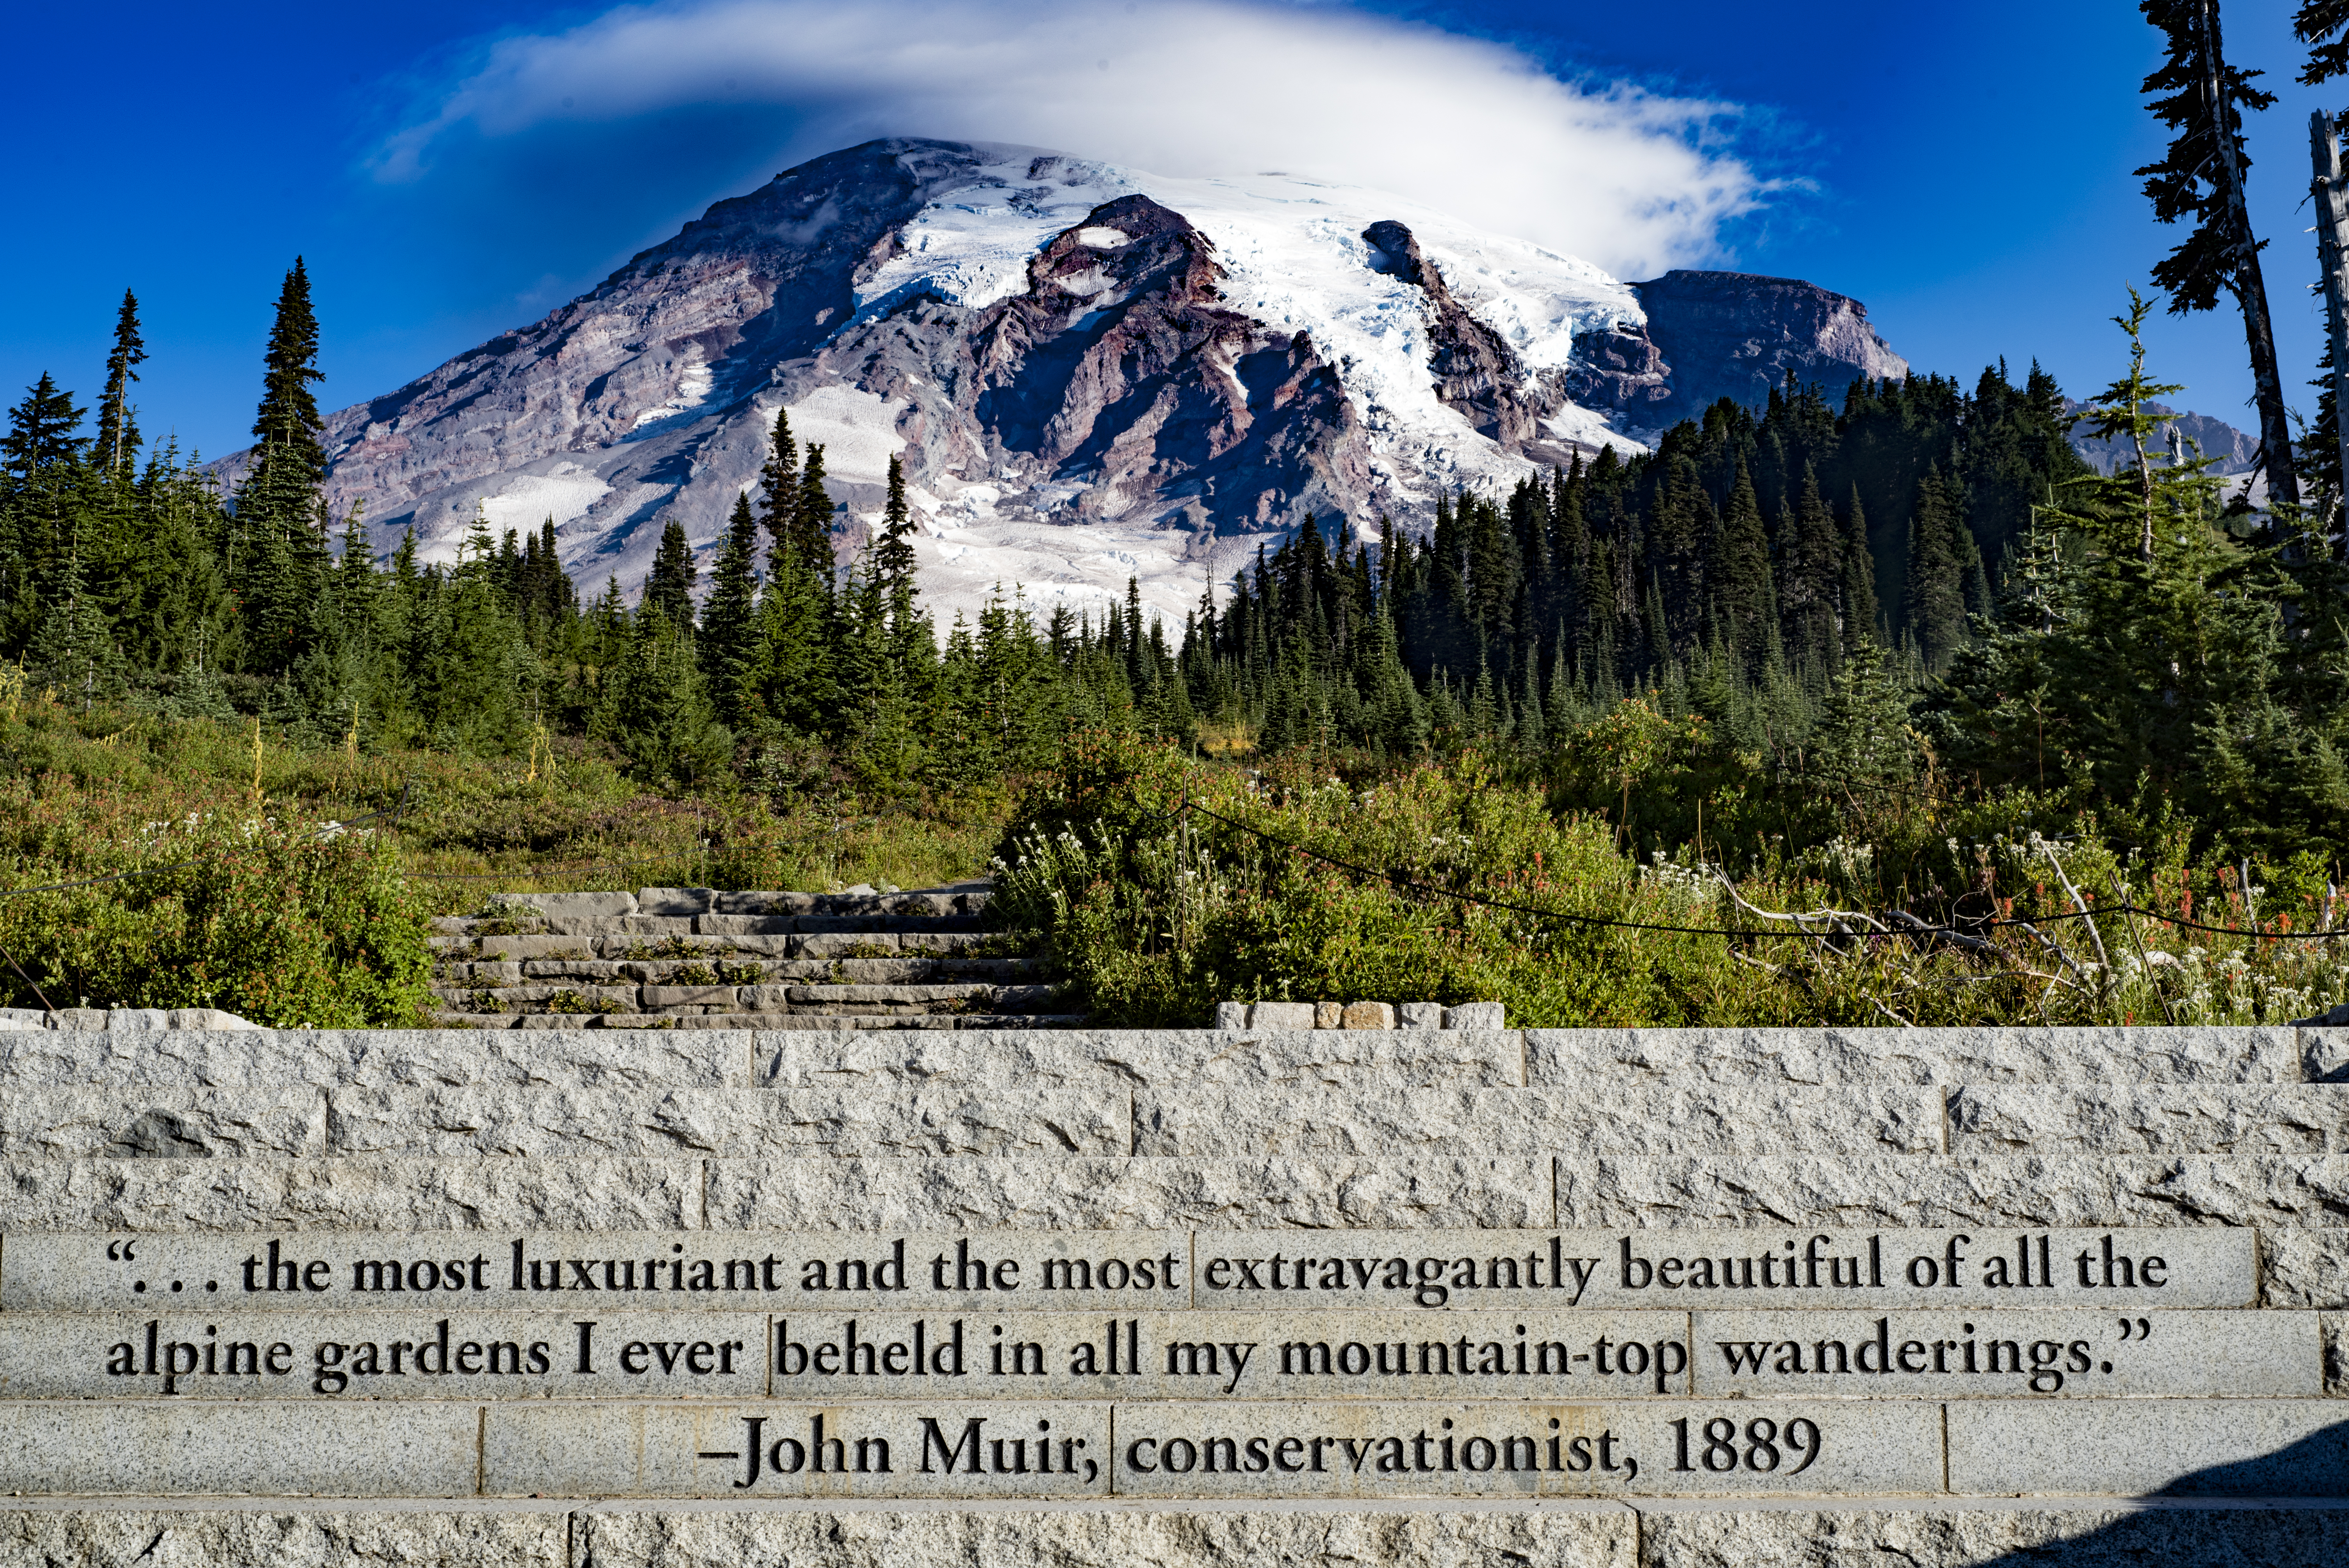
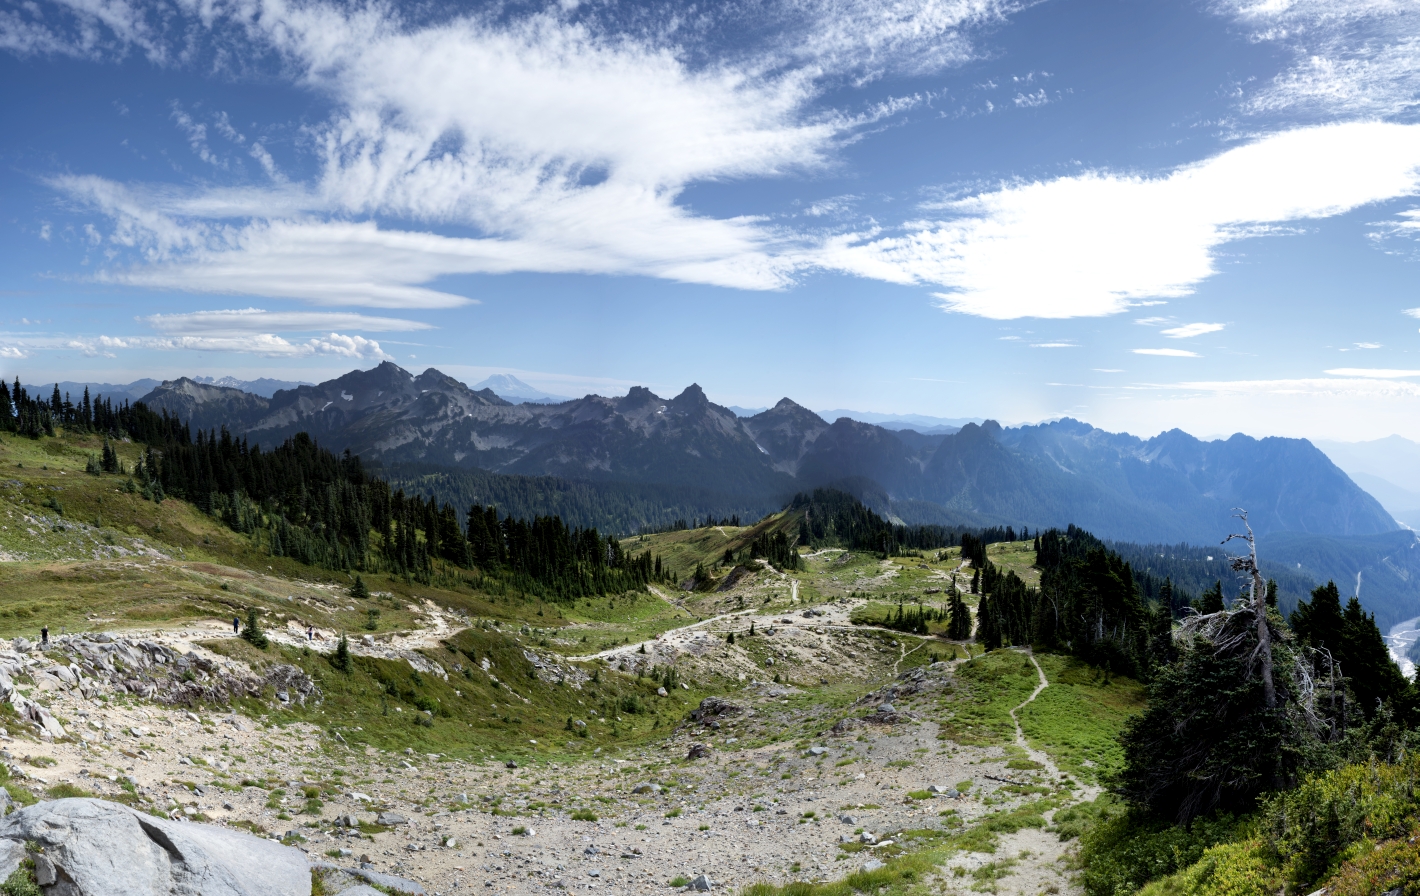
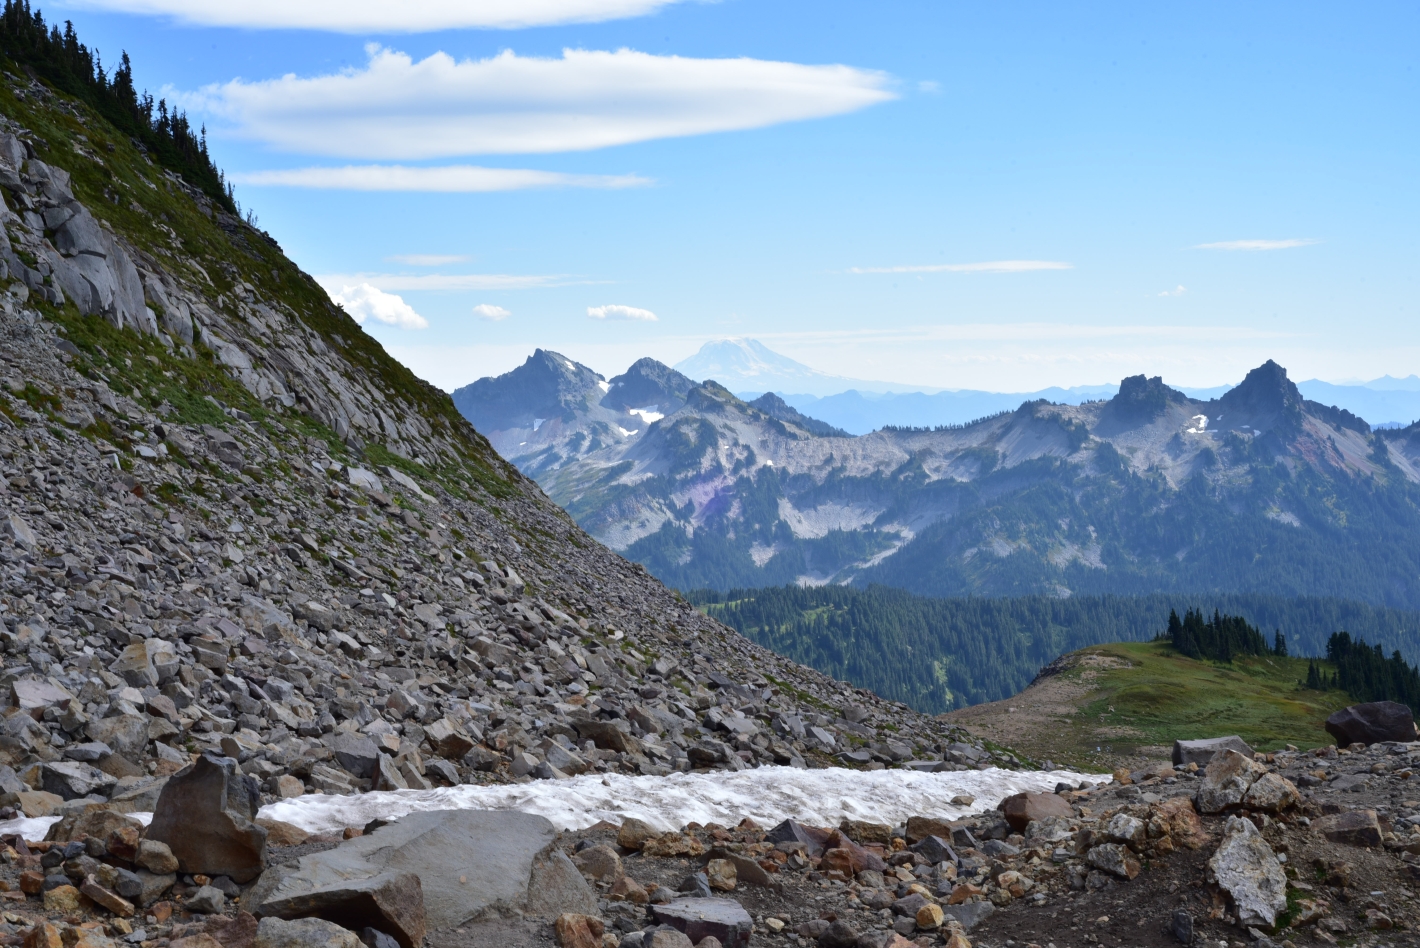
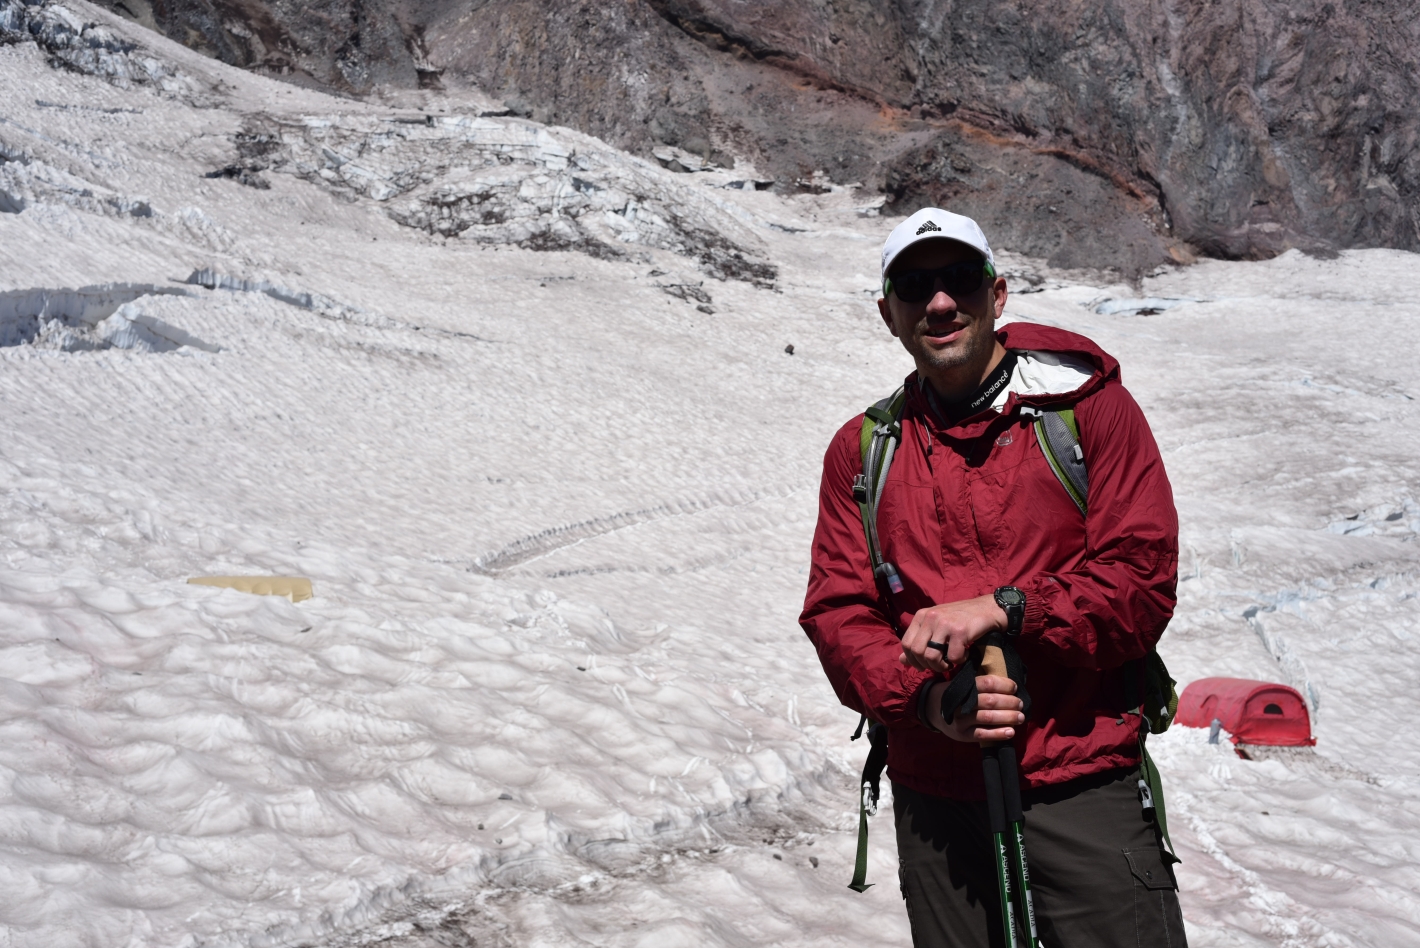
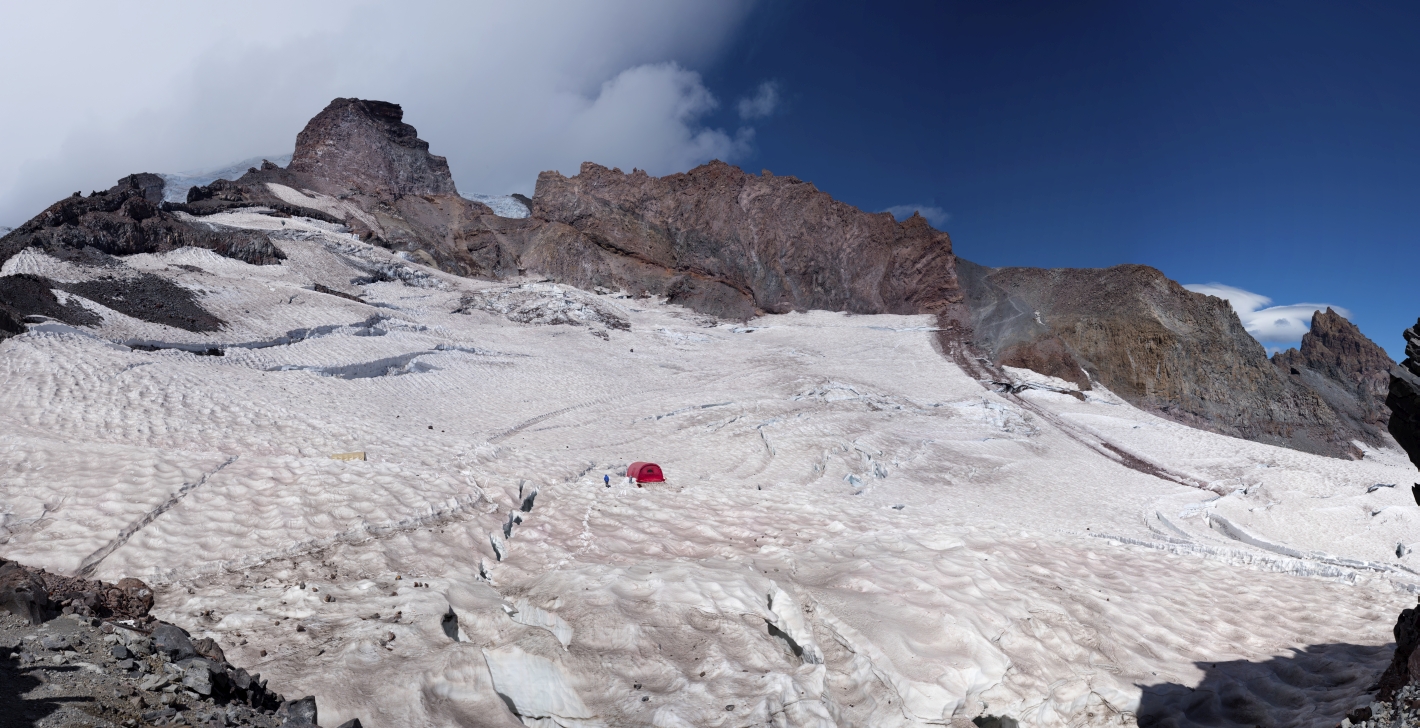
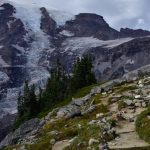
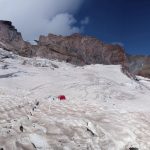
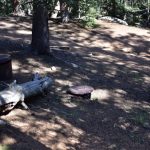
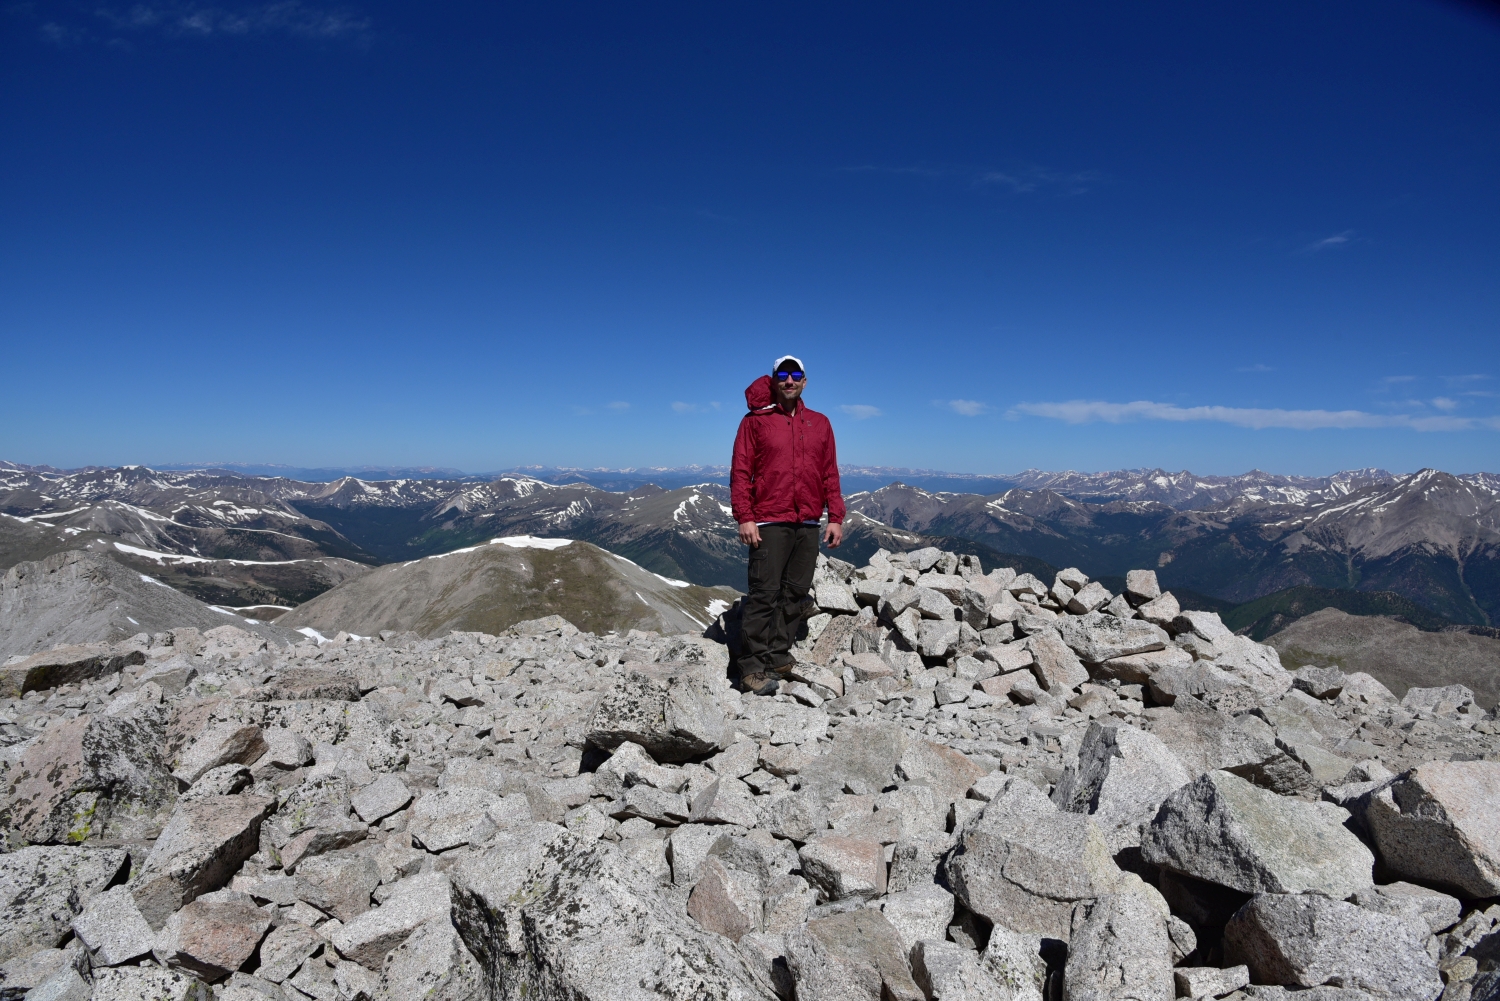
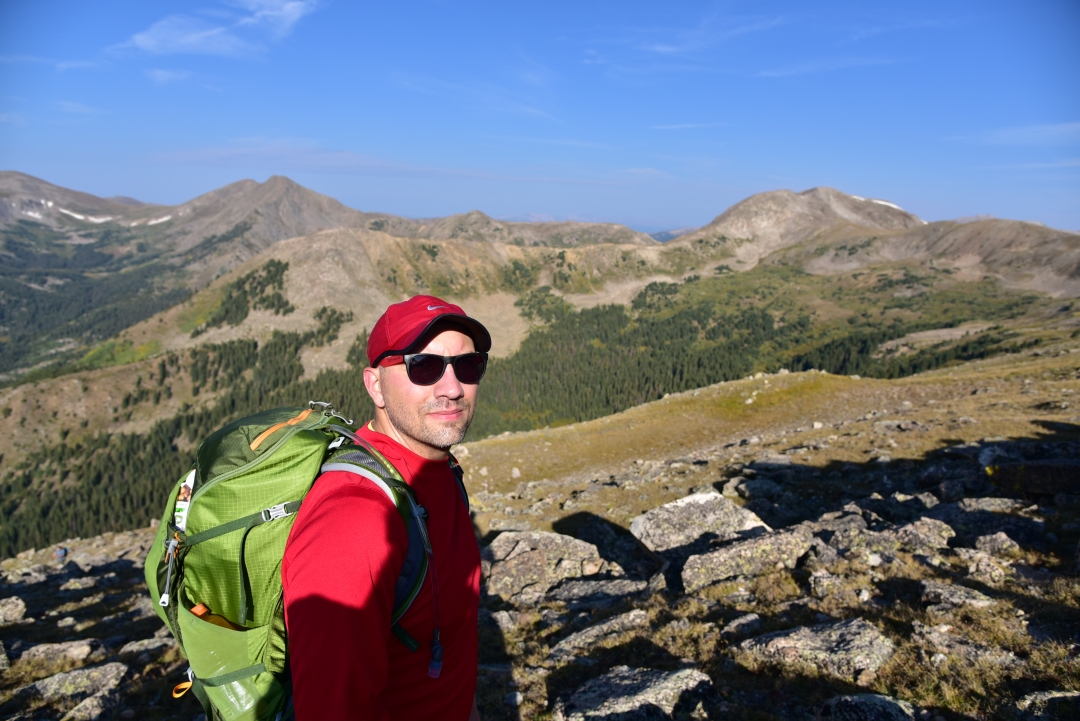
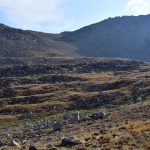
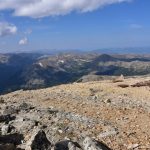
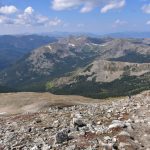
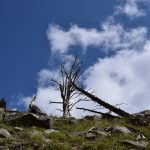
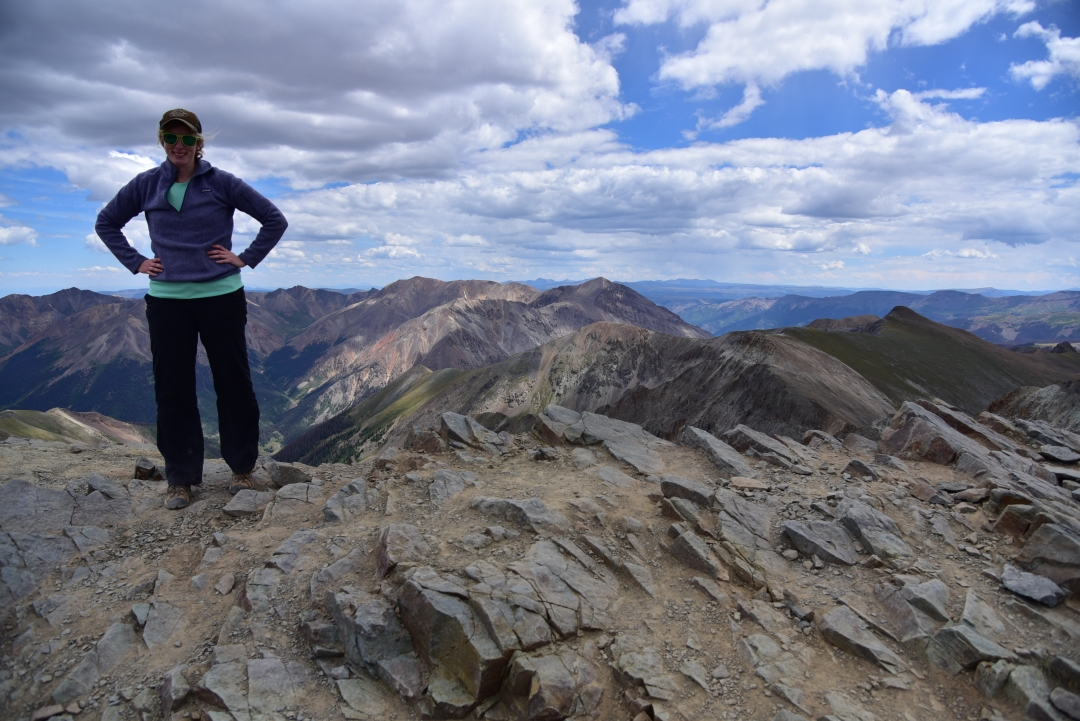
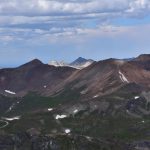
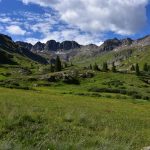
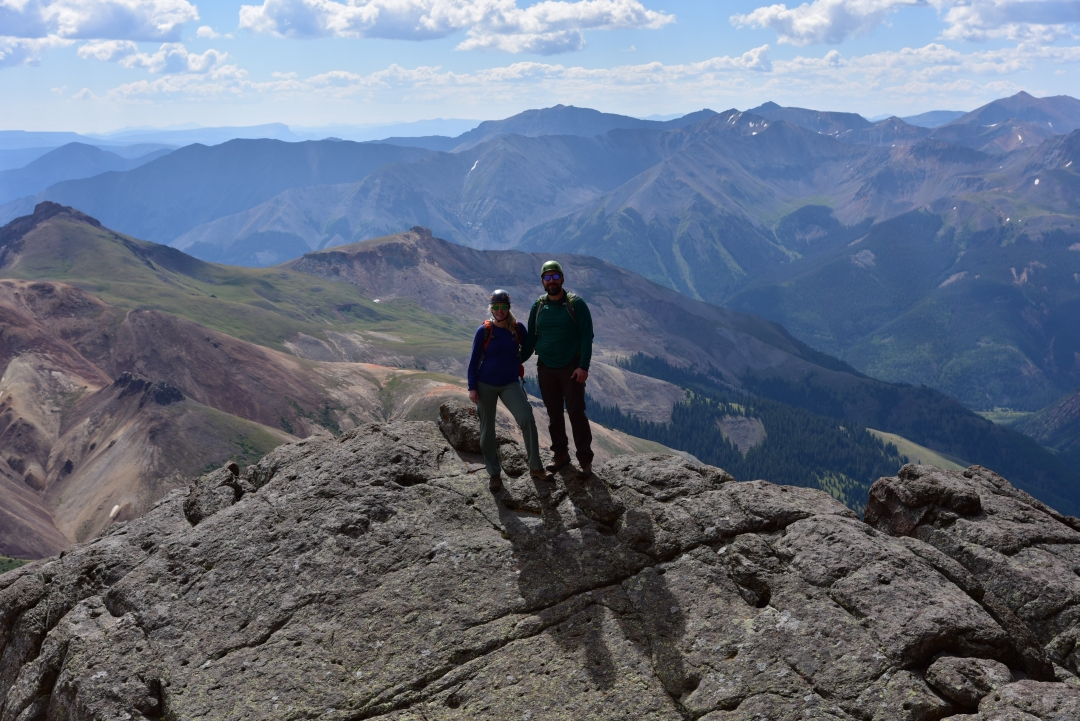
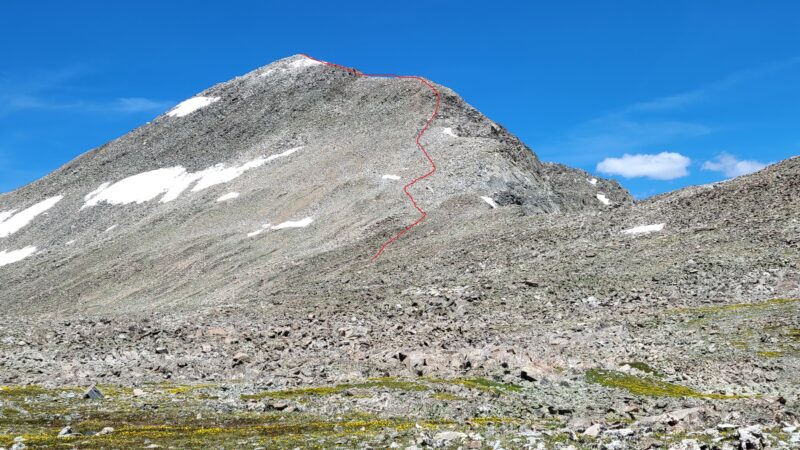
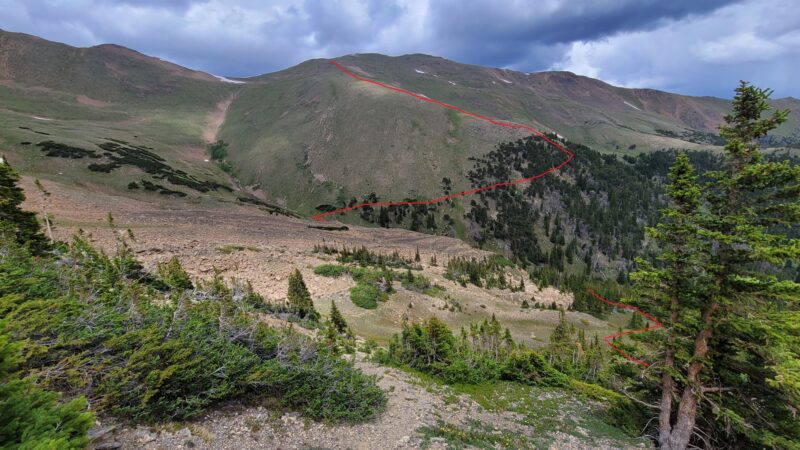
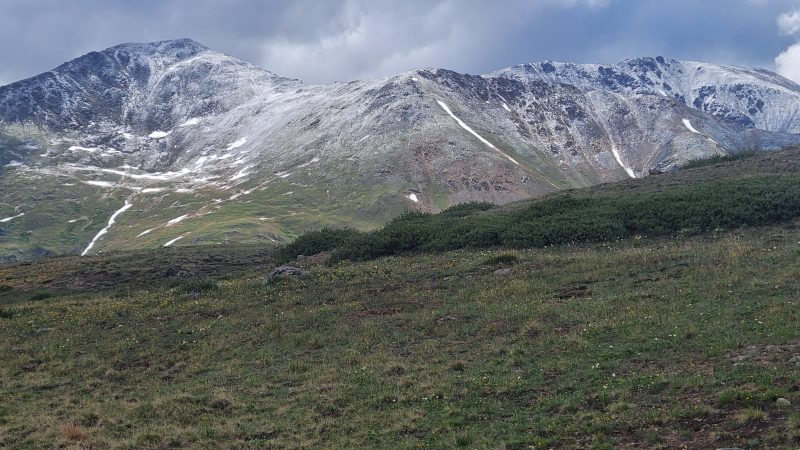
Camp Muir, Mount Rainier 10,100 ft
Some Background and History
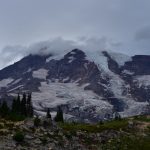
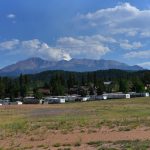
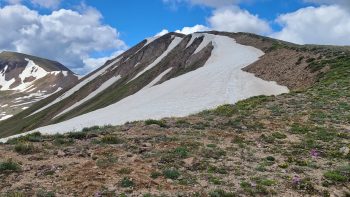
A rich geological and human history both contribute to the wonder of the stratovolacano that is Mount Rainer. The peak was forged by fire and years of lava, ash, and pumice piling up, layer upon layer, eventually forming a summit cone, a consequence of thousands of years of volcanic activity. Close to 6,000 years ago, the peak had a violent eruption which knocked off the cone, and subsuquent years of volcanic activity left the peak with two overlapping craters at the top. It is the largest peak in the Cascade Range and sits prominently above all other peaks in the nearby vicinity at a stunning 14,411 feet above sea level. For perspective, the others sit around 6,000 feet. The mountain face is constantly changing as fluctuations in the weather and temperature shift and melt its heavily glaciated regions. Every few hundred years, small to moderate eruptions occur, with the most recent occuring in 1894. Importantly, the mountain is still an active volcano.
The Mount Rainier region has always pulled humanity close, providing natural resources and in more modern times, recreational ones. Native American tribes have gathered for millenia to hunt and gather resources here. The first recorded ascent occured in 1870 by Rhode Islander, Hazard Stevens. The park was established in 1899, and the true infrastructure began to take shape following the creation of the National Park Service in 1916, though the road to Paradise had been in place since 1910. There has been some tumultuous history of the park through the years, that we won’t go into here, but relative stabilty has been achieved since the 1960s. Visitation continues to boom, with 1.8 million visits recorded in 2016. The number of attempted climbs of Mount Rainier is also large. In the last 8 years, there have been between 10,000 and 11,000 yearly registered climbers.

Our Trip
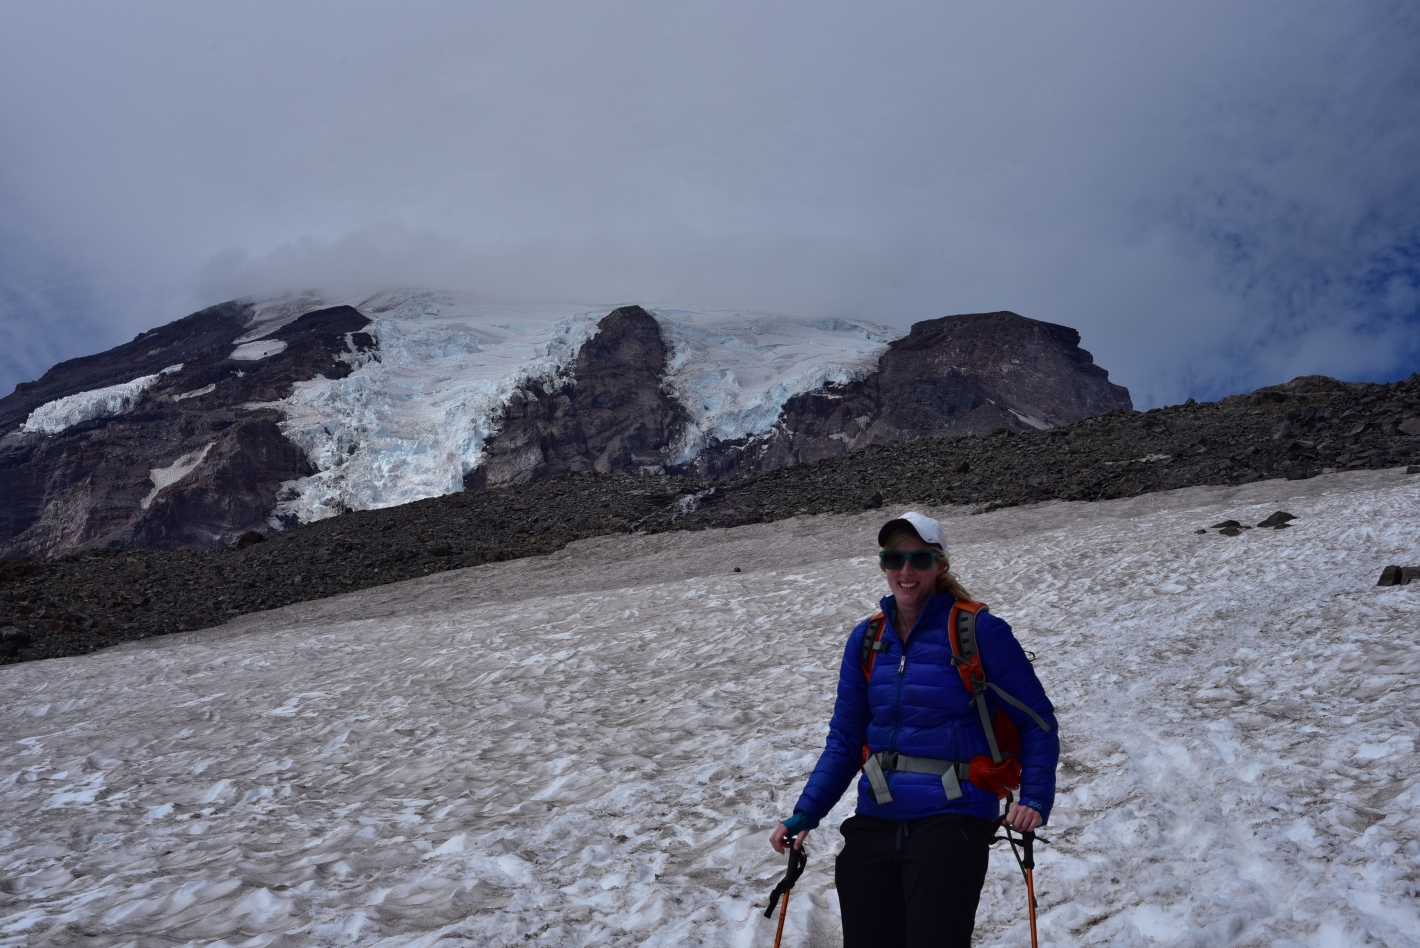
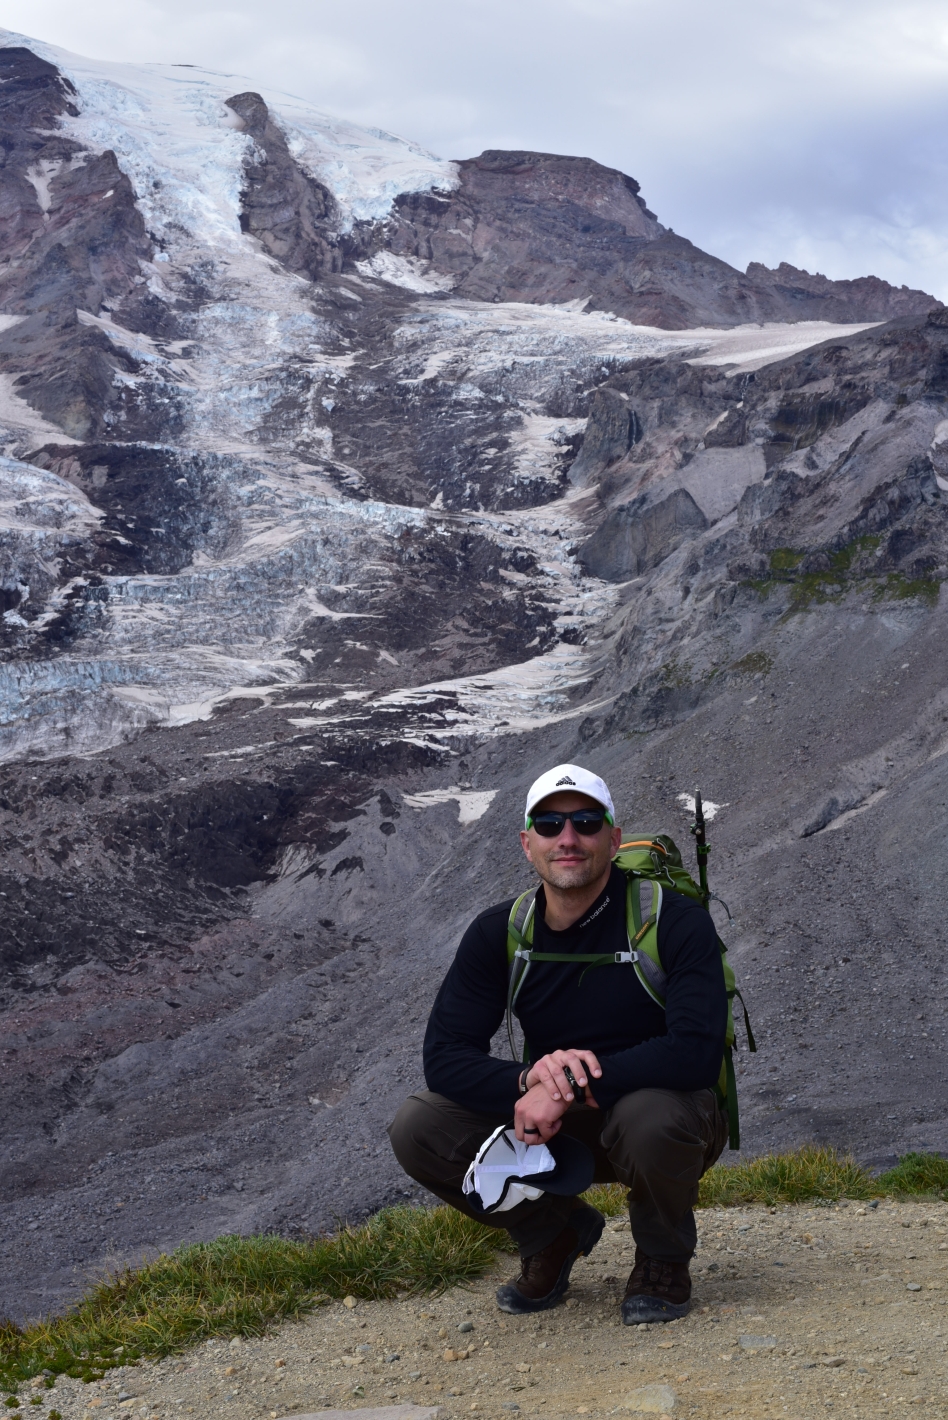
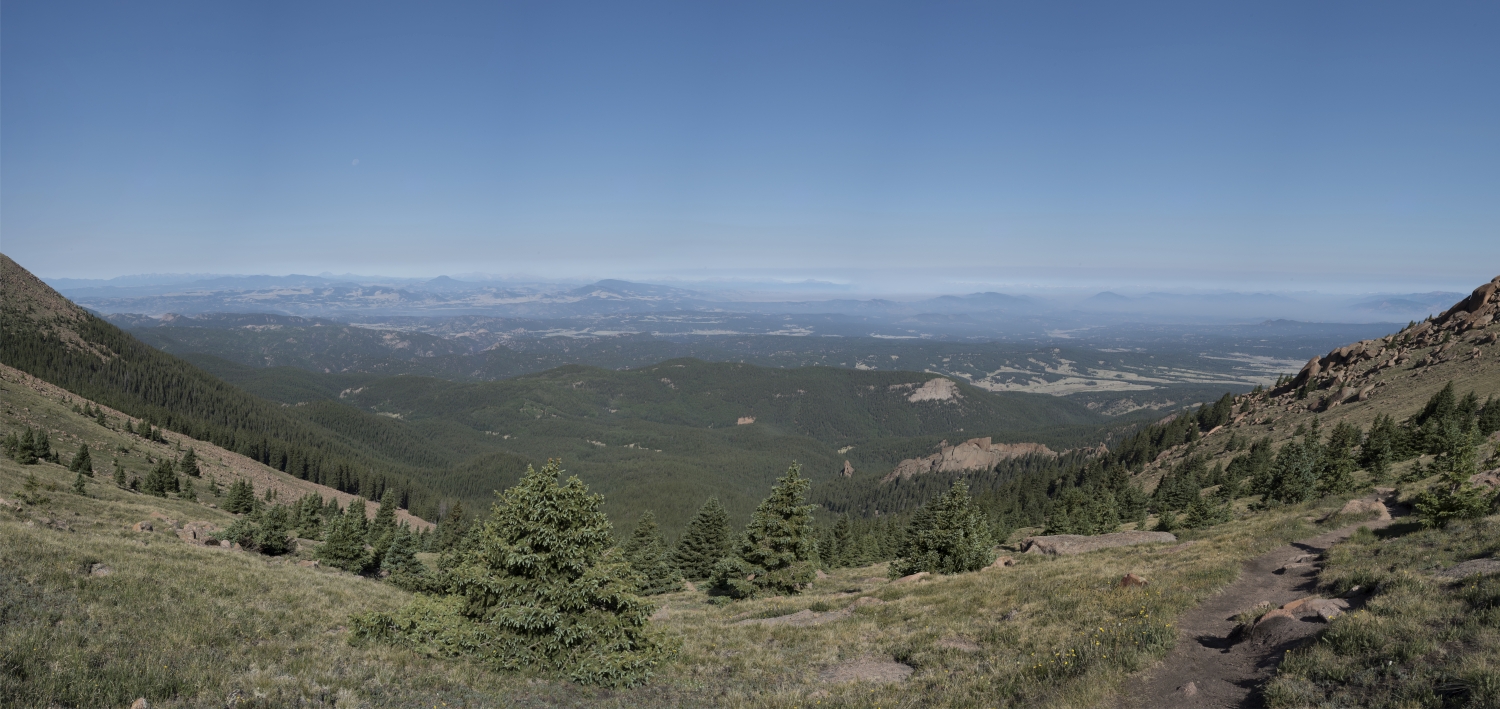
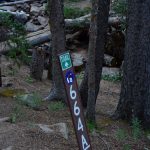
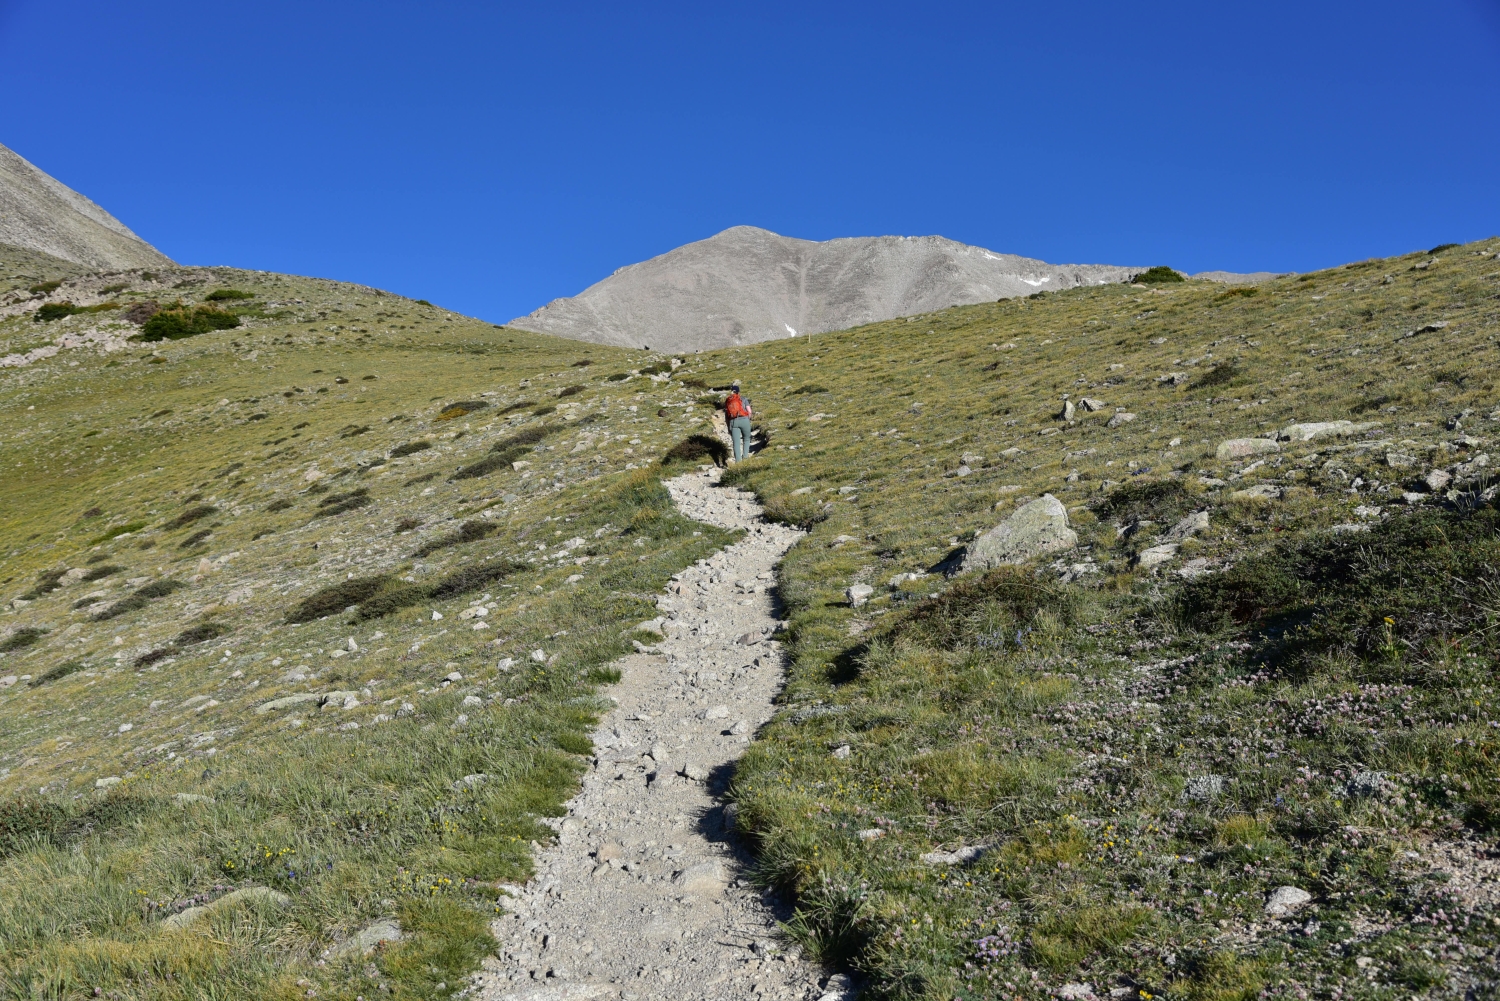
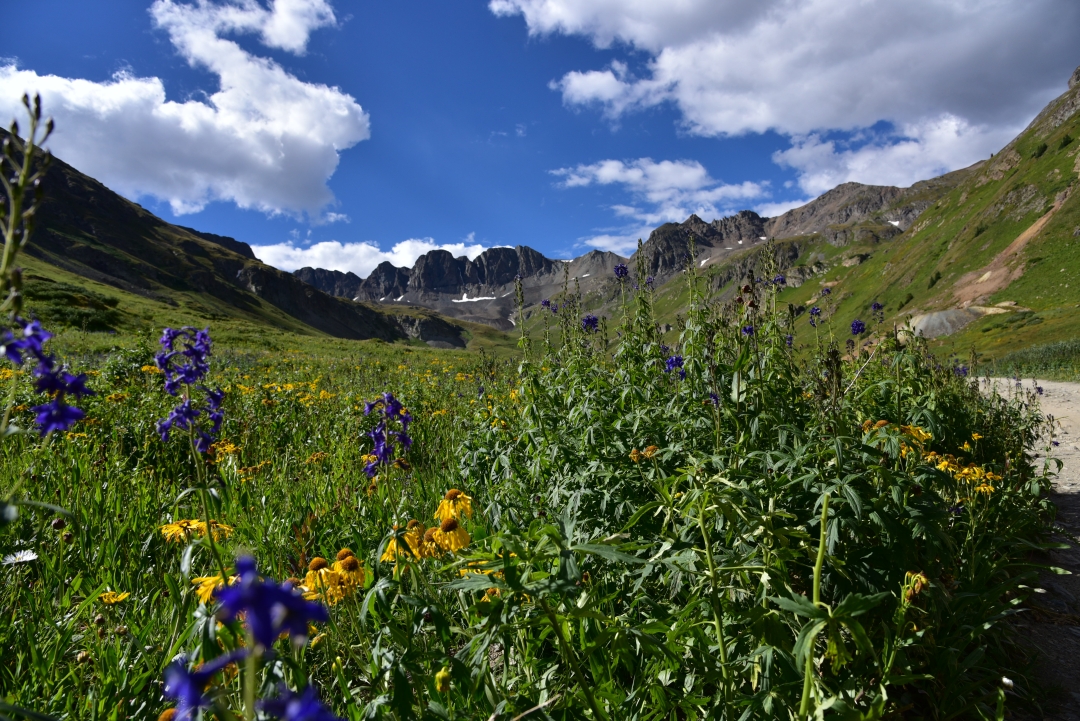
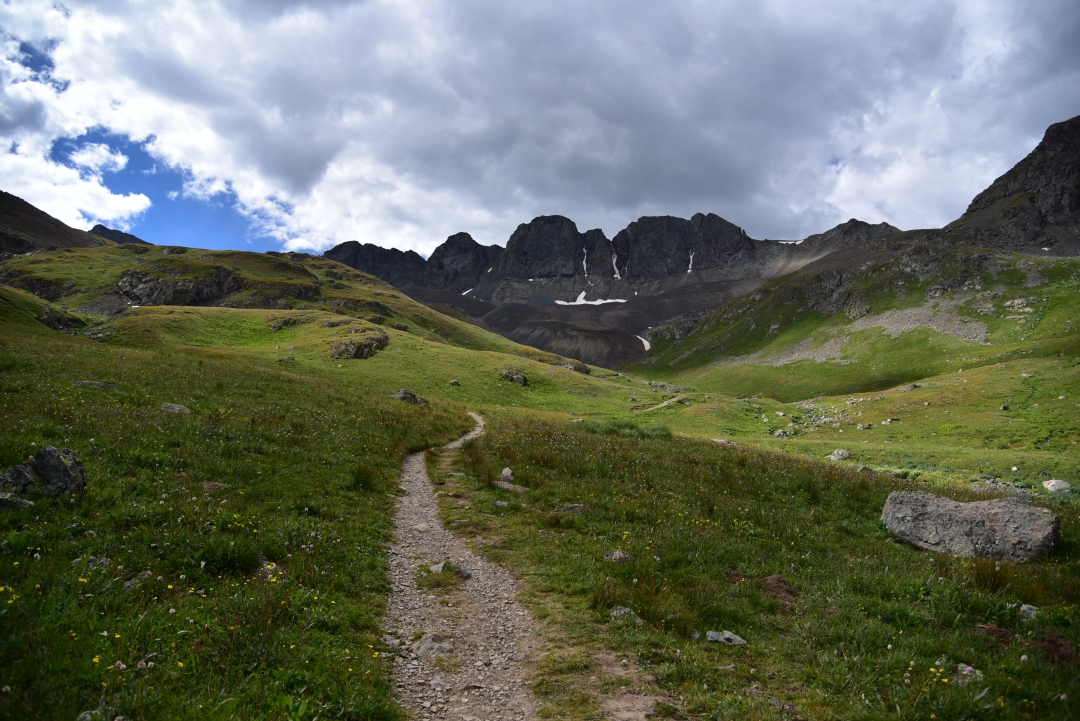
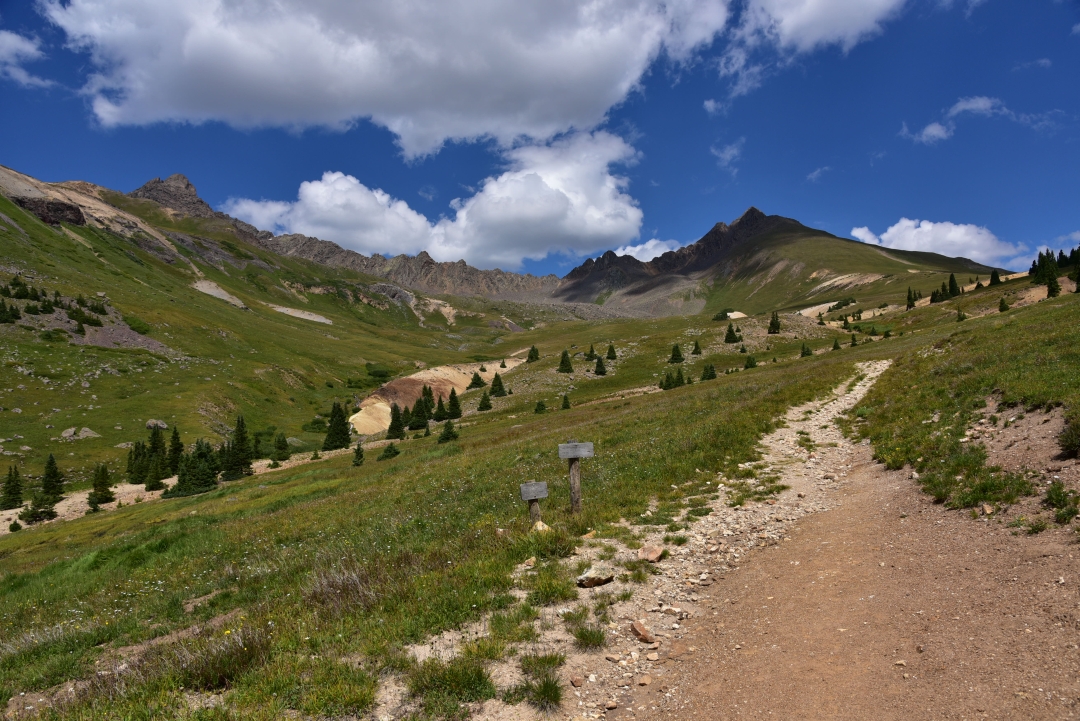
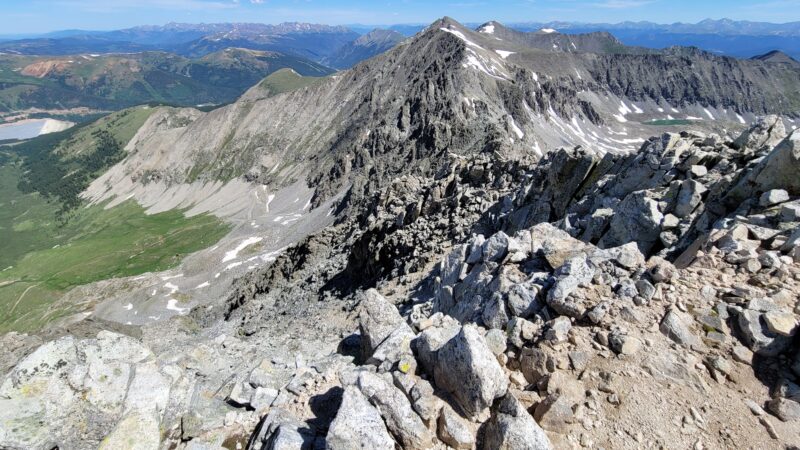
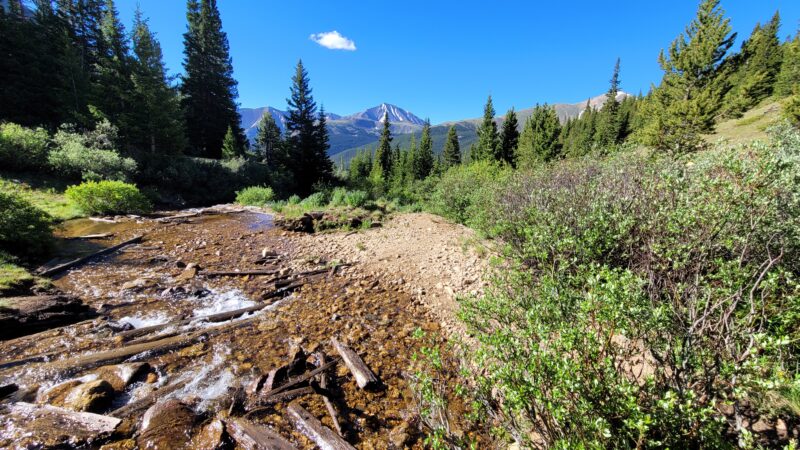
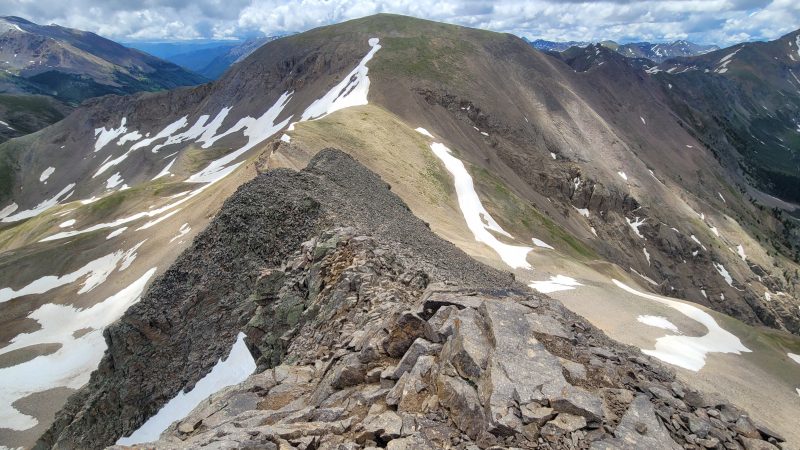
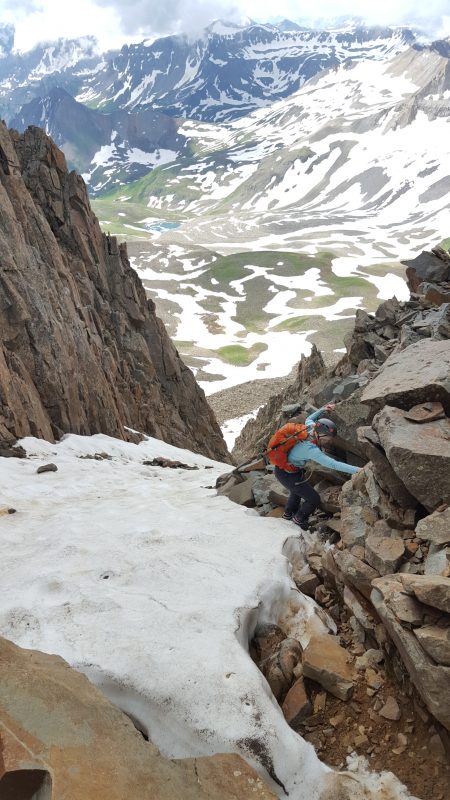
We have not escaped the allure of Mount Rainier and decided to plan a visit to the mountain in mid-September as part of a week long excursion to the Pacific Northwest. Though we did not decide to make an attempt at the summit as we had insufficient time to secure guiding resources, we did want to go halfway and visit the famous Camp Muir. Camp Muir, named after the famous alpinist, is nestled at 10,100 feet above the Muir Snowfield and on the edge of the Cowlitz Glacier and serves as base-camp for those planning a summit attempt. Reaching the camp requires a mix of trail hiking and traversing the unmarked Muir Snowfield. The one way trip is roughly 4.5 miles with close to 4,800 feet of elevation gain from the Paradise Visitor Center. The National Park Service recommends the trip for only experienced hikers as there is no marked path up the 2.2 miles of the snowfield and white-outs are frequent.
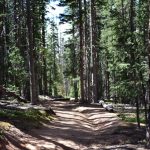
Skyline Trail
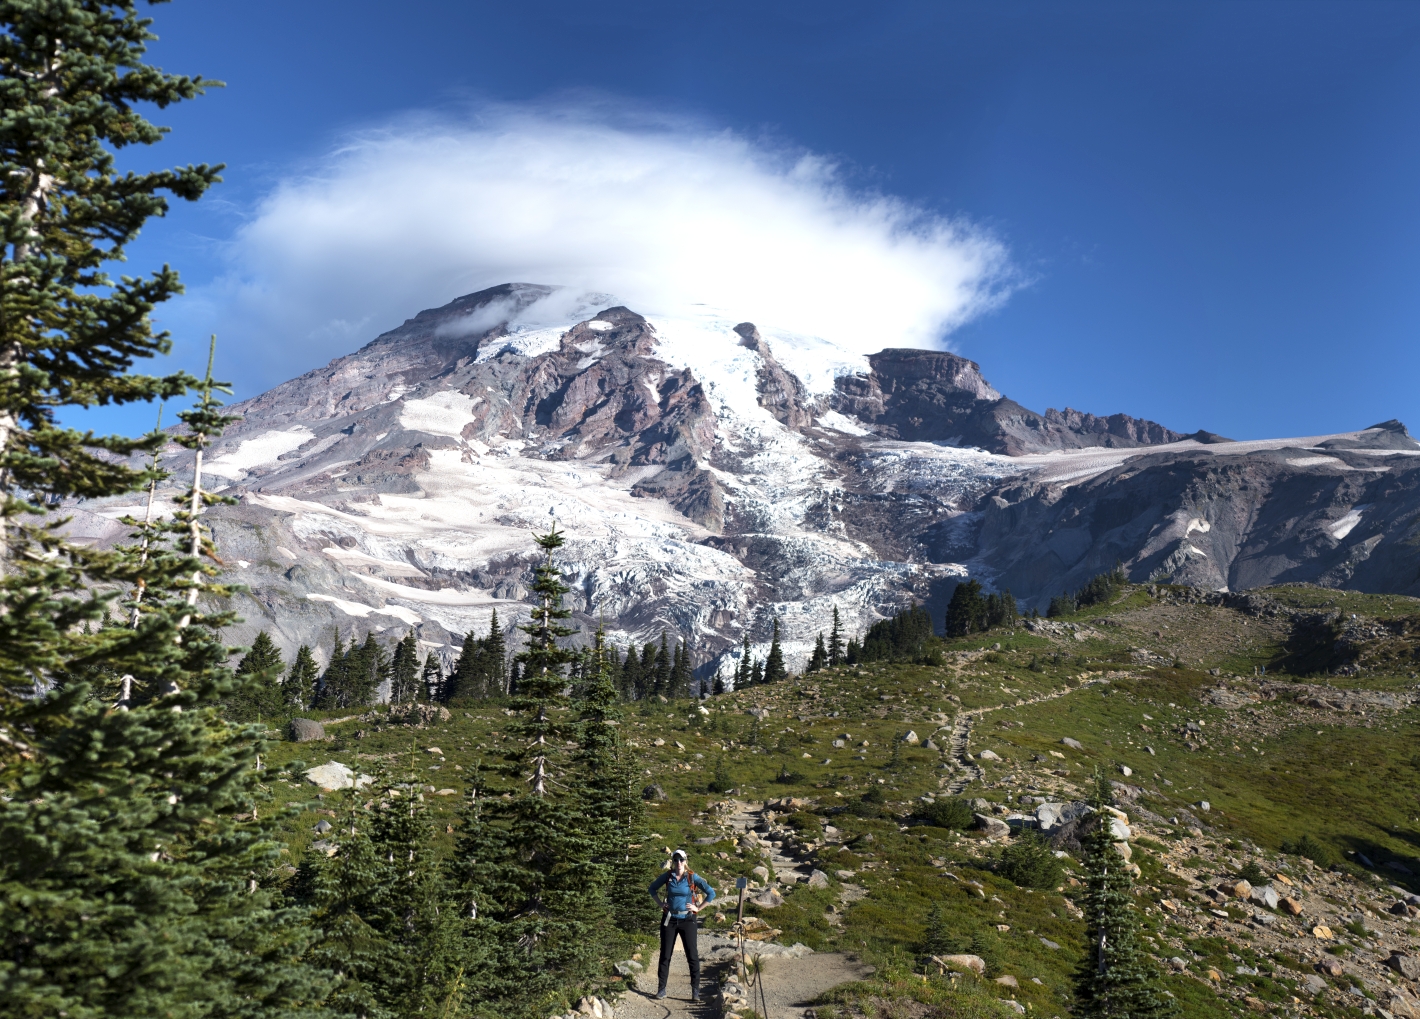
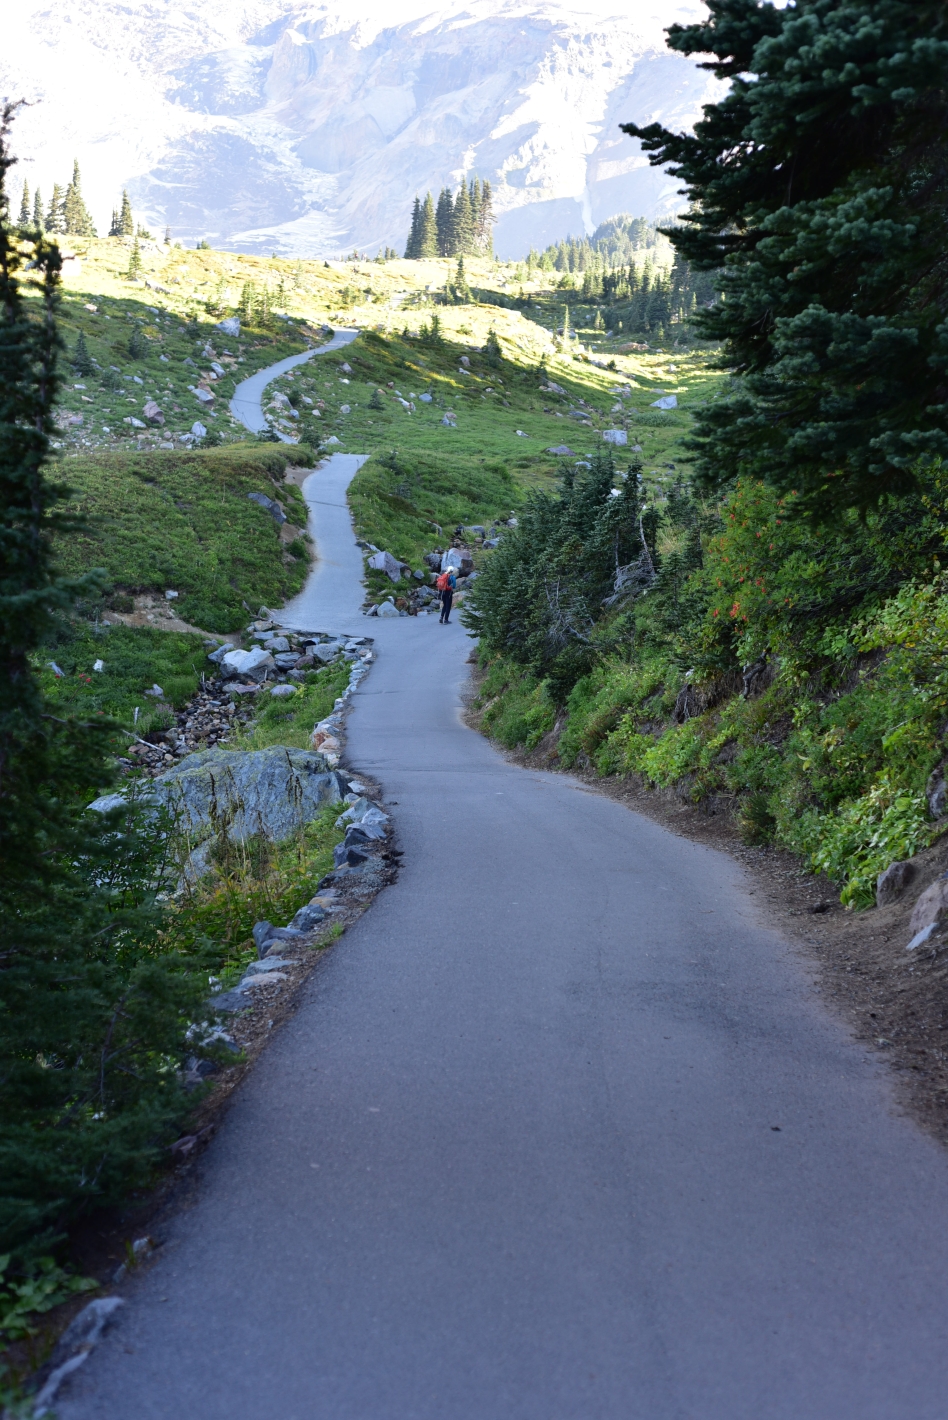
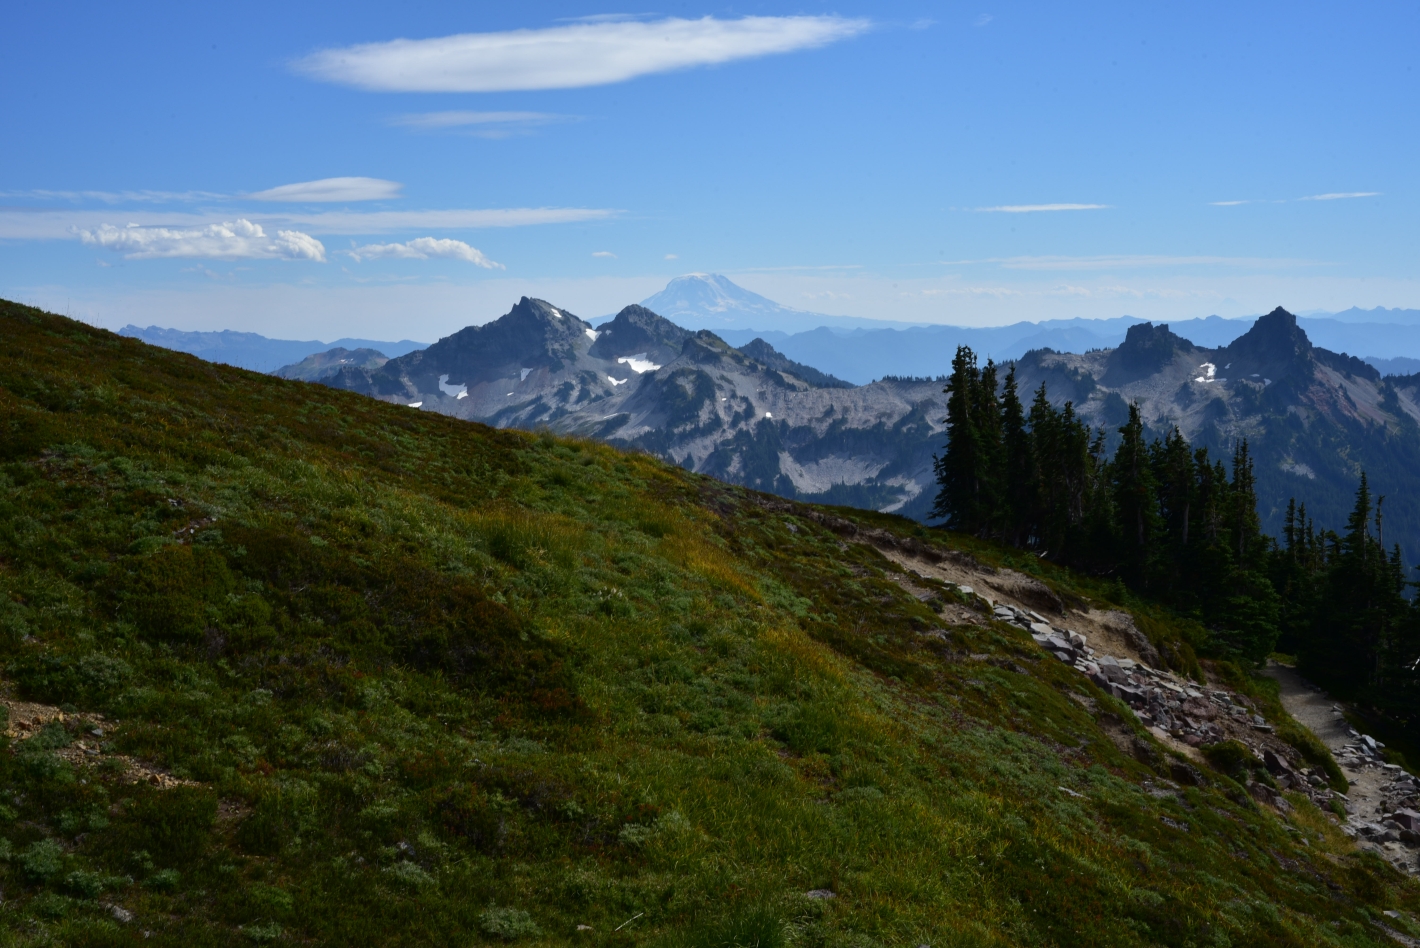
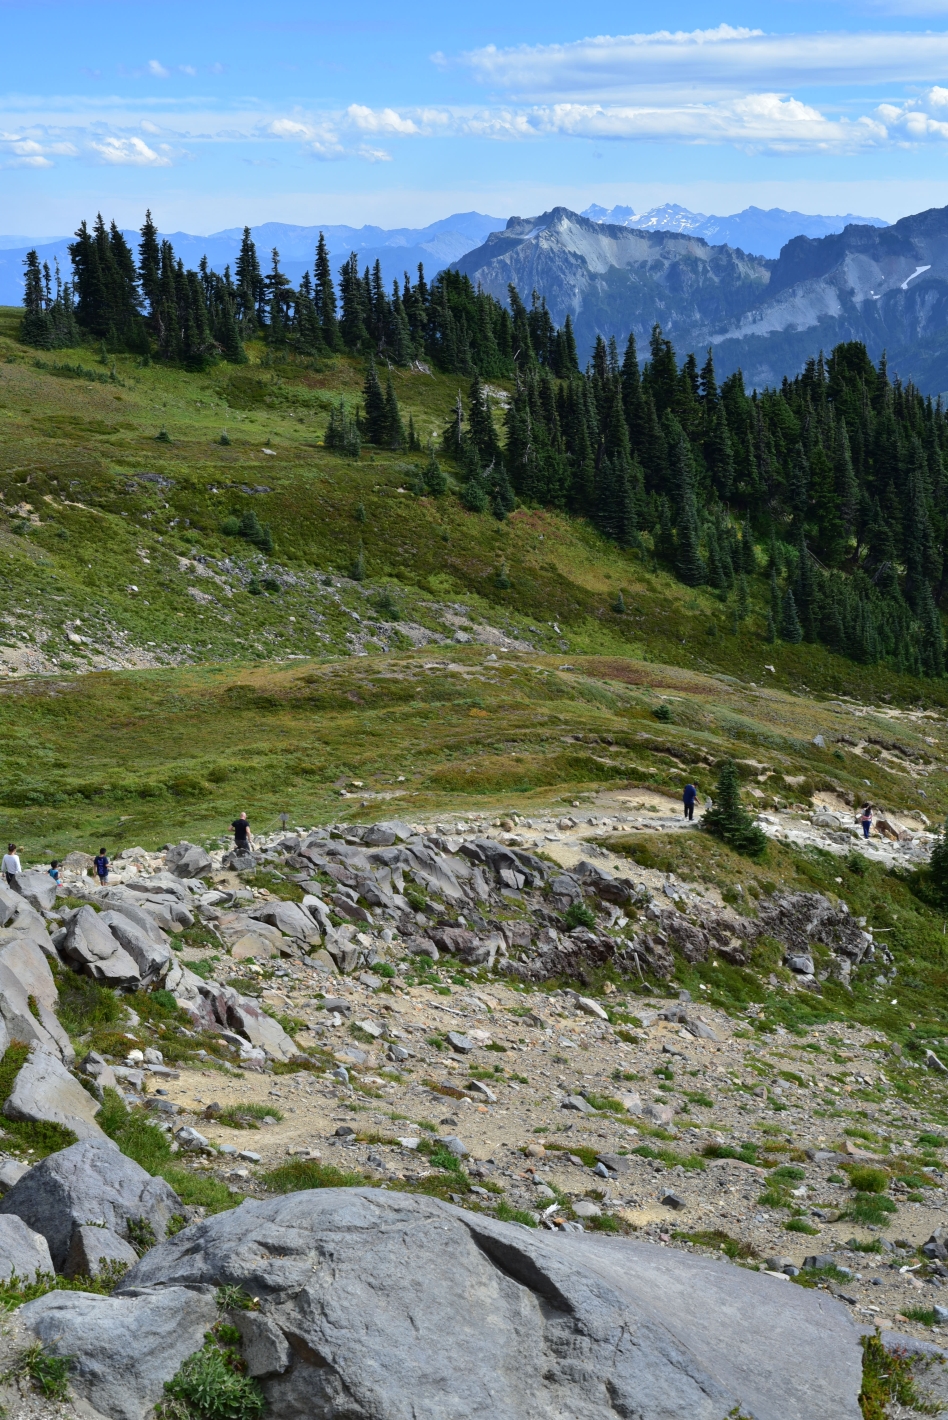
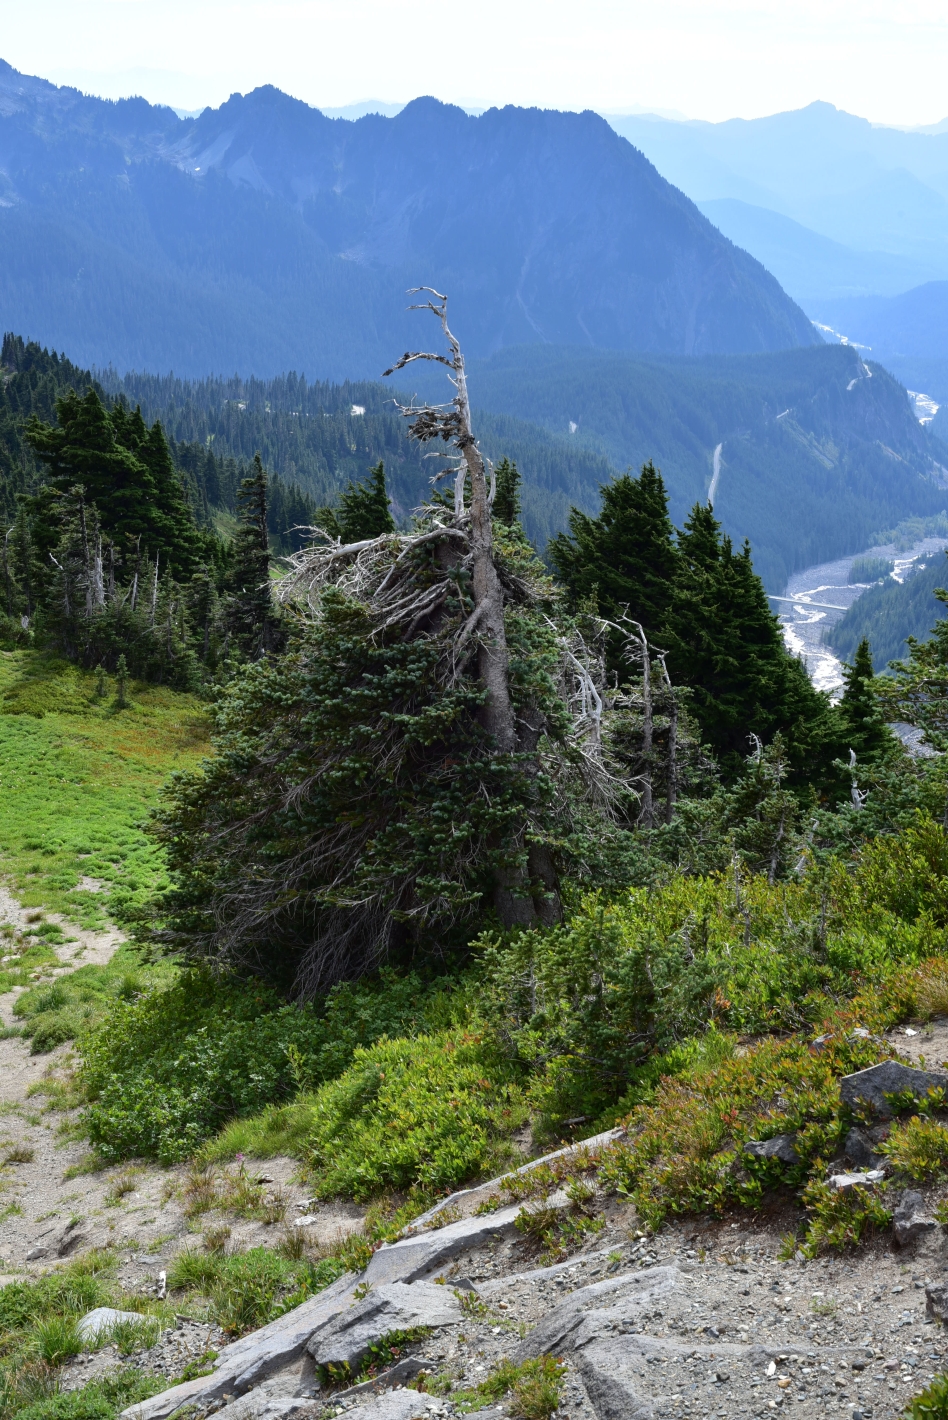
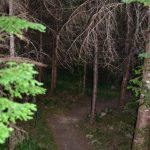
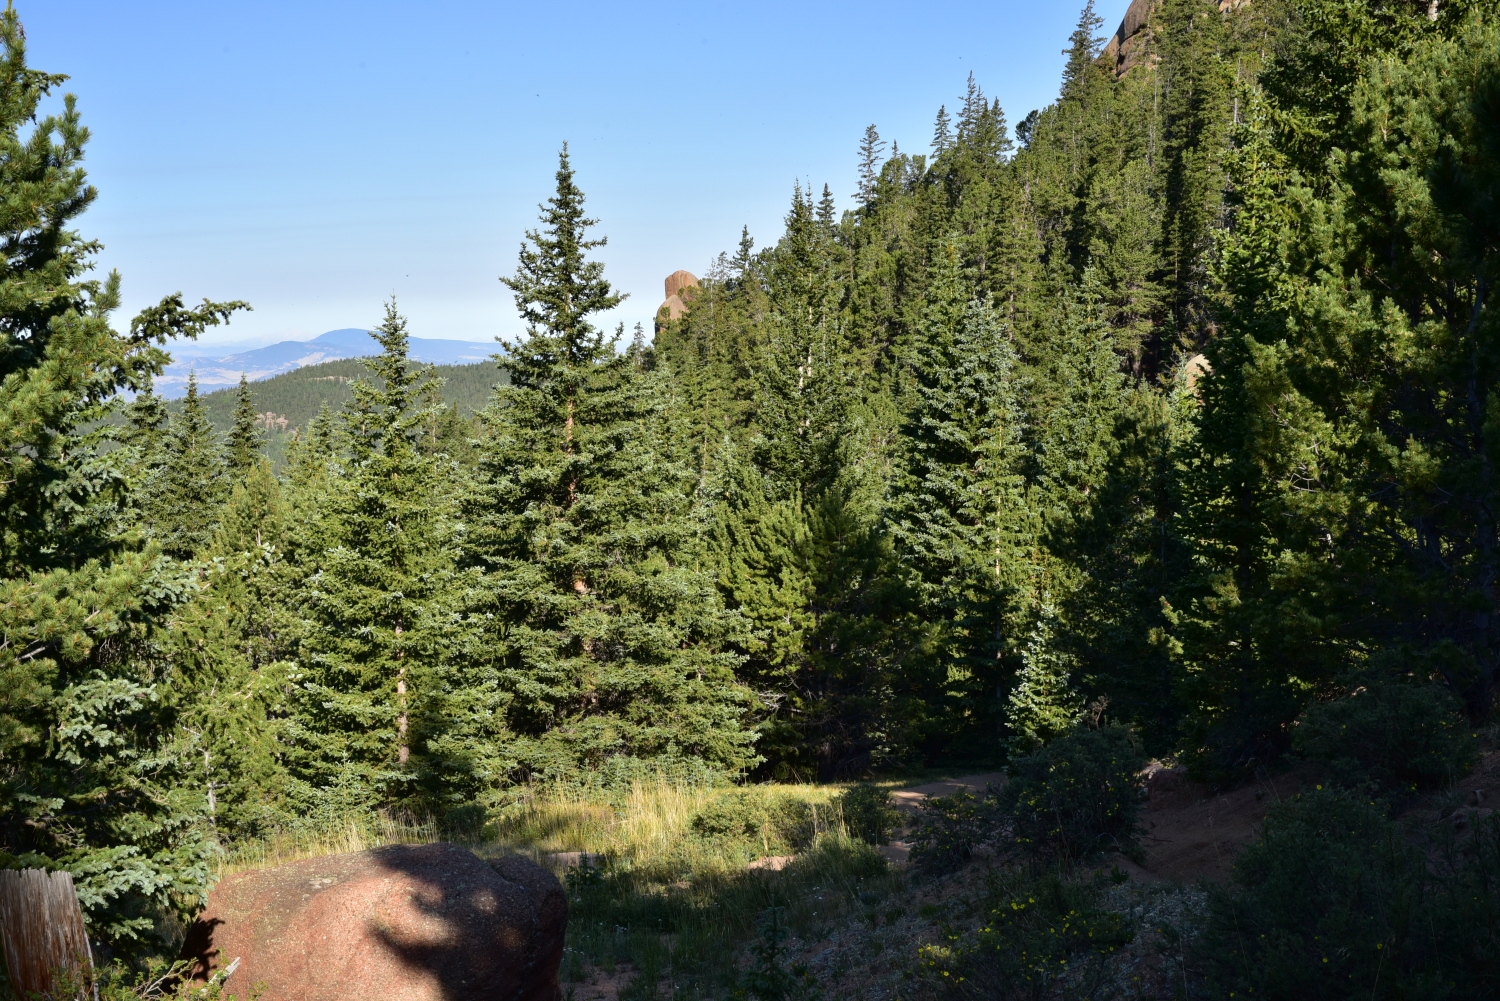
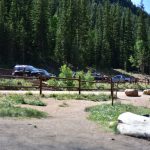
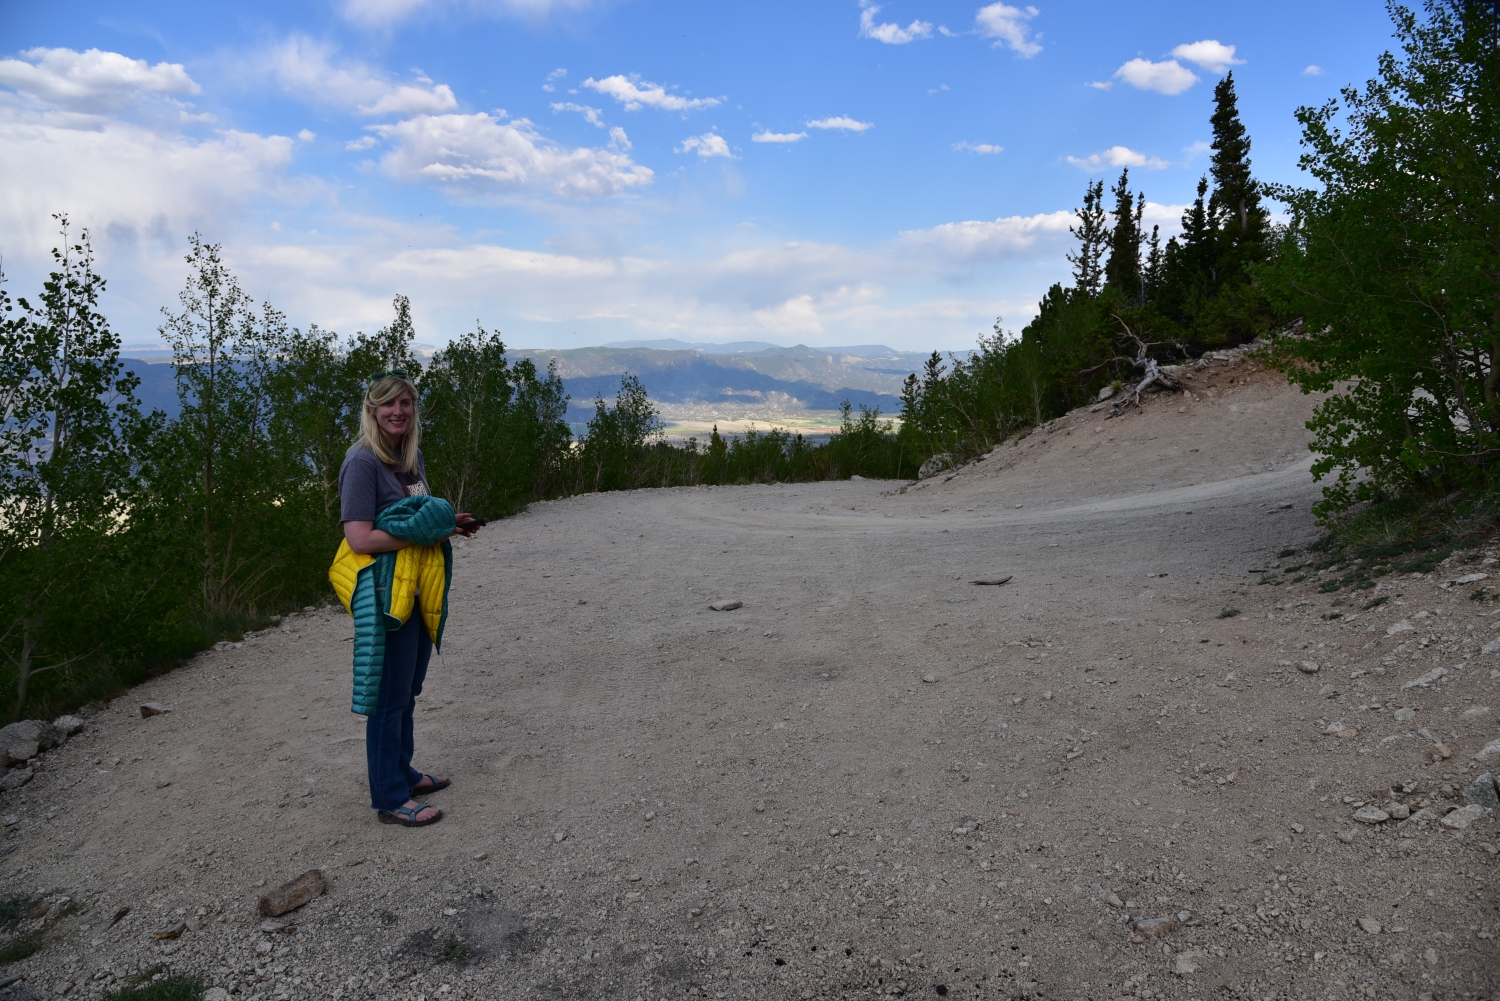
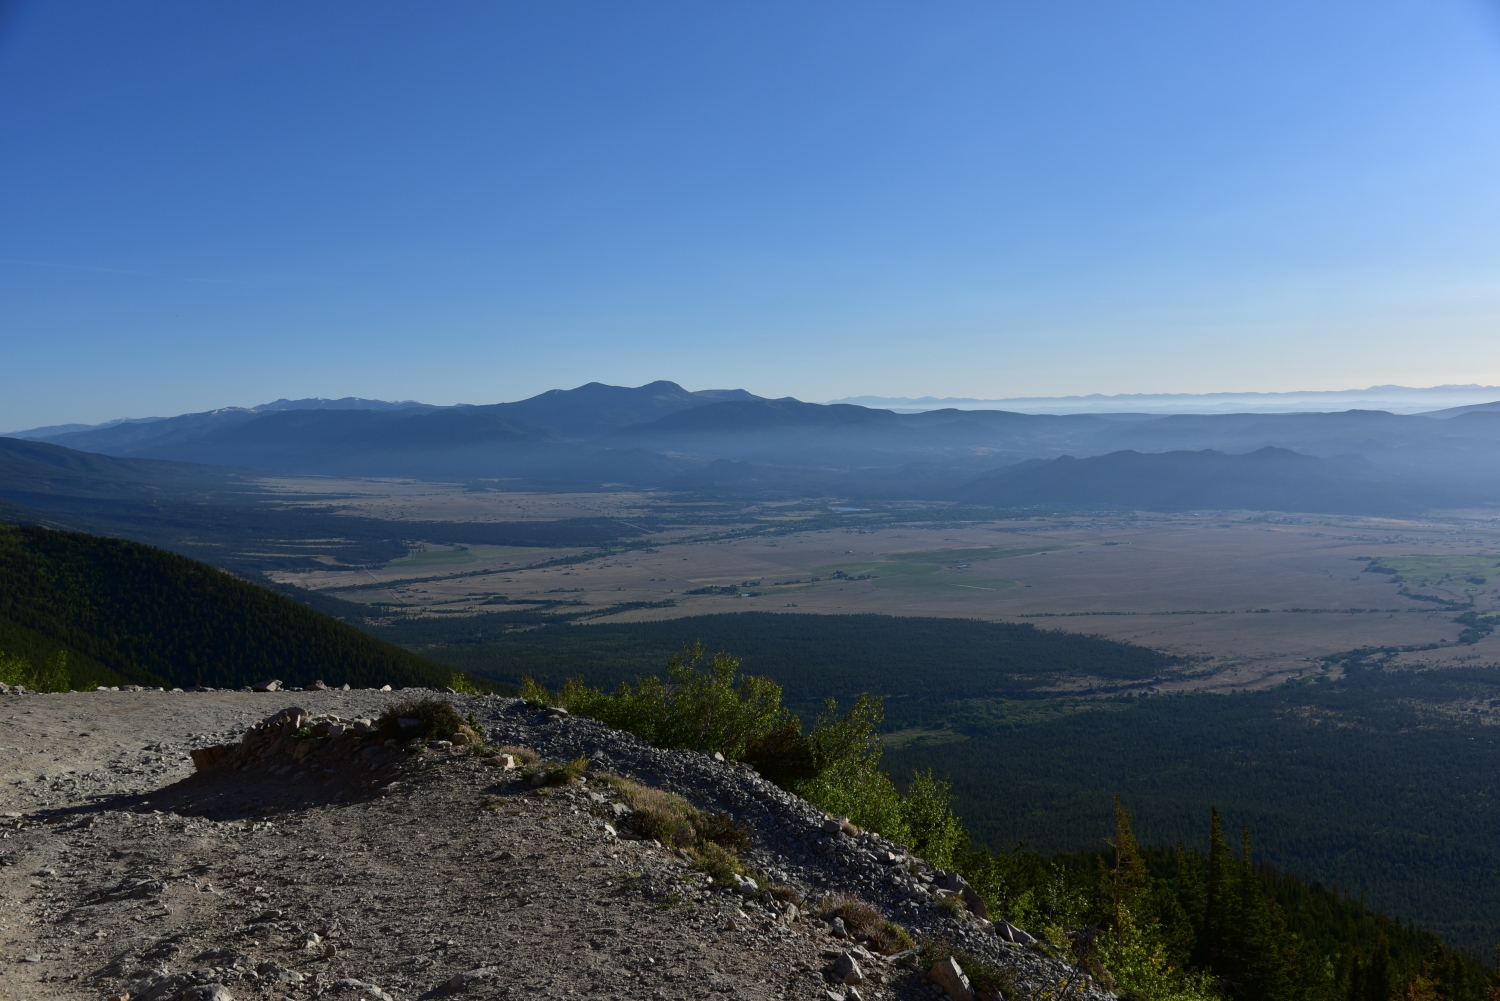
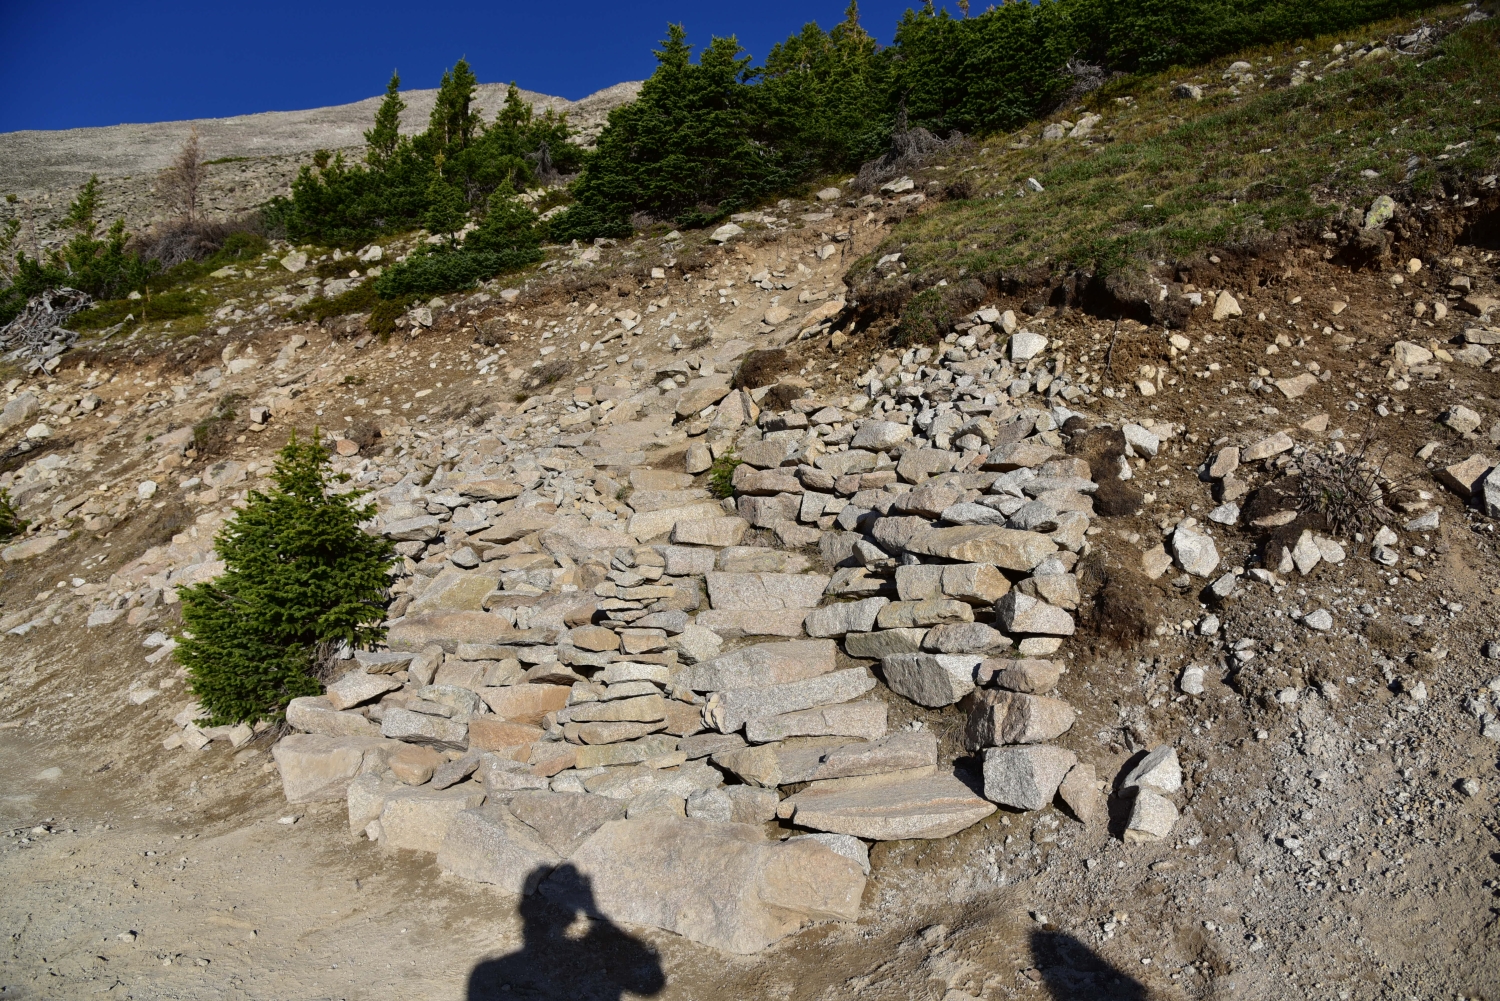
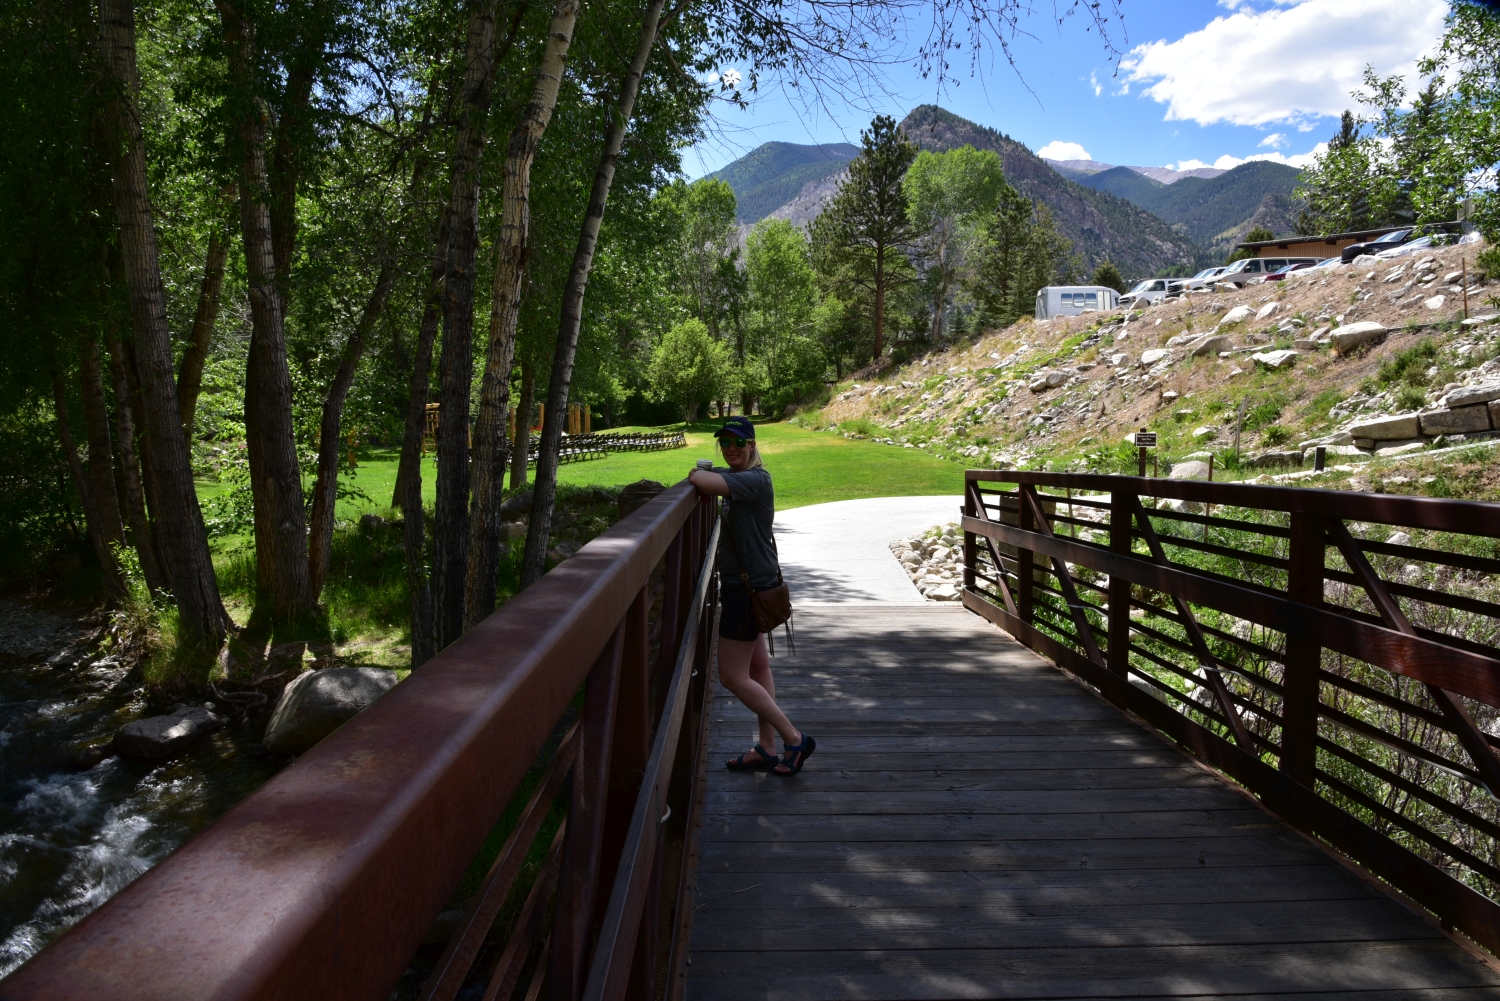
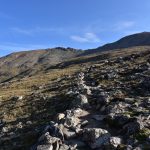
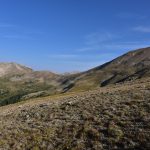
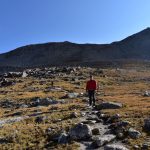
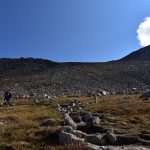
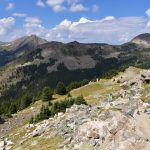
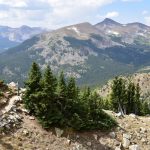
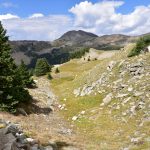
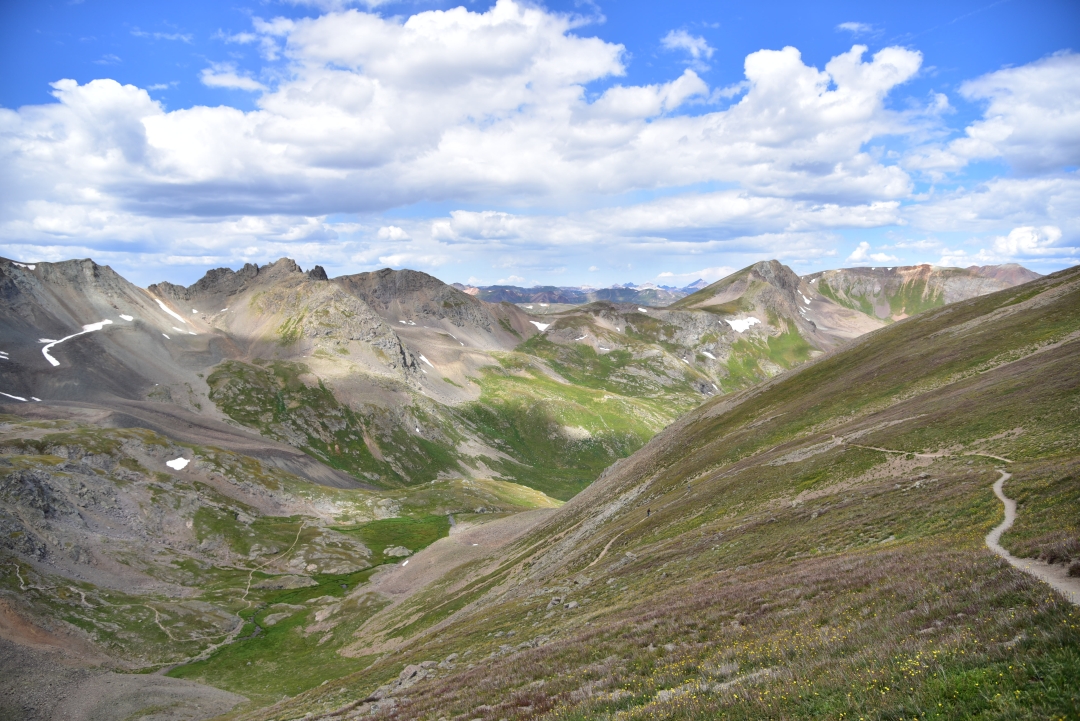
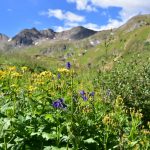
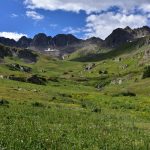
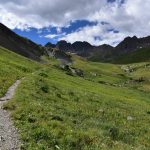
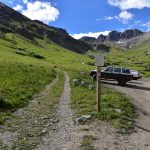
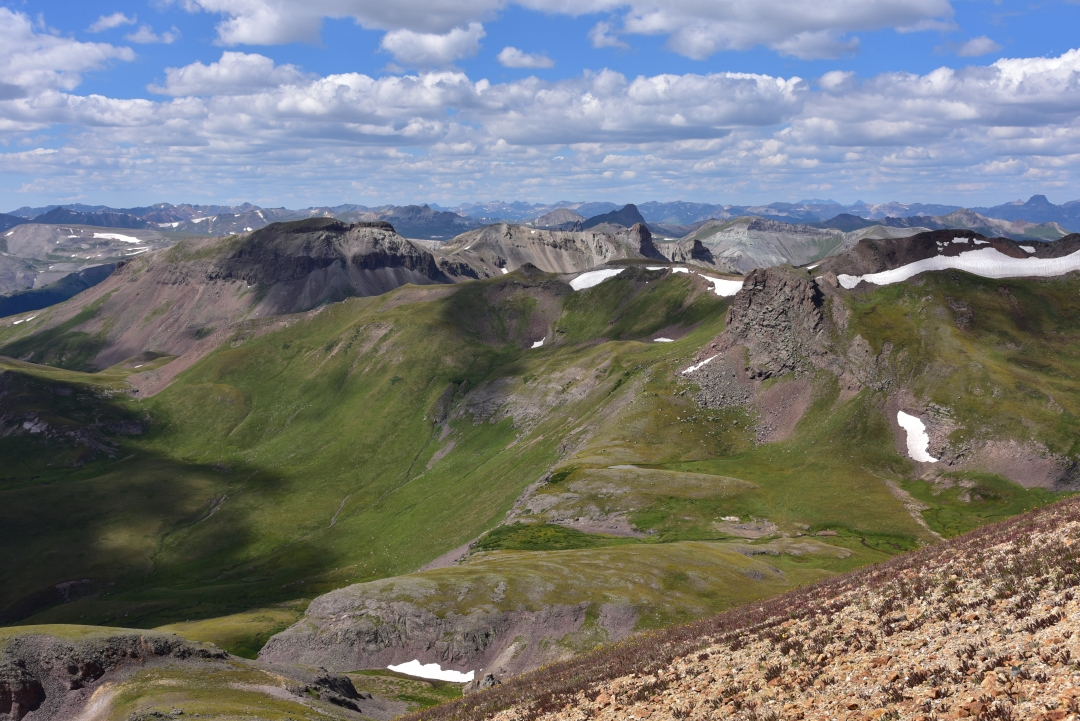
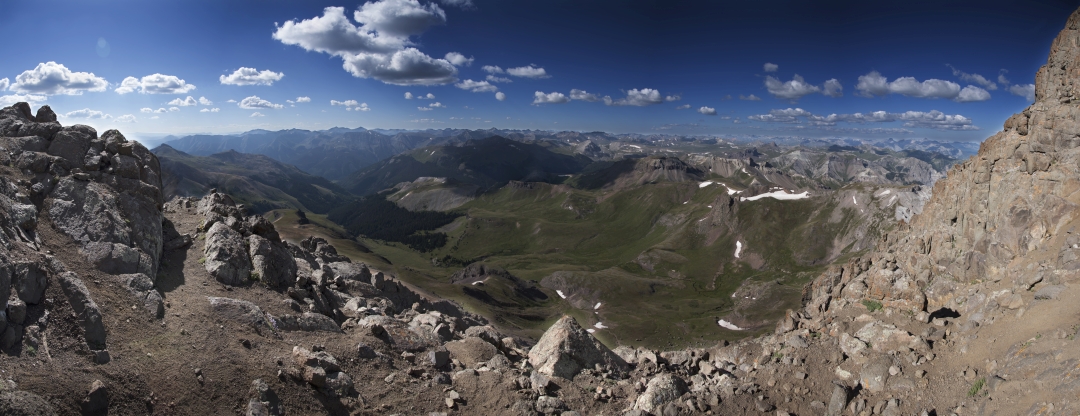
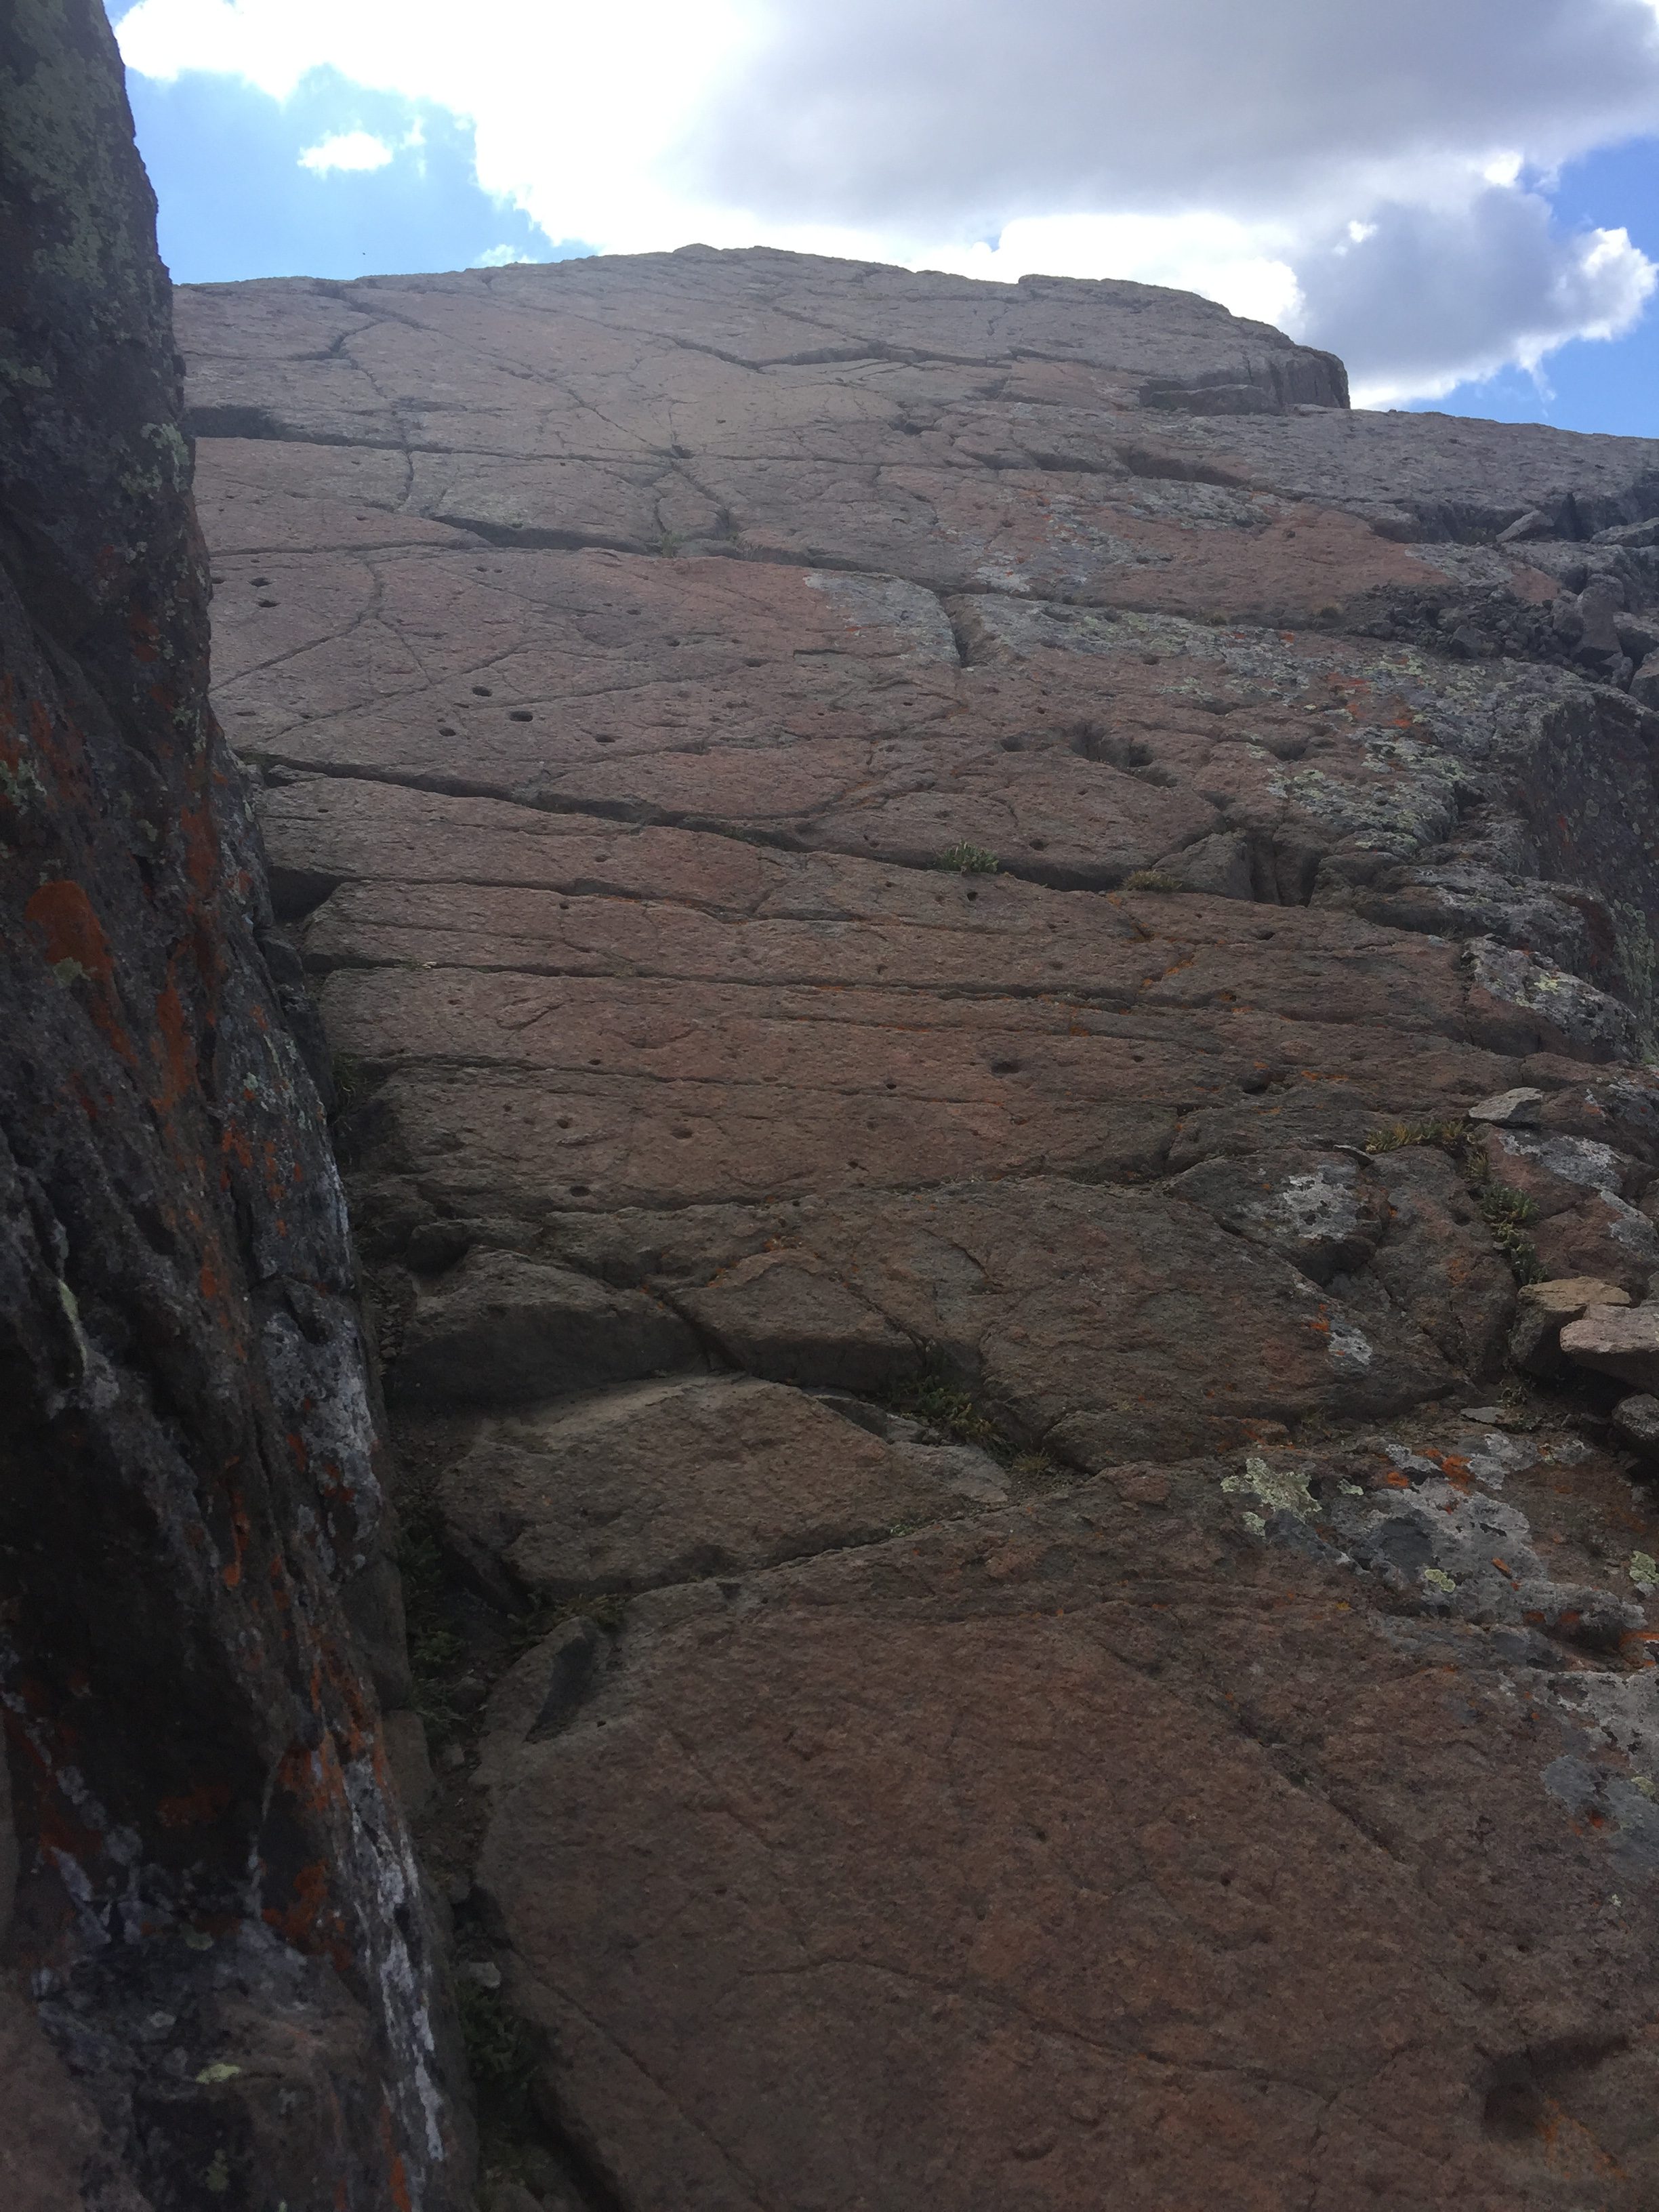
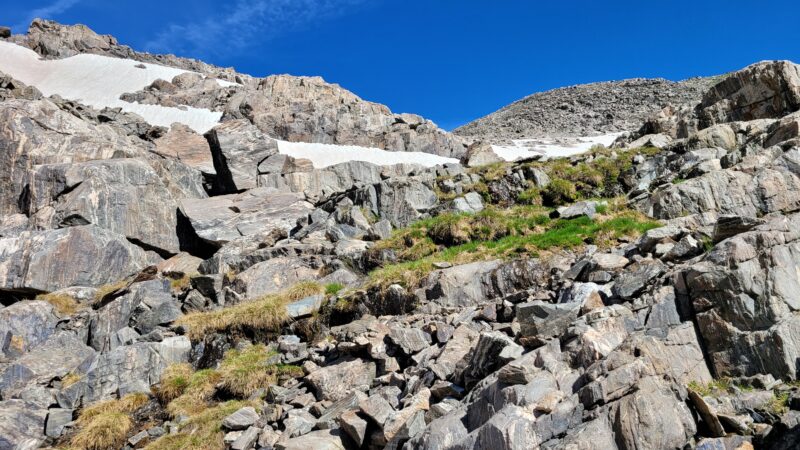
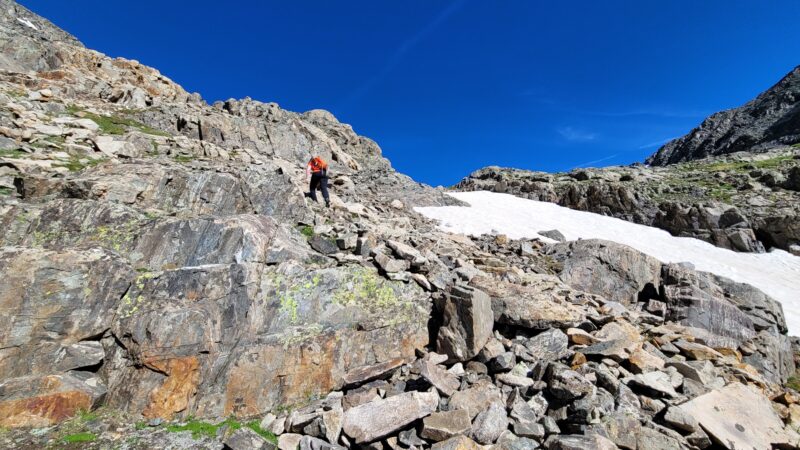
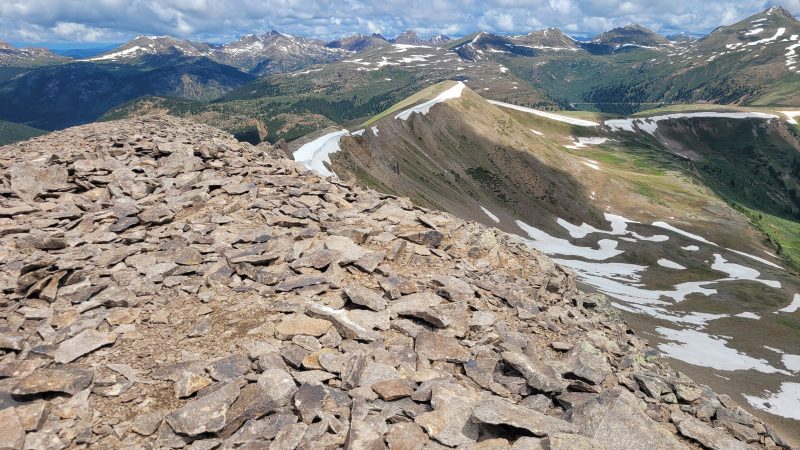
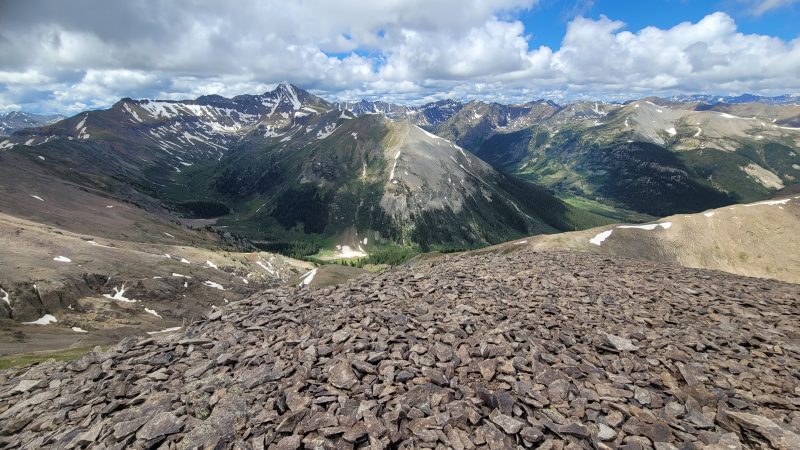
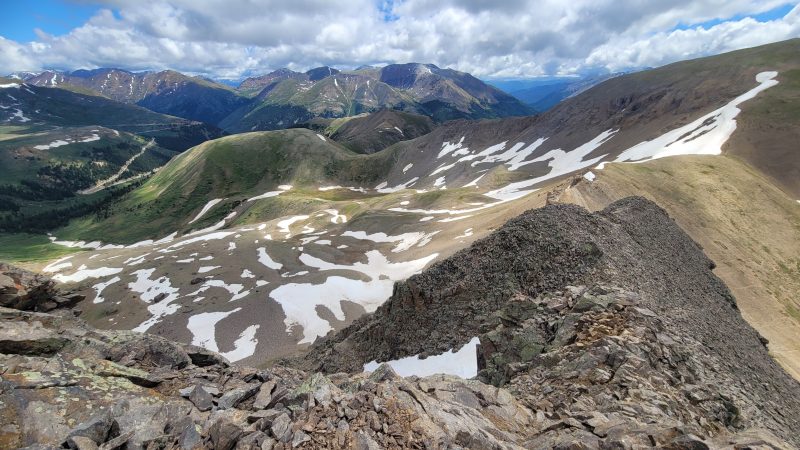
On September 6th, we flew in to Sea-Tac and immediately drove down to our quaint cabin nestled in the woods approximately two miles from the park entrance. After a good night’s rest, we arose at dawn and made the short drive into the park to the Paradise Hiker’s parking lot. Blue, clear skies were abundant, and we began our journey on the Skyline Trail. The trail is an extremely steep and well-paved path for the first 10-15 minutes of hiking before it turns into a much more pleasant gravel/dirt path. There were several signs along the way to direct us to the direction of Camp Muir on this portion of the hike as many side trails exist to gain different vantage points of the the nearby glaciers and the mountain. Near mile 1.1, there was a junction in which both routes go the correct direction. Going left leads to Glacier Vista, overlooking the Nisqually Glacier to the west which also has a waterfall. Going right bypasses the ridgetop and takes hikers on a more direct route. Of note, the trails do reconnect fairly quickly. On the way up, we bypassed the overlook and continued toward our objective. At approximately 1.6 miles, we saw the sign for Pebble Creek and followed it to the creek at about 2.1 miles. We climbed over the creek and past McClure rock. Looking down at our GPS, we noted an elevation of about 7,300 feet. The trail had now ended. It was time to throw on the spikes. We entered the snow.
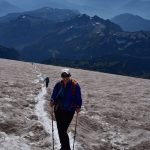
Muir Snowfield
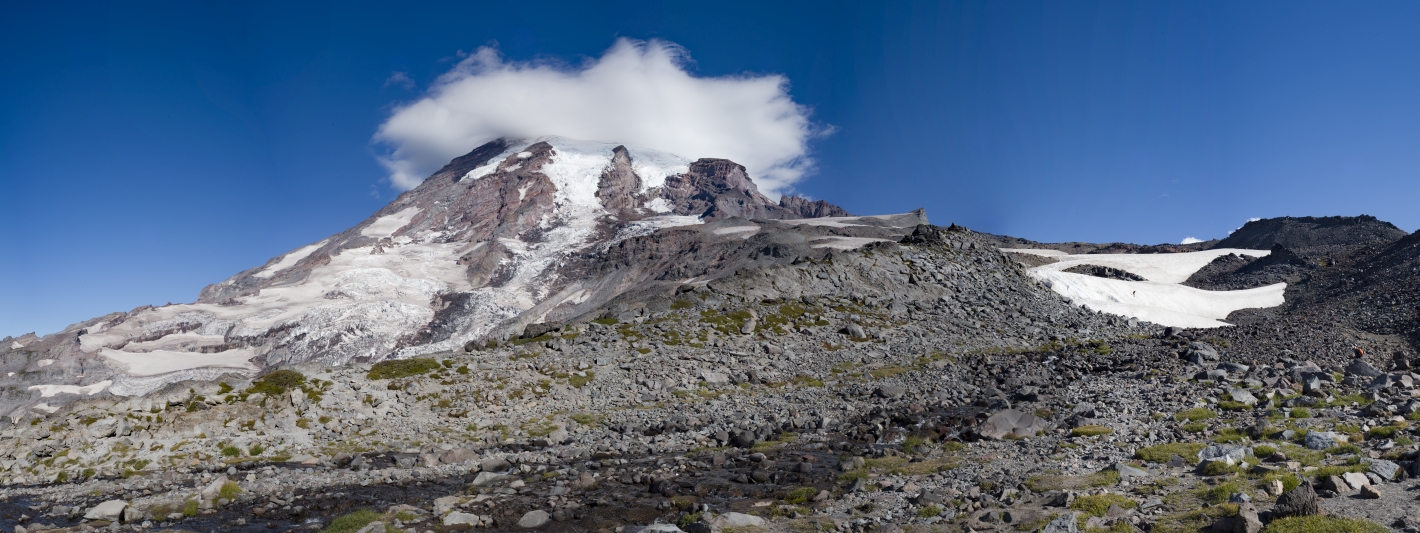
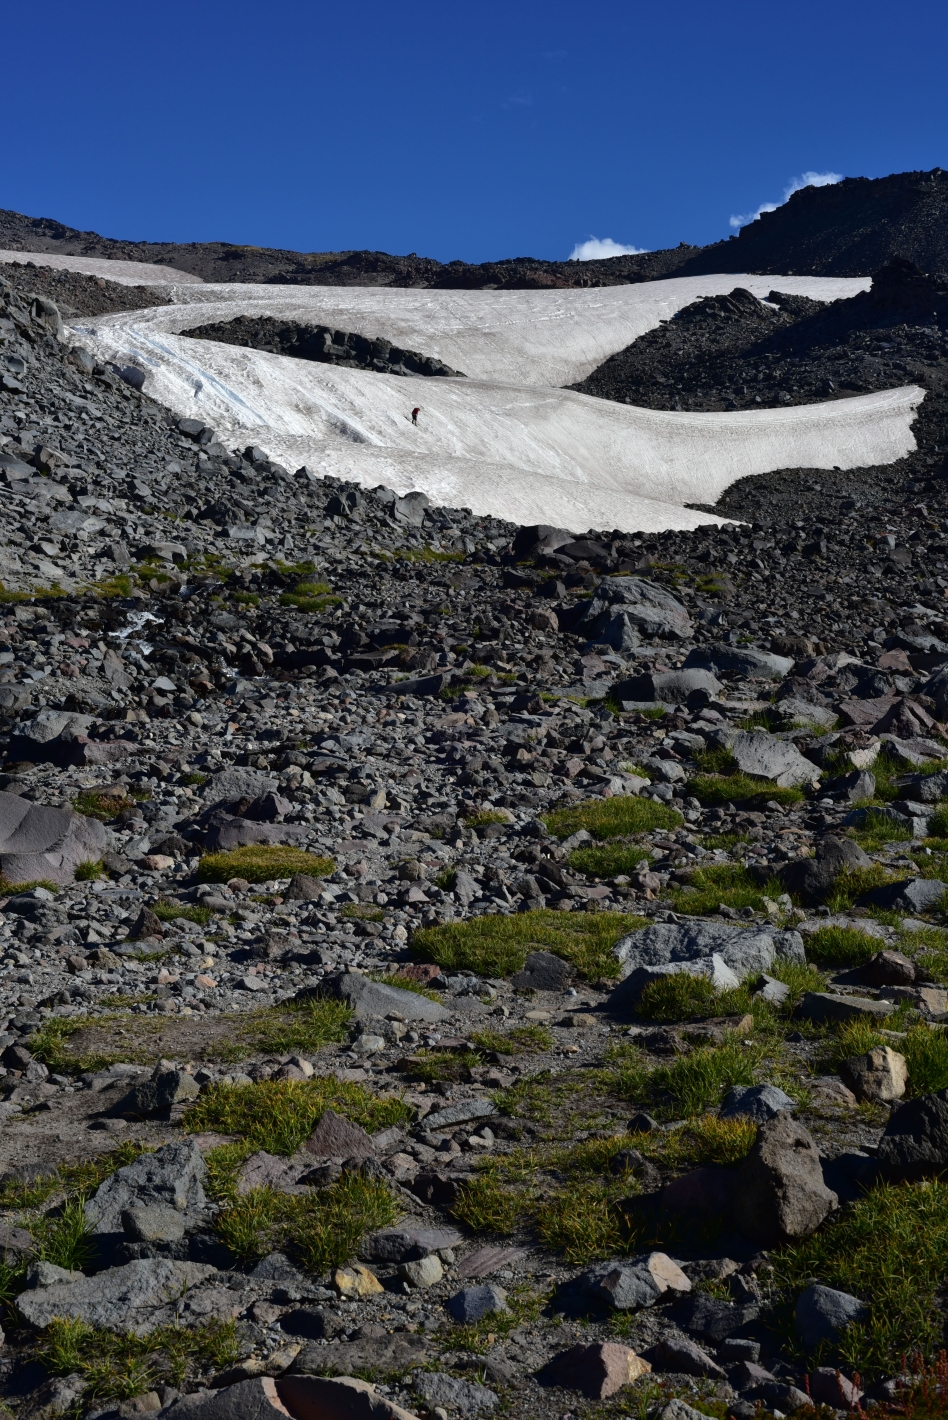
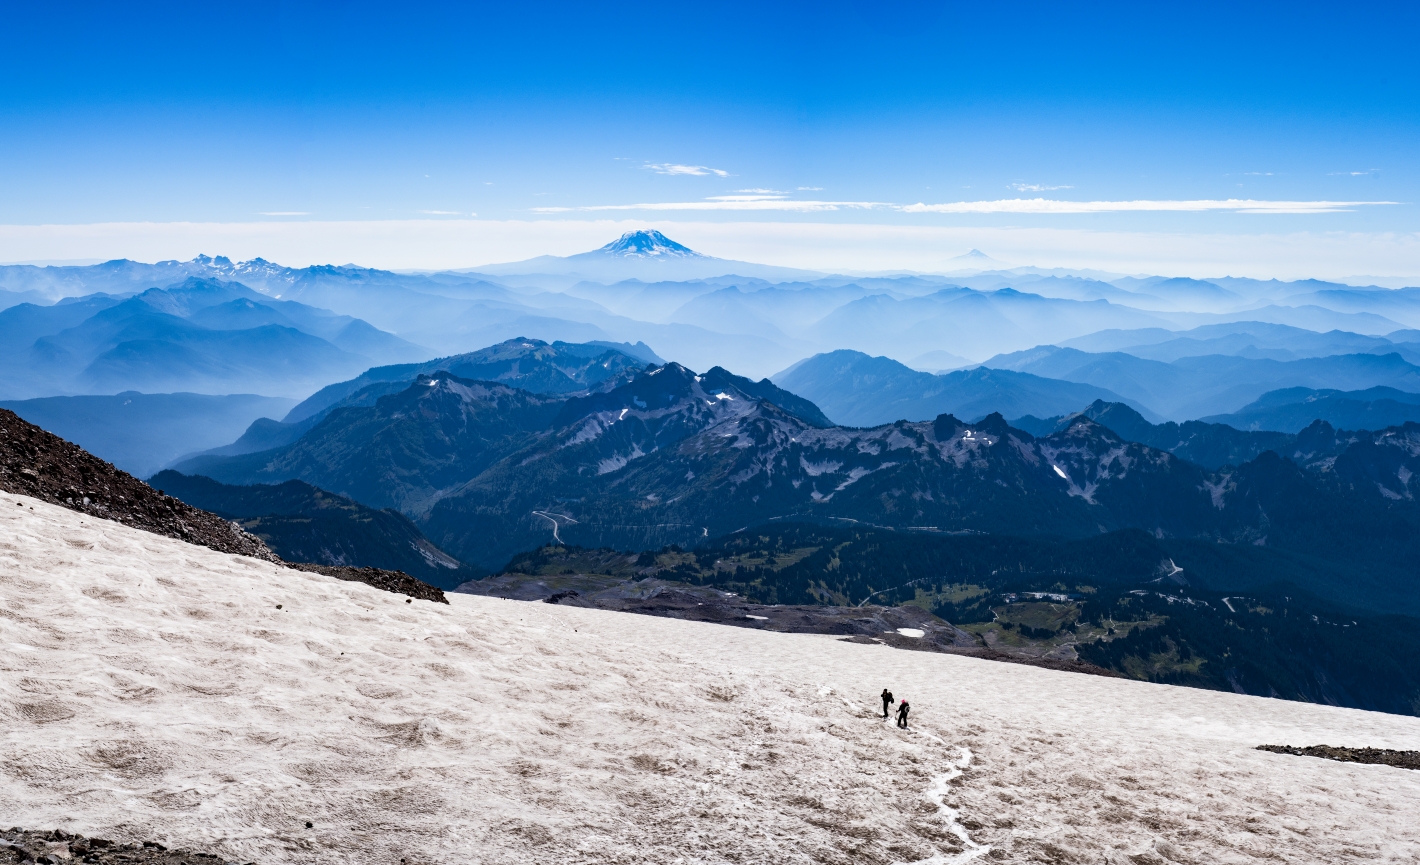
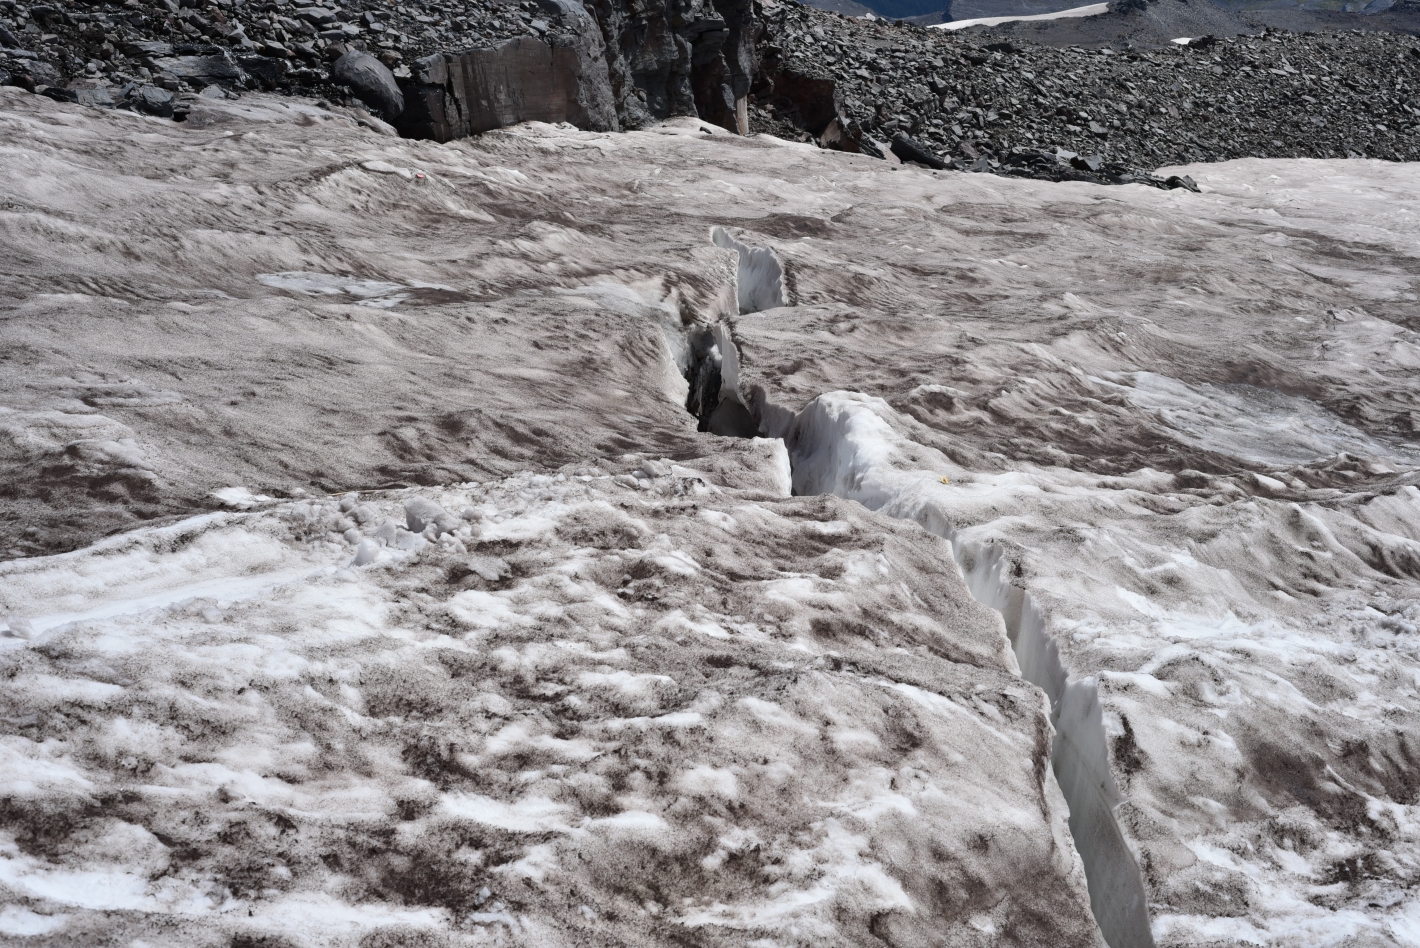
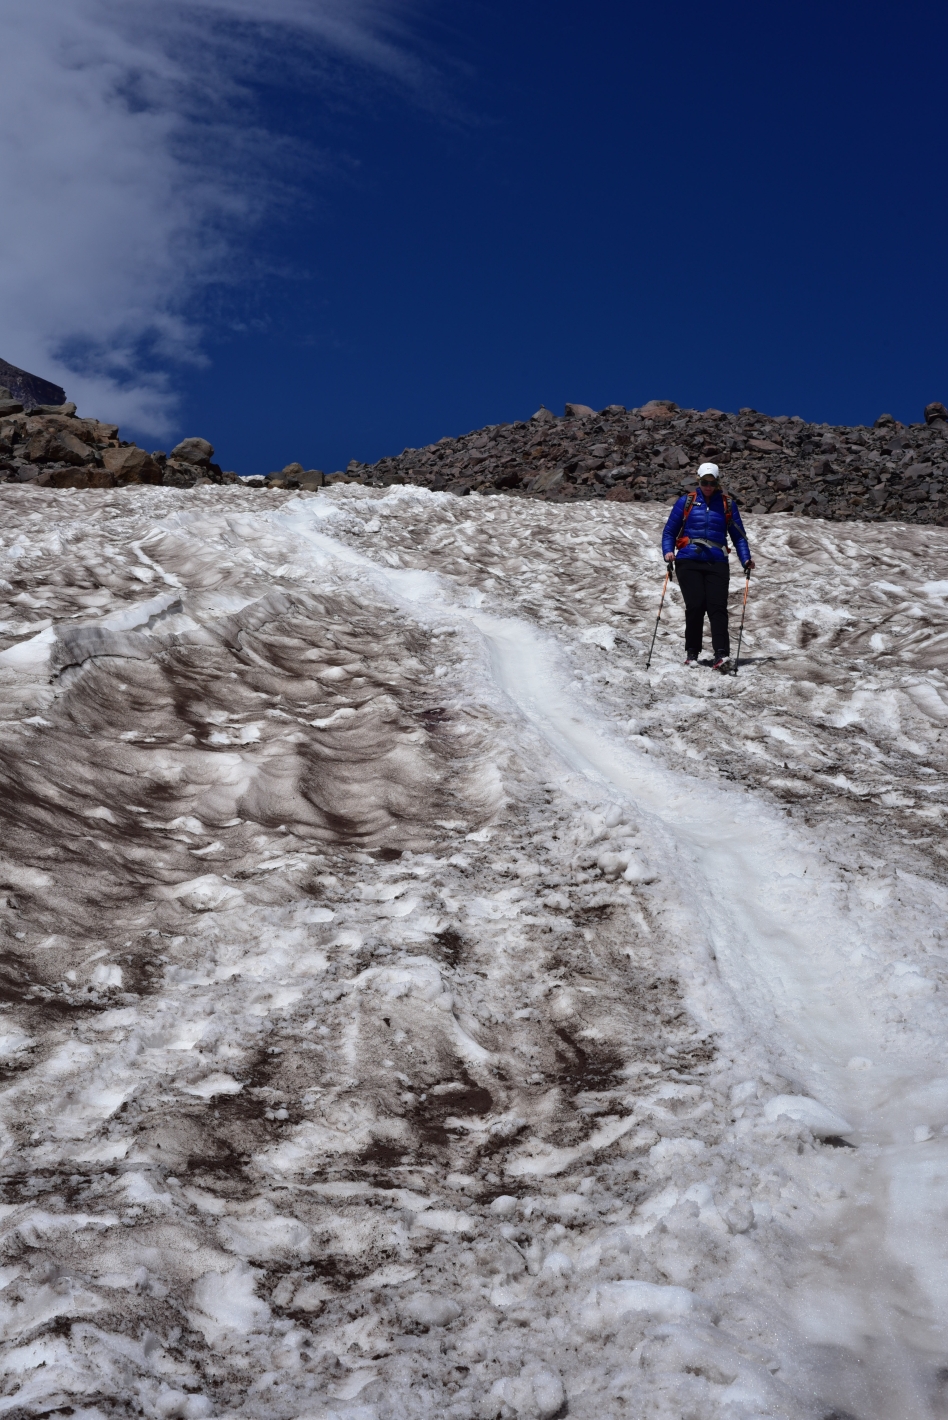
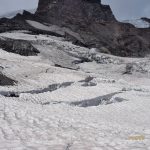
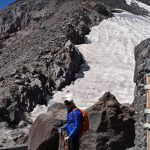
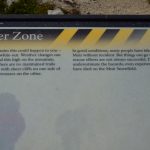
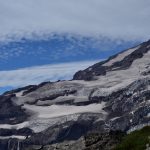
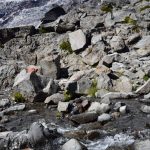
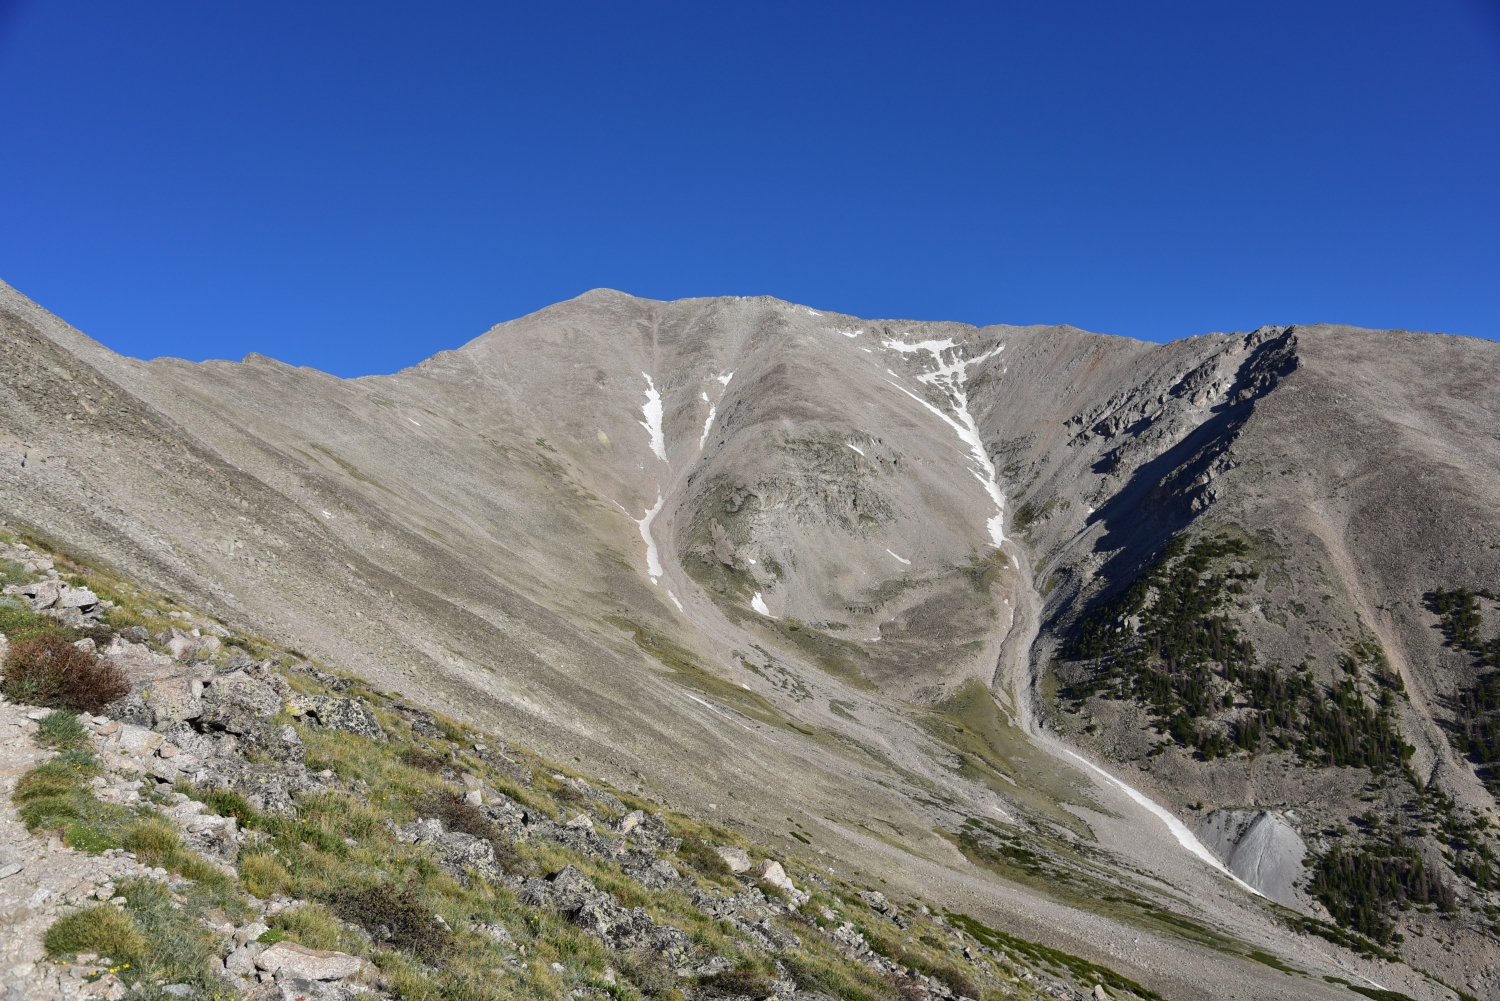
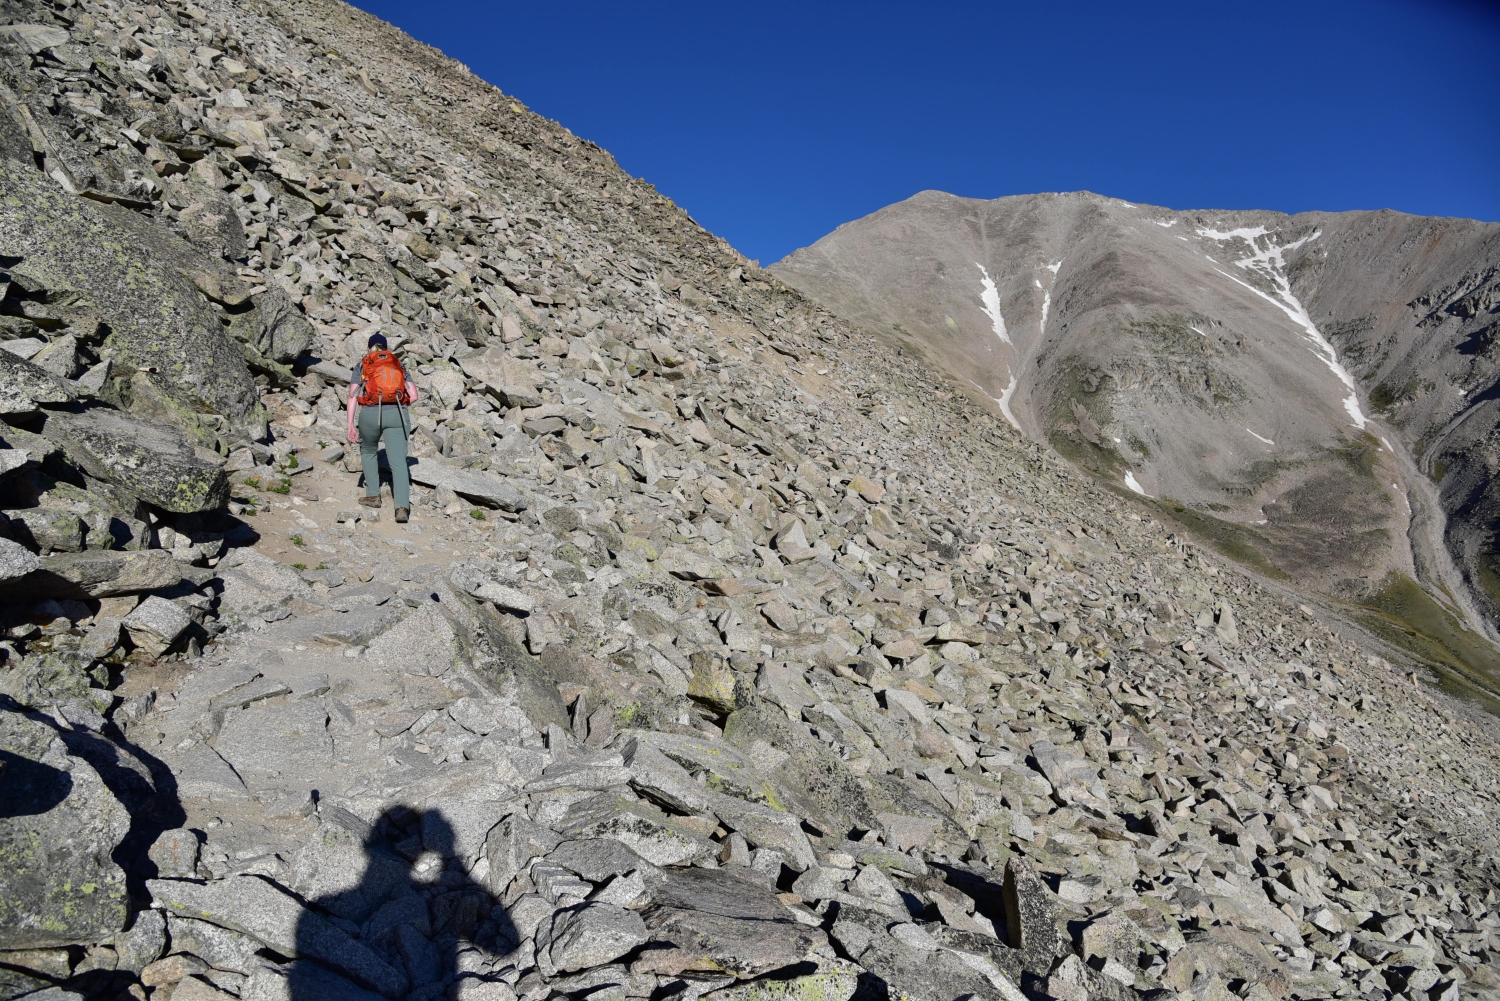
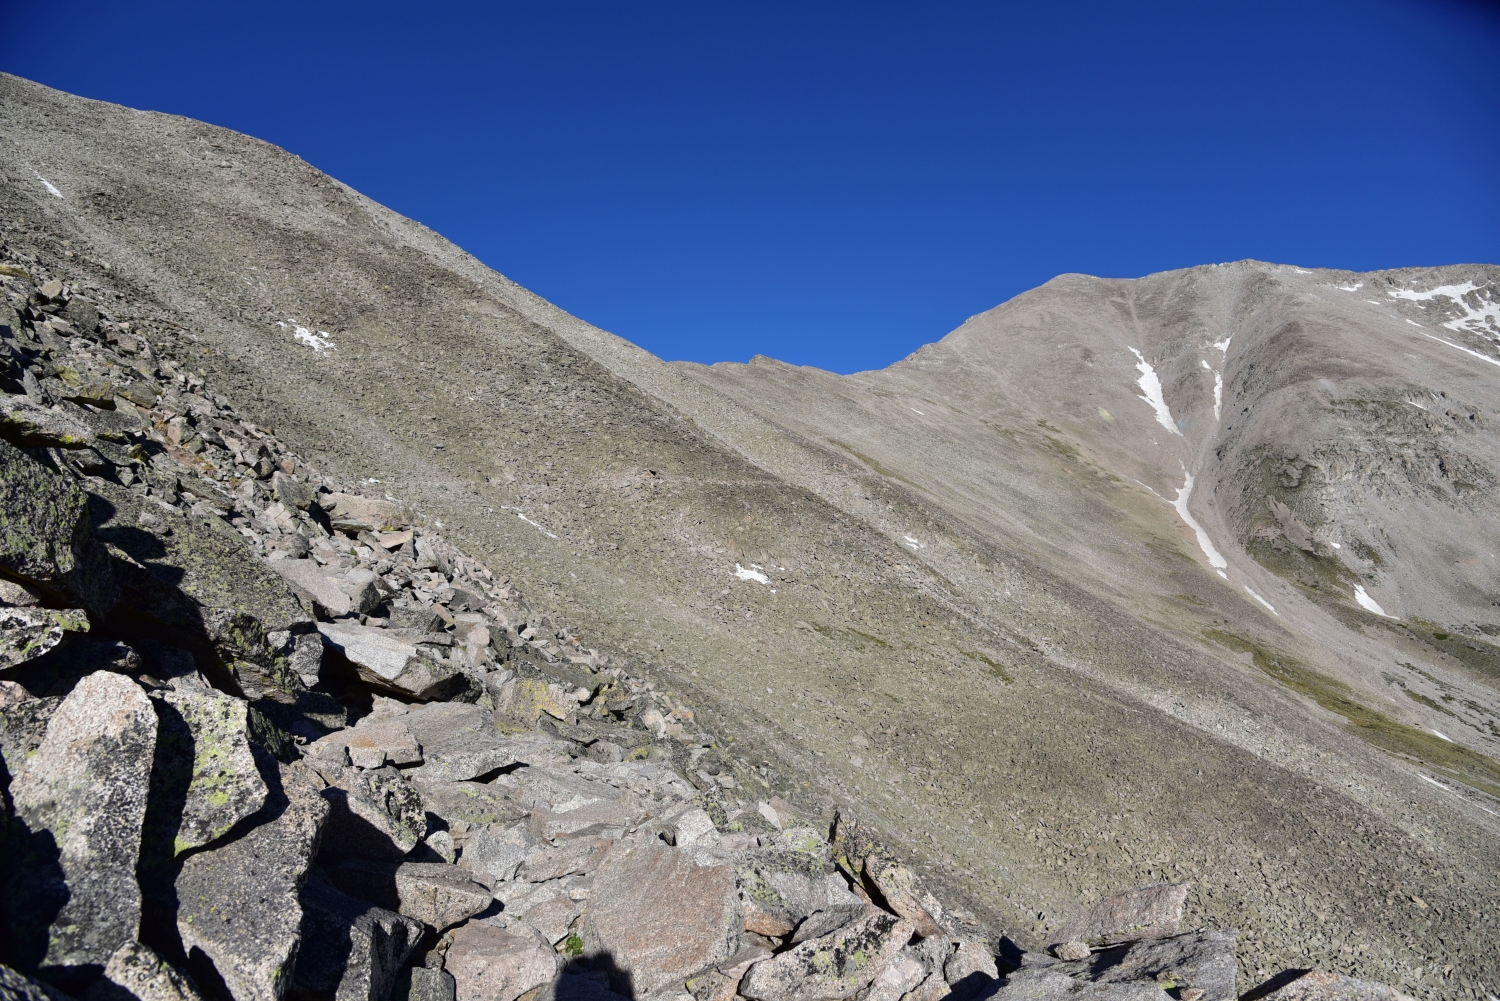
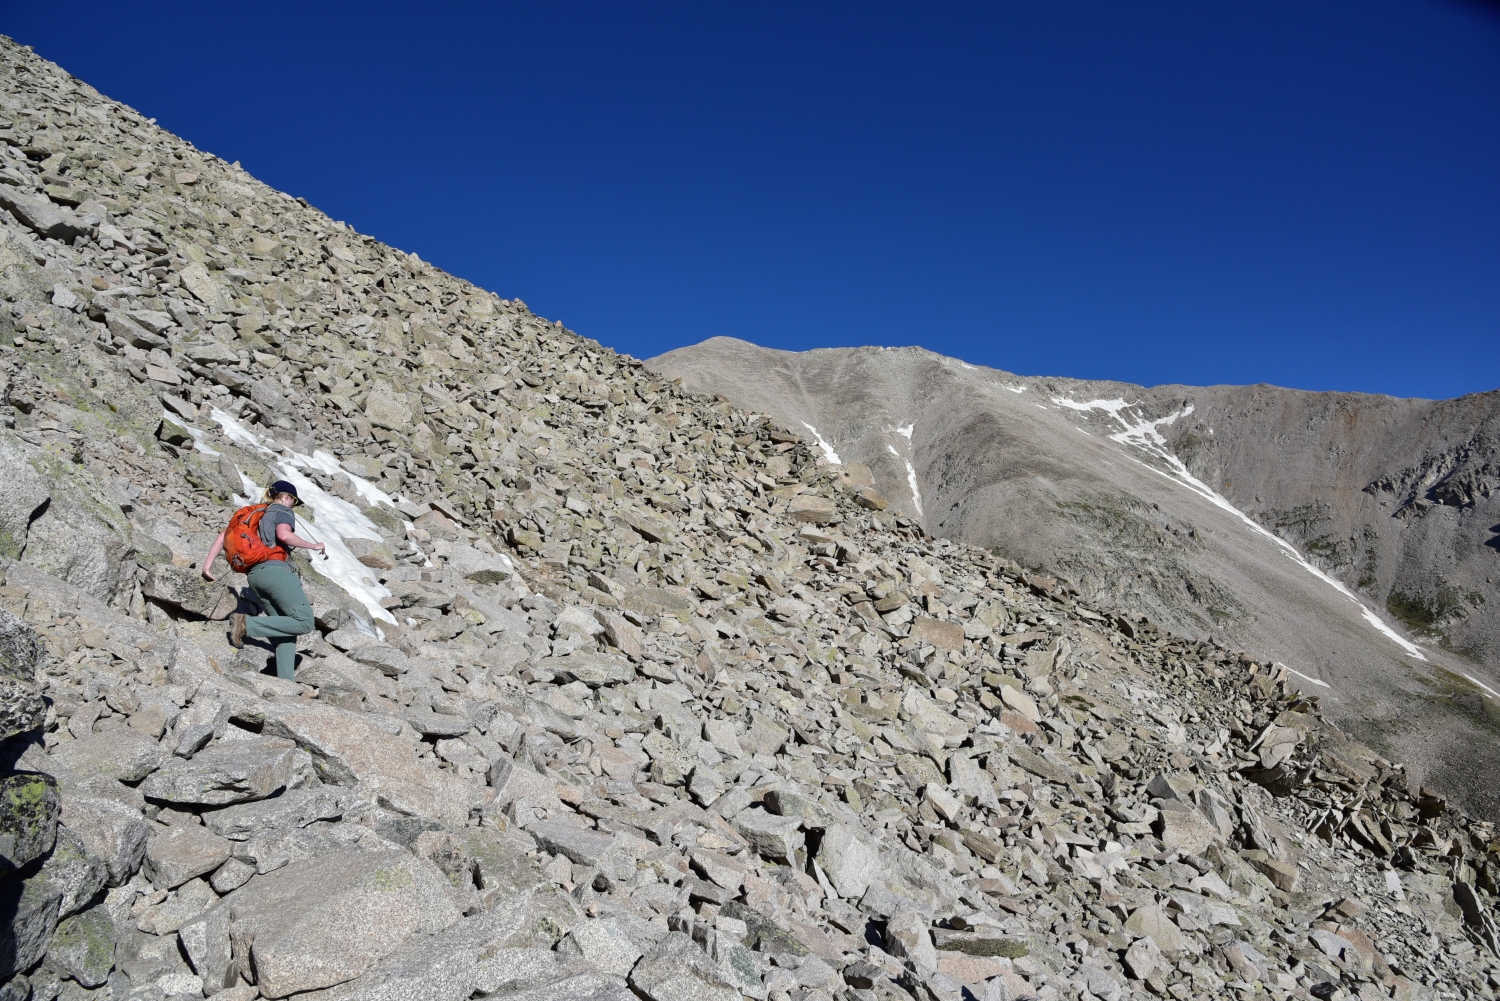
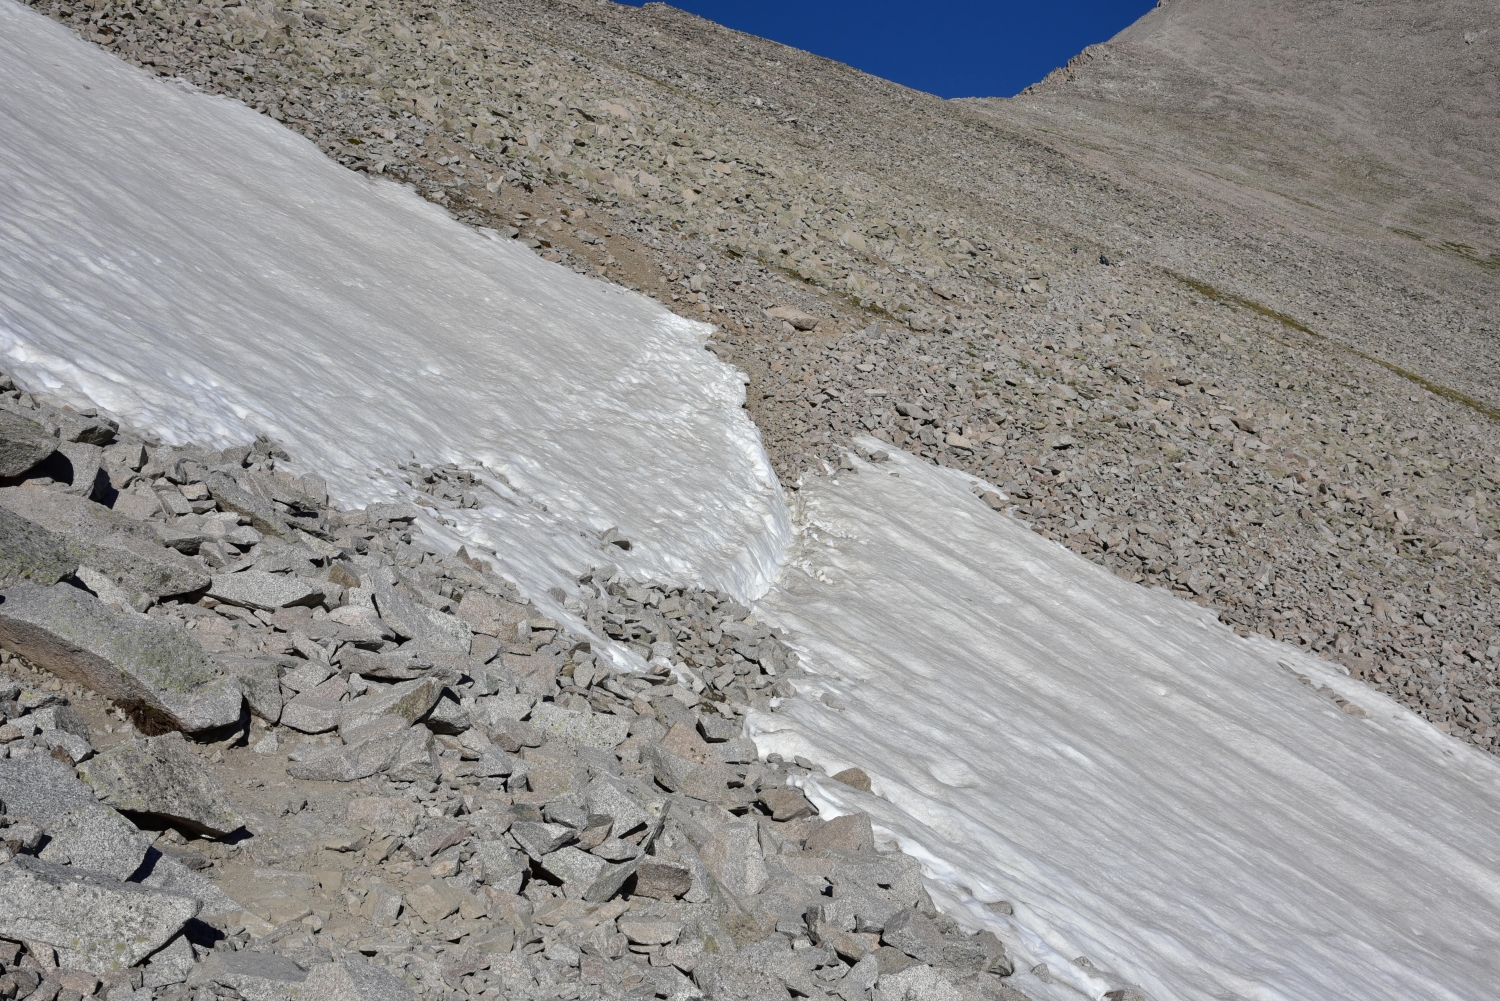
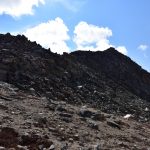
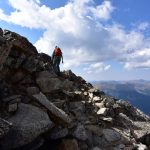
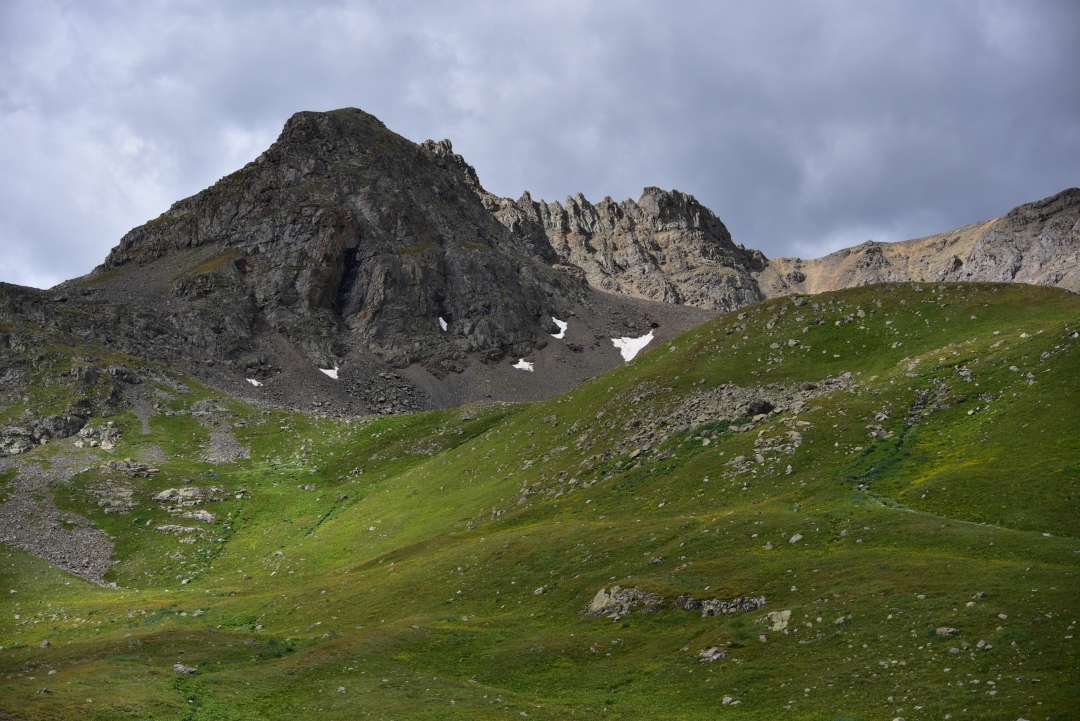
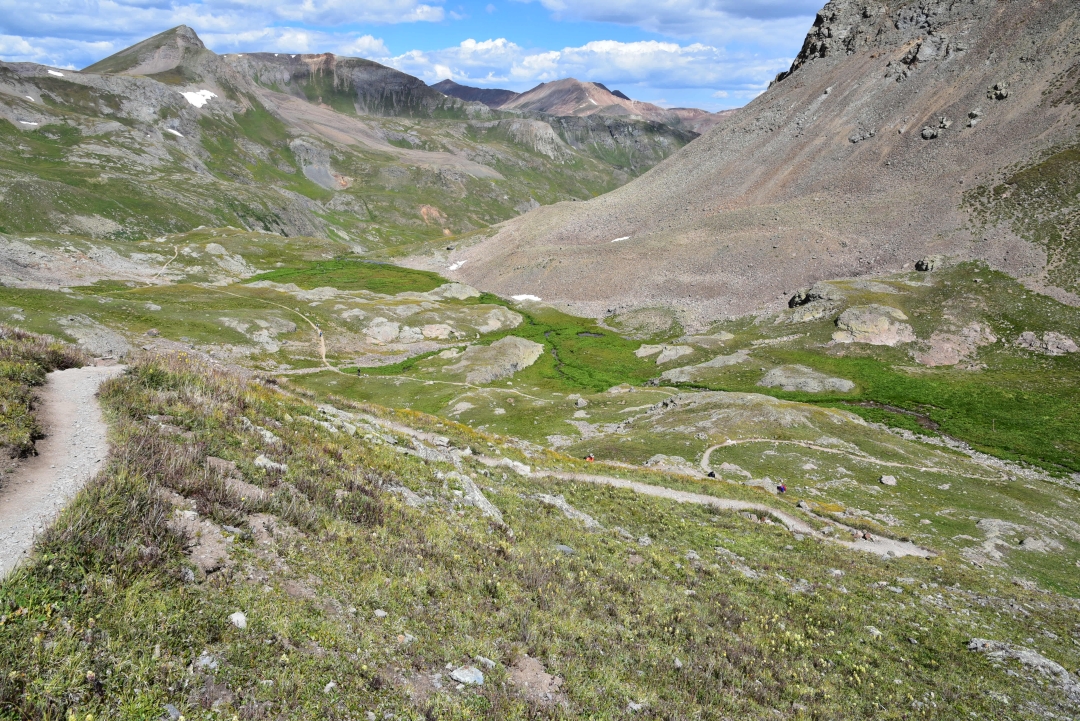
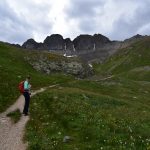
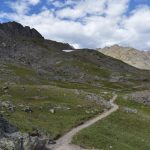
Our spikes grabbed the snow easily, and we proceeded upward and closer to the upper reaches of Mount Rainier. We took the most obvious path forward and kept near earlier bootpack and some glissading paths. Camp Muir was not yet visible. The snowfield appeared to stretch for miles and miles. Intermittently, there were some brief breaks in the snow via small sections of rocky outcroppings. We used one once to sit and dress a blister since it was preferable to sitting in wet snow. The snow was a strange redish muddy color in places. We’ve been told this is common in late summer due to pumice and ash. At 8,600 feet, we noted the turn off for the ridge that connects to Anvil Rock, a 9,000 something foot detour on the way to Camp Muir. We had our goal in site and did not choose to venture on this scenic path this time around. In the remaining mile on the snowfield, we acsended roughly 1,500 feet. It was intense. We kept checking the GPS thinking that it must be off or something. Surely we are higher in elevation with only a mile to go we thought. There were several wire wands in the snow with florescent tape marking the best path forward, which was helpful considering a few crevasses had started opening up on the snowfield. One we noted was 3 feet wide in places. Camp Muir and the snowfield are nearly completely surrounded by glaciers, and there are several warning in place by the National Park Service reminding hikers and climbers of the dangers of climbing the snowfield. Sadly, this hike has claimed a few lives when conditions turned poor. Backpacker magazine ranks the hike as one of the 10 most dangerous in America.

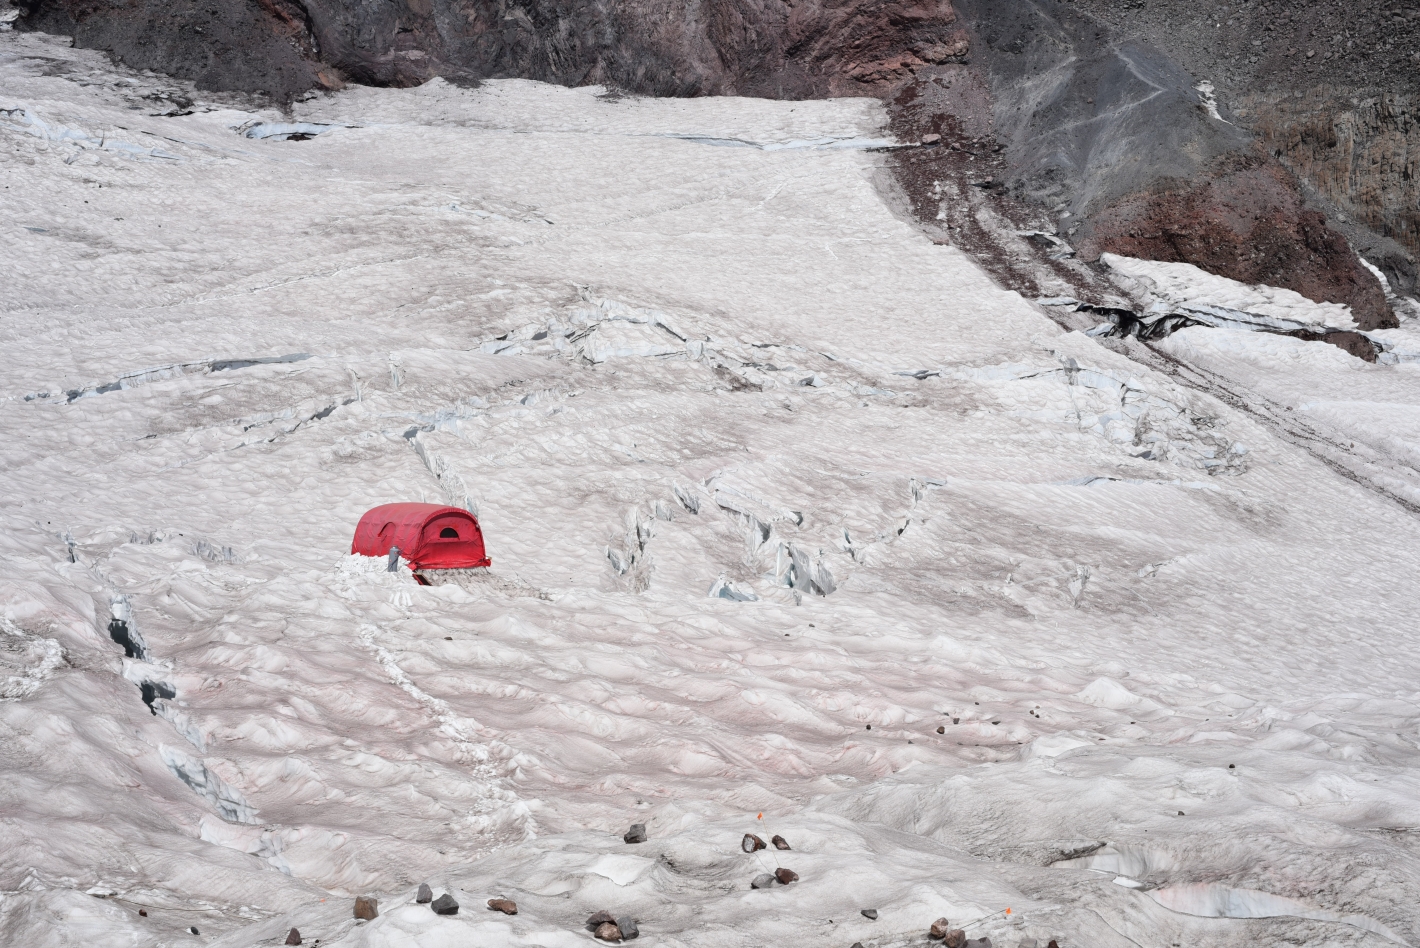
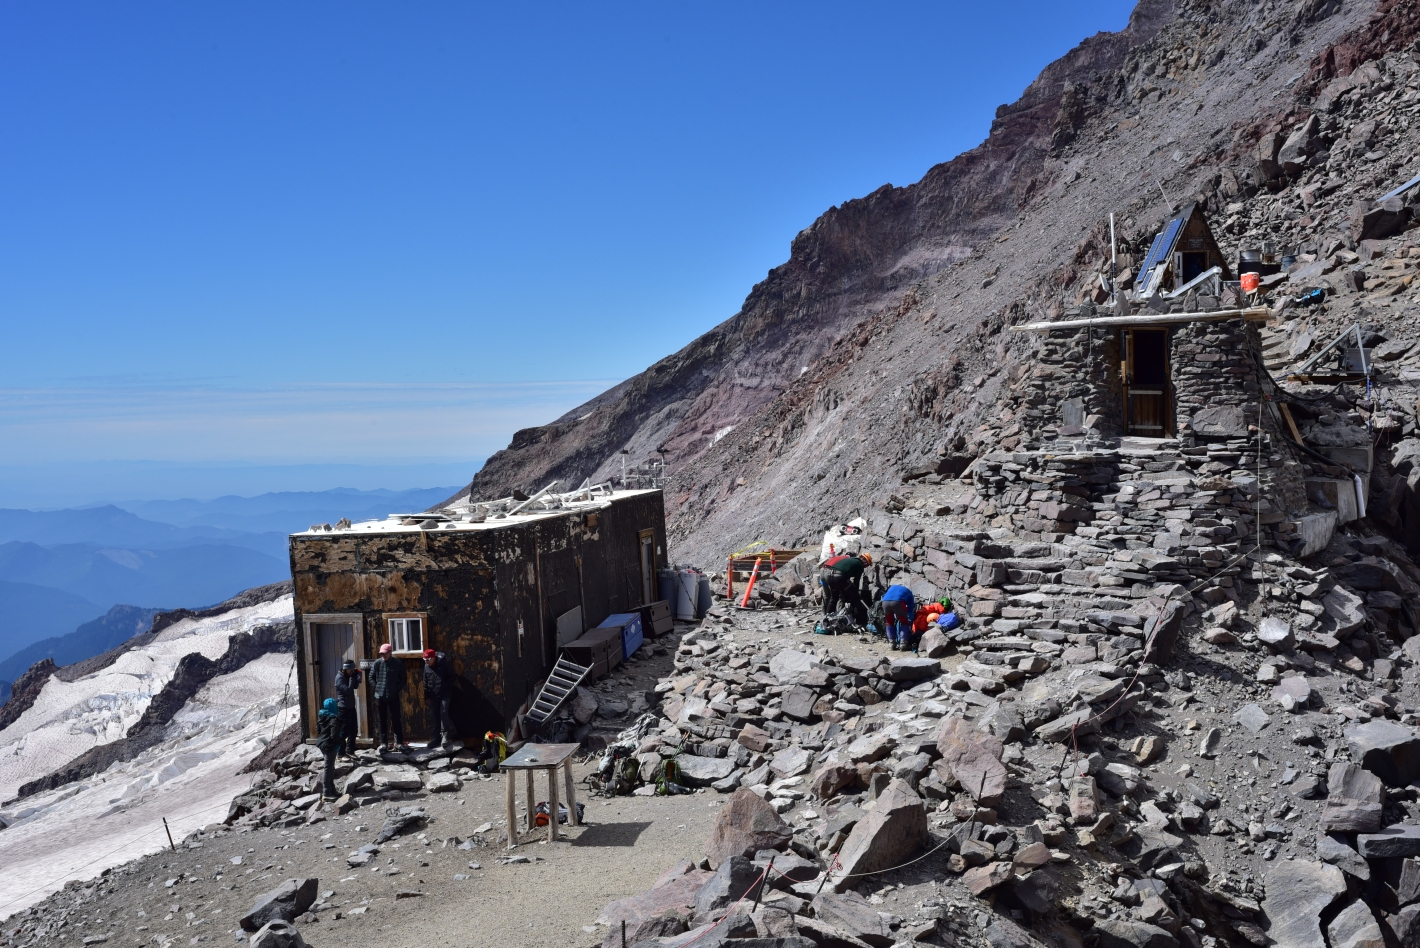
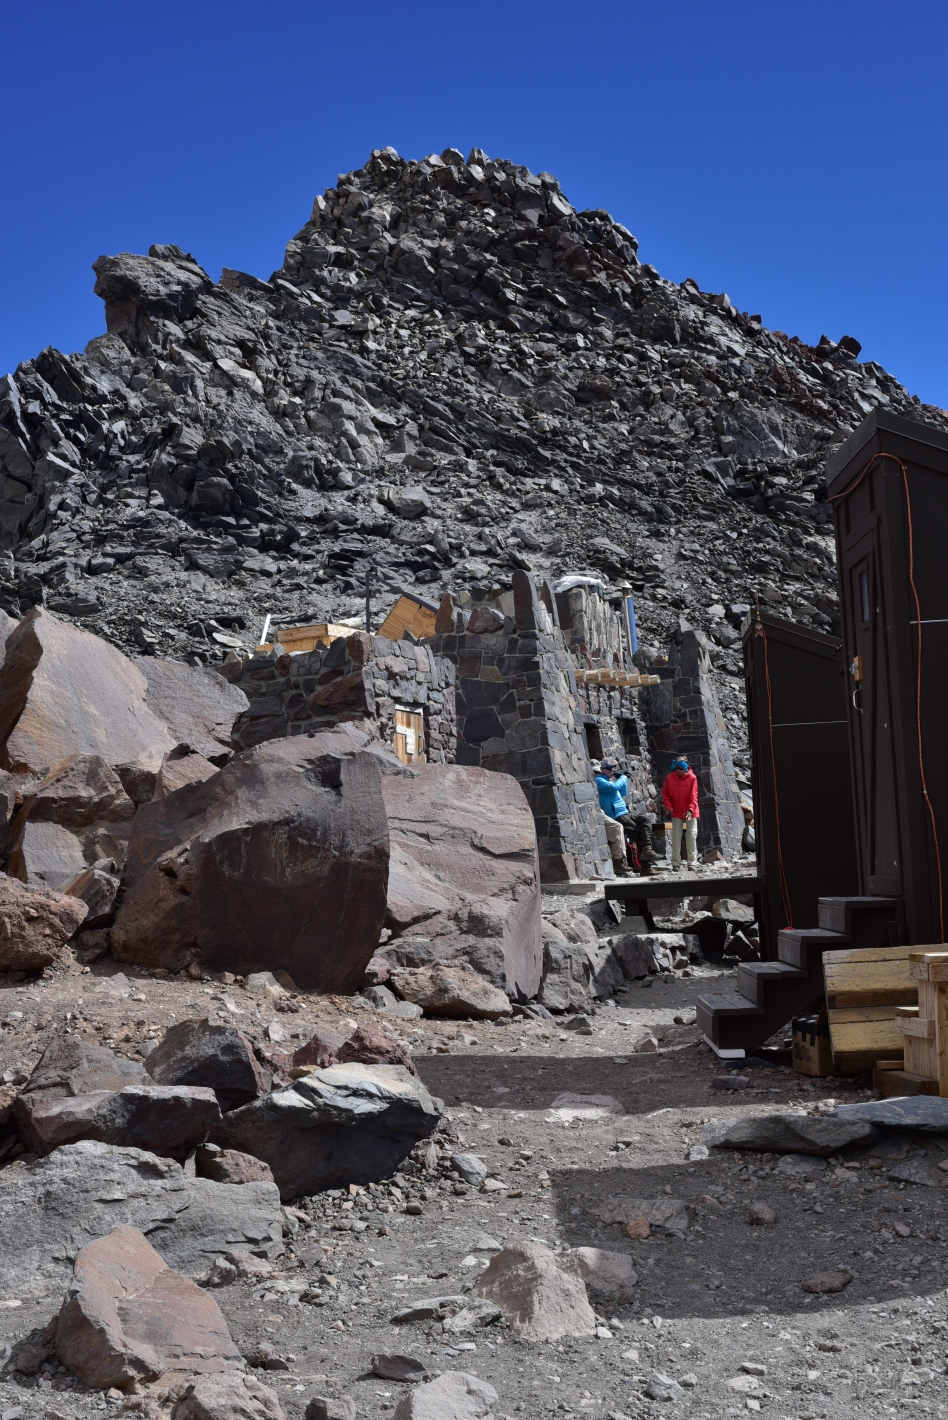
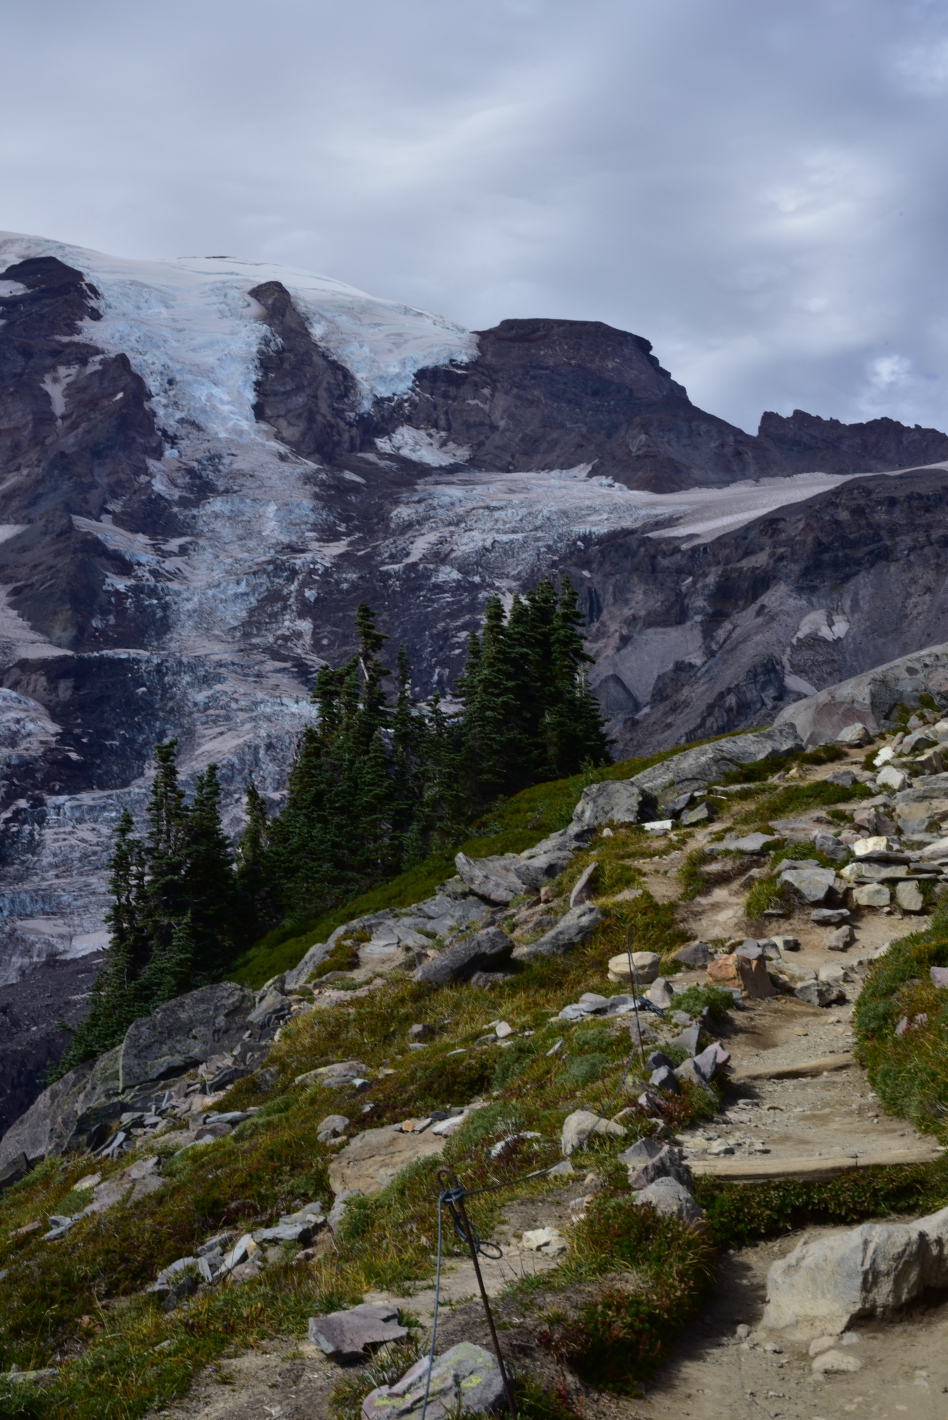
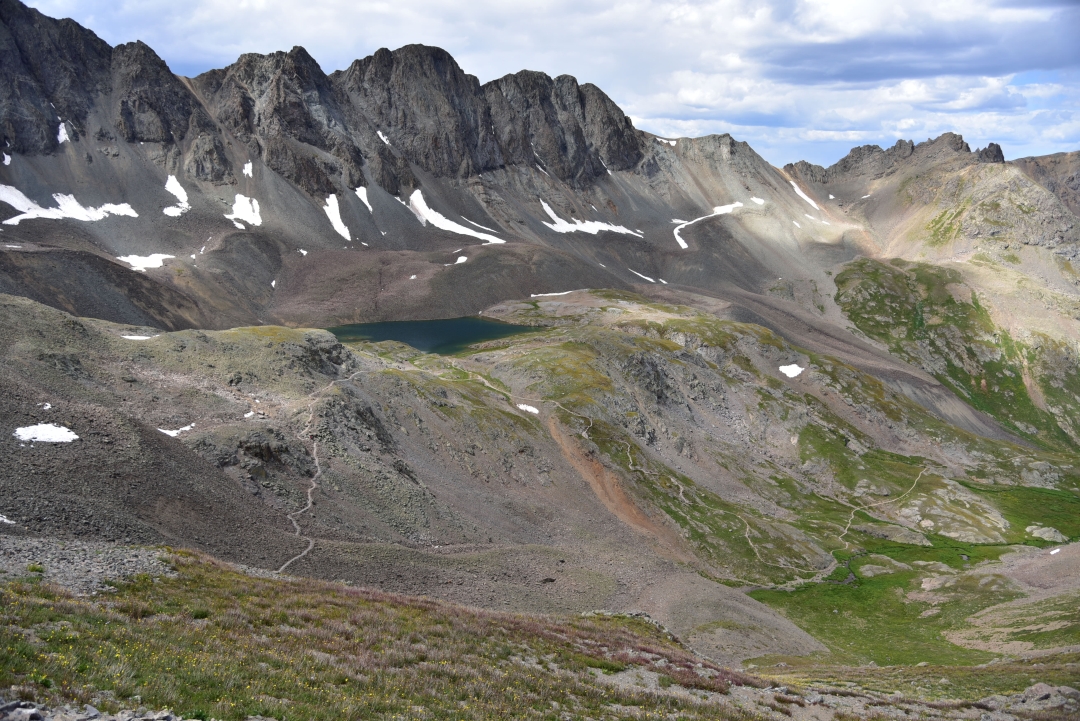
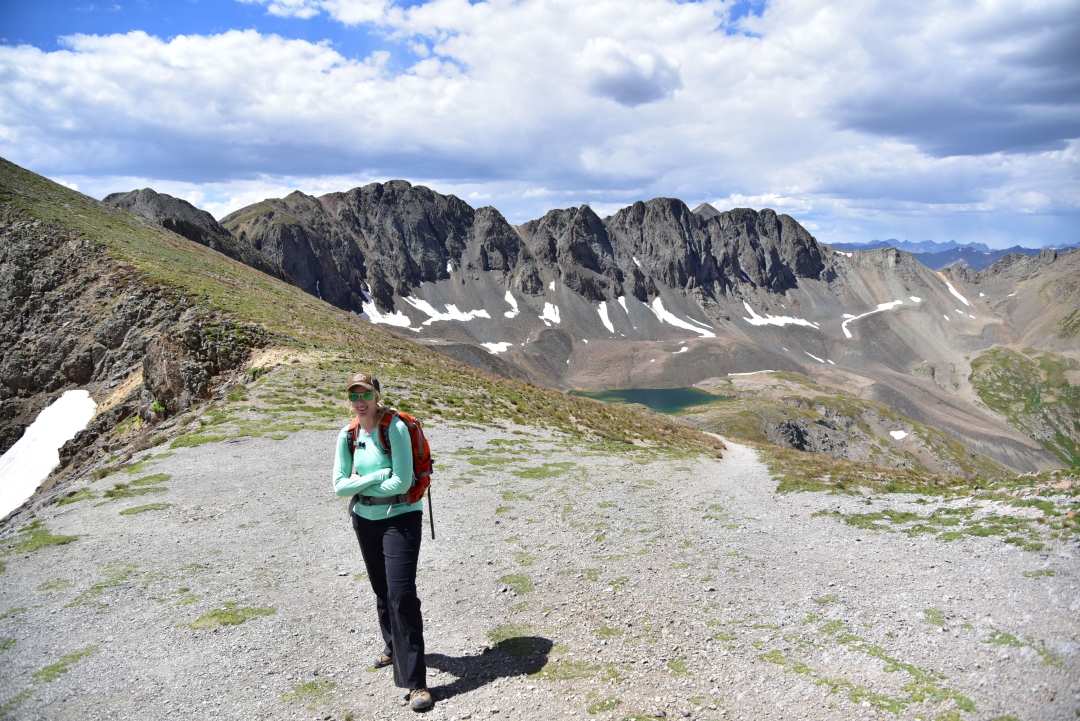
Camp Muir / Cloud Camp
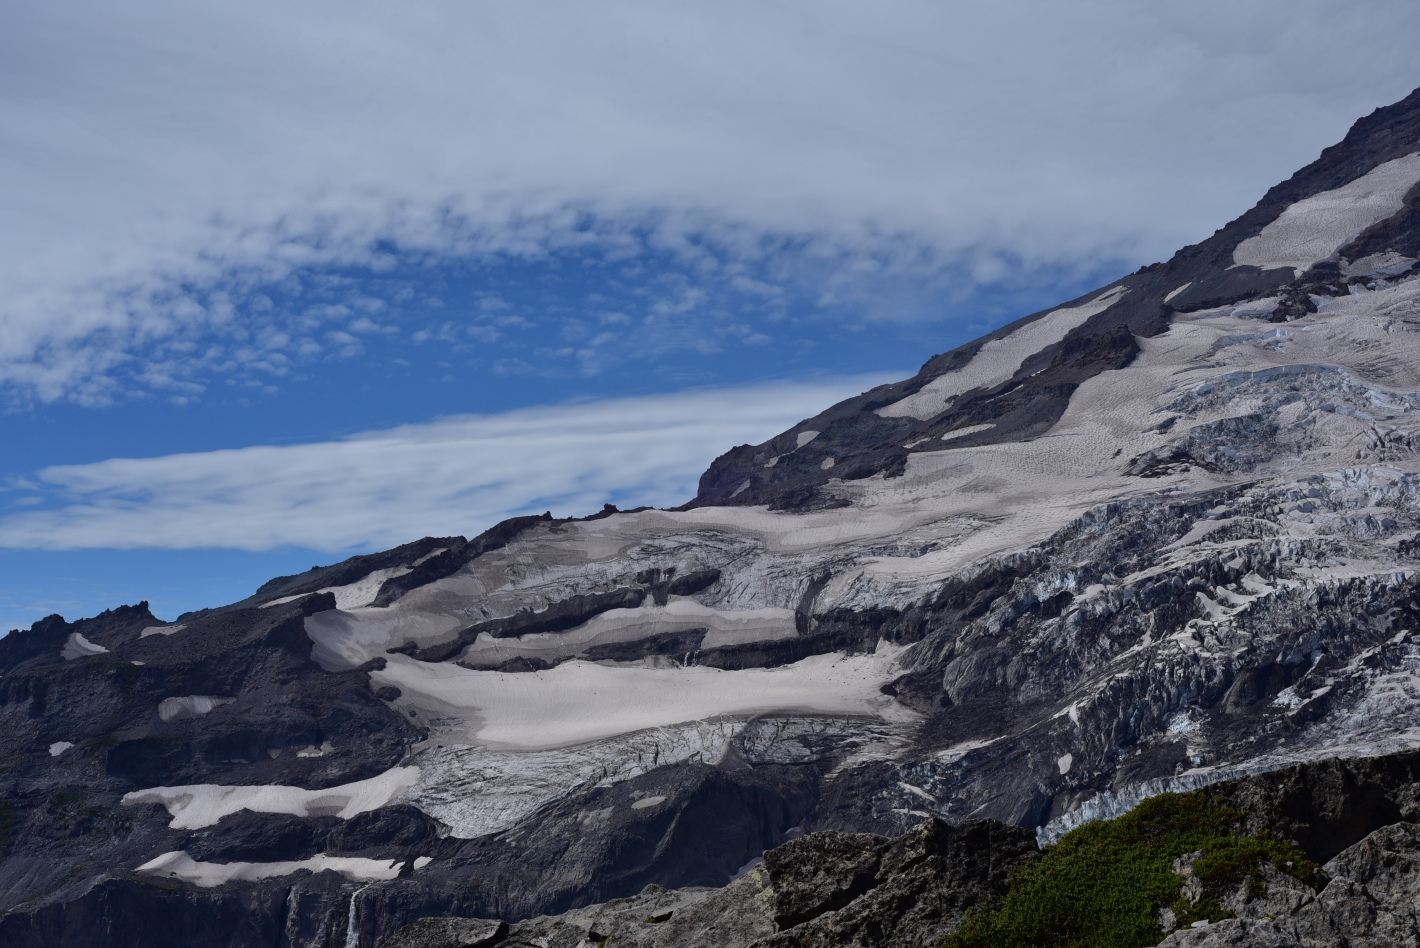
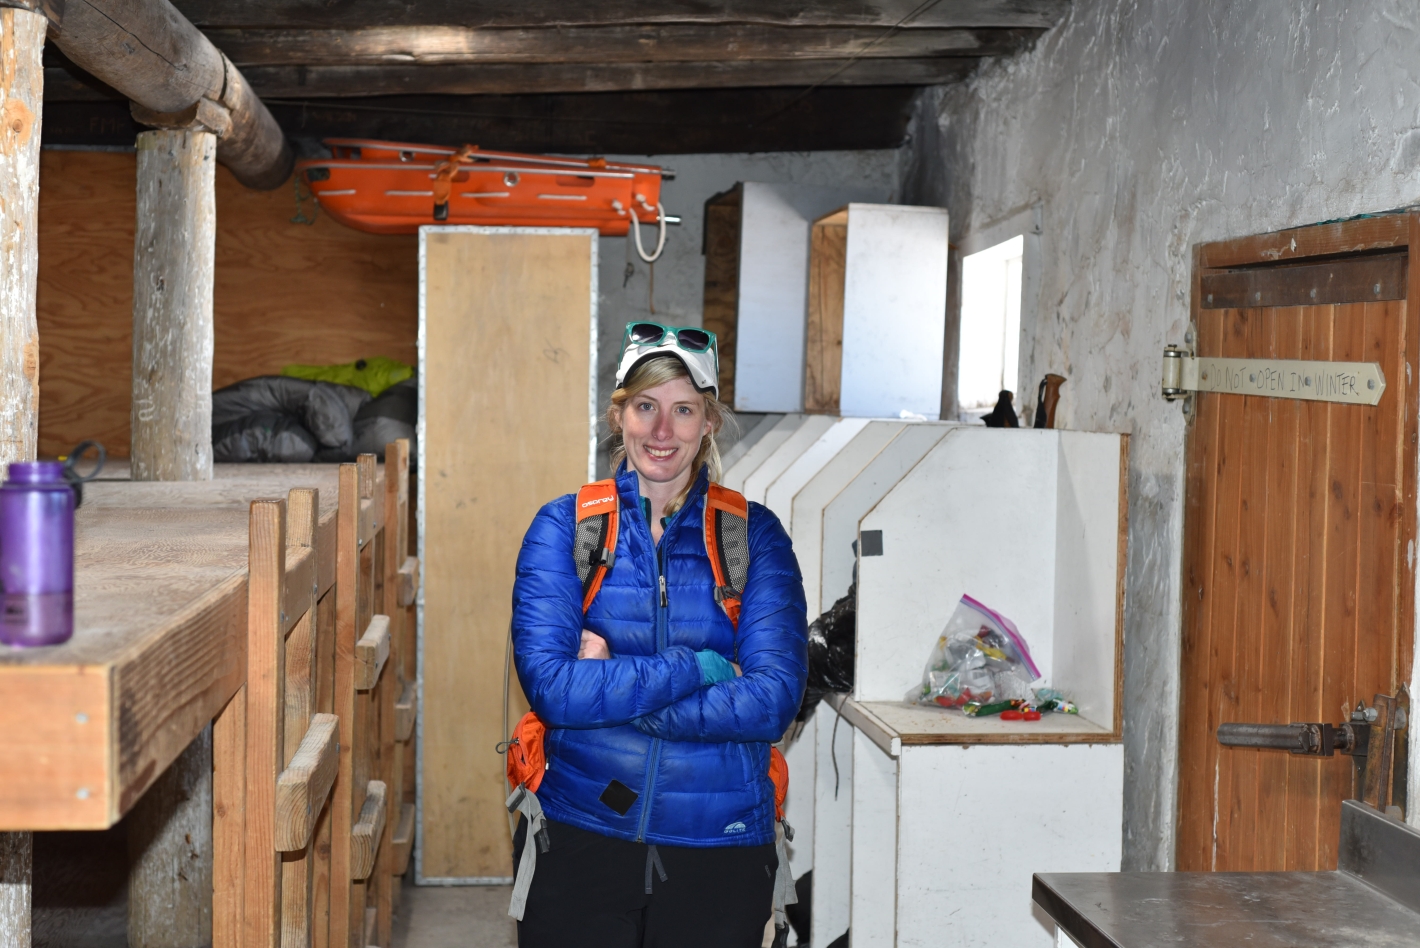
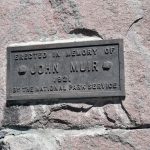
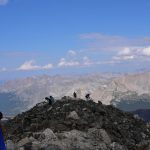
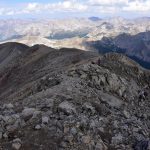
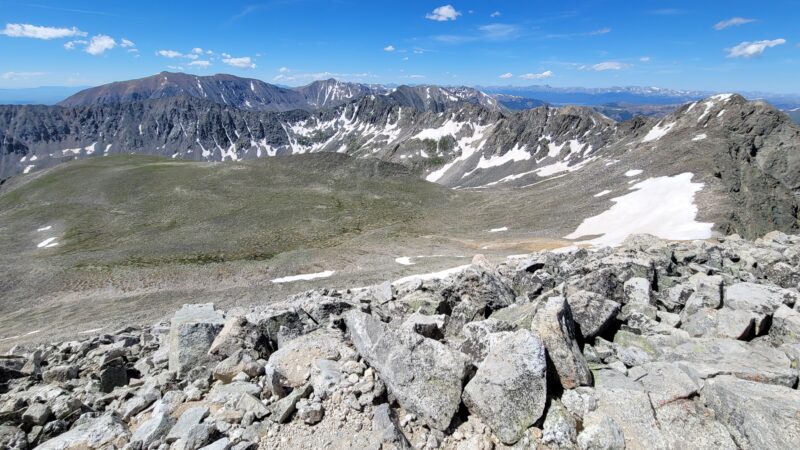
Camp Muir was originally called Cloud camp, and aptly so. The small camp sits above the Muir snowfield on the edge of the Cowlitz Glacier seemingly floating above the world below. After John Muir made the 6th recorded ascent in 1888, the name of the camp changed. Excitement ensued as we began to get our first glances of the camp. The first structure that camp into view was actually the guide hut. Only the famous stone structures would come into focus as we got much closer. We followed the boot pack and continued upward. It was a bit farther than it looked. The blue tint of the glaciers were quite apparent now, and finally we touched of our feet on hard rocky surface. We had made it to Camp Muir. While we were only sitting slightly above 10,000 feet, the hike was not too unlike many of our treks up to 14,000 feet. The elevation gain was intense. The camp was full of life and busy just before noon on a pleasant Friday. There were several guide groups and camps already set up on the Cowlitz glacier. Half a dozen or so day hikers were already perched at the front of the stone sleep shelter. We spent almost 45 minutes at the camp, eating some food and relaxing in the beauty of our surroundings. It was interesting to see tents pitched on the edge of 6 foot wide crevasses on Cowlitz Glacier. There were several warning signs in place stating that unropped travel past this point was not advised. As we looked south, we could see very clearly Mount Adams and Mount St. Helens. Mount Hood was slighlty visible between these two mountains.

The Descent
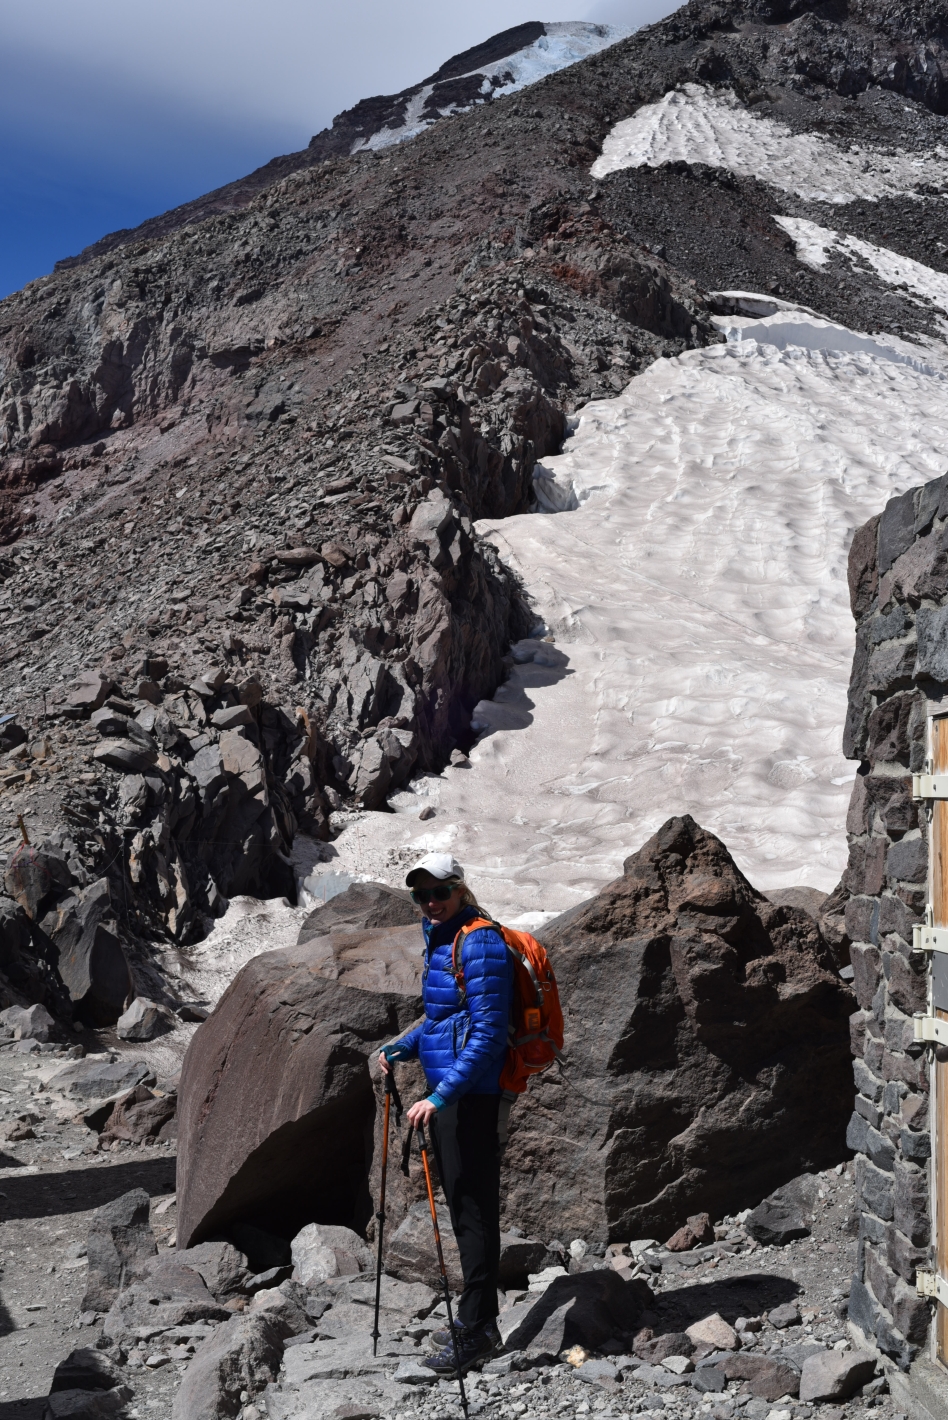
It was finally time to return to the world below, and we reluctantly put our spikes back on and began our descent. It was afternoon now, and the snow had gotten quiet slushy. Even in spikes, we were slipping and sliding. We eventually determined that the most efficient route down the mountain was via running/sliding down the mushy snow in our boots. There were several glissading paths that we saw on the way down, but at this point, unless they were steep, it was very hard to gain any speed. Scarily, we noted that one glissade path led straight into a crevasse. Though it was only 1 to 2 feet wide, it was still a scary prospect to think that a joyous slide might land you in a deep ice pit. On the way down, we saw several guide-led groups heading up to Camp Muir for a night’s rest prior to the summit push. Many of them looked a bit miserable to be honest. Though one day, we may be returning and participating in that march, today we were free to frolick down the mountain. On the final section of steep snow before reaching Pebble Creek, there was a short but very steep glissade. Several groups gathered here, and we all took turns gleefully sliding down it. There was even a bump that allowed those of us with enough speed to catch some air. Pure Joy.

Paradise Mount Rainier
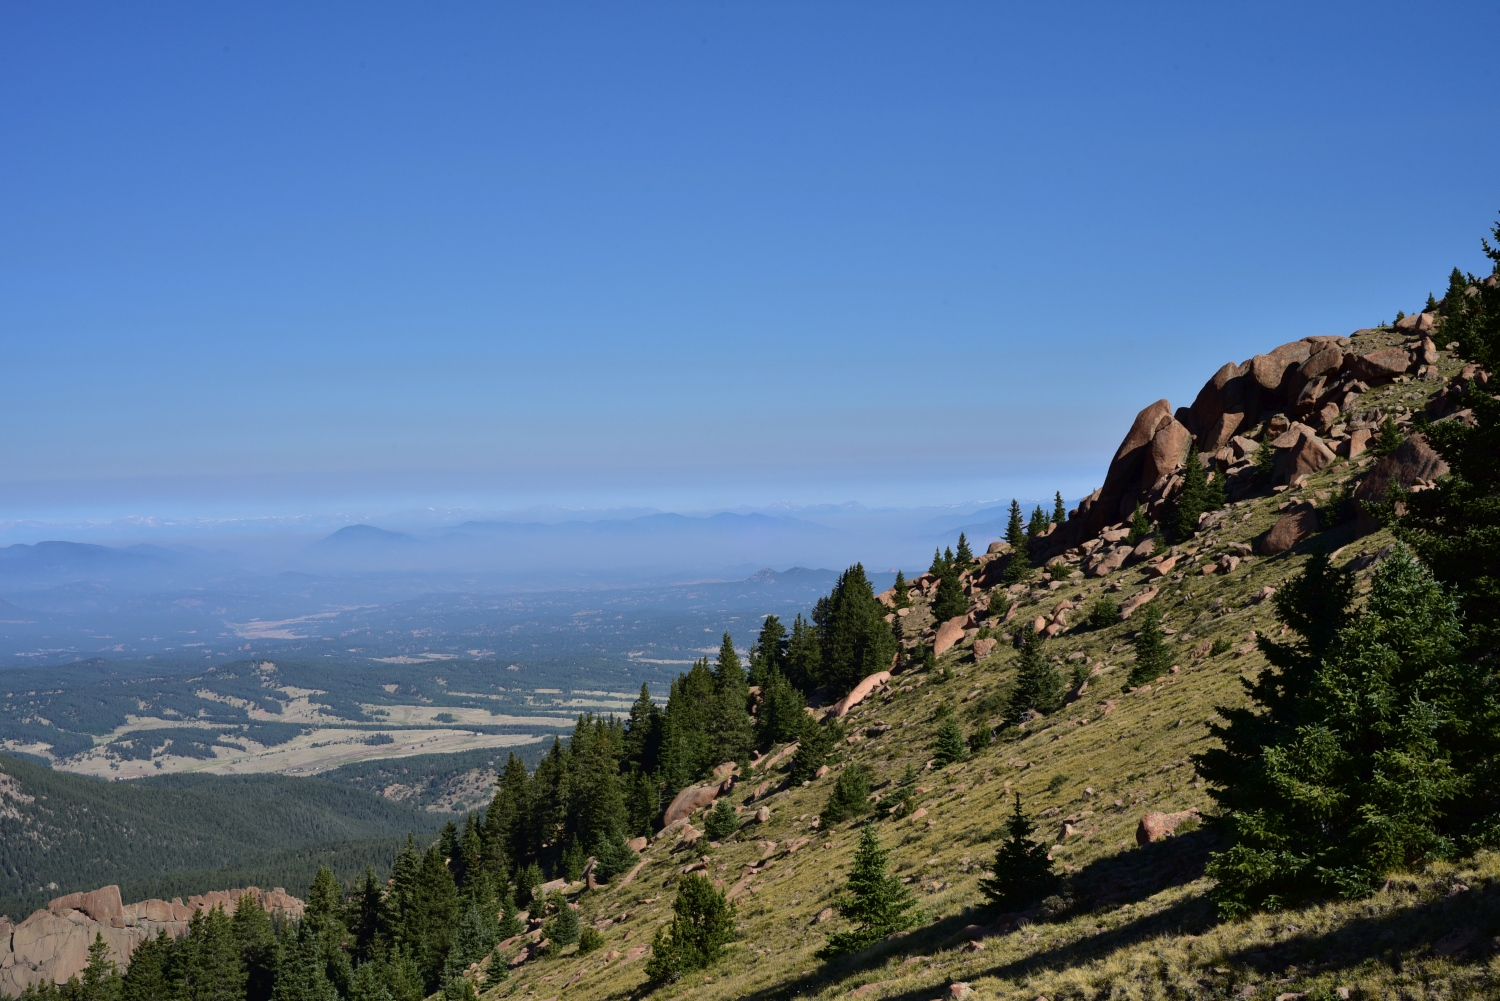
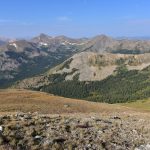
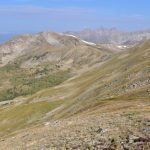
Once on dry, snow free ground we took our time enjoying the Skyline Trail. We took the loop that looks directly over the Nisqually Glacier this time. There were now hundreds of people out on the trail enjoying the bluebird day and exquisite surroundings. We returned to the Paradise Visitor Center and enjoyed the small but interesting display they had on the stratovolcano and then determined it was time for some real food and a soak in the hot tub at our Cabin. On the drive out of the park, we made one extra stop at Narada Falls for some beautiful waterfall pictures. This requires just a short hike down a steep path.

Parting Thoughts
The hike to Camp Muir was strenuous but rewarding and fun. The scenary was breathtaking virtually the entire hike. Prospective hikers to Camp Muir should remember that part of the trail is on a long snowfield covering nearly 2.2 miles and very steep at portions. While we had a safe fun day, weather can and does often deteriorate quickly and can turn the snowfield to a blanket of white leaving hikers with no sense of direction. This is particularing harrowing here, because there are cliffs and crevasses surrounding the snowfield. Compass/map and GPS are critical for this trek.
Side notes: Verizon had some cell reception at Camp Muir and a bit near Pebble Creek. AT&T had none…anywhere. Also there is a cafeteria at the Paradise Visitor Center. We got small snacks here and they were tasty but expensive. We ask the cashier why the prices are so high. He replied ” that’s the high altitude tax” of which we replied “hey man, this is the elevation of our living room!” To put things in perspective, Paradise is only 5,400 feet above sea level, close to that of our home in the Mile High City. Sigh. Everything is relative. And lastly, eat dinner at Copper Creek Inn Restaurant right outside the park. It was amazing!


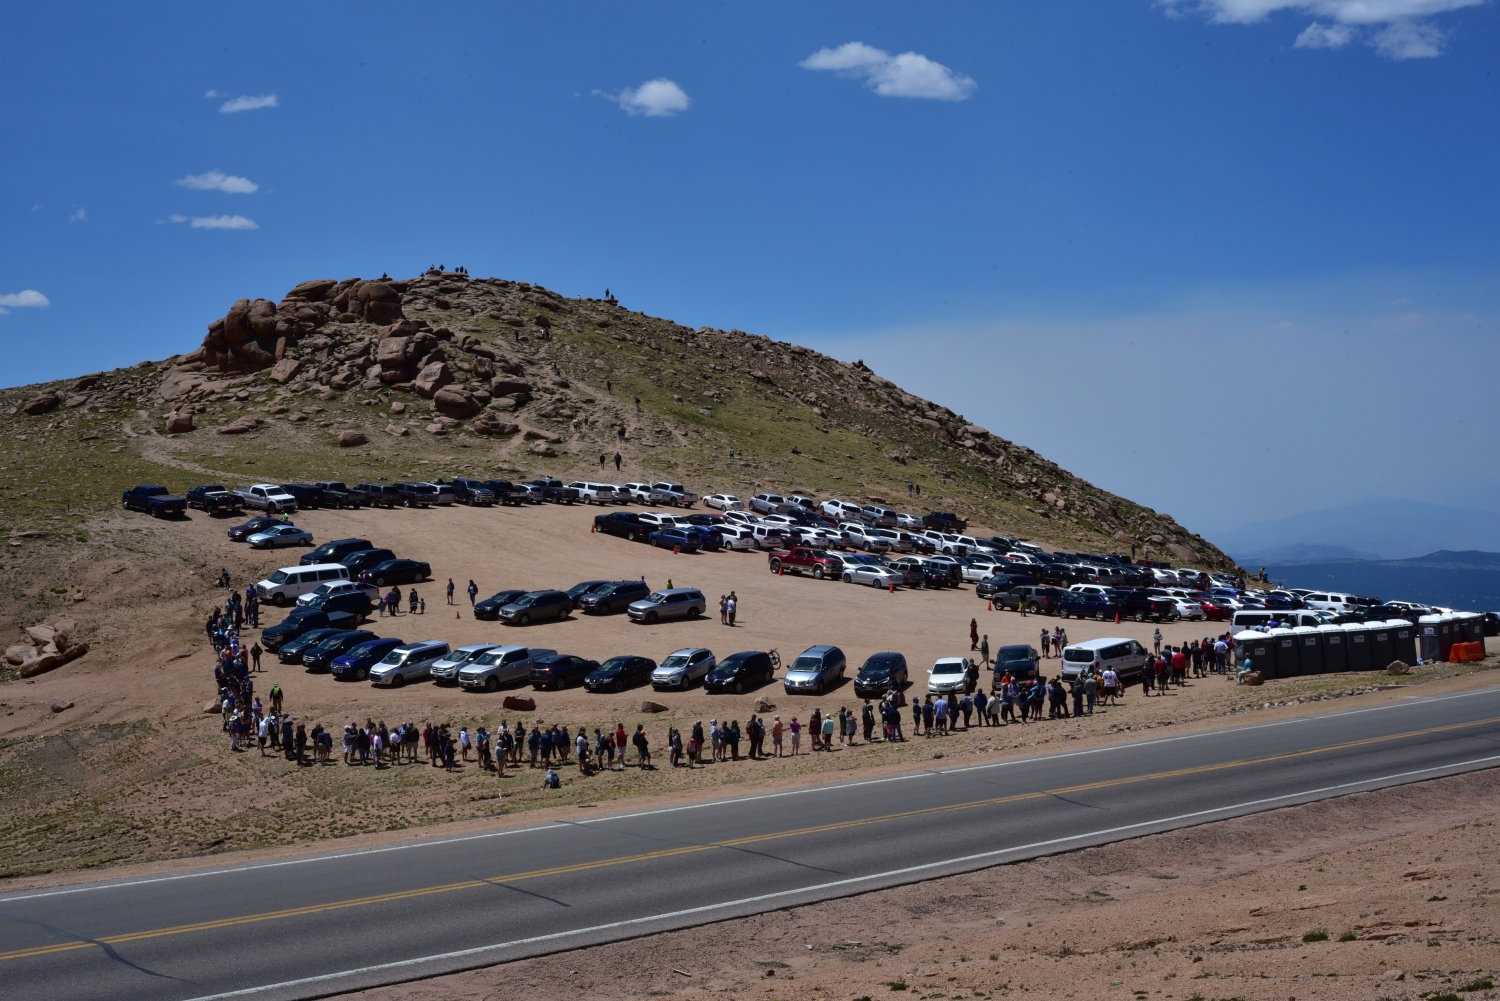
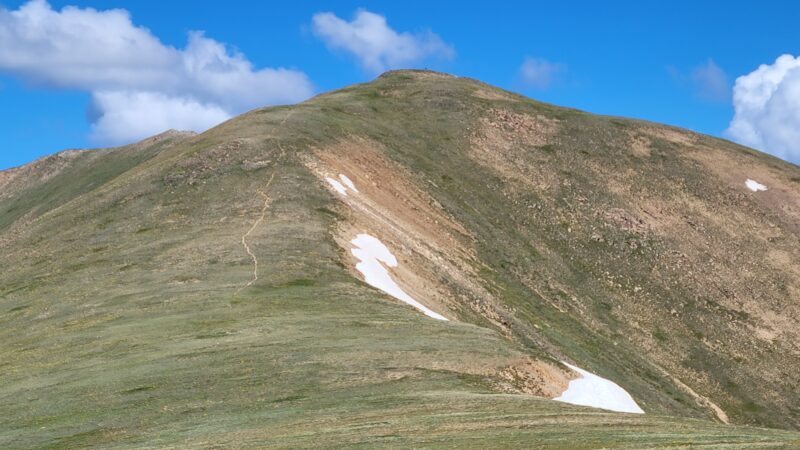
Pikes Peak via the Crags 14,115 feet

Data from the Garmin
Distance: 14.59 miles Net elevation gain: 4,418 ft Date of summit: 7/2/2018
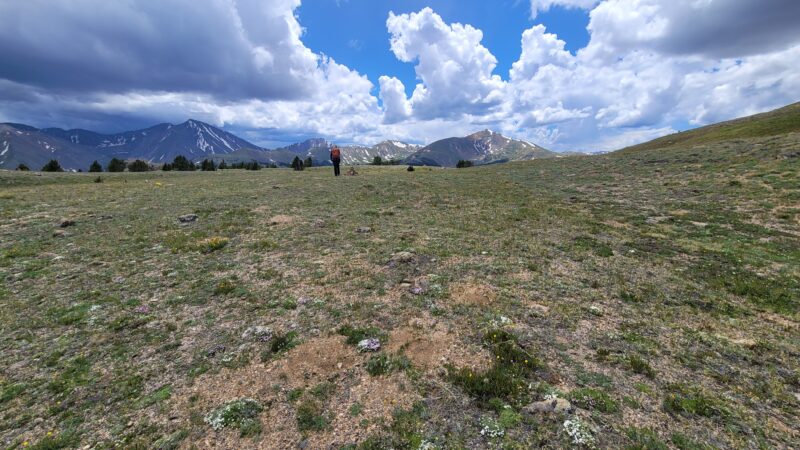
It was the Sunday evening before the 4th of July, and we were itching for another 14er to summit though we weren’t particularly eager for a long drive or car camp the night before. In our peak “bagging” project, we only have Longs Peak and Pikes Peak left in the Front Range, and for some time have contemplated letting our 14er finisher be Pikes Peak so that family and friends can drive up and meet us at the top. Well plans change, and we figured this was the only reasonable peak to get in this time while allowing us a little more sleep in the comfort of our own home. Bright and early…or should we say dark and early on Monday July 2nd, we awoke and made the 2 hour drive to the Crags Campground TH for Pikes Peak.
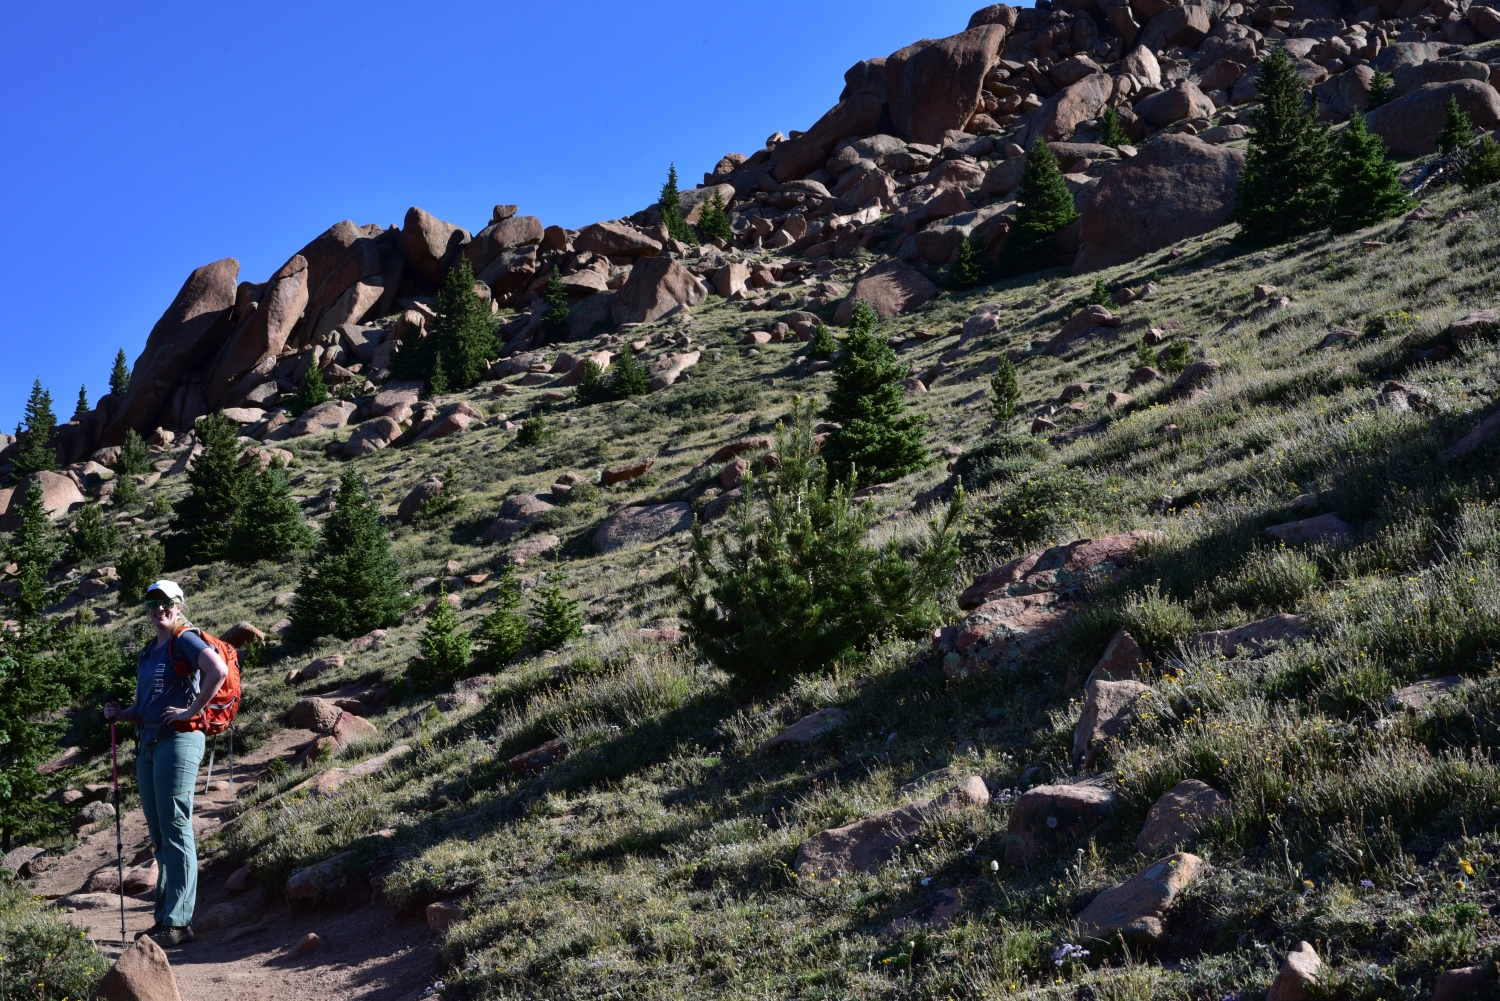
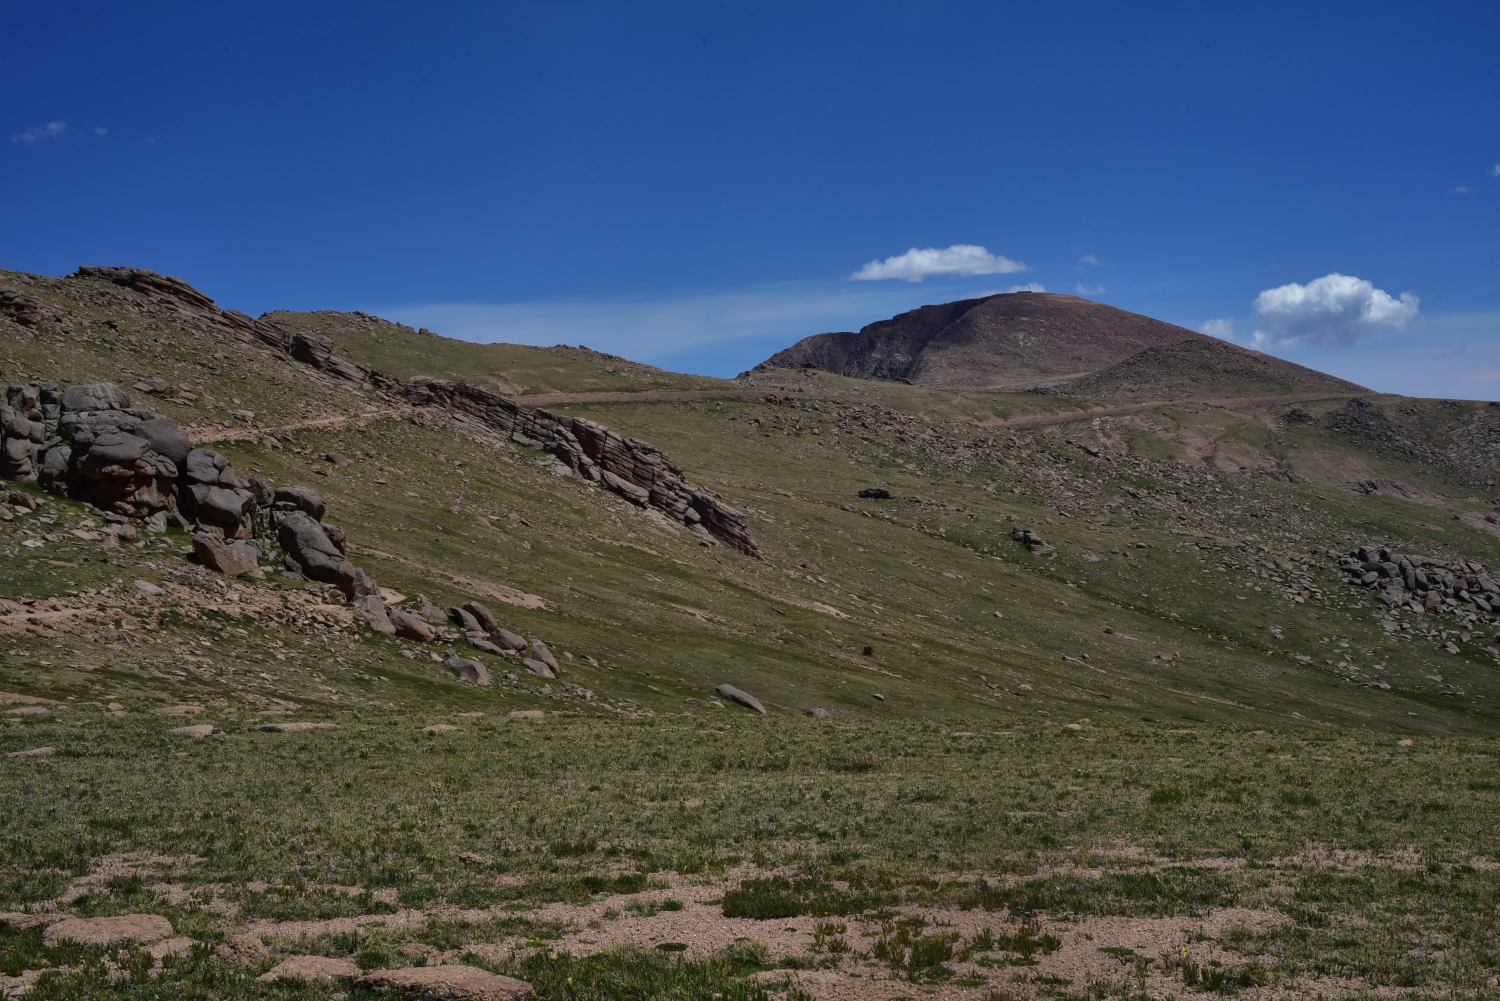
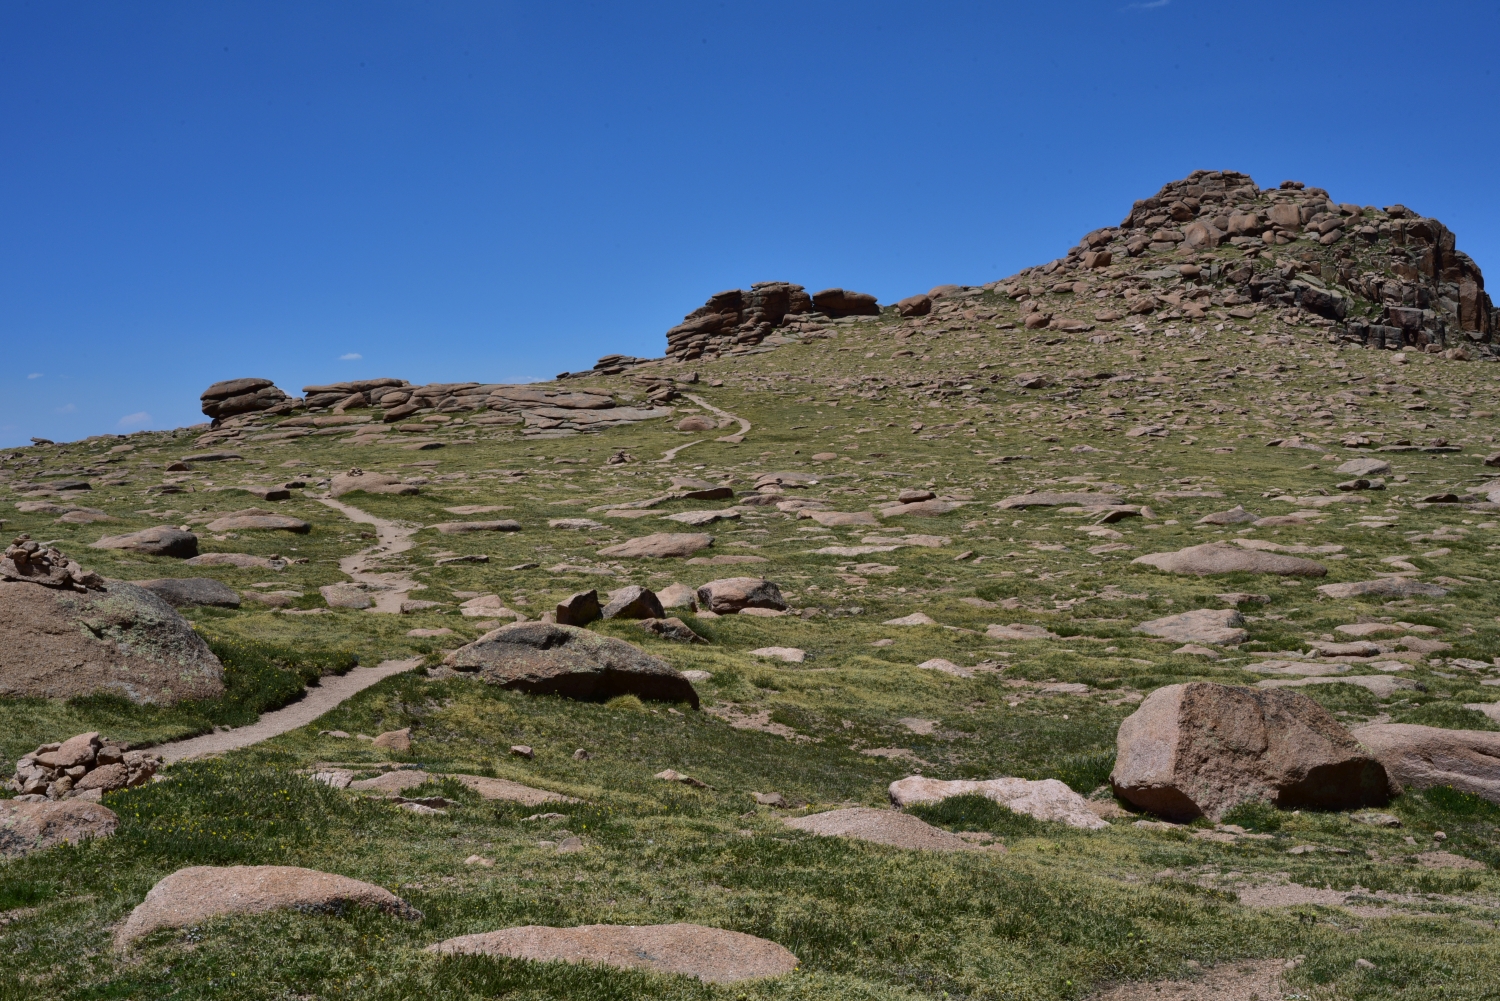
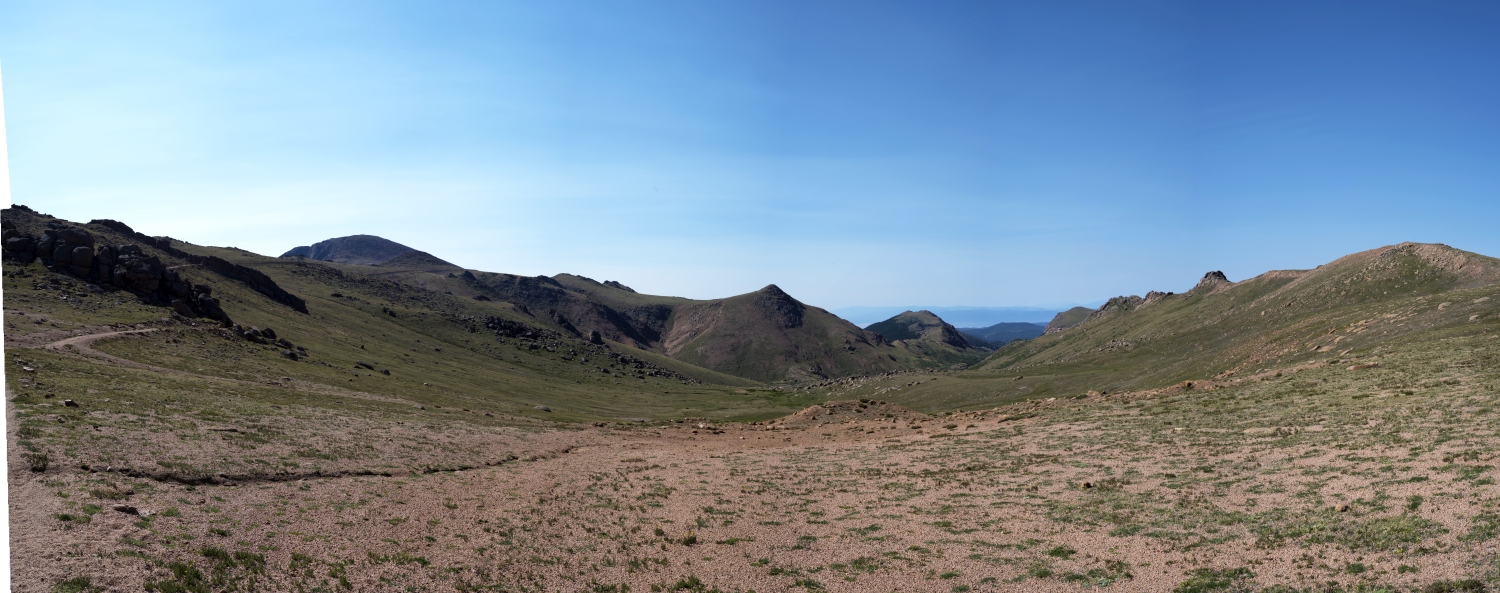
For those of you familar with Pikes Peak, you’ve probably heard of the famous Barr Trail that leads 13 miles up to the summit with over 7,000 feet of elevation gain. This is the standard iconic route that most people take and usually involves an overnight stay at Barr Camp about half-way up the peak. However, there is an alternative for those seeking to gain the summit of Pikes without such a long slog. Less popular and less traveled is the Crags route, which begins near the Crags Campground located near Divide, Colorado. Round trip this route is a litte over 14 miles and gains roughly 4,100 feet of elevation. While still long, this route saves a lot of time compared to the standard 26 mile walk up. To reach the moderately sized parking lot and the start of the trail, we turned off of Colorado 67 near a ranch and drove for about 3 miles on a 2wd dirt road. The parking lot was nearly empty and there were vault toilets there as well. We began our ascent at about 7:20 am. Though we had hoped for an earlier start time, the distance to reach the Crags TH from our home in Denver took much longer than expected. Plus, one of us needed a coffee/breakfast stop on the way there.
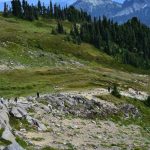
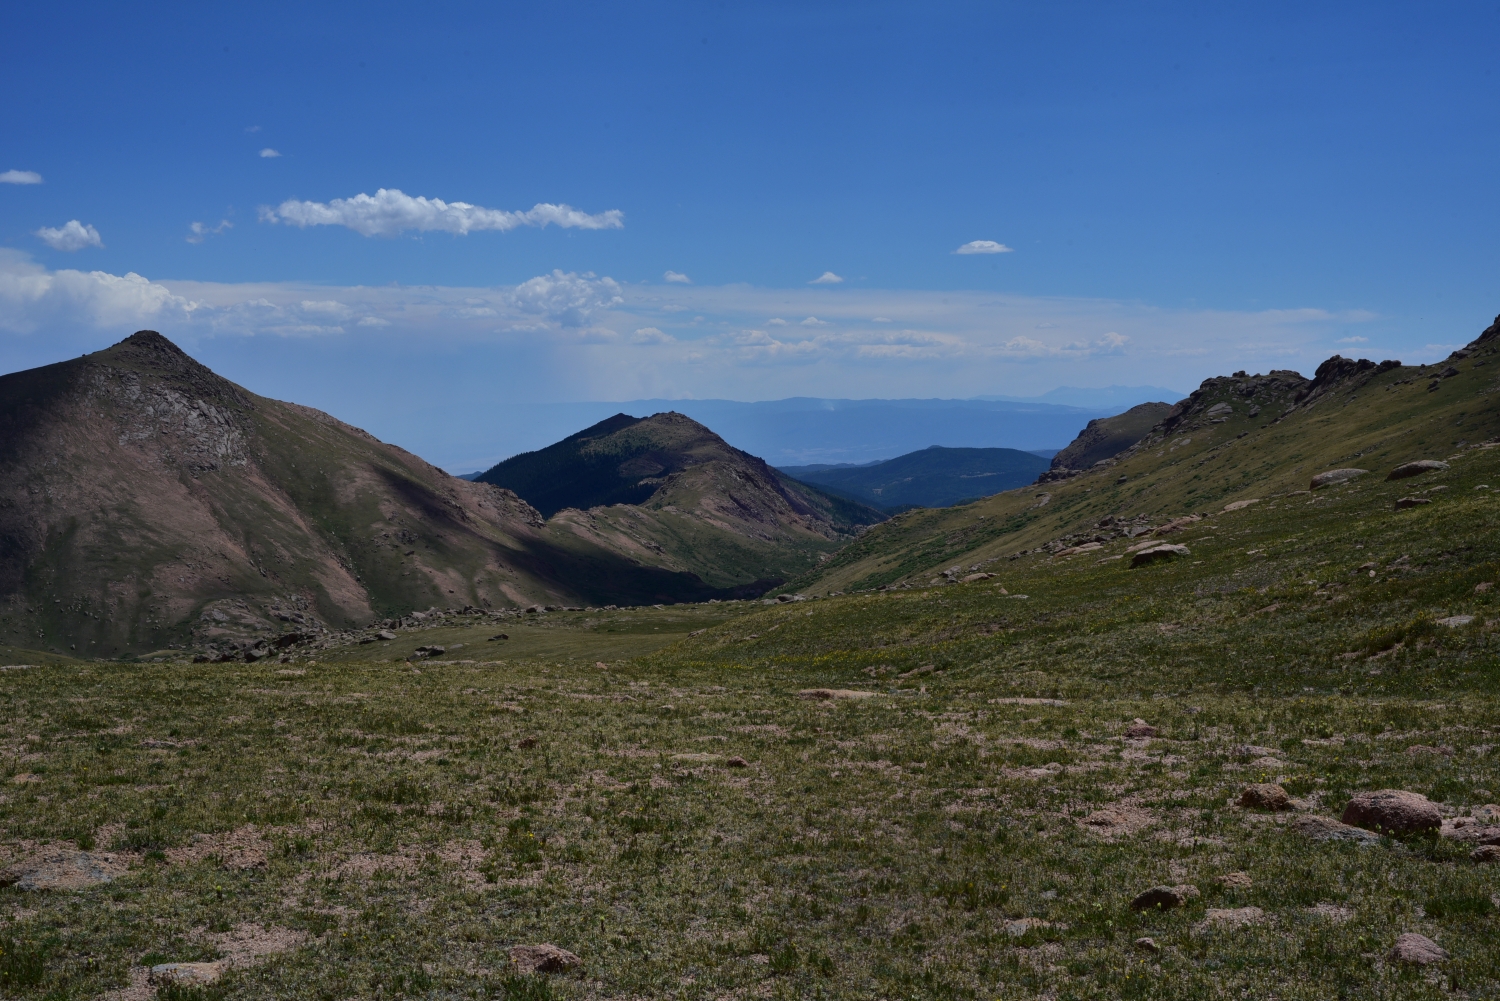
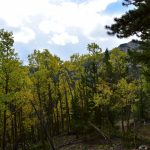
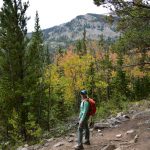
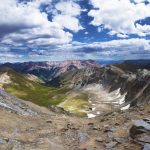
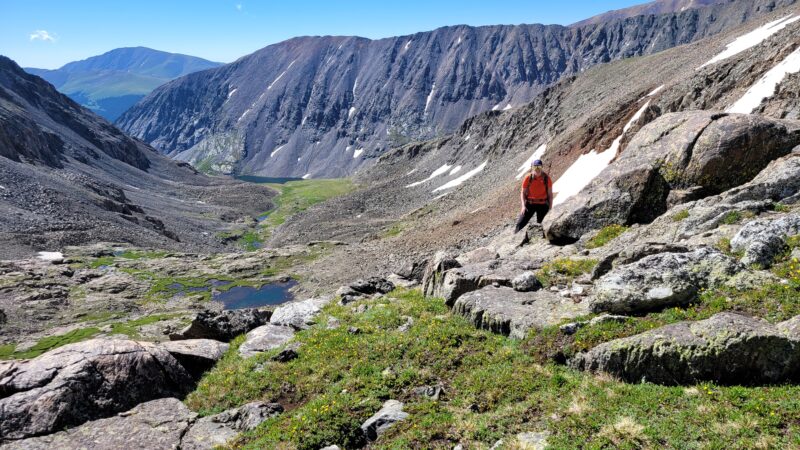
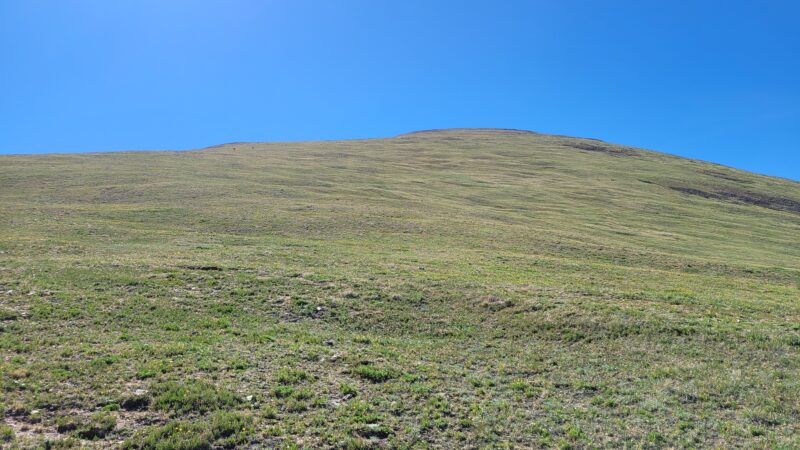
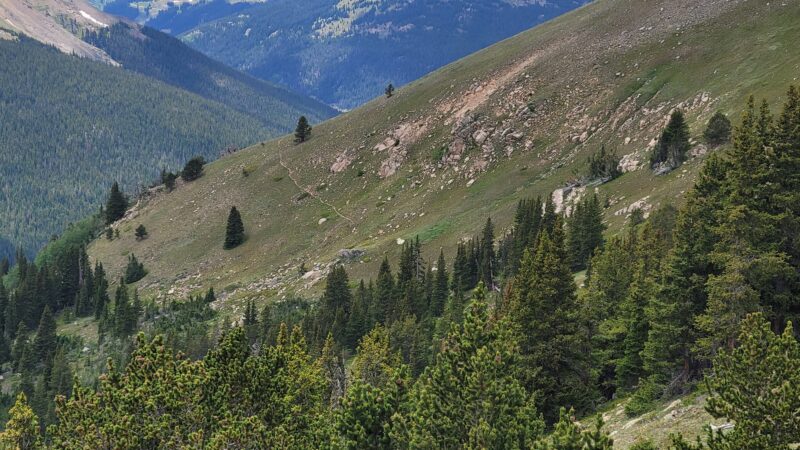
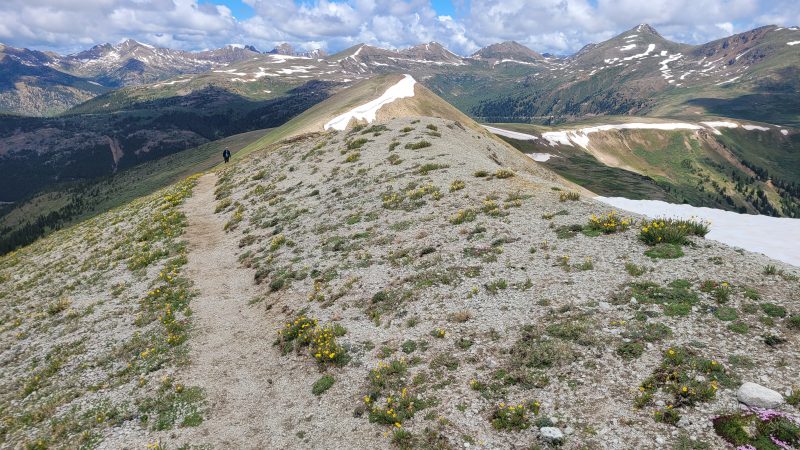
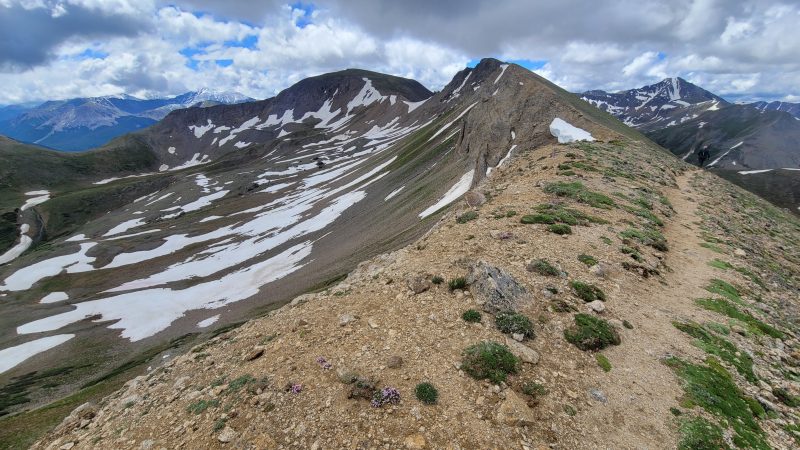
We immediately crossed Fourmile creek on a nice bridge and began our trek through some dense forest. After about half a mile of moderately gaining elevation, we reached a trail junction. After reading trip reports, we were on the lookout for three “pipes” sticking out of the ground to mark the upcoming junction. We easily found the pipes but there were also nice signs indicating the junction. We followed the signs to Devil’s Playround towards the right. This portion of the hike was quiet, and peaceful. We passed two parties hiking up which always makes us feel great about our pace and accomplishment, however a trail runner later passed us quickly humbling us. The hike became much more interesting as the trees started to thin, opening up views of the exquisite valley below us. Close to 11,000 feet, we encountered a small meadow before ascending a steep hillside that exited the trees completely. Seen below are photos as began to leave treeline.

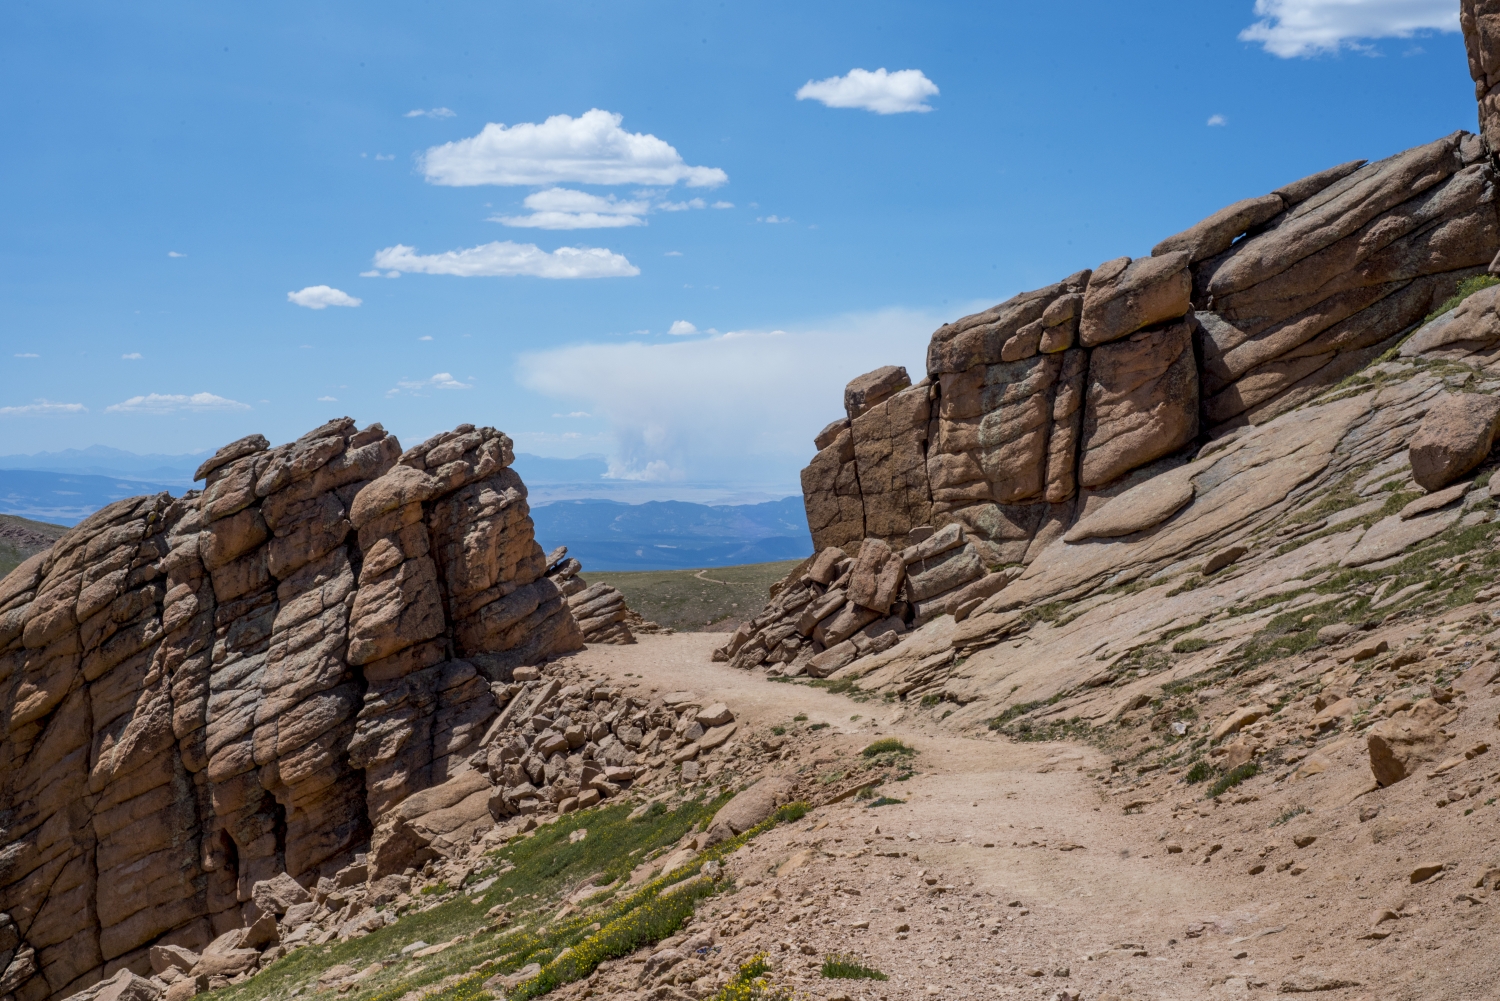
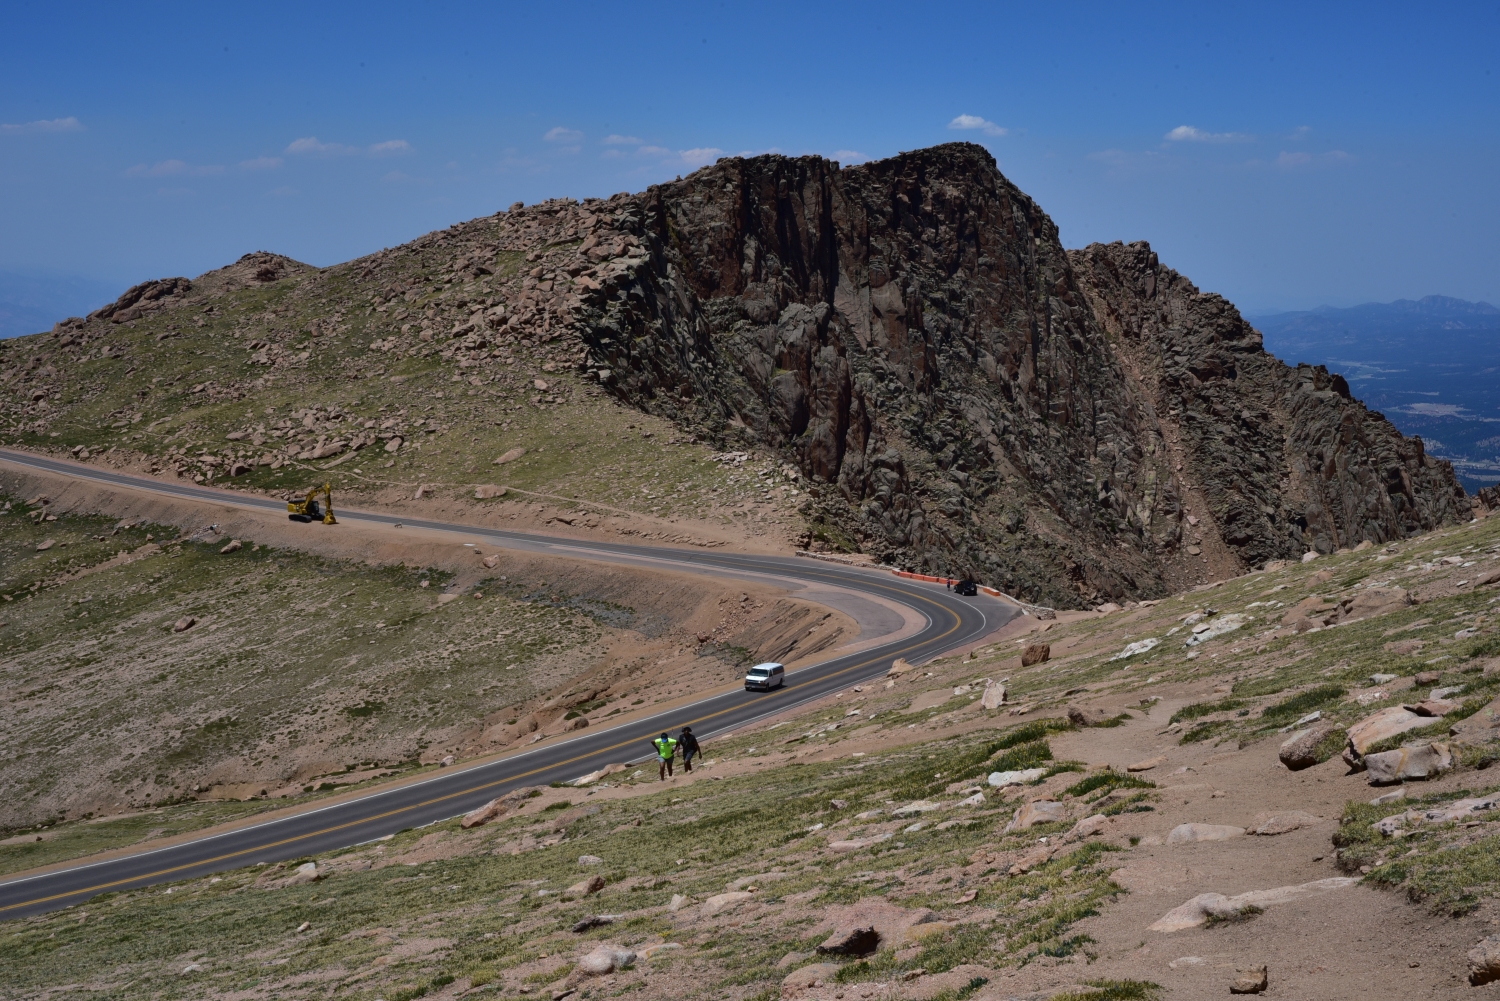
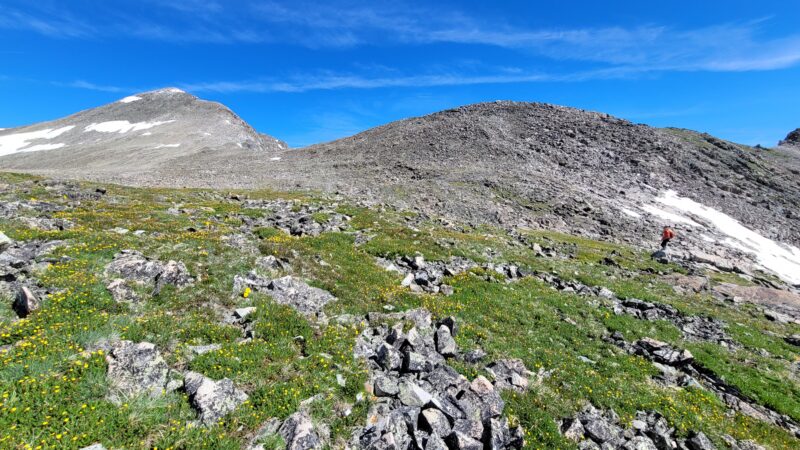
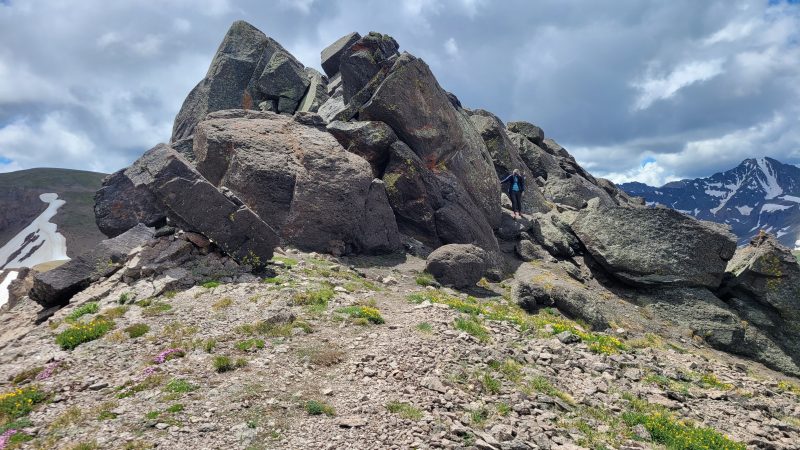
After ascending another steep hillside, we gained a ridge, and the trail leveled off a bit. This portion of the hike was very reminiscent of the Mount Flora hike off of Berthoud Pass for those familiar. This is the quintessential alpine environment that we seek so frequently. At the top of this slope, we were near 12,800 feet. We had gained close to 3,000 feet of elevation after about 3.5 miles. While beautiful, there were some steep sections in the first few miles of the Crags route. The trail widens here, and we followed it northeast towards Devil’s Playground and the Pikes Peak road. As we approached the “Playground” named for the frightening lighting storms that take place here frequently in summer afternoons, we came upon a large gap in a strip of rocks that we passed through to get to the Devil’s Playground parking lot. This entry point to the remaining route was quite dramatic. For our fellow Tolkien fans, we imagined Gandalf shouting “you shall not pass!” We passed though and were greeted with the first signs of civilization, and were reminded of why we have been putting off climbing Pikes Peak. Because of construction at the summit house, there is currently limited parking on the top of Pikes. Shuttle bus operators were asking people without kids or disabilities to park at Devil’s Playground and ride up with them to save parking. It was still relatively calm this early in the morning, and there were bathrooms which is rare for a 14er adventure above treeline. Nonetheless, the remaining route would be devoid of the privacy we were afforded in the first few miles.

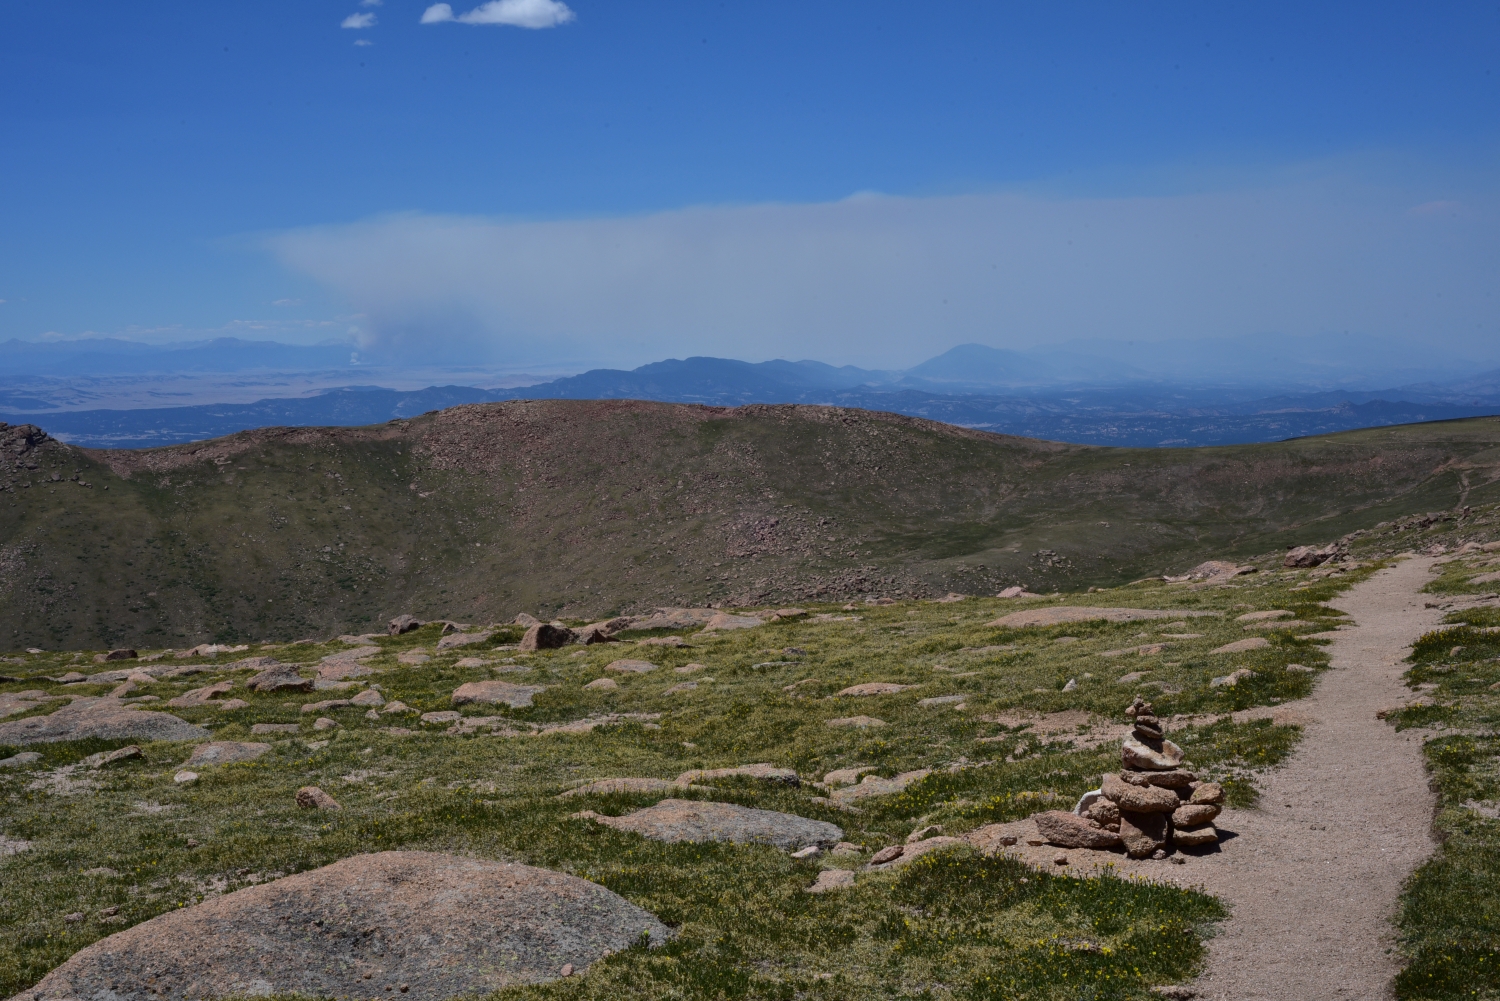
We crossed the Pikes Peak Road for the first time at the Devils Playground parking lot. Hiking along the road is prohibited, and if you are caught then you are likely to get a ticket. Instead, the trail follows the road for a portion, which in our opinion is much preferable to hiking up concrete next to vehicles flying by. We were now about 2.25 miles from the summit, and the trail was gentle until the final push. There were a few more hiking parties that had joined the trail for the abbreviated version at Devil’s Playground, but most people we saw were boarding the shuttle busses for the top. We enjoyed the mild terrain as we got closer and closer to the summit. Seen below are photos.

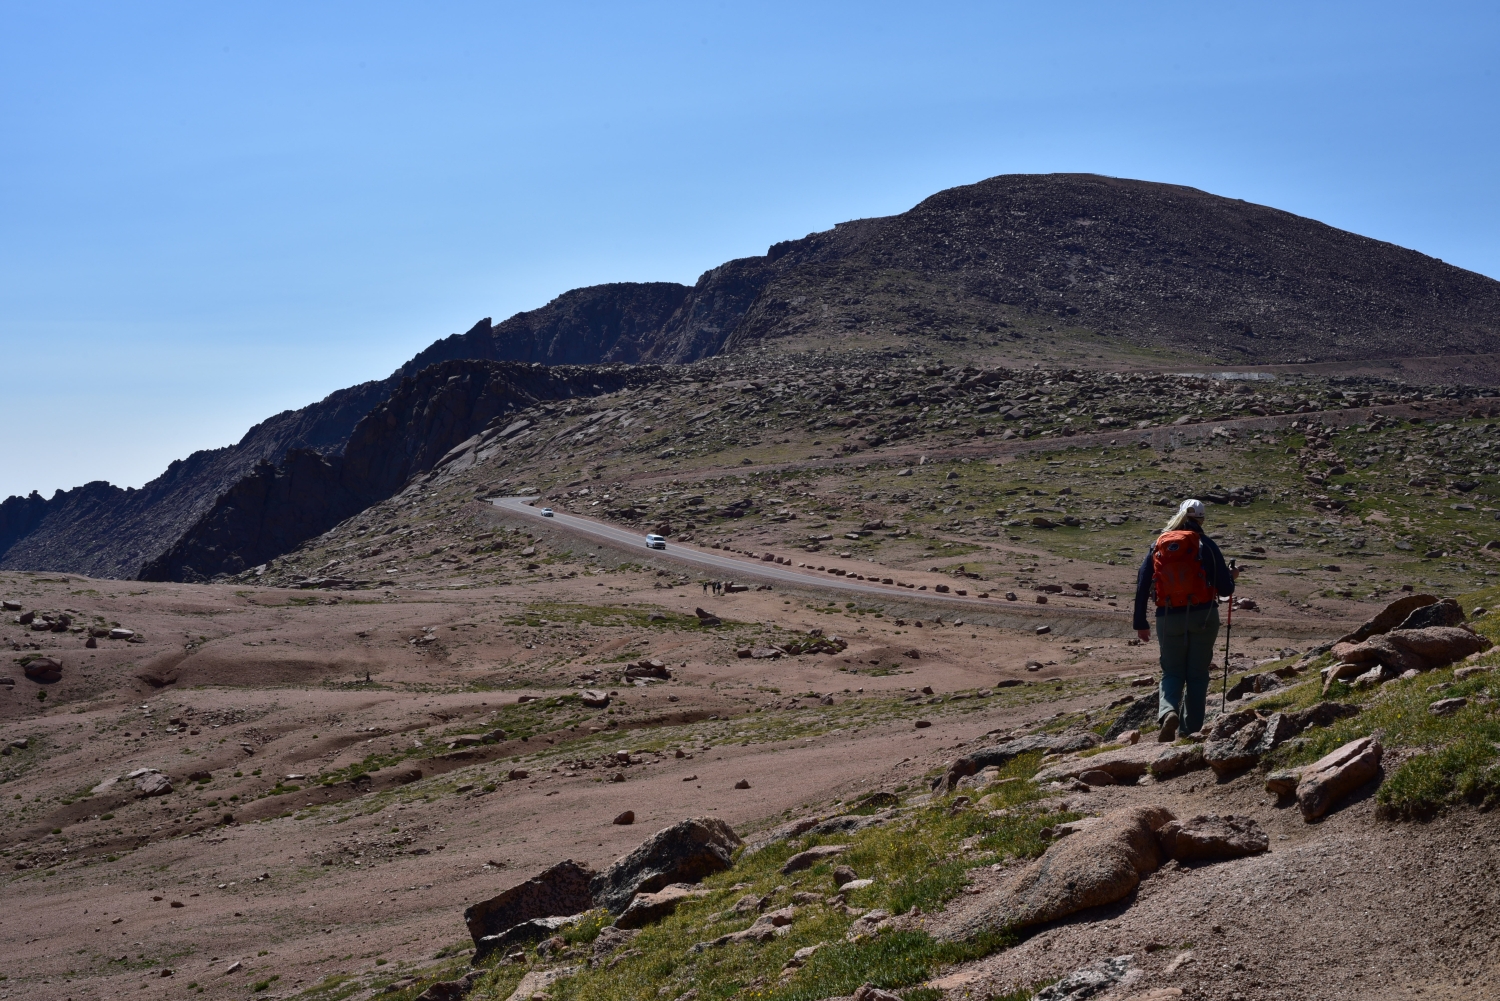
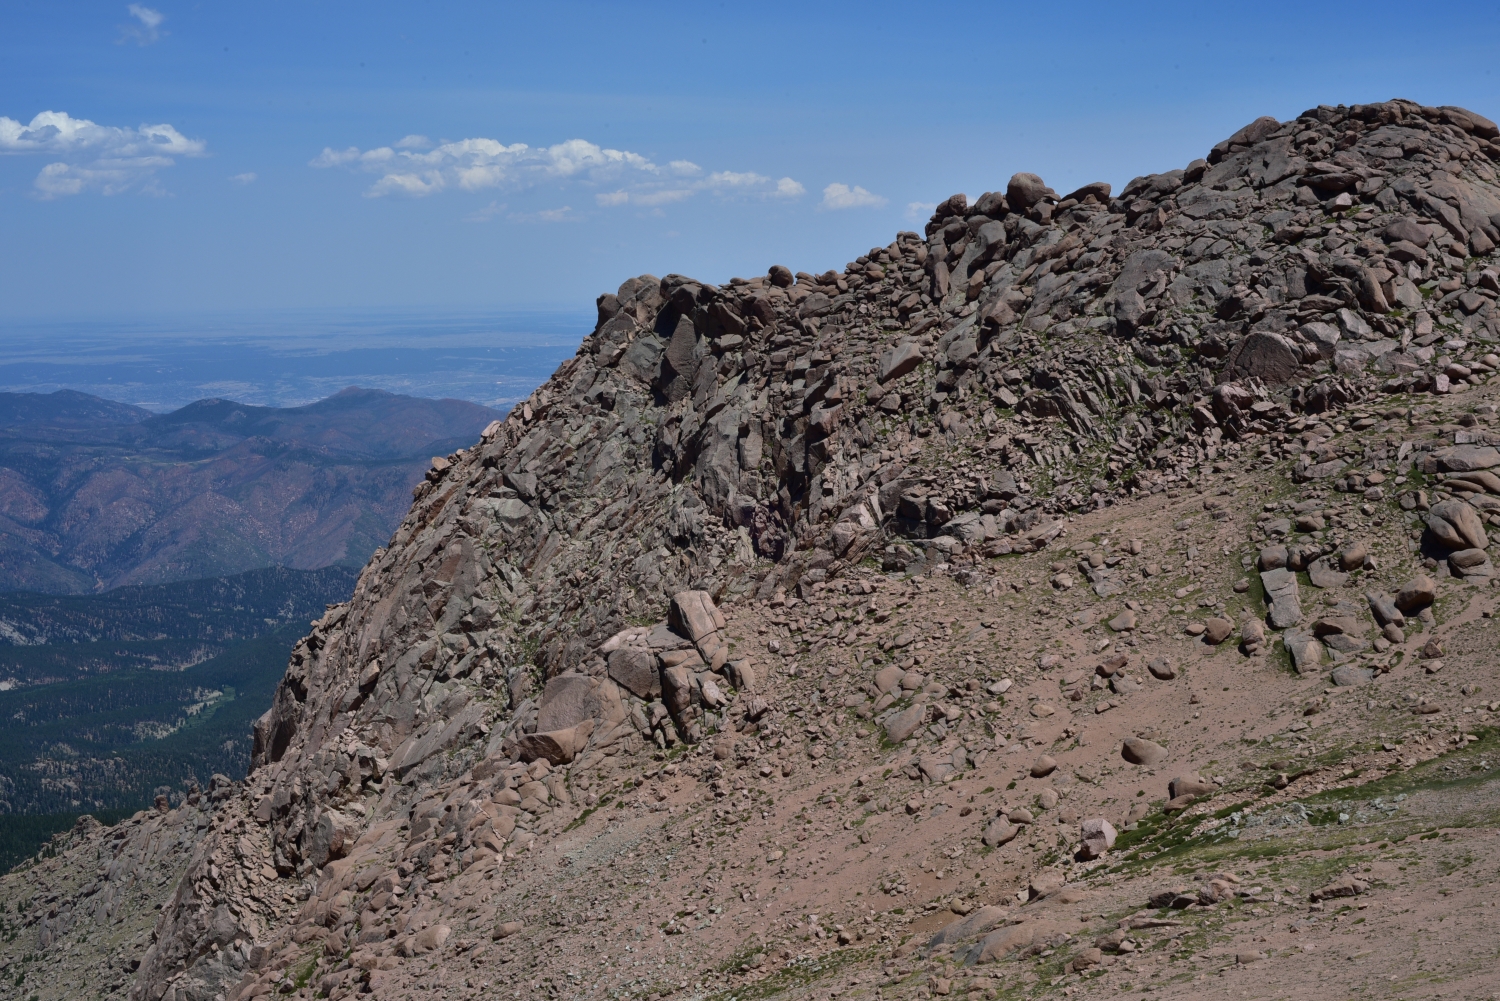
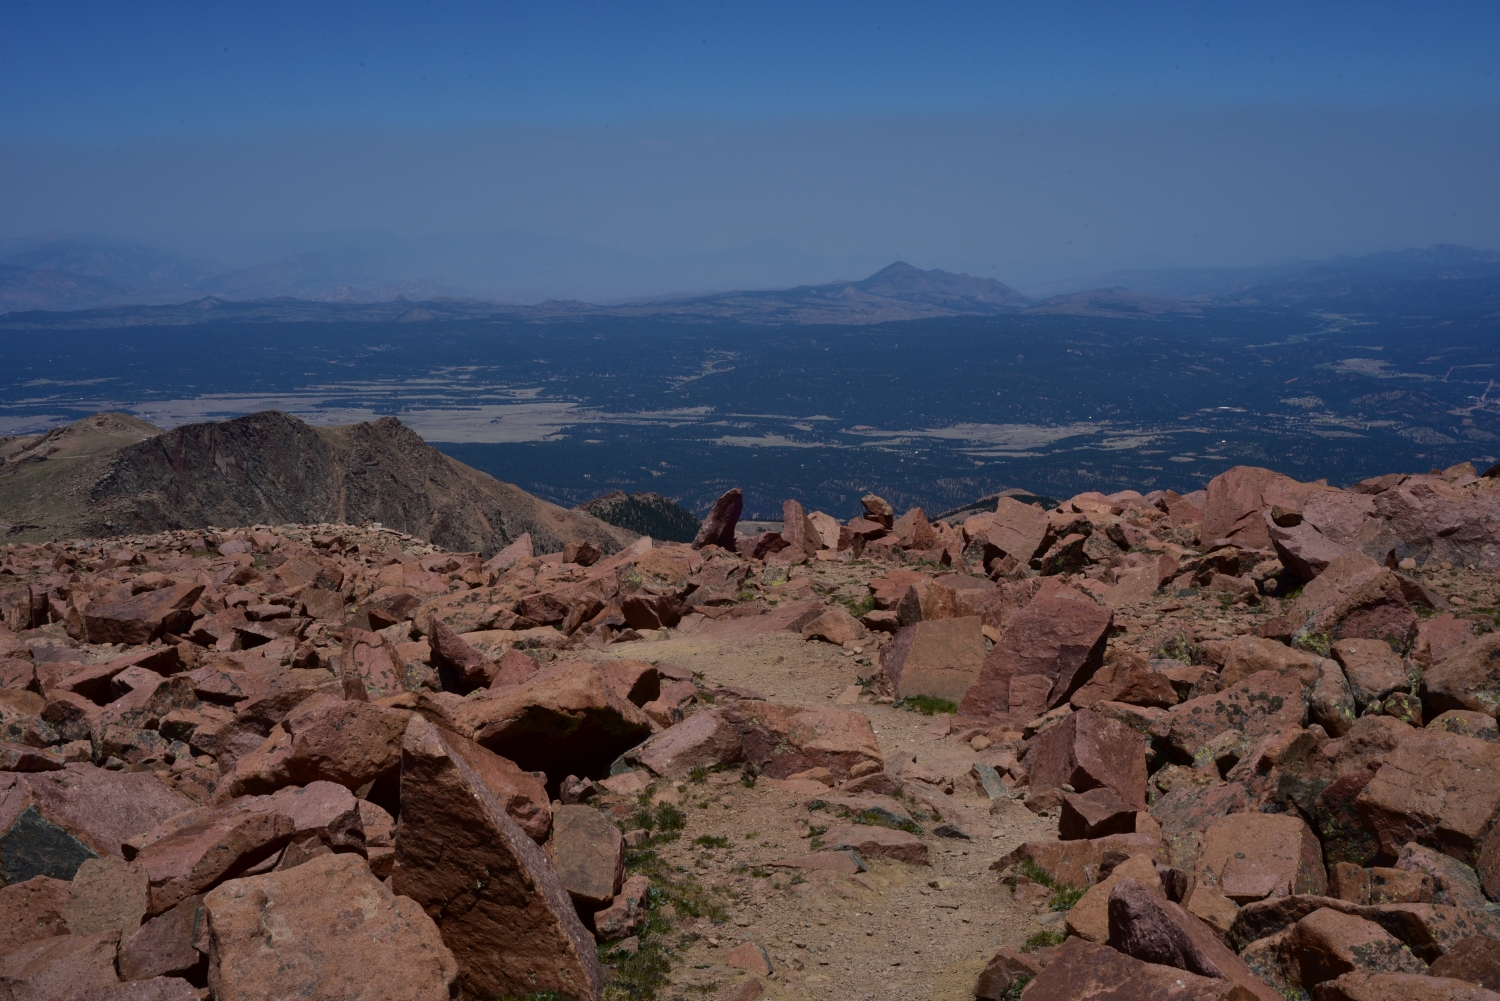
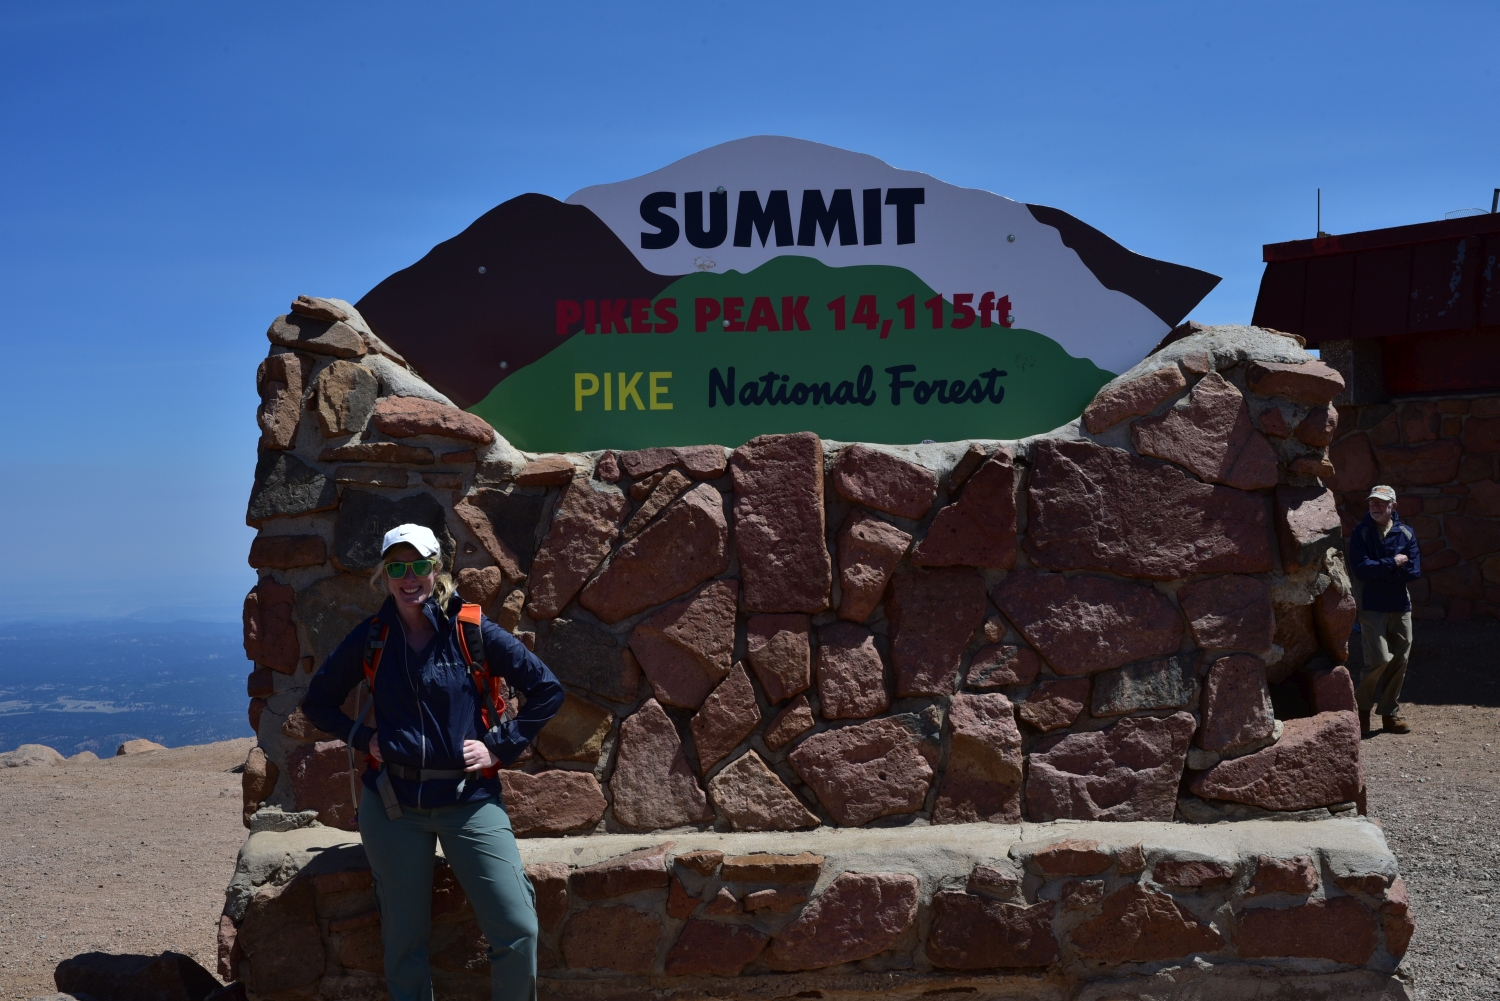
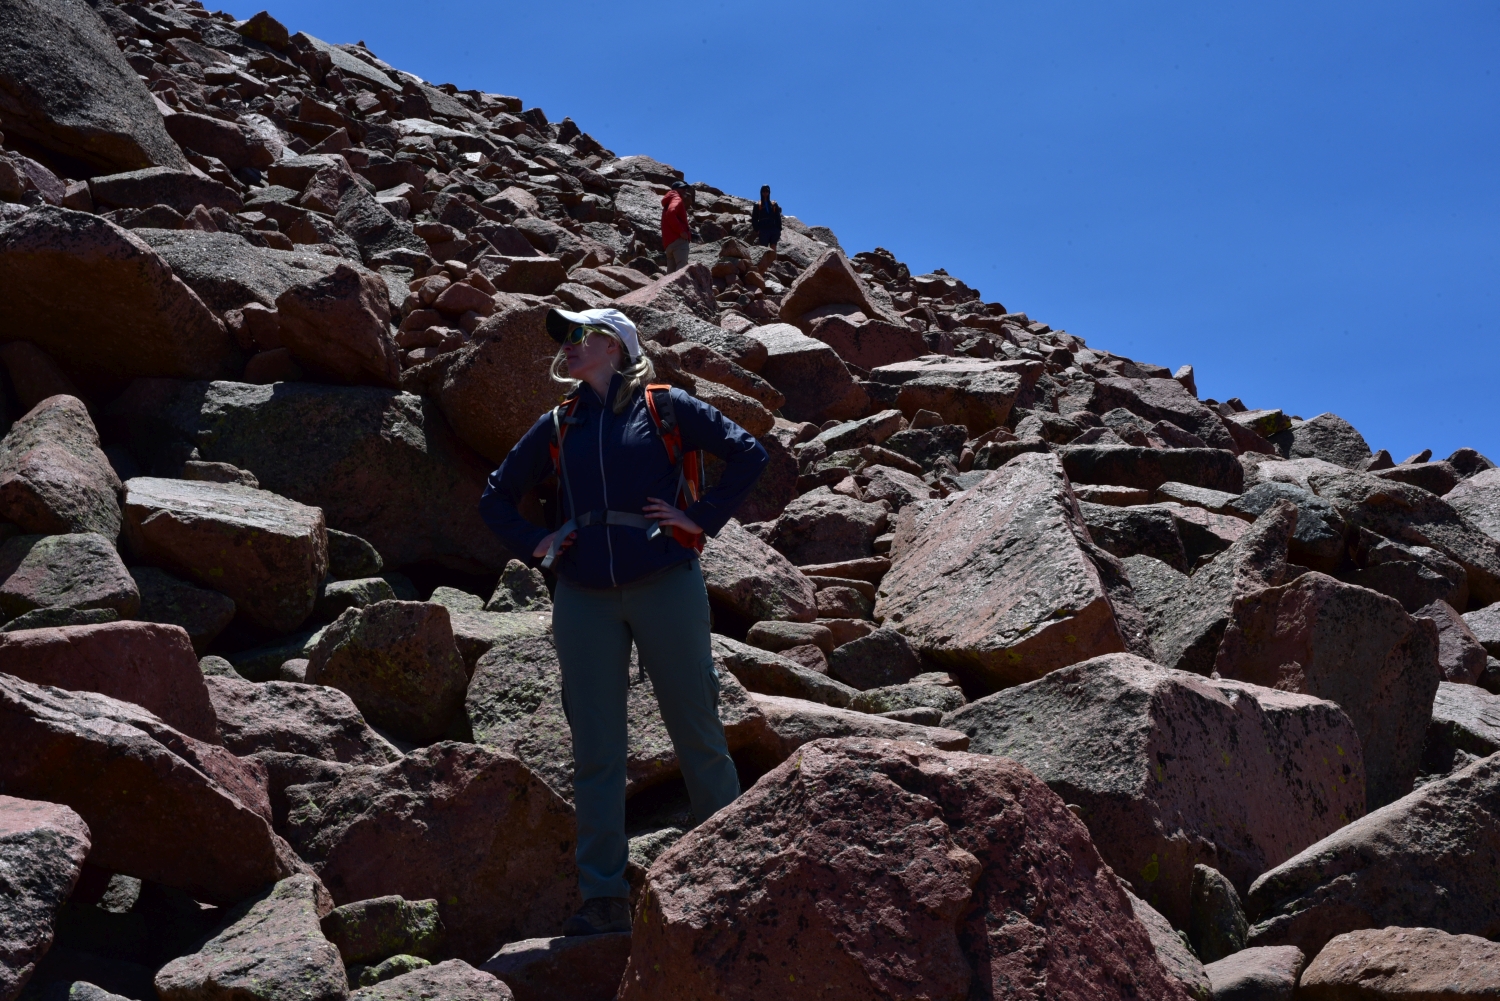
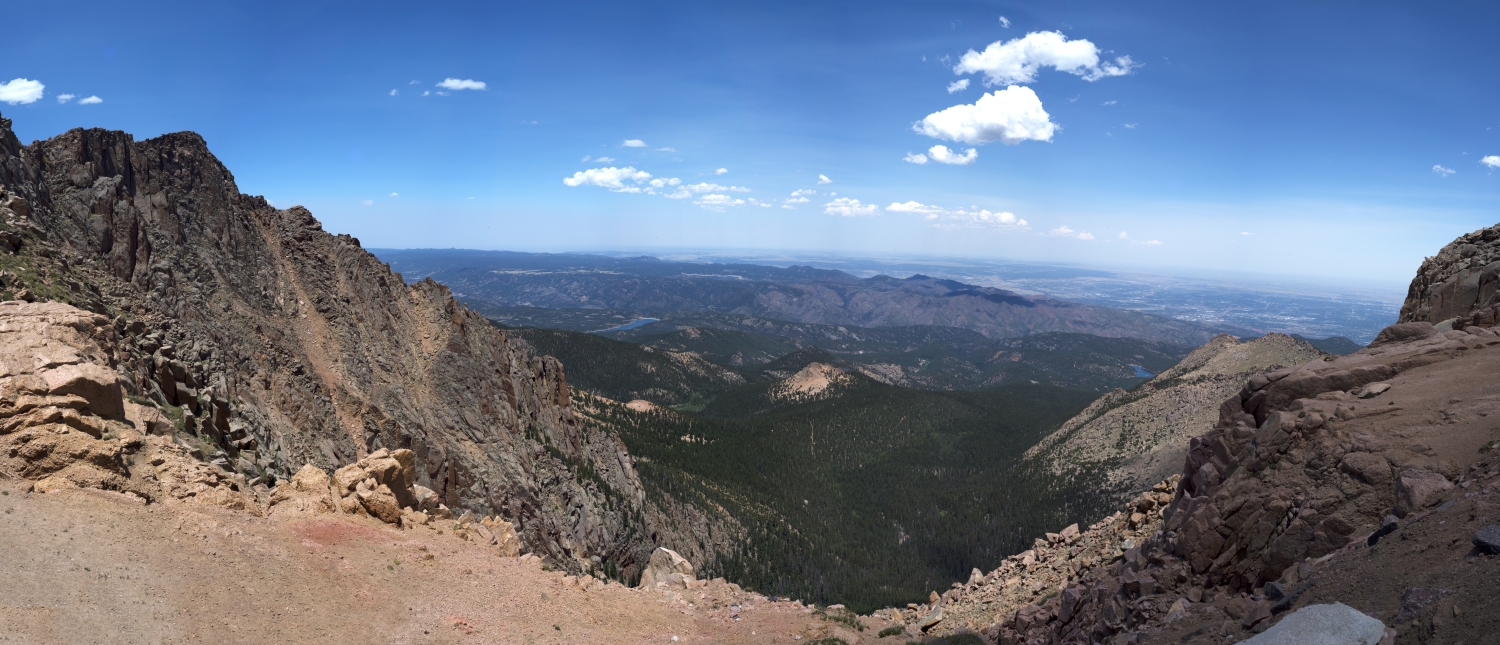
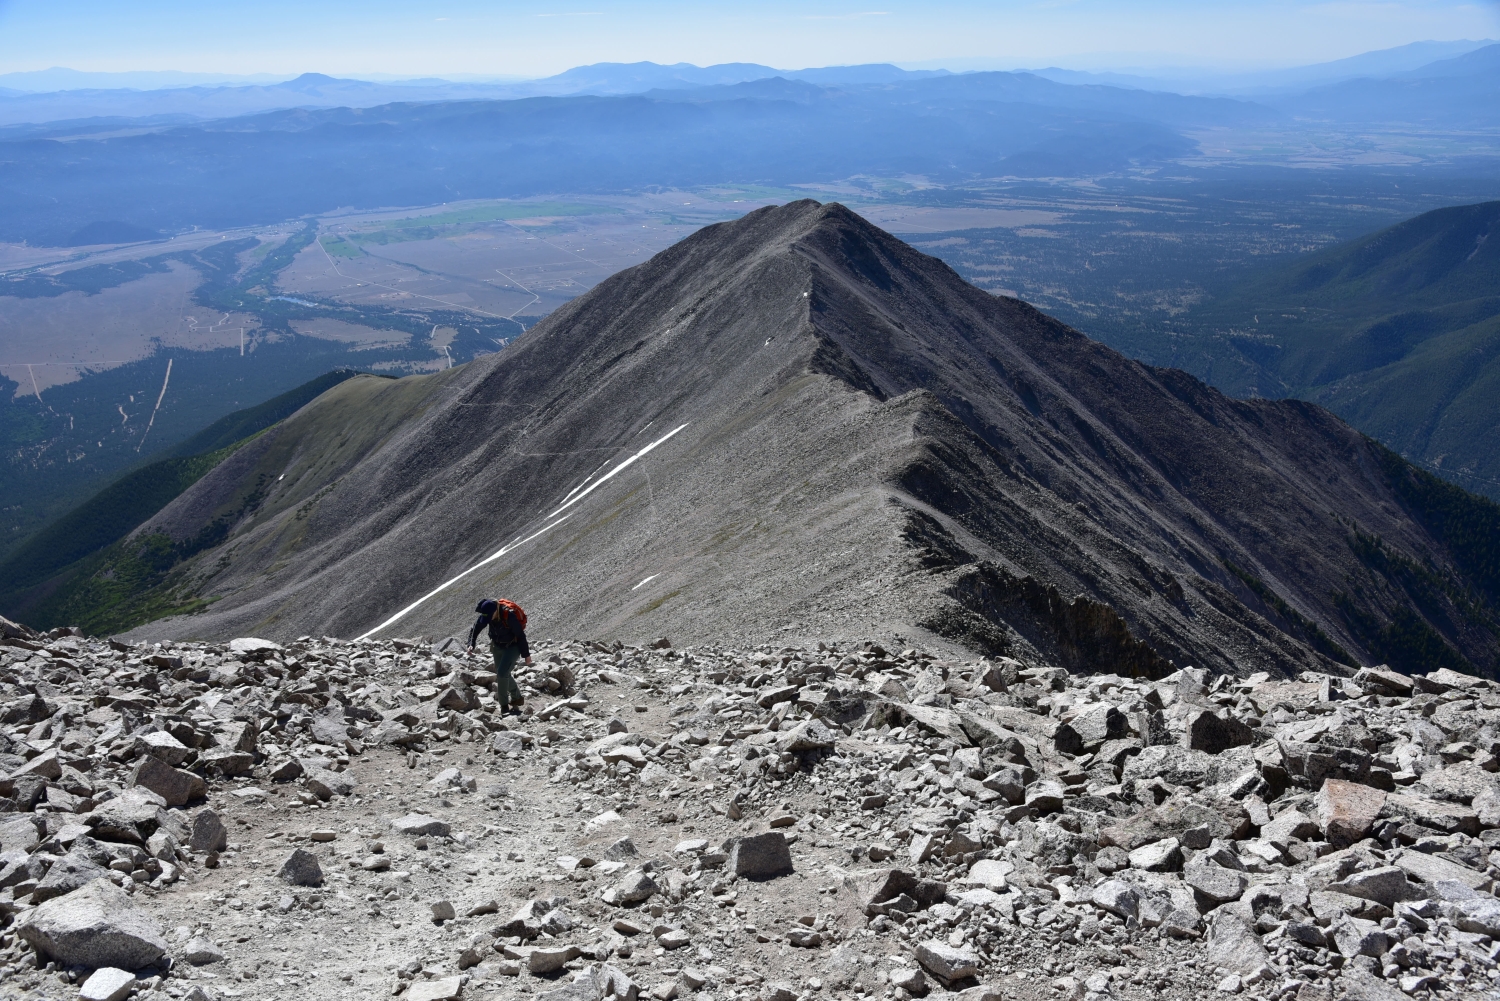
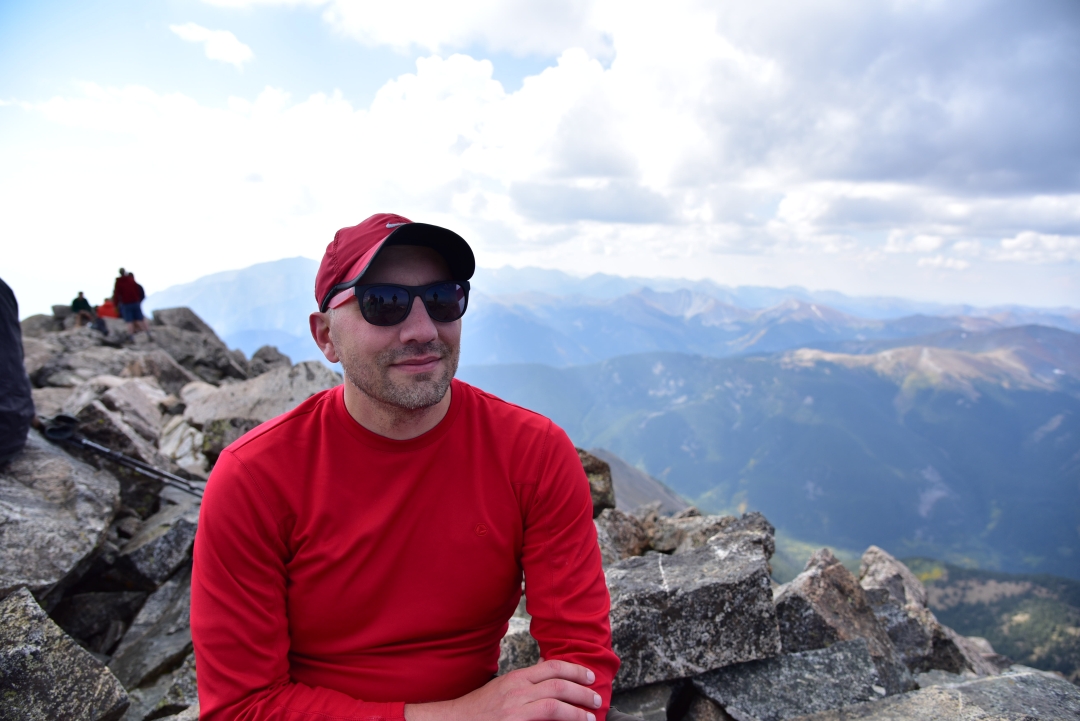
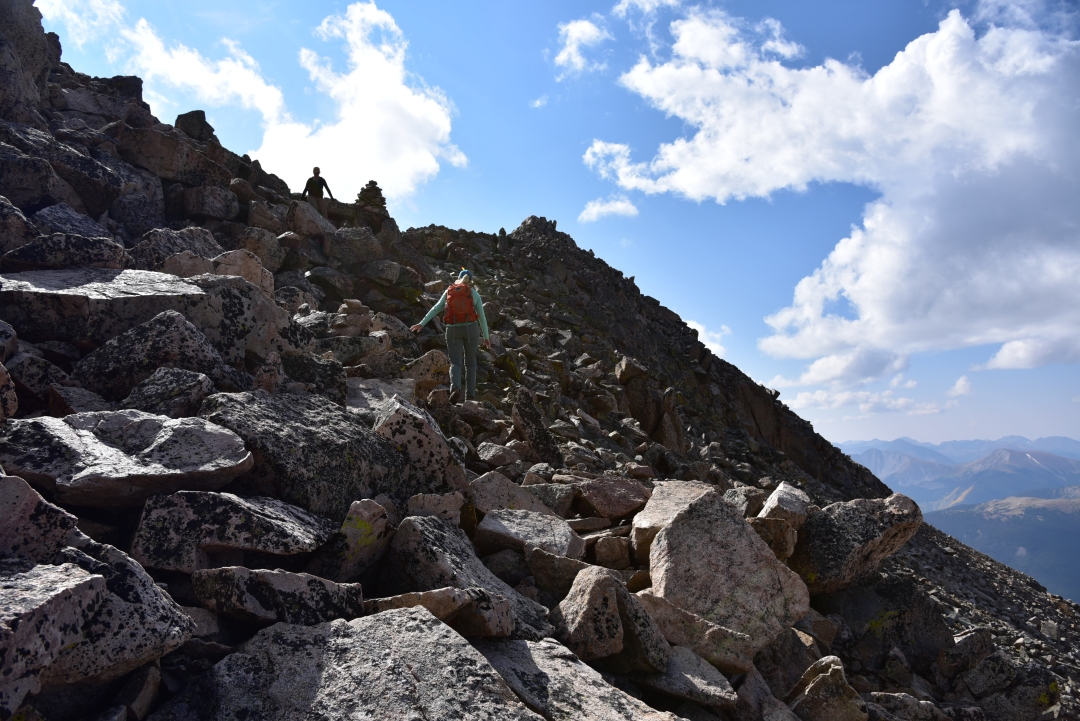
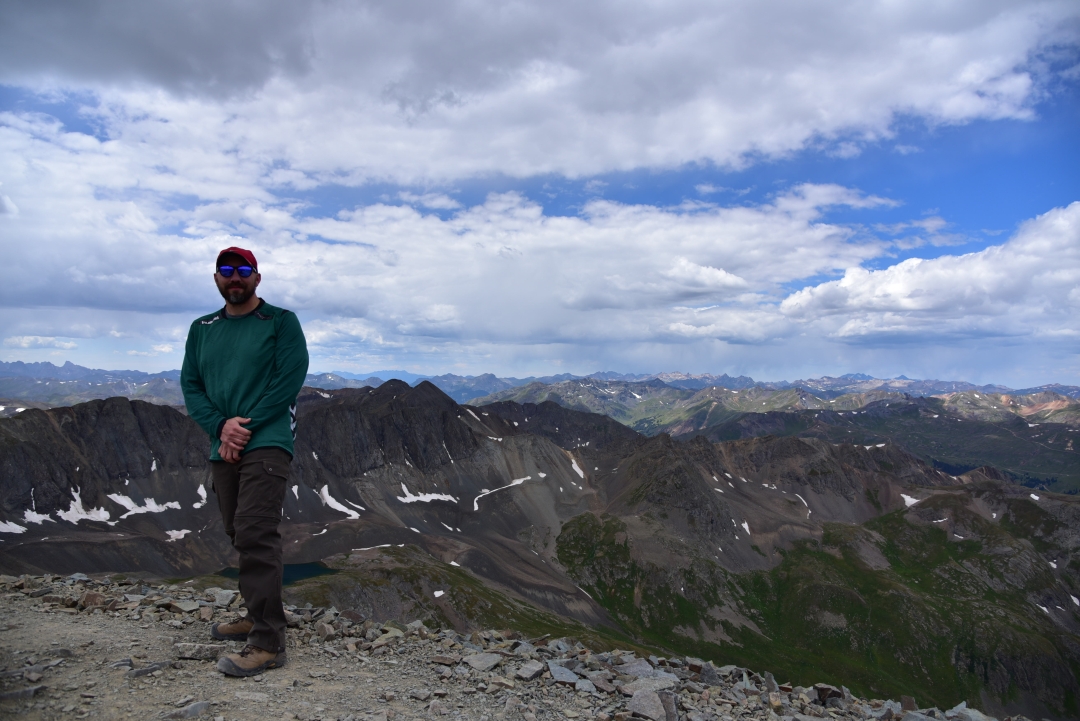
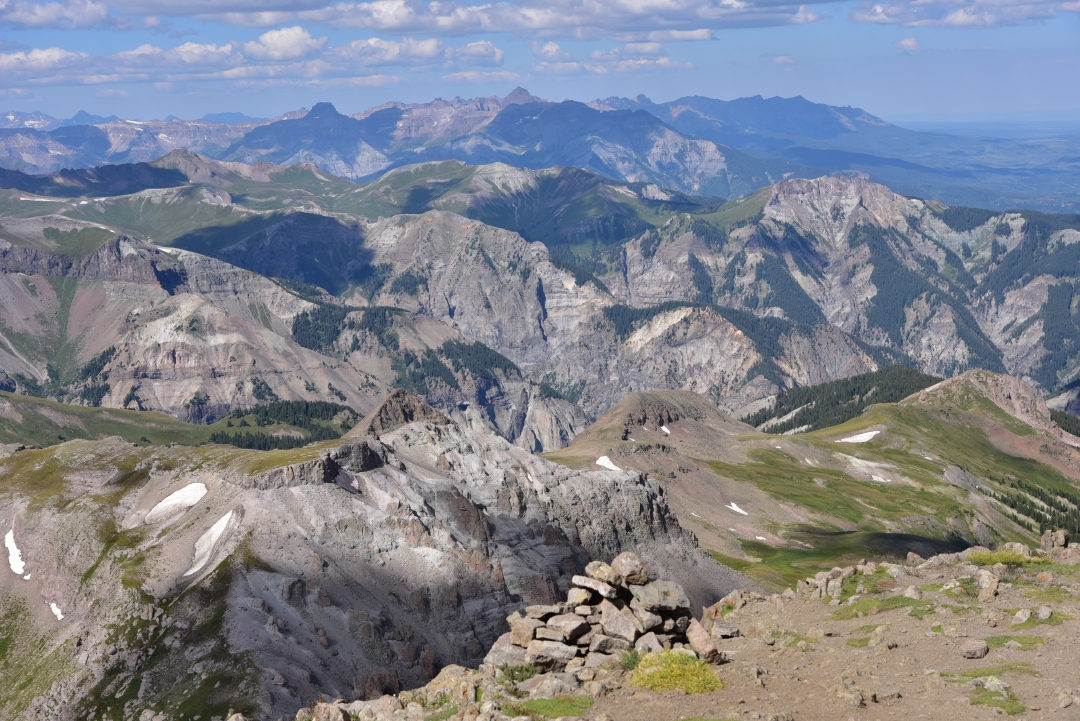
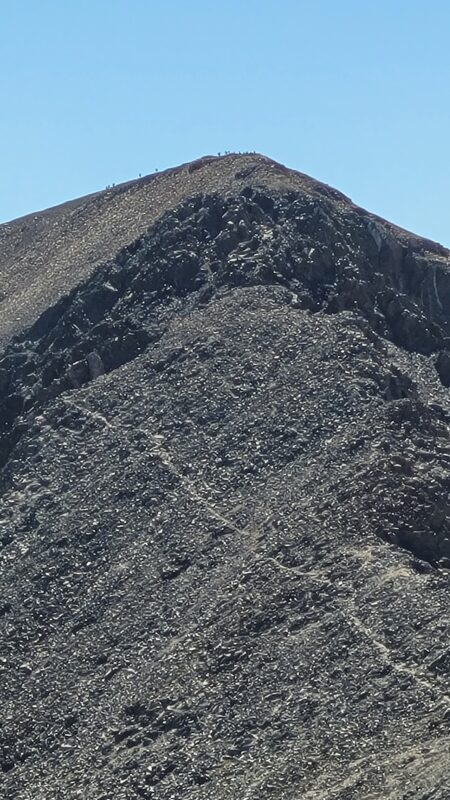
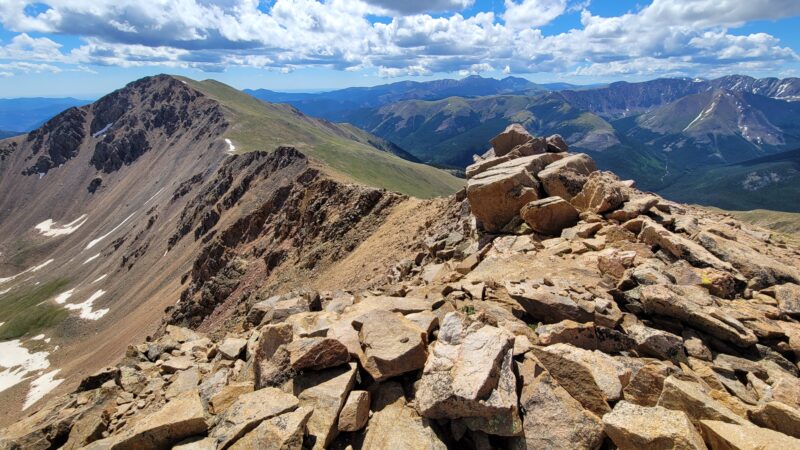
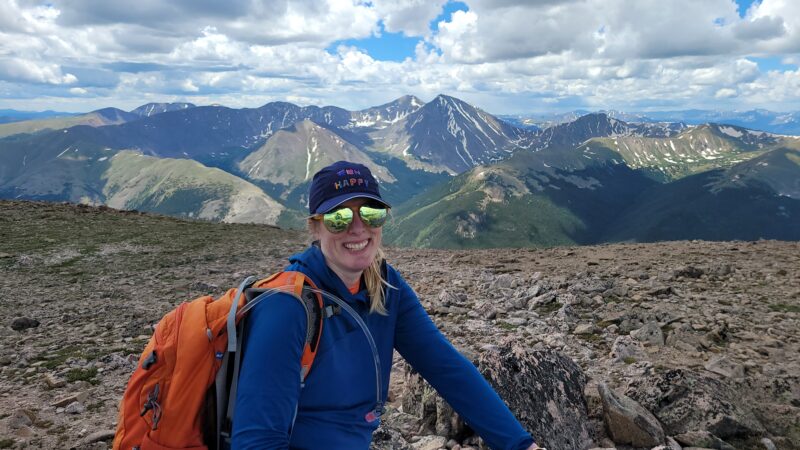
The final push to the summit was much more entertaining than most of the hike. There was some easy class 2 scrambling fun as we picked our way up the remaining 500 feet. Once again we felt emersed in the wilderness as we hopped from boulder to boulder, the air feeling almost thinner we each new step. It was almost unnerving as we gained the summit and approached a large parking lot, hordes of people, and the summit gift shop and restaurant. Nonetheless, we knew what kind of trek Pikes Peak would be and embraced the opportunity to refill our water, buy a few gifts for nieces and nephews, and eat some of the famous donuts and a grade school cafeteria style cheeseburger. We spent about an hour on top, eating, shopping, and taking video and photos from America’s mountain. It was fun to see so many families of all ages together enjoying themselves at 14,110 feet. Or is it 14,115 feet…The summit sign states 14,115 feet, but through the years the elevation keeps getting changed. Originally measured 14,110 feet in 1929 and then there were some strange hundred feet increases from that when people tried to count the height of the summit house. When Congress adoped the “National Geodetic Vertical Datum of 1988” in 2002 and recalcuated peak measurements, it changed to 14,115. As far as we are concerned, it’s well over 14,000 feet but not close enough to contest the tallest peak in Colorado, Mount Elbert, so..who cares! Seen below are more summit photos.


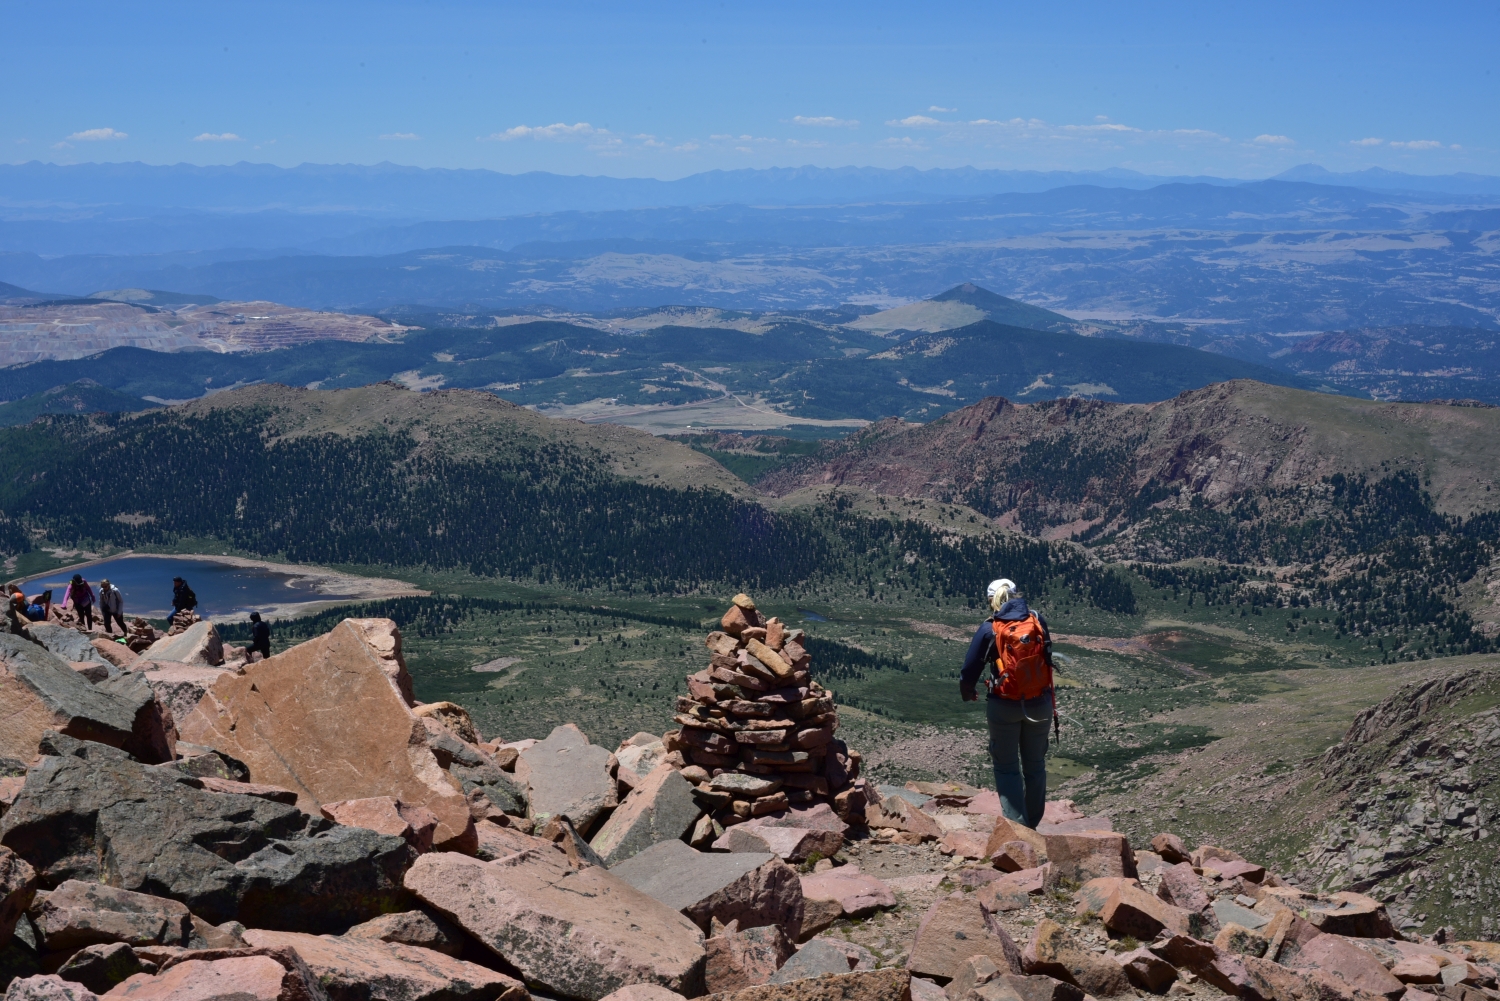
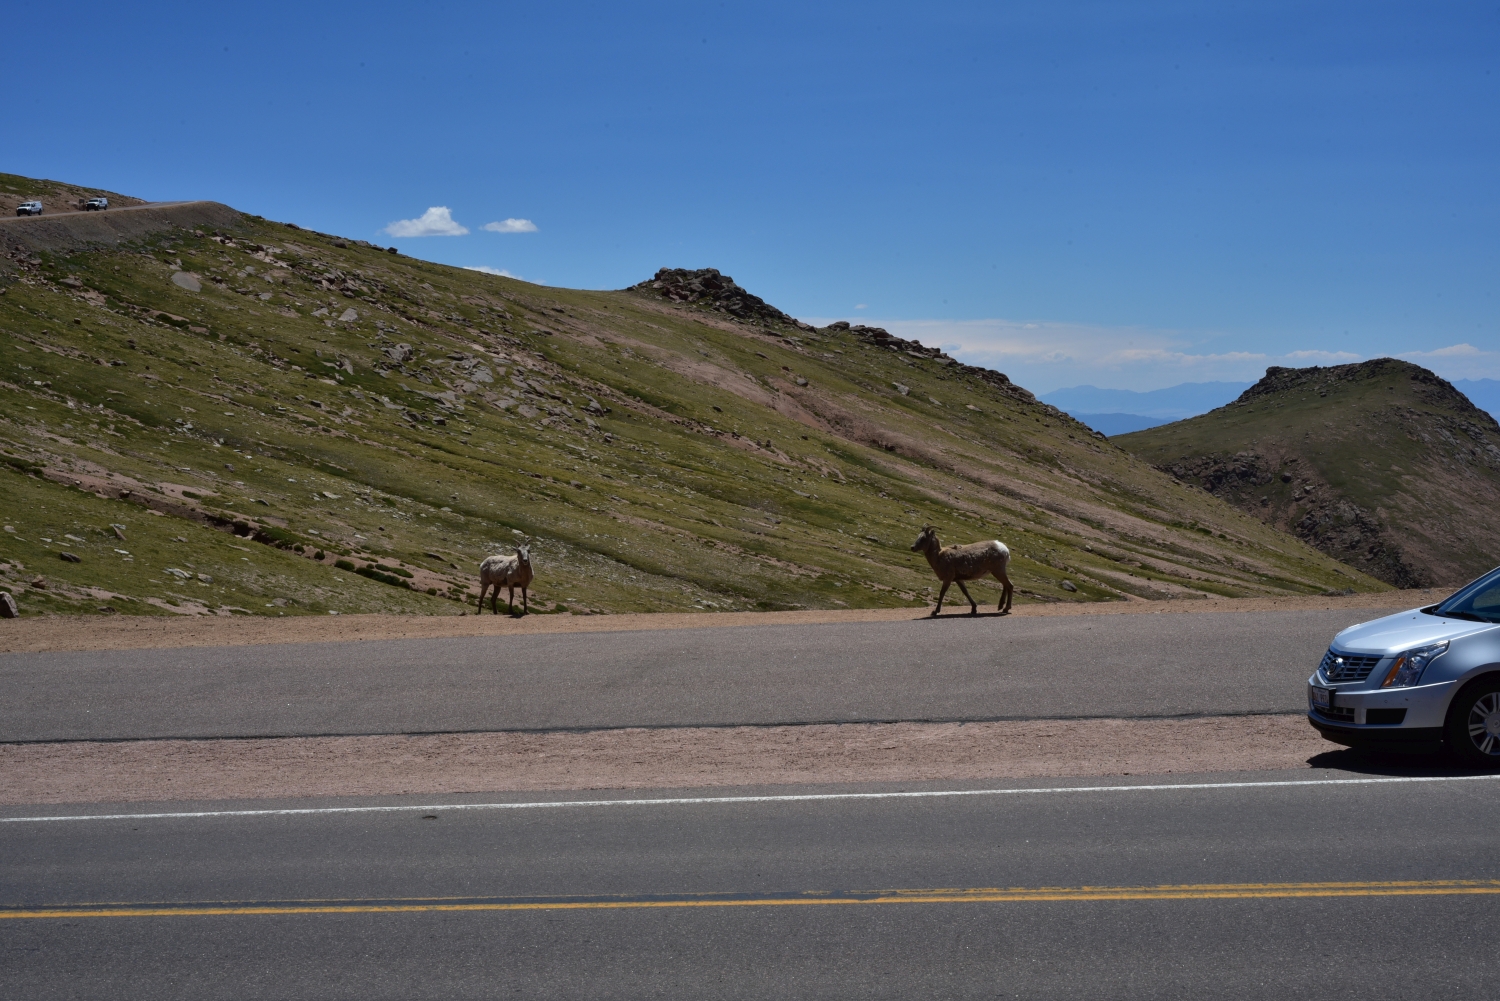
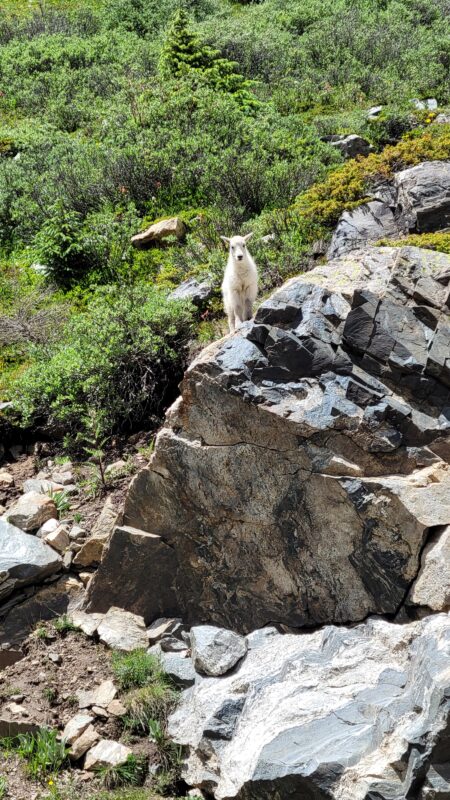
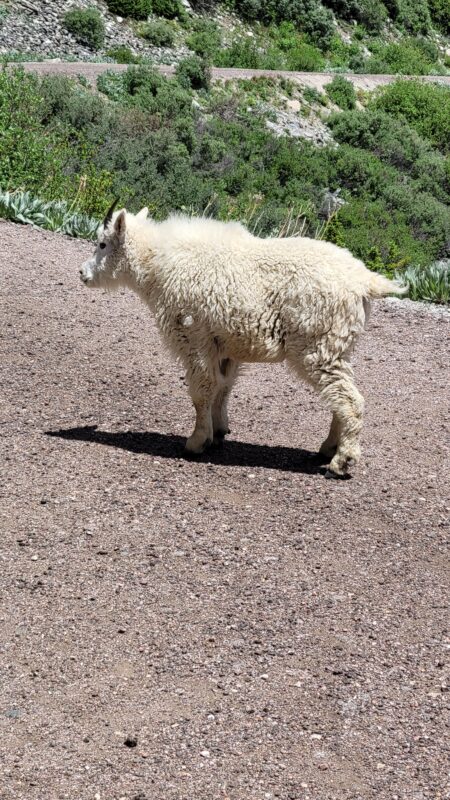
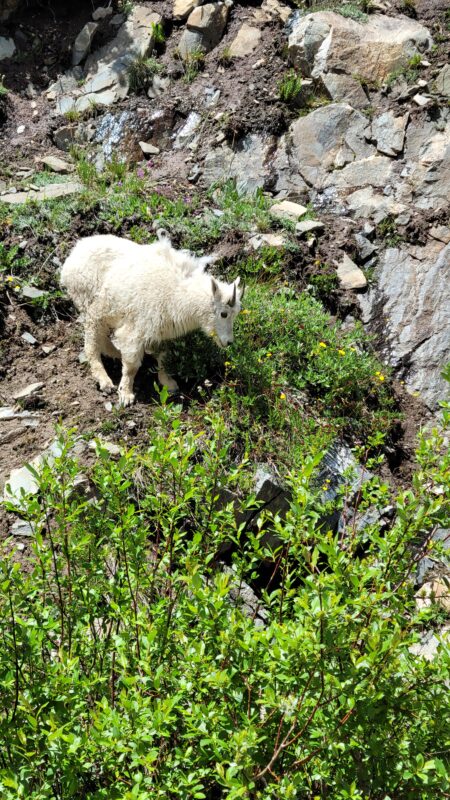
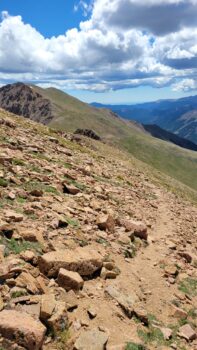
It was noon now and time to go back down. The weather was perfect, with barely a cloud in sight, however we understand how quickly this can change in the alpine. We followed our path back through the boulder field and headed for the gateway to solitude once again at Devil’s Playground. And we do mean gateway. At around 1:00 pm, there were hordes of people. We estimated probably 100-15o people were in line to ride the shuttle to the summit. There were more people here than on the summit. It was very satisfying to just keep walking away from the crowds back to the alpine splendor, even if it meant we had another 5 miles to the car. Seen below is the “gong show” at the Playground and some views from the way back down. Of note, there were several mountain goats near the roadway on the way down. They stared us down intently as we hike down, and it was unsettling. We were a couple hundred feet away. Several cars coming up thought it was a great idea to pull up right next to them and shout at them from the windows which is not too cool.
As we began the steep descent to the car, we noticed several large plumes of smoke from nearby fires. There is not enough moisture this year, and fires are sadly burning all over the state. The descent proved more challenging than the ascent on the remaining trail. There were steep scree slopes that reminded us of hiking on a bunch of marbles. In fact, as we were resting and snacking near treeline, we encountered a member of the Colorado 14er’s Initiative. He had been scoping the trail all day and noting trail quality for future grants and improvement projects. He pointed out that many areas of the this trail were in need of modification, and overall the trail was in poor condition. The remaining hike was uneventful, and we reached the car at about 4:00 pm after about an 8 hour day on the trail. We thoroughly enjoyed the day and hike much more than we expected too. Prior to beginning this peak, we had some negative thoughts about the crowds and summit house and cars. But, it turned out to be a fun and unique high alpine experience. Not everyday do you get to enjoy a cafe on a summit.
We finished the day in Woodland Park enjoying dinner at the Ute Inn which was quite satisfying after a long day. Rather than battle traffic in the Springs, we opted to take a scenic route home on 67 through Deckers and along the Platte River. It was quite tranquil, but took us way longer than expected. A detour ended up leading us up a steep dirt road with hairpin turns. Despite the long adventurous drive back we were happy to be together and thankful for another great day climbing and hiking in this amazing place. We are now getting close to the halfway mark of the CO 14er peaks. Until next time….enjoy some more photographs from the day.


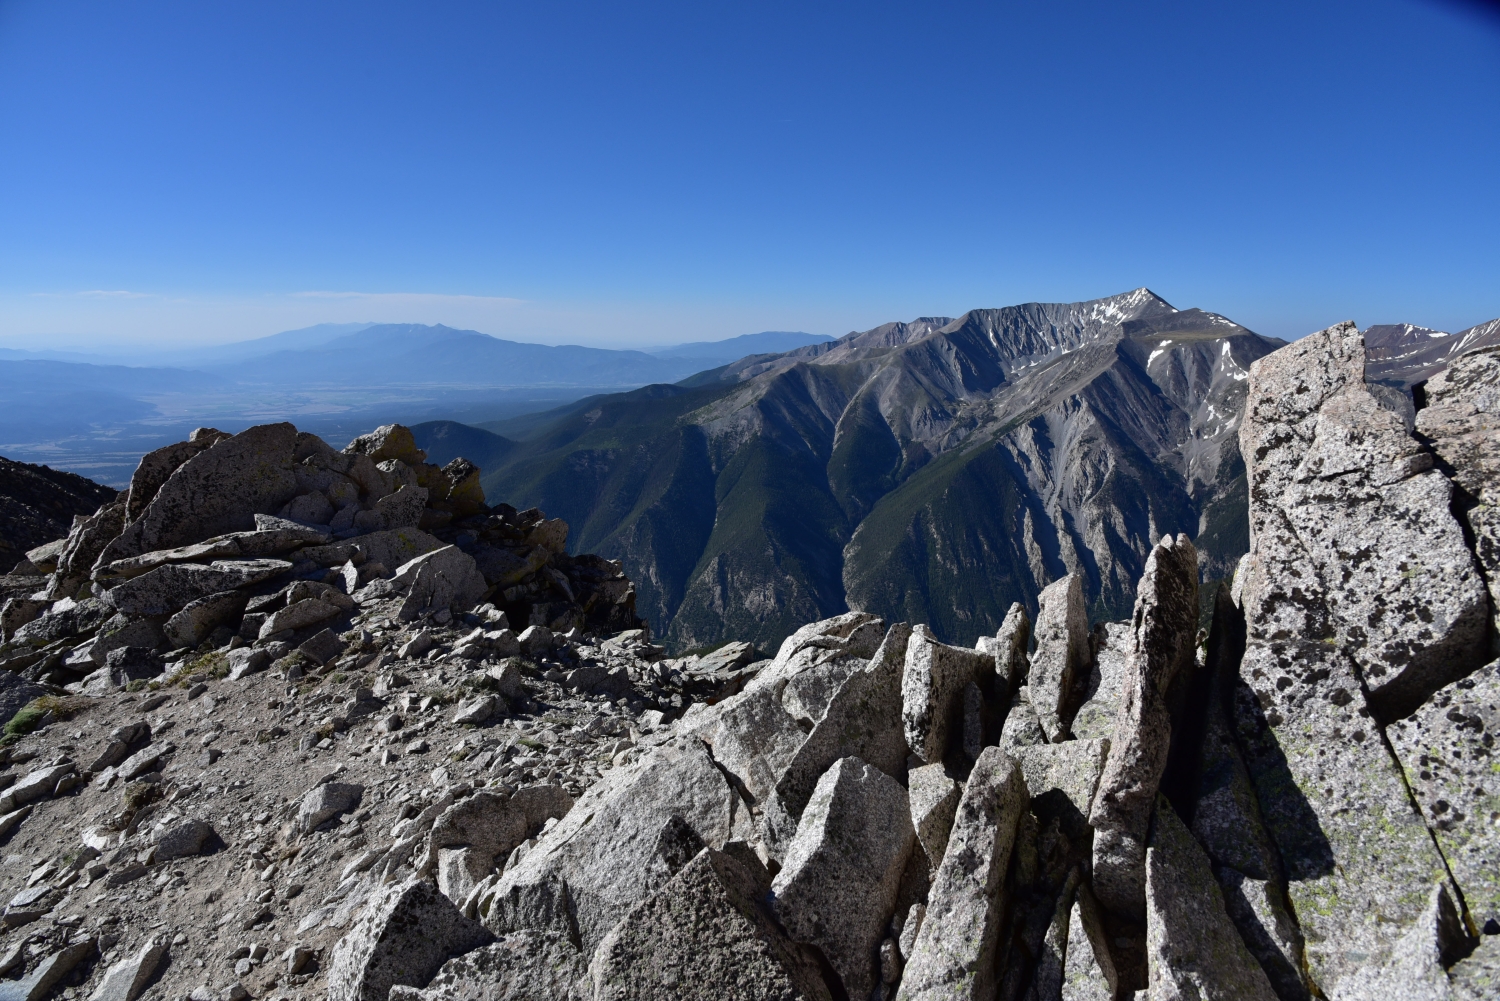
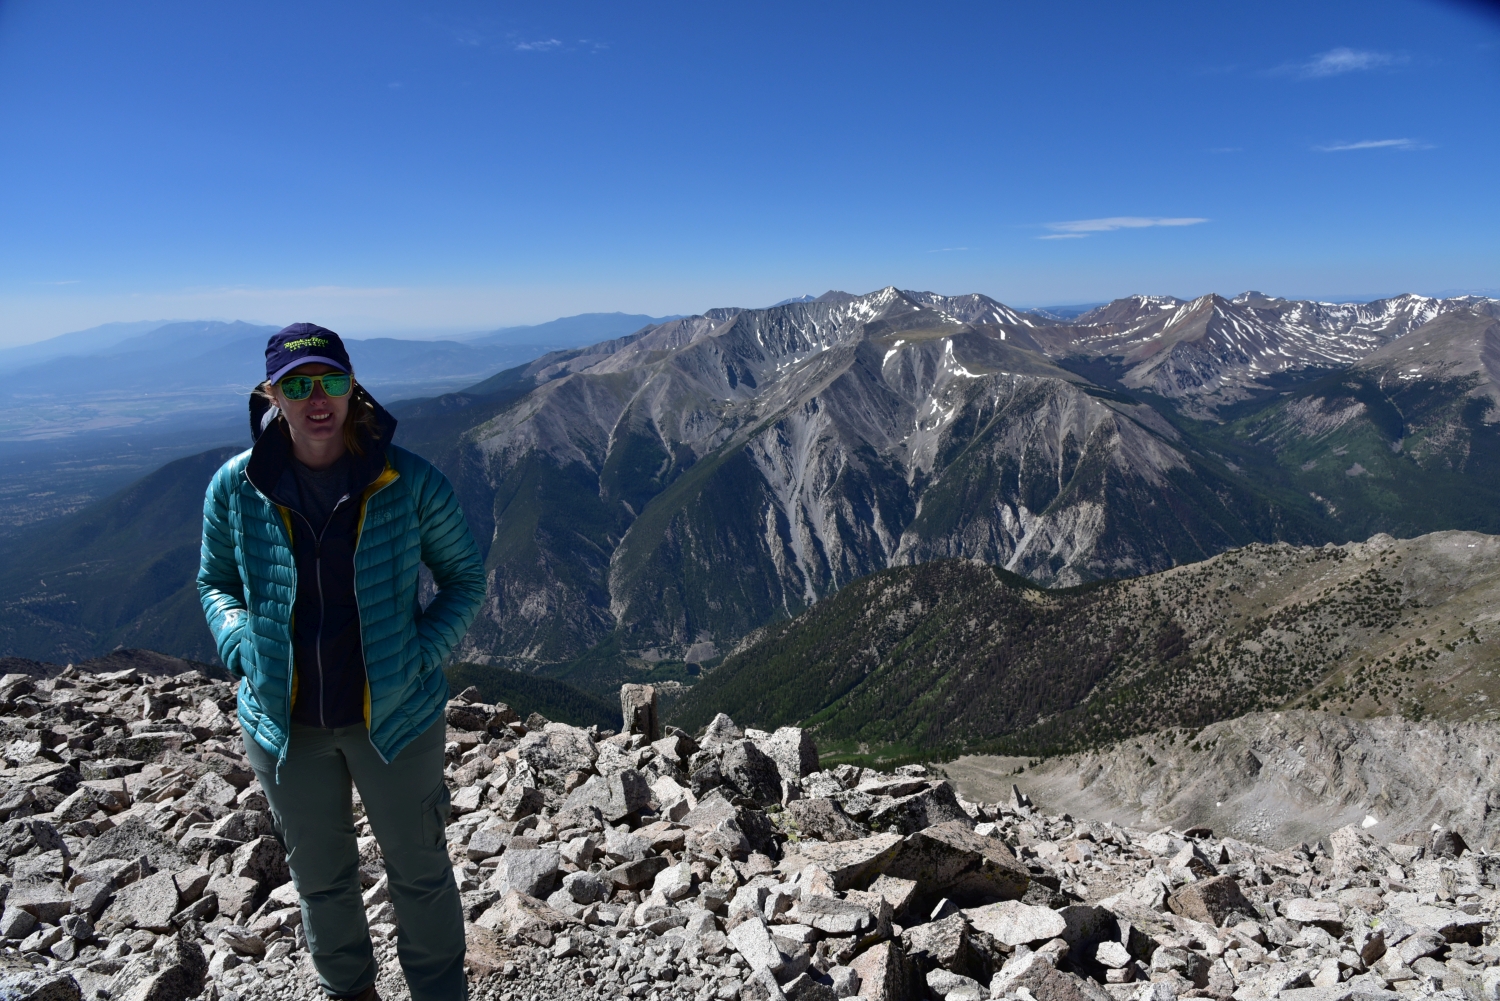
Mount Princeton 14,197 ft, Sawatch Range

Though the hike up Mount Princeton will be described in better detail as we go along, the photographs above provides a fairly accurate summary of this mountain for those seeking to summit this summer. Talus hopping, navigating steep scree- filled slopes, and dodging the apparent infestation of spiders spinnning their intricate webs among the maze of rock were interwoven into our day. In between the scree surfing and selecting our next boulder step, we drank in the views of the bright blue sky above us and the exquisite alpine around us.
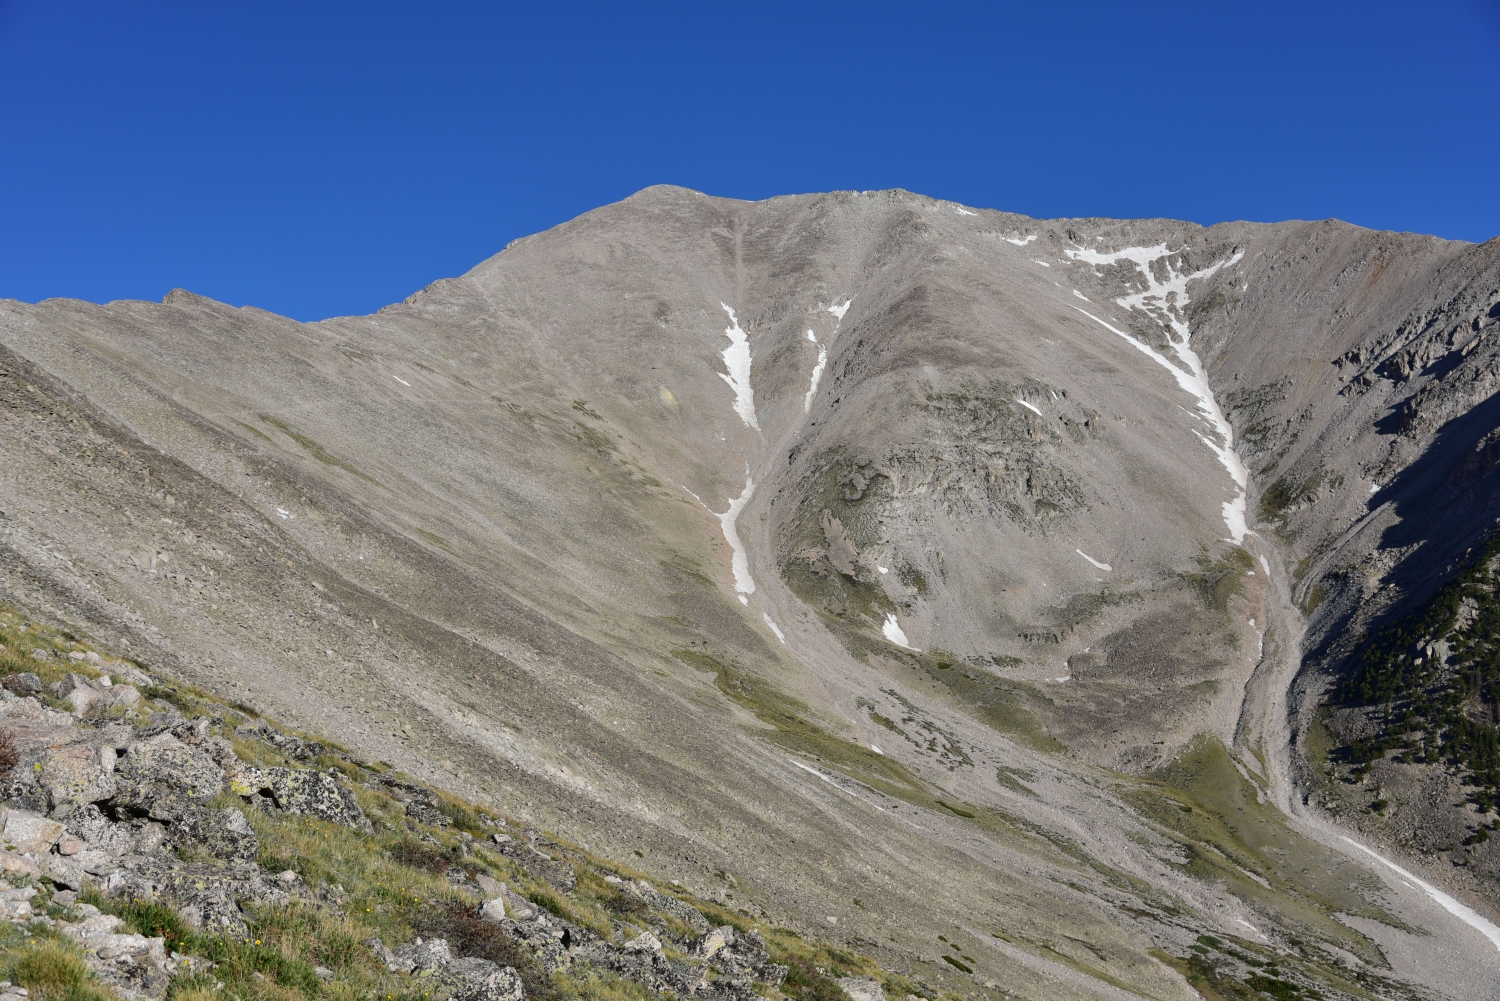
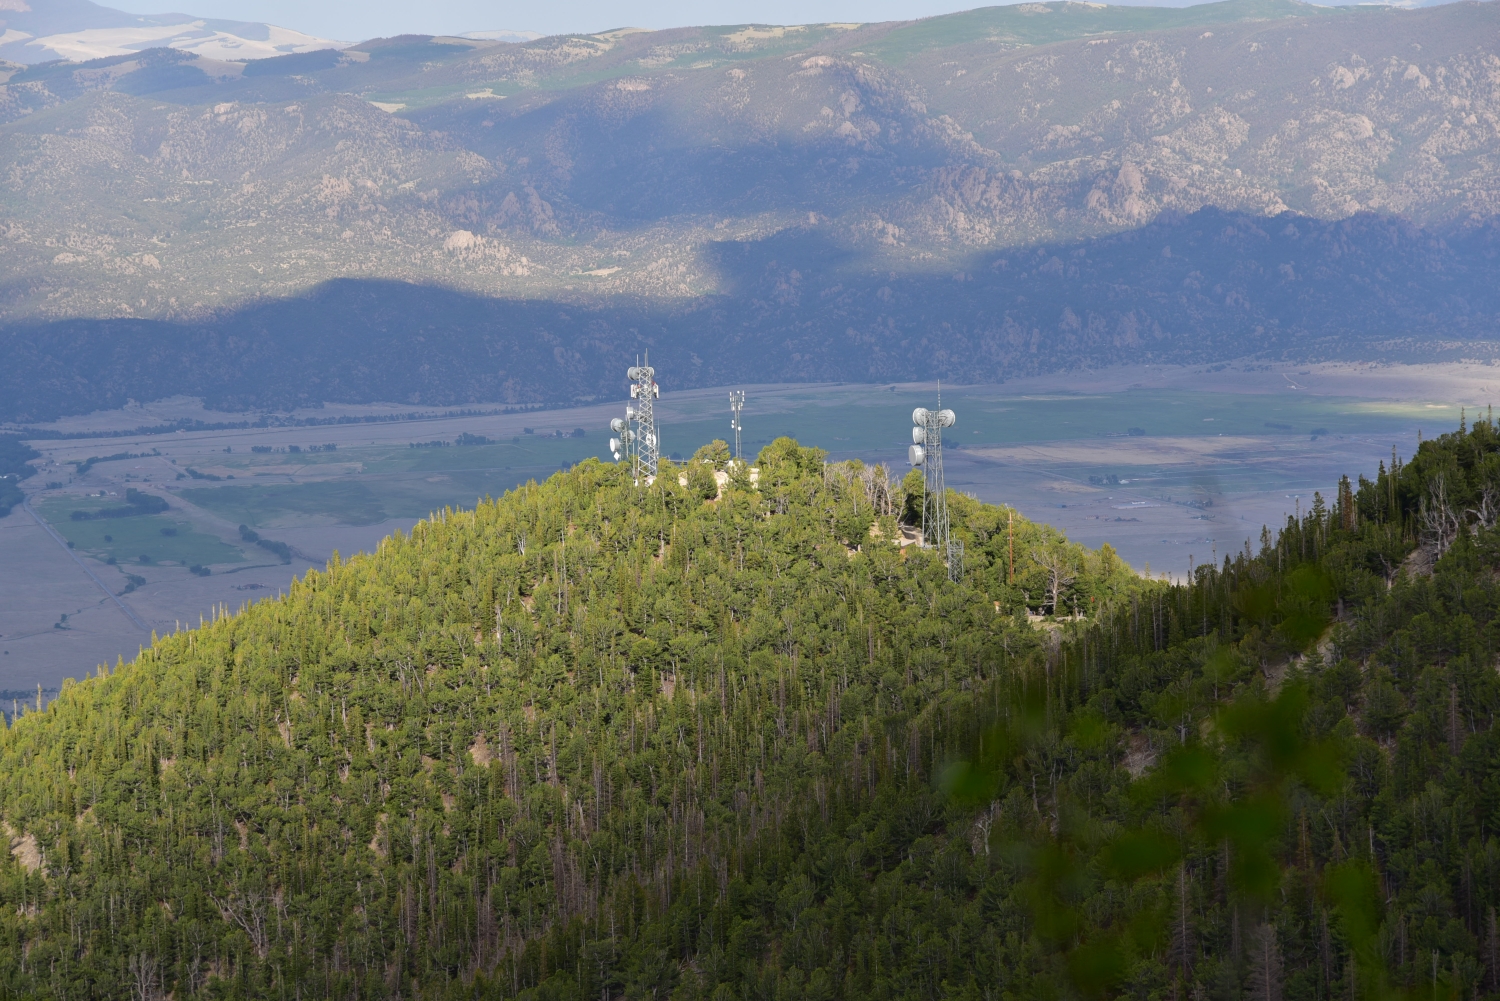
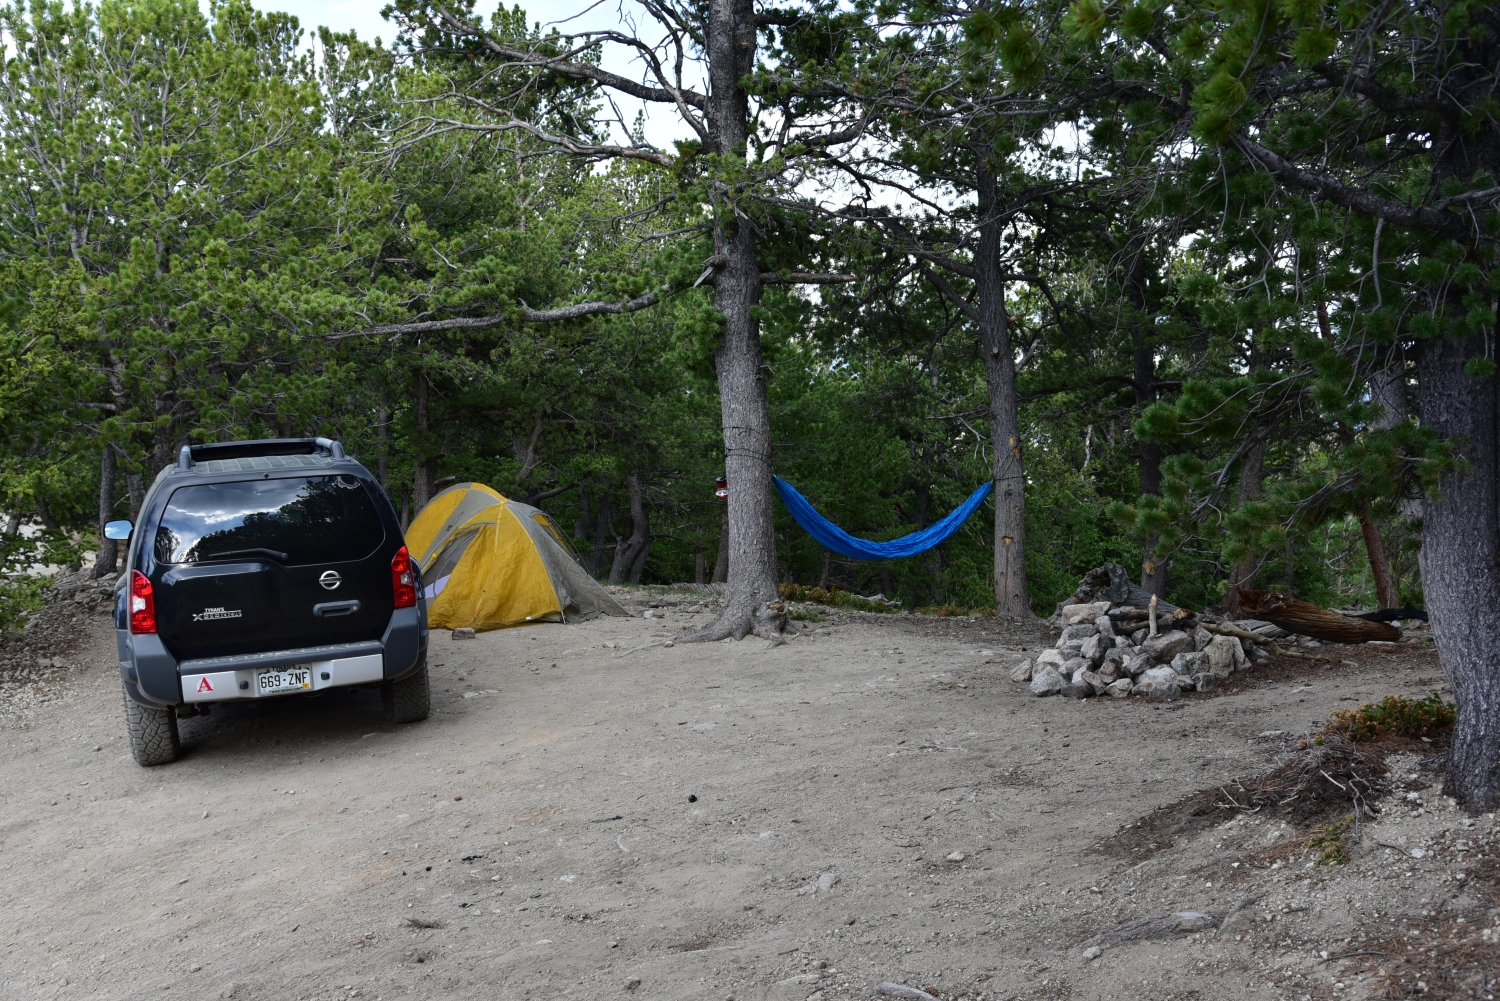
Mount Princeton is one of the Collegiate Peaks located in the Sawatch Range. It’s 14,197 feet above sea level and prominently sits above the small mountain town of Buena Vista. The lower TH is easy to get to, with a large parking area, but be warned, starting from here makes for a much longer, more strenuous day. Hikers will need to gain 5,400 feet of elevation and hike a total of 13.25 miles. We chose to take the X-terra with brand new all-terrain tires up the narrow 4WD road to reach the upper trailhead and camping spots located just past the radio towers. This reduced the gain and round-trip mileage to around 3,200 feet and 6.5 miles, respectively. Almost immediately, we encountered large dips and steeps gains along the road. However, the biggest challenge of the road is how narrow it is. There were several long stretches of the road in which there was no way for two-way traffic. We headed up around 4:30 pm on a Thursday afternoon hoping to not encounter any down hill traffic. Unfortunately, about half a mile up, three large suburbans/trucks were heading straight for us. While uphill traffic has the right of way, there was a small pull-out about 500 feet below, so we carefully backed down the road to let the others pass. The rest of the drive up was fairly uneventful, with the exception of some very large drop-offs as the path became a shelf road. It was slightly unnerving to have the truck lean slightly while skirting the edge of a cliff. Once we reached the radio towers, we continued on the road for another 0.2 miles and found a lovely campsite with room for our tent, two trees to tie our hammock, and spot for the truck. Seen below is a set-up of our camp, the radio towers, and wandering around the area prior to our hike the next day.
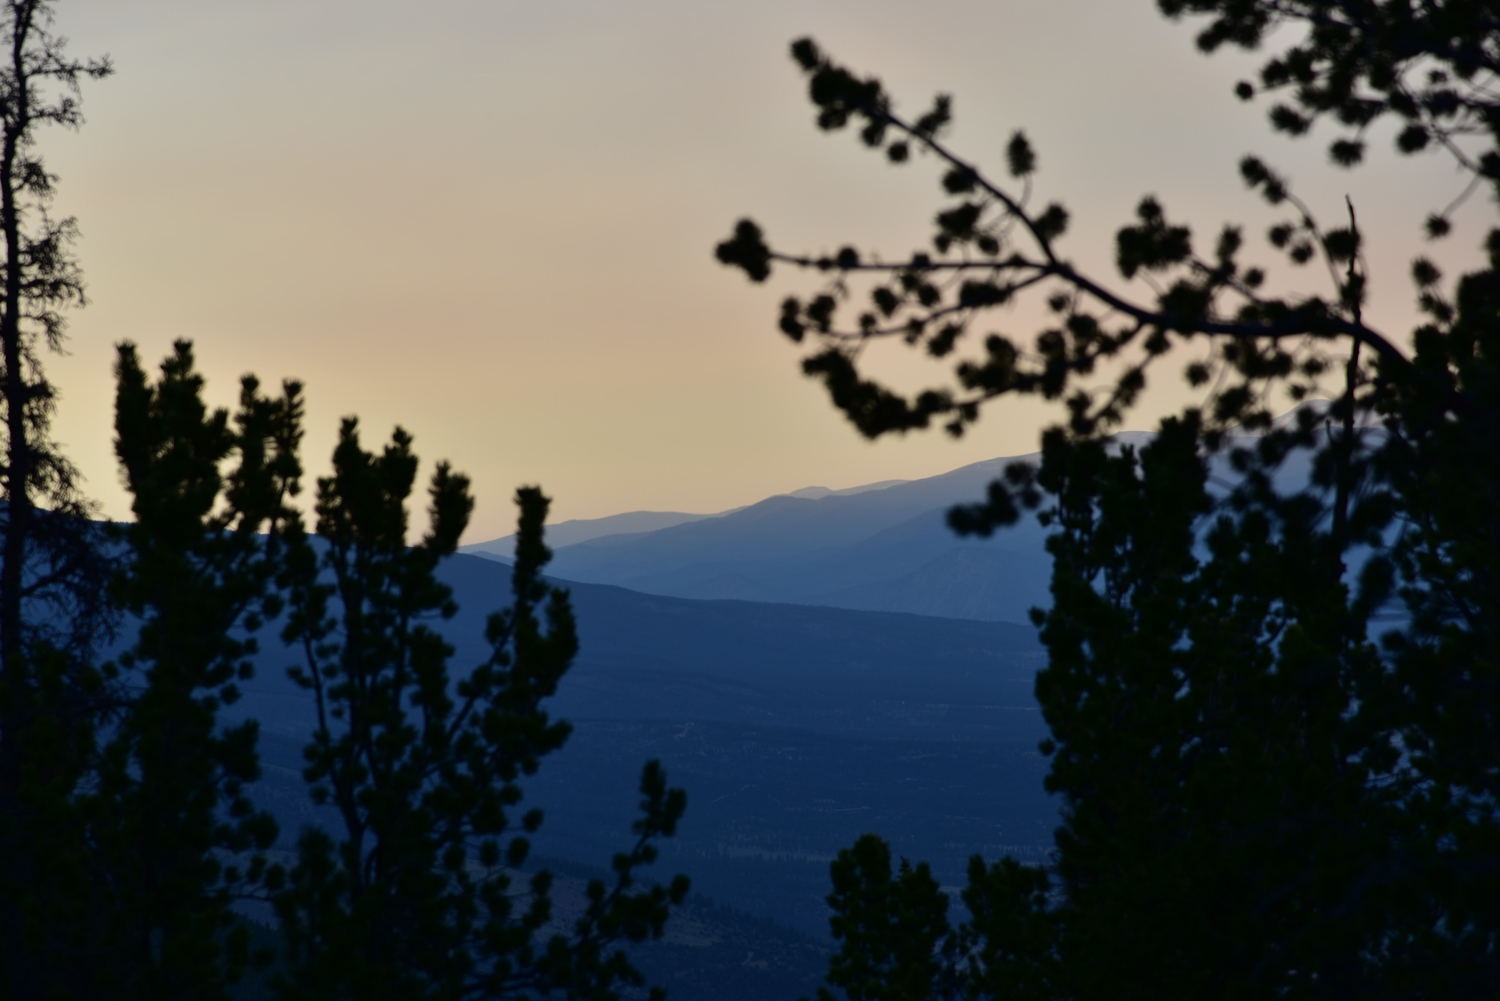
The temperatures were cool, but not cold as the sun began to set. We hiked up the road a bit further to enjoy the sun setting. Several spots had openings among the trees that offered views of the town below. As we hiked a little further, we also gained our first views of the summit of Mount Princeton. As it got dark, we retired for the evening. It was mostly a quiet night, with the exception of some strange noises at 3:00 am. At first, we thought it was the Colorado 14ers Initiative group perhaps working on something for the next morning. Their group was camping near us. However, as the noise got louder, it sounded as if it was coming from the car. We quickly flipped on the lantern, and made some noise, and the scrapping/grinding noise stopped. We never figured out what the noise came from, but we think some forest creature was attempting to get into our vehicle. At least this disturbance gave us a glimpse of the night sky. The inky black sky was dotted with a plethora of stars. The views were brilliant and such a amazing treat when coming from the city lights of Denver.
A short two hours later, the sun began to rise. It was time to get moving. All ready we could hear the few other hikers and CFI workers getting ready to start their day. We began our hike at 6:20 am. The morning temperatures were in the upper 40’s, but we quickly ditched our jackets as we made progress up the road. We continued to follow the 4WD road up for what seemed like close to a mile where we reached around 11,800 feet. As views of Tigger peak appeared, we began looking to our right for the trail turn-off for Mount Princeton. There is a large stone staircase that marks the start of the Mount Princeton Trail, and we didn’t have any trouble locating it. Online forums mentioned it can be easily passed by if snow is covering the steps or if you aren’t paying close attention. Missing the turnover will take hikers up the road to the top of “Tigger Peak” and then down the connecting ridge to Mount Princeton. This is the winter route to Princeton, and will add some distance and elevation gain to the day. Seen below are photos of the hike up the road and the turn-off to the Mount Princeton TH.


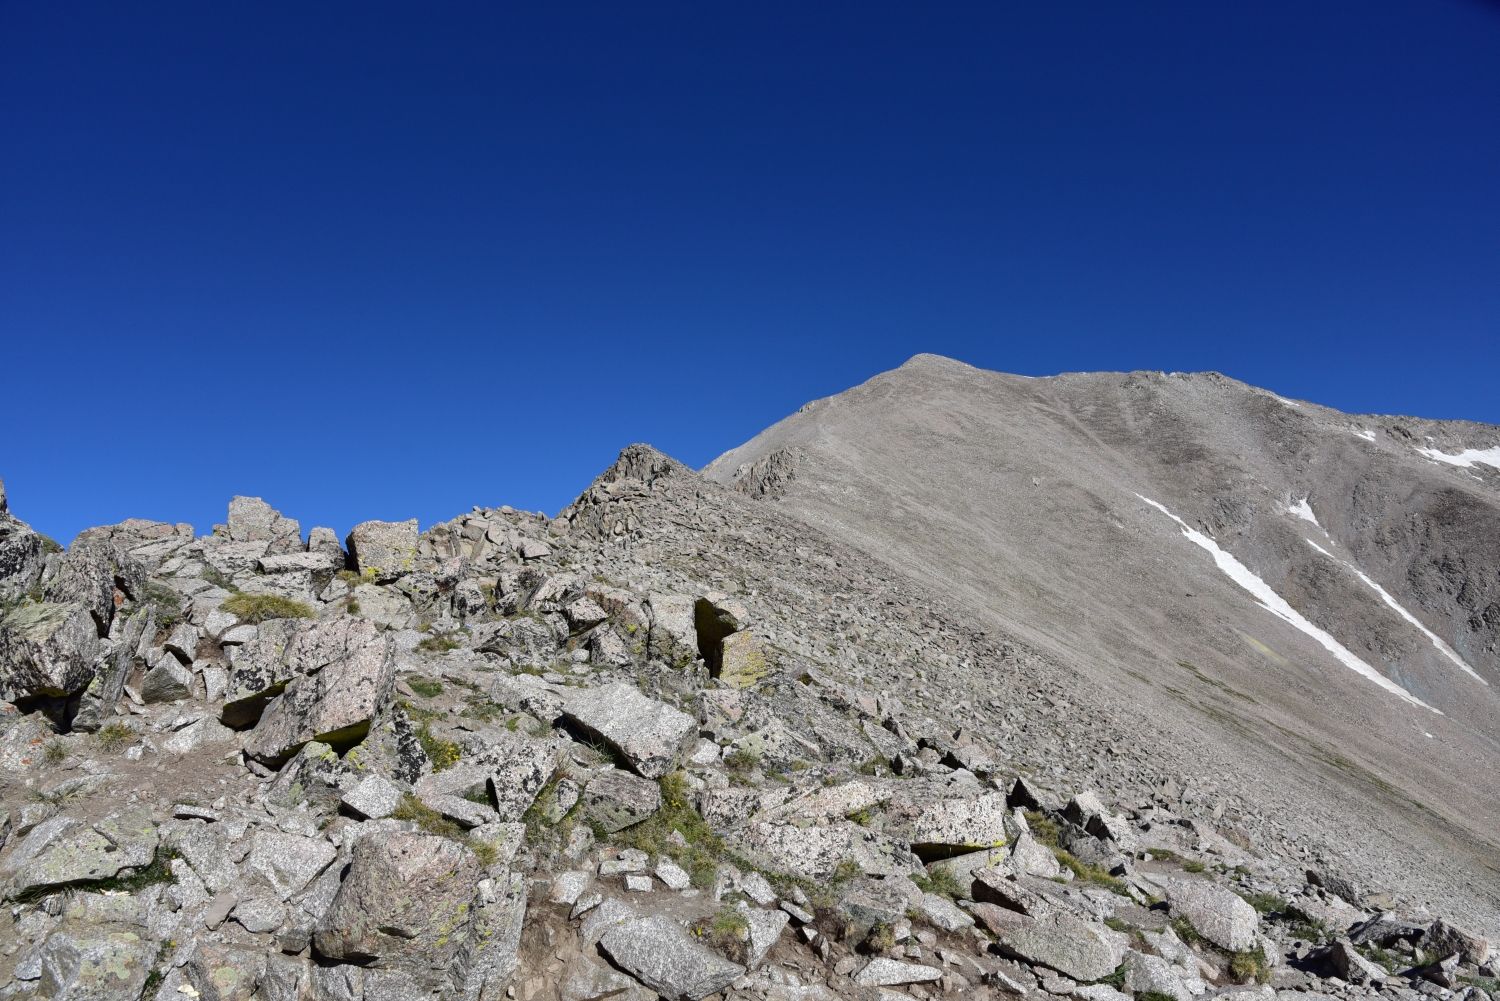
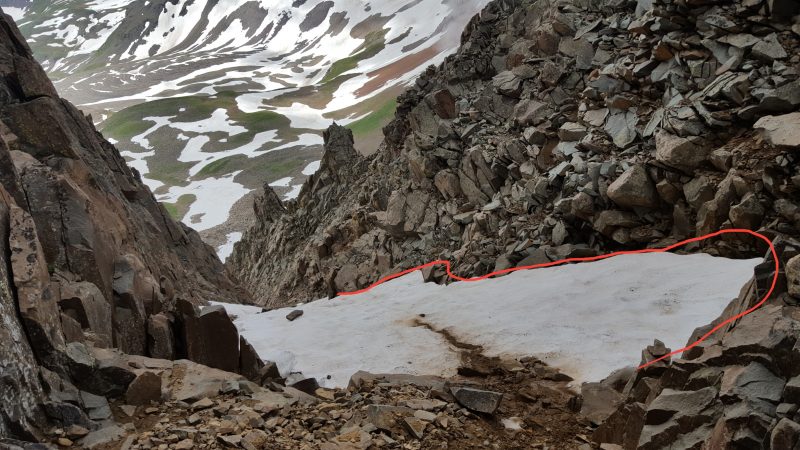
We were thankful to ditch the road and continue our journey on an actual trail, even if that trail became a talus field soon. We crossed the north side of “Tigger Peak” on relatively smooth trail for about a quarter of a mile until we reached the gullies. The trail crossed through mostly stable rock, and the elevation gain through here was modest. There was one remaining snowfield to cross when we summited on June 8th, but the section was well-boot packed and we had no trouble crossing. It was truly astonishing how little snow is left in the high country this early in the year, and also a bit concerning. As we hopped and skipped our way over boulders, we could see the remaining route in front of us and the summit of Mount Princeton. Compared to some of the other 14ers, we thought it honestly didn’t look too far away. Seen below are photos of the start of the Mount Princeton Trail and the fun gullies we had to cross. If you look closely, you can see the faint path through the gullies leading towards the summit.
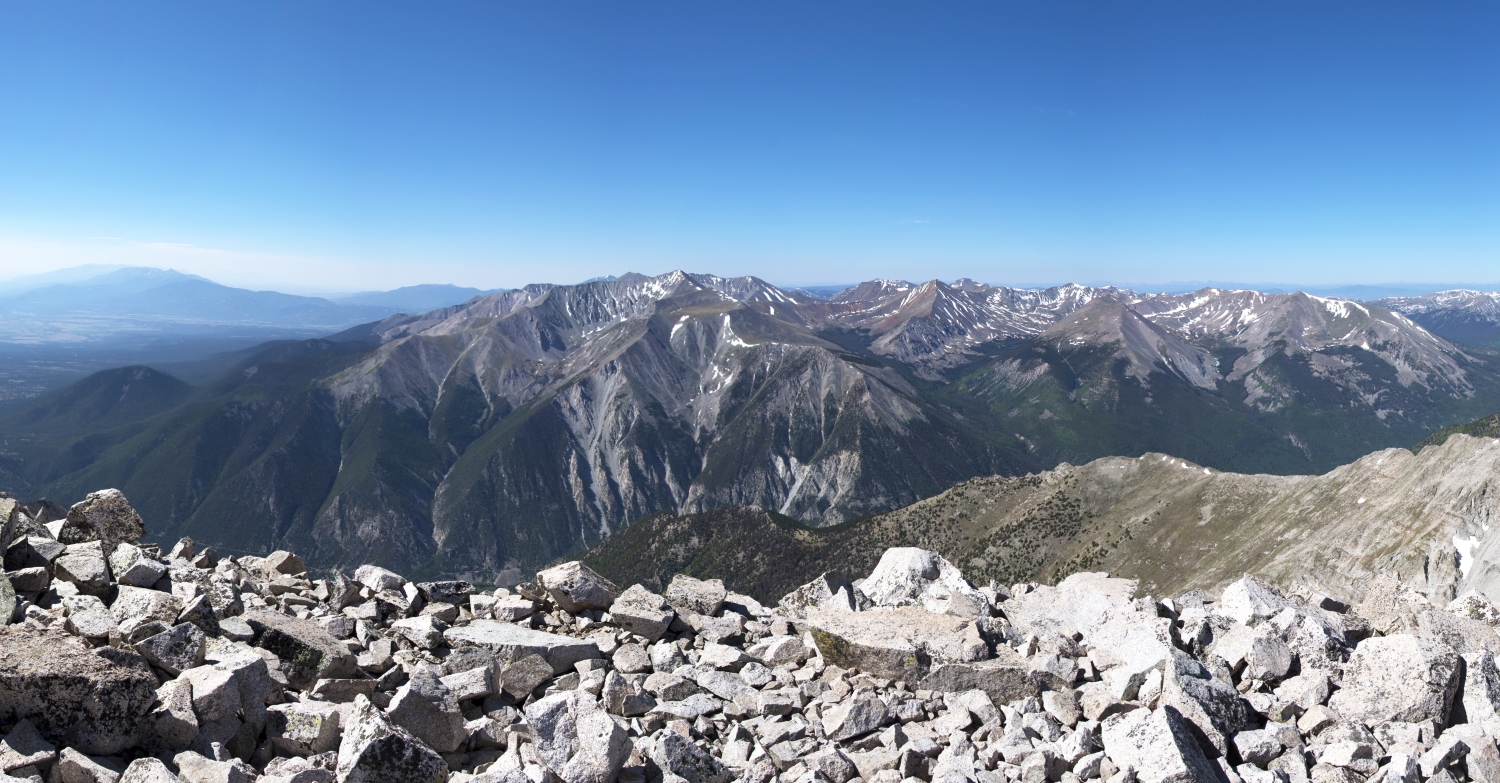
Shortly past the snow drift, the trail veers left to gain the ridge. We followed the series of steep-switch backs up the ridge and were greeted with some cold wind, but also striking views of the nearby 14er, Mount Antero. We could still see some remaining snow hanging on to the nearby slopes. We paused for a moment on the ridge to enjoy the views before carefully picking our way along the talus ridge towards the summit. The terrain and elevation made the hike slow going once we gained the ridge. We were now above 13,000 feet for the first time in several months. Despite the heaviness in our legs and strain on our lungs we could see the summit, and it looked so close. We continued to weave through large spider-webs and subequently pass large spiders that looked to be Mountain Spiders (Aculepeira carbonarioides). They were out in the bright sun, basking. Seen below are views of Mount Antero from the ridge, and the slog up the steep rock leading to Princeton’s summit.

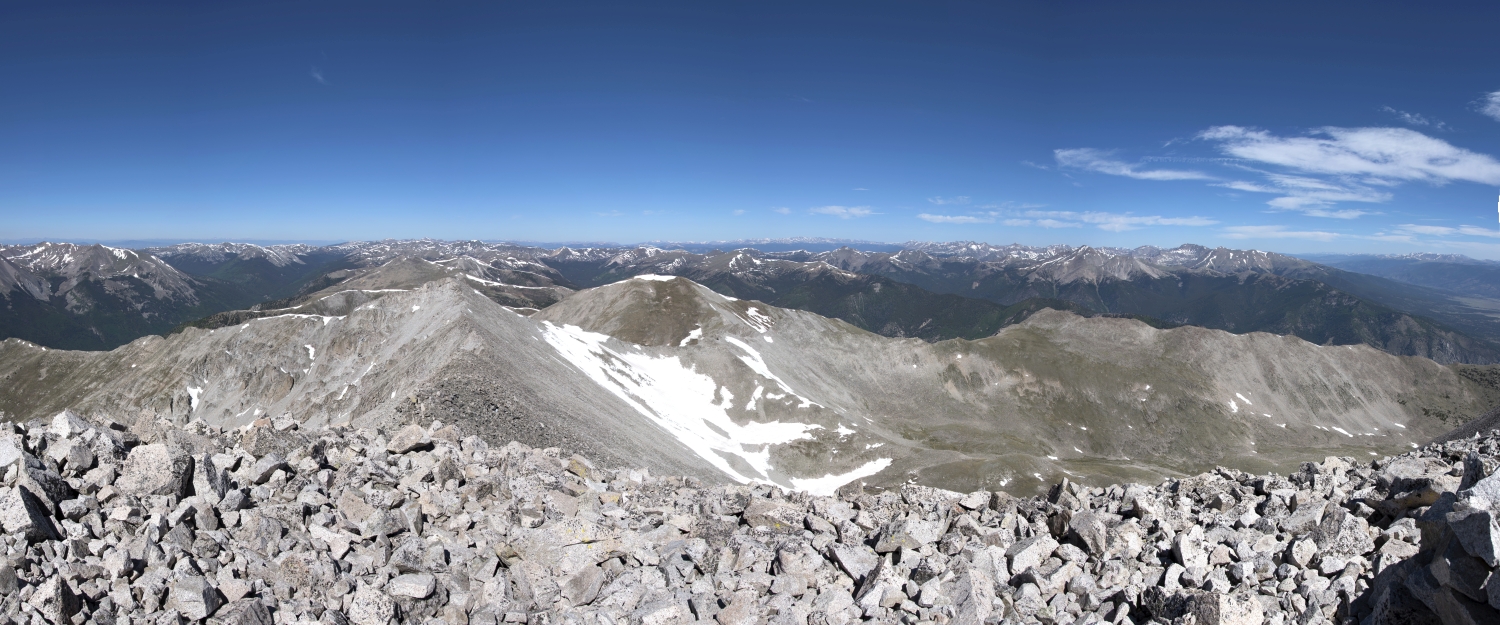
The final 900 feet (elevation gain) or so to the summit were tough. The trail turned to loose scree and dirt and was very steep. It took more energy to balance and gain elevation at the same time. Despite looking close by to us earlier, at this point, it seemed just out of reach with each additional step. At around 9:30 am, we finally topped out. The sky remained a perfect hue of blue and clear. We could see for miles in all directions. There were nice views of much of the Sawatch range including Mount Antero and Mount Yale and to our east we could see all of Buena Vista below. We took reprieve from the sudden gusts of wind in one of several rock shelters built on the summit for around half an hour. Seen below are photos from the Summit.

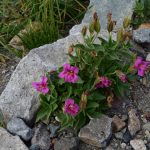
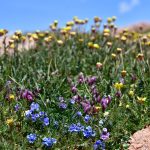
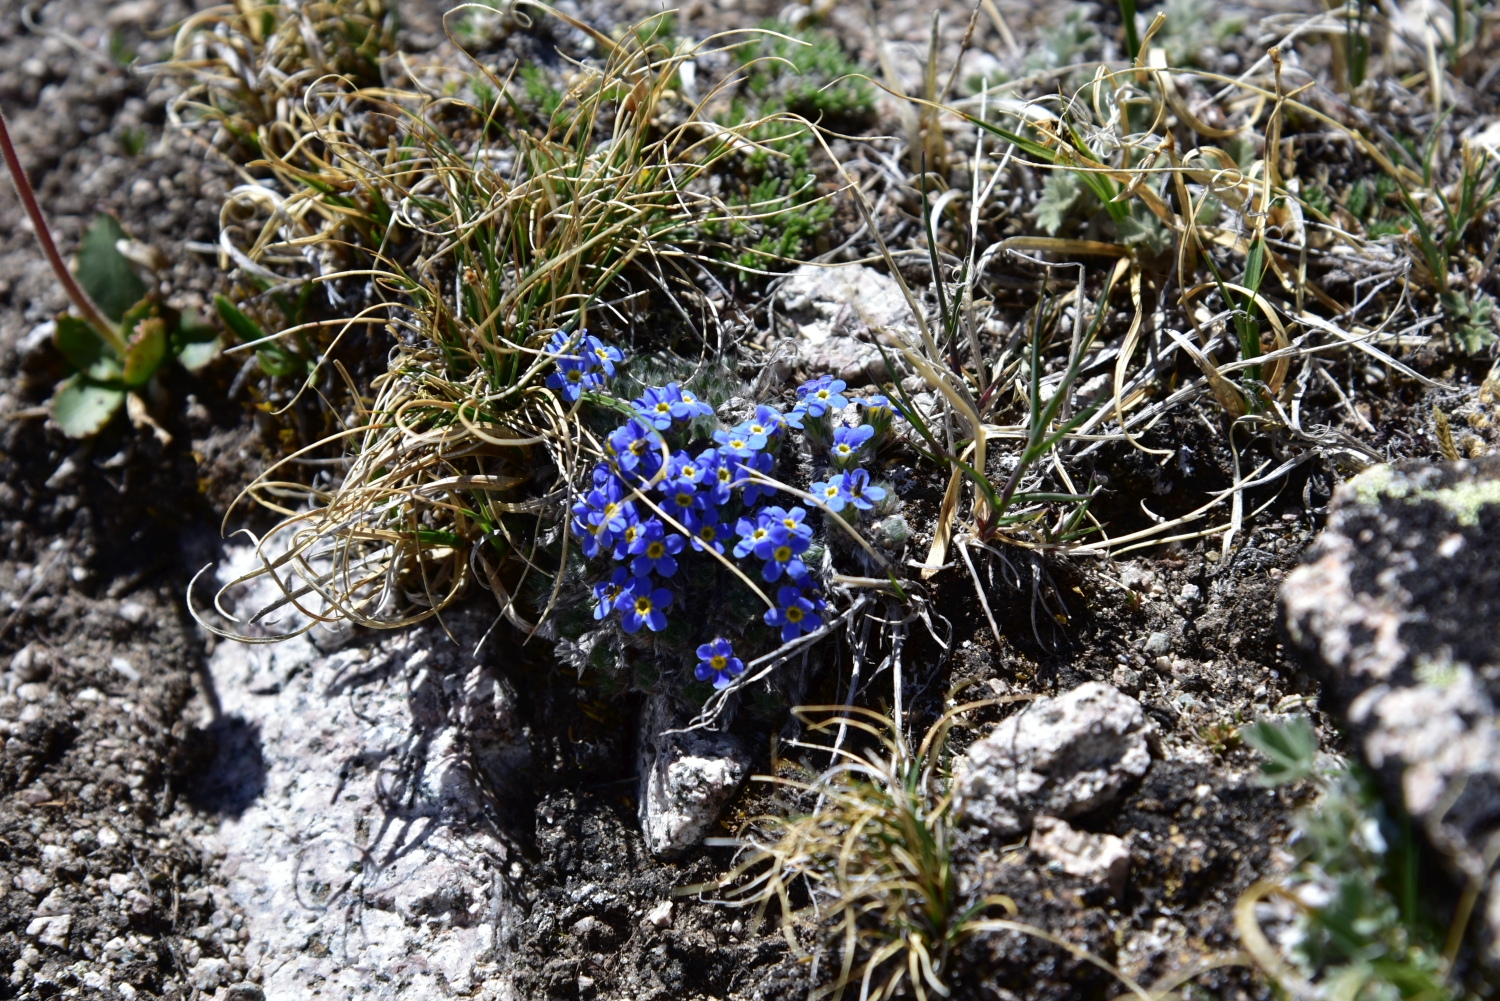
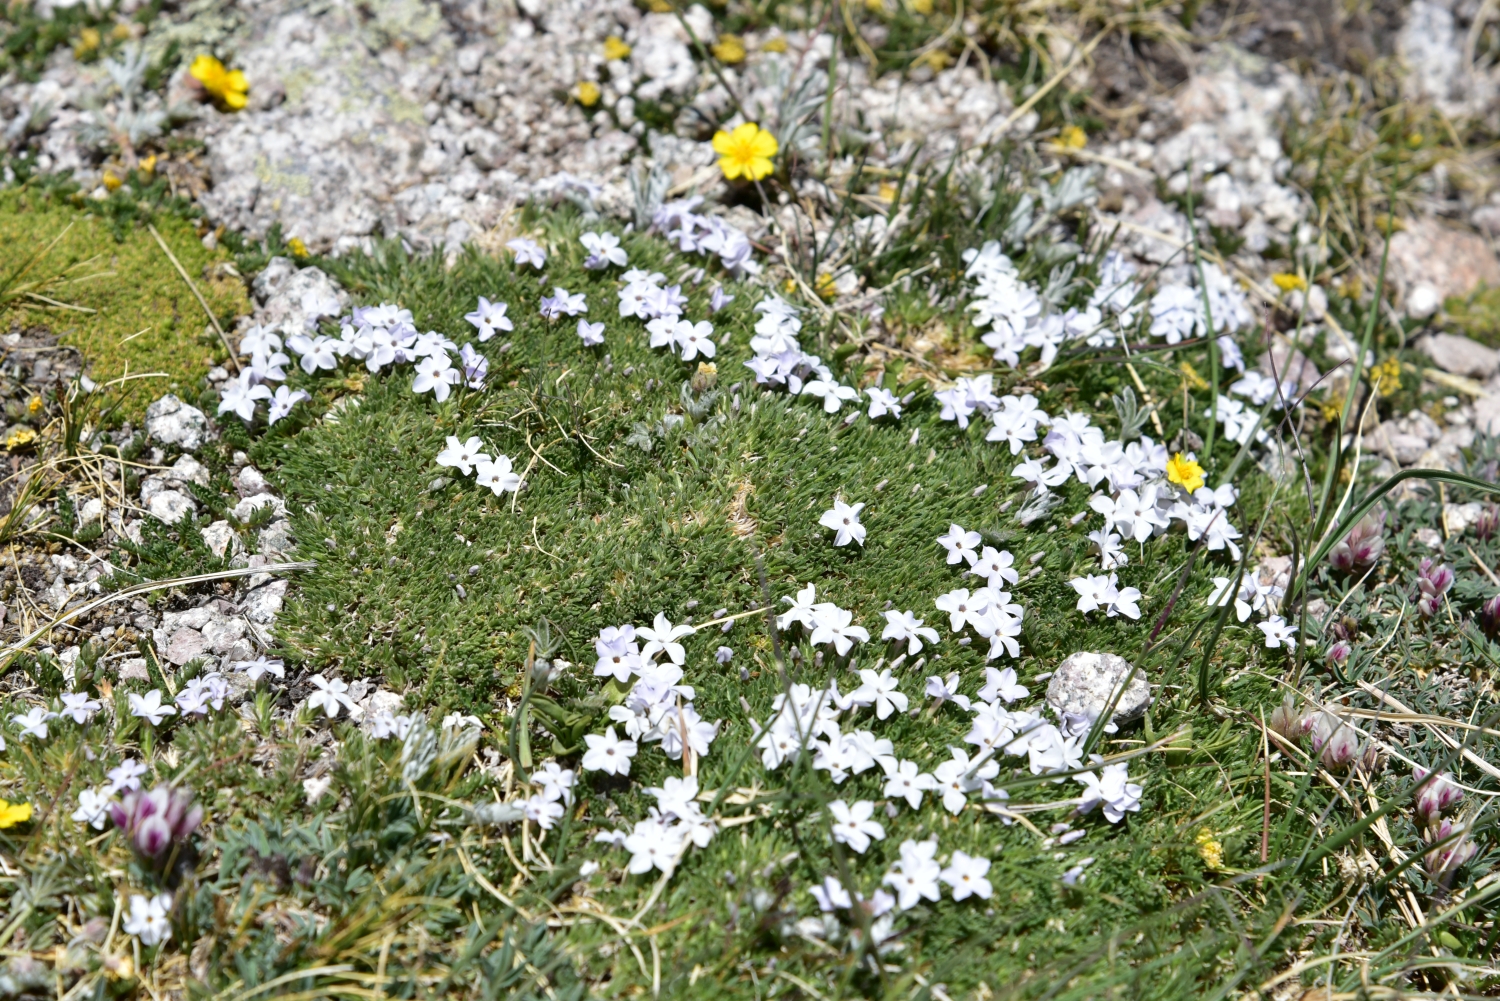
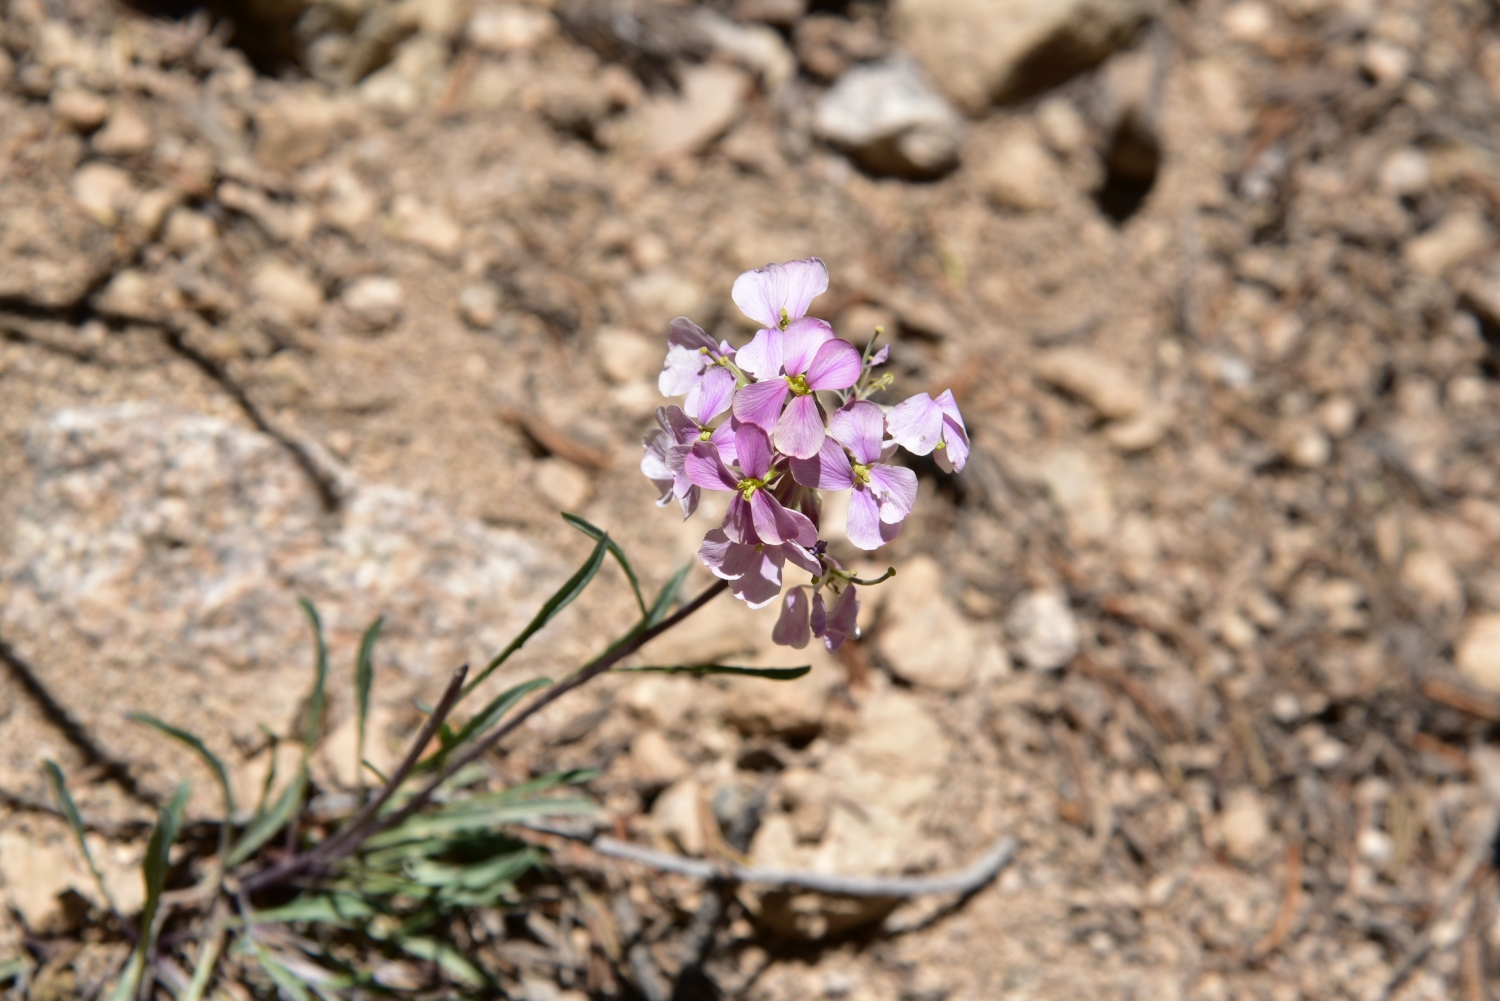
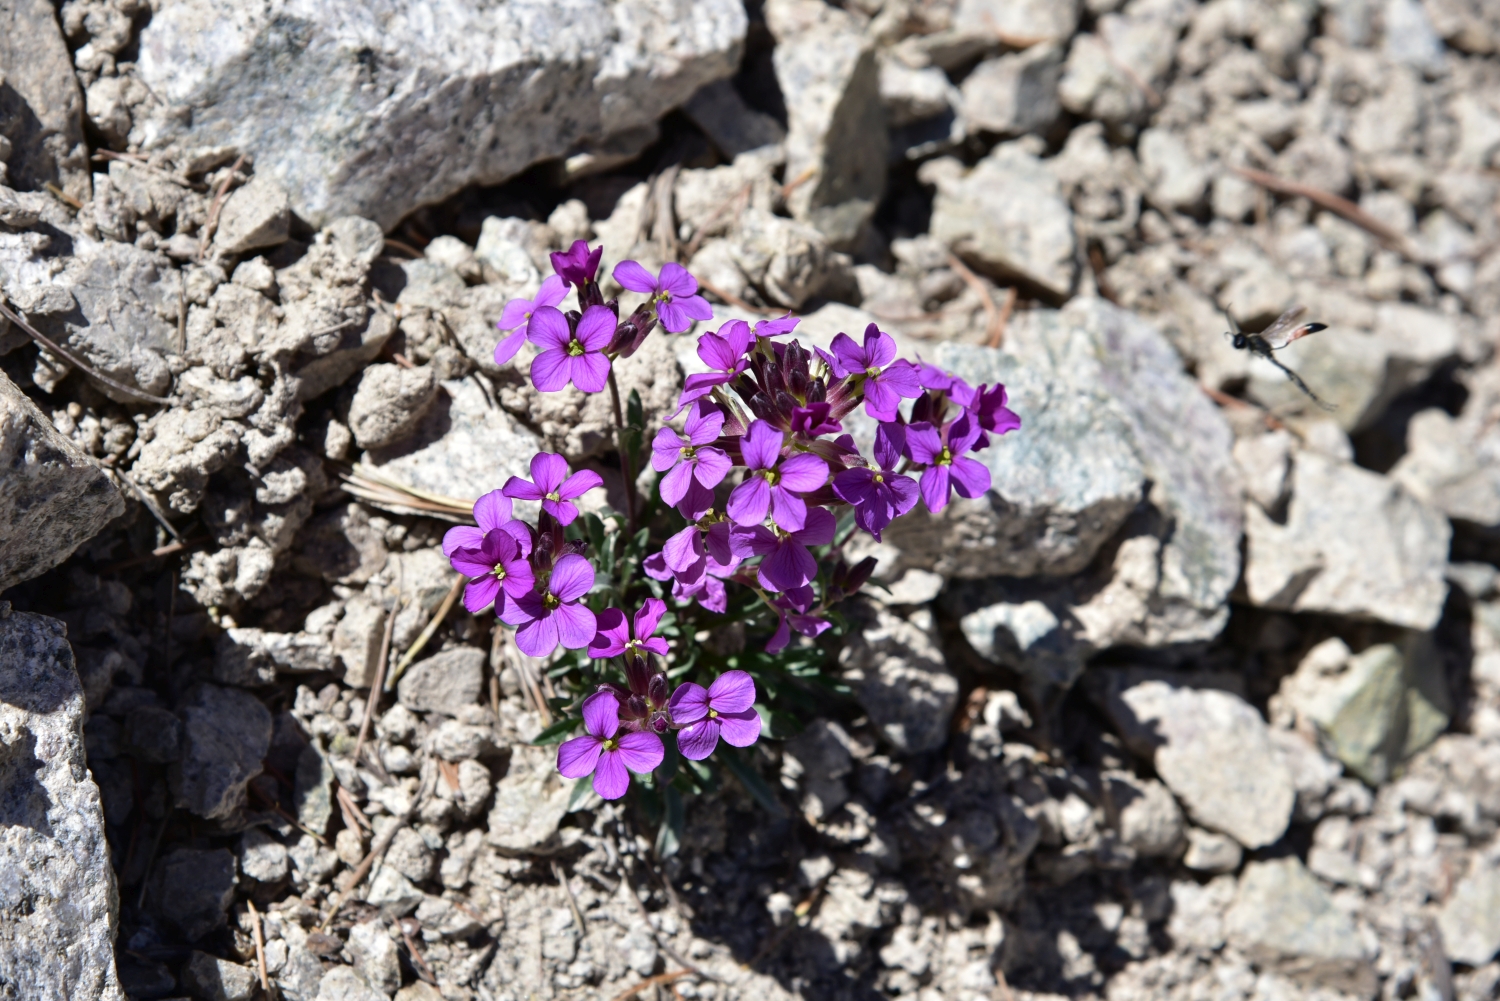
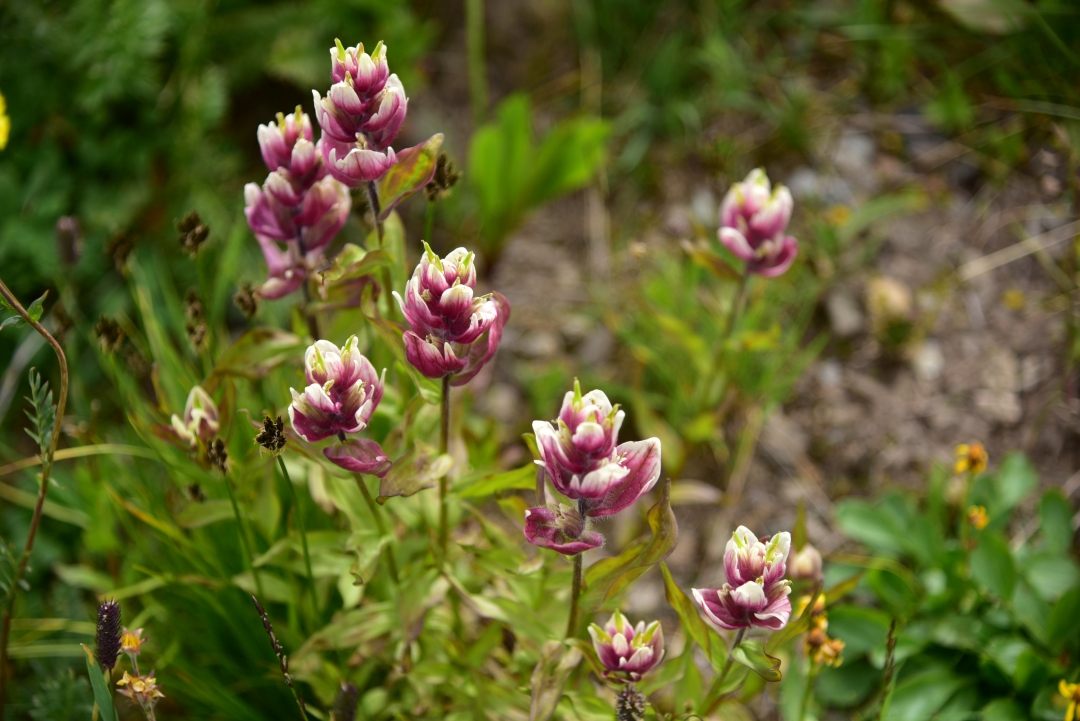
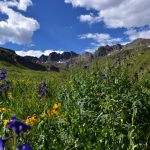
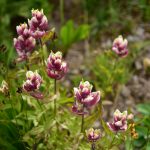
Interestingly, the descent from Princeton’s summit was not as fast as normal. The loose dirt and scree and series of boulder hopping across the gullies made for slow going for most of the journey back to the road. We took our time and ensured good footing, and also admired much of the alpine flora. It’s always amazing to see the brilliant display of flowers that manage to survive the harsh conditions of this environment. Seen below are a view of the many varieties that dotted the grassy slopes and the crevices between rocks on our descent.
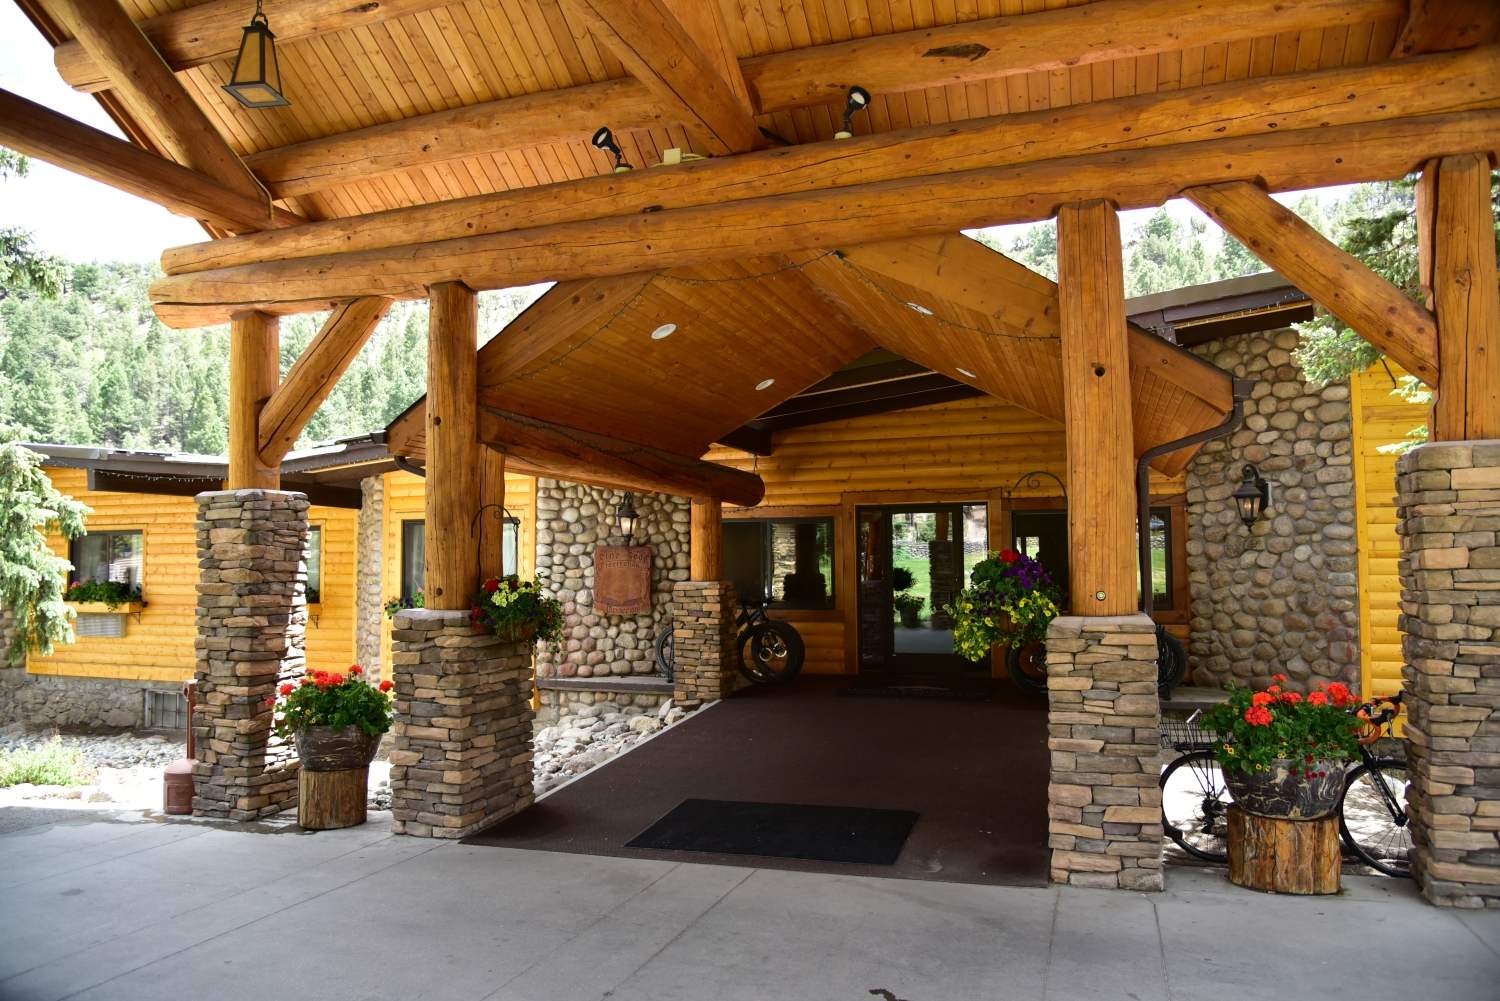
We reached our camp around 12:30-1:00, roughly 6 hours after we began. Though this hike can be done much faster, we took our time with footing and let ourselves adjust to the workload at high altitude since we haven’t been to 14,000 feet in a while. As we drove back down the 4WD road to the lower parking lot we had the road to ourselves, which was very nice. We stopped by the Mt. Princeton Hot Springs Resort — only a few miles from the trailhead — and had a nice lunch. It was far too hot to want to soak in hot springs for us, but we did walk the grounds, and we want to come back when the weather is cooler.


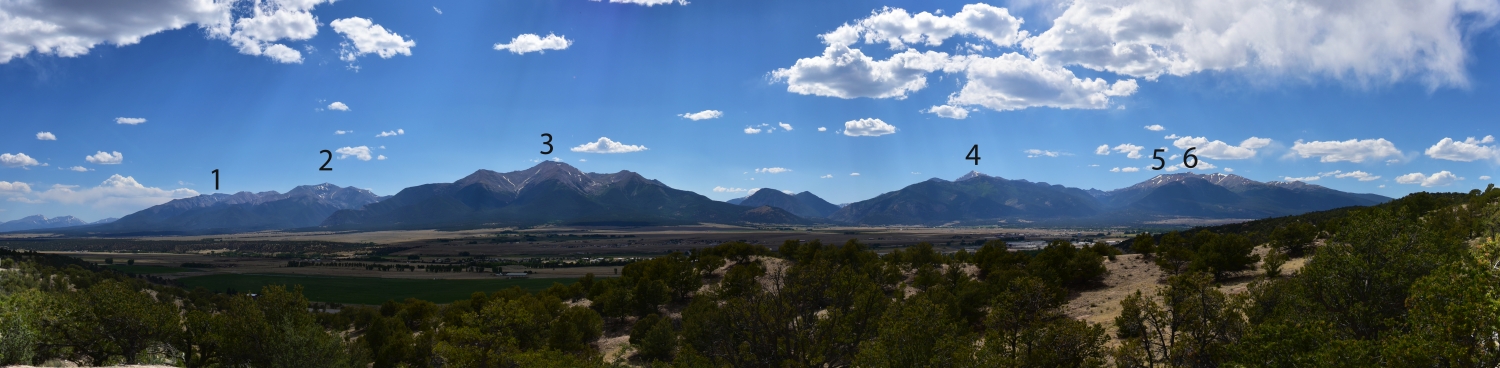
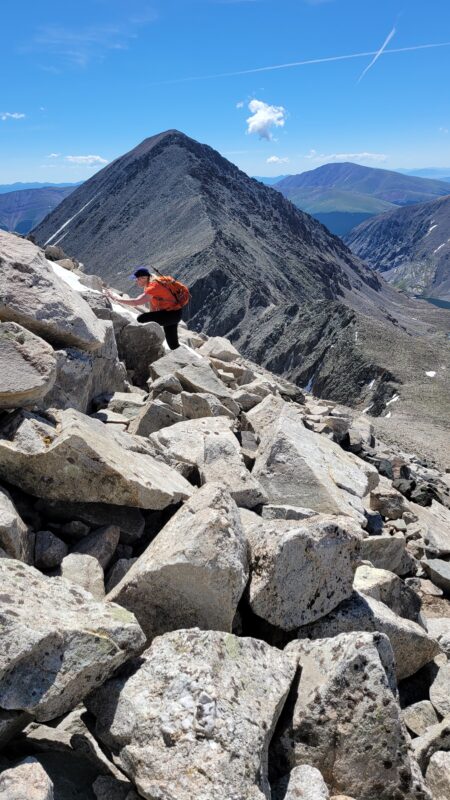
It was a quick drive back to highway 285 and as we passed Johnson Village we stopped briefly to look back at what we had just done. Even from miles away, Mt. Princeton stood prominently over the entire range. We could make out the trail to the summit and see the small snow field we crossed. Shavano, Antero, Princeton, Yale, Columbia, and Harvard were all in view (see below). It was a humbling end to a great trip and we look forward to coming back for more adventures.

Mount Yale Sawatch Range, 14,196 feet
It’s currently October 9th and already a fresh blanket of snow has fallen on the front range. Though not the typical dry fluffy snow of later in the season, the wet slushy puddles have definitely reminded us that the warm summer months are gone. As such, we reflect back on our last snow-free 14er of the season, Mount Yale which we climbed exactly one month ago from today. Mount Yale is another one of the gentle Sawatch Range giants nestled in the Collegiate Peaks just west of the Buena Vista. When we say gentle, we simply mean a lack of technicality to the climb. In no means was the peak gentle in distance and elevation gain. The trailhead to the peak is located just right off of Cottonwood Pass. A short 12 mile or so drive on a smooth paved road leads to a smooth paved parking lot and easy access to adventure. Nonetheless, the long distance of TH from the Denver metro area required an overnight camp in the nearby Collegiate Peaks Campground. Despite sleep deprivation and a large workload in the days proceeding, we shrugged off our exhaustion, drove to our destination, and set up camp just before the sun set. The moon remained bright this night. Once our eyes adjusted to the darkness of the night, we could actually see quite well. We hunkered down for what we thought would be a cold night, but to our surprise, the early fall weather did not make us suffer. Even at over 9,000 feet, temperatures did not drop below 48 or 49 degrees F. Throughout the night, there was the occassional rustle of the leaves and perhaps a mouse or two seeking shelter near our tent, but otherwise relatively quiet. When the sun rose, we reluctantly crawled out of our shelter and drove the half mile down the road to the TH.
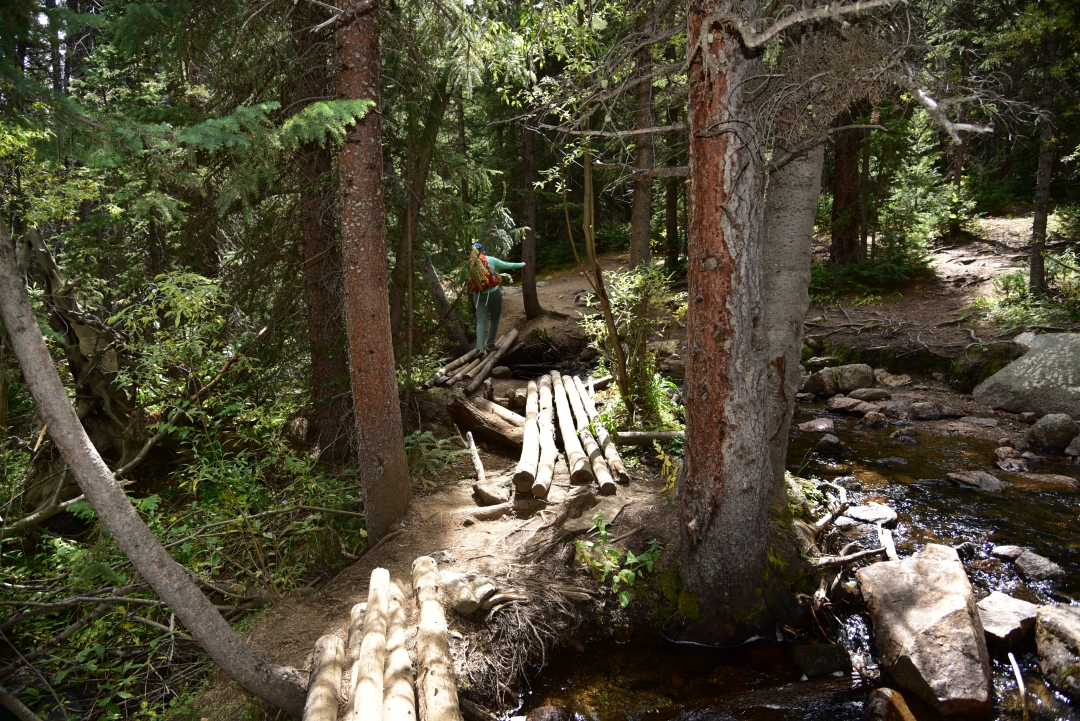
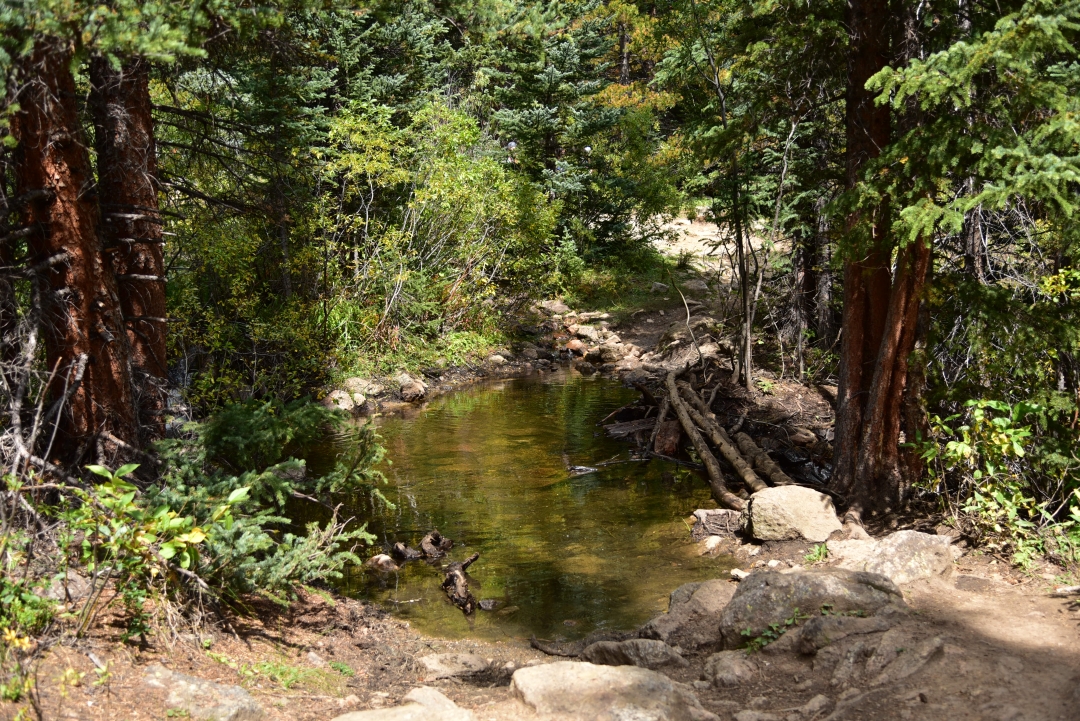
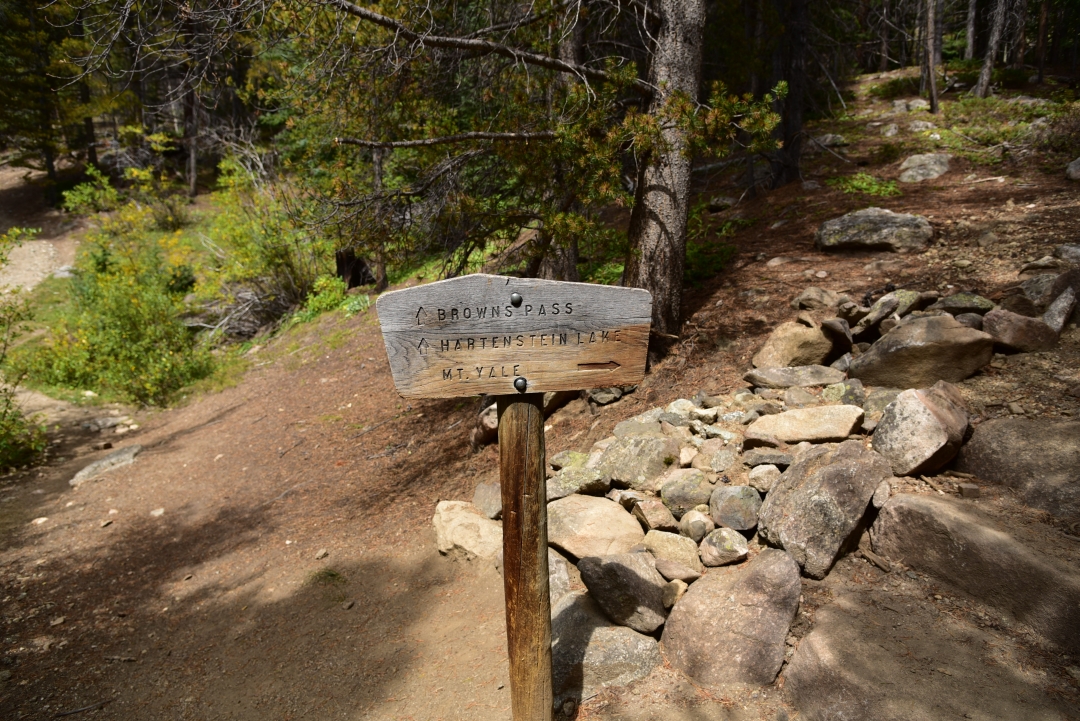
Though not completely full at 6:30 in the morning, the parking lot did have several other hikers prepping for their summit attempts. September truly can be one of the most spectacular times of year to hike and climb in Colorado. The crowds near popular THs are reduced, the fall foliage exudes color in every direction and the crispness in the air puts a bit of urgency in the step. Thunderstorms are less common, but snow and ice are known to commonly appear, particularly when one is close to the summit enjoying lunch or any other such activities. We started the climb about 7:00 am. The initial grade of the trail was mild and enjoyable. The aspen and lodgepole pine forest provided a cool canopy. The sounds of the Delaney Creek could be heard as we wove through the forest. About a mile into our hike, we crossed the creek over a log bridge (the first of many crossings it would seem). Shortly after we reached a trail junction. Head left for Browns Pass/Hartenstein Lake and right for Mt. Yale. Seen below are photos from the beginning our our hike.


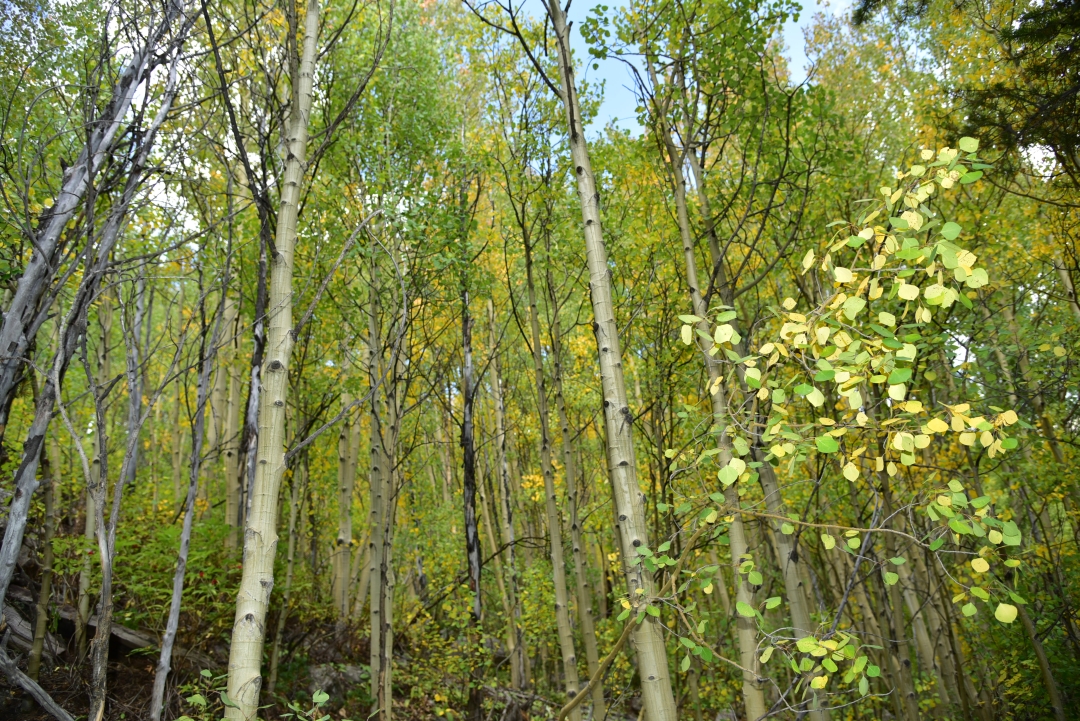
There were several flat areas of the initial portion of the hike which had us a bit concerned for the work load that was ahead. Just as we began to think we might actually be getting off easy, we reached a series of brutal switchbacks near 11,200 feet. We followed the steep trail up the hillside through more and more trees and thought that we would never reach treeline. Several hiking parties were passed during this time, and we kept our quick pace if only to avoid the constant leap frogging that can occur when sharing the trail. Everything was still so green and beautiful on this great trail. Seen below are photographs before we completely left the trees and green vegetation above 12,000 feet.

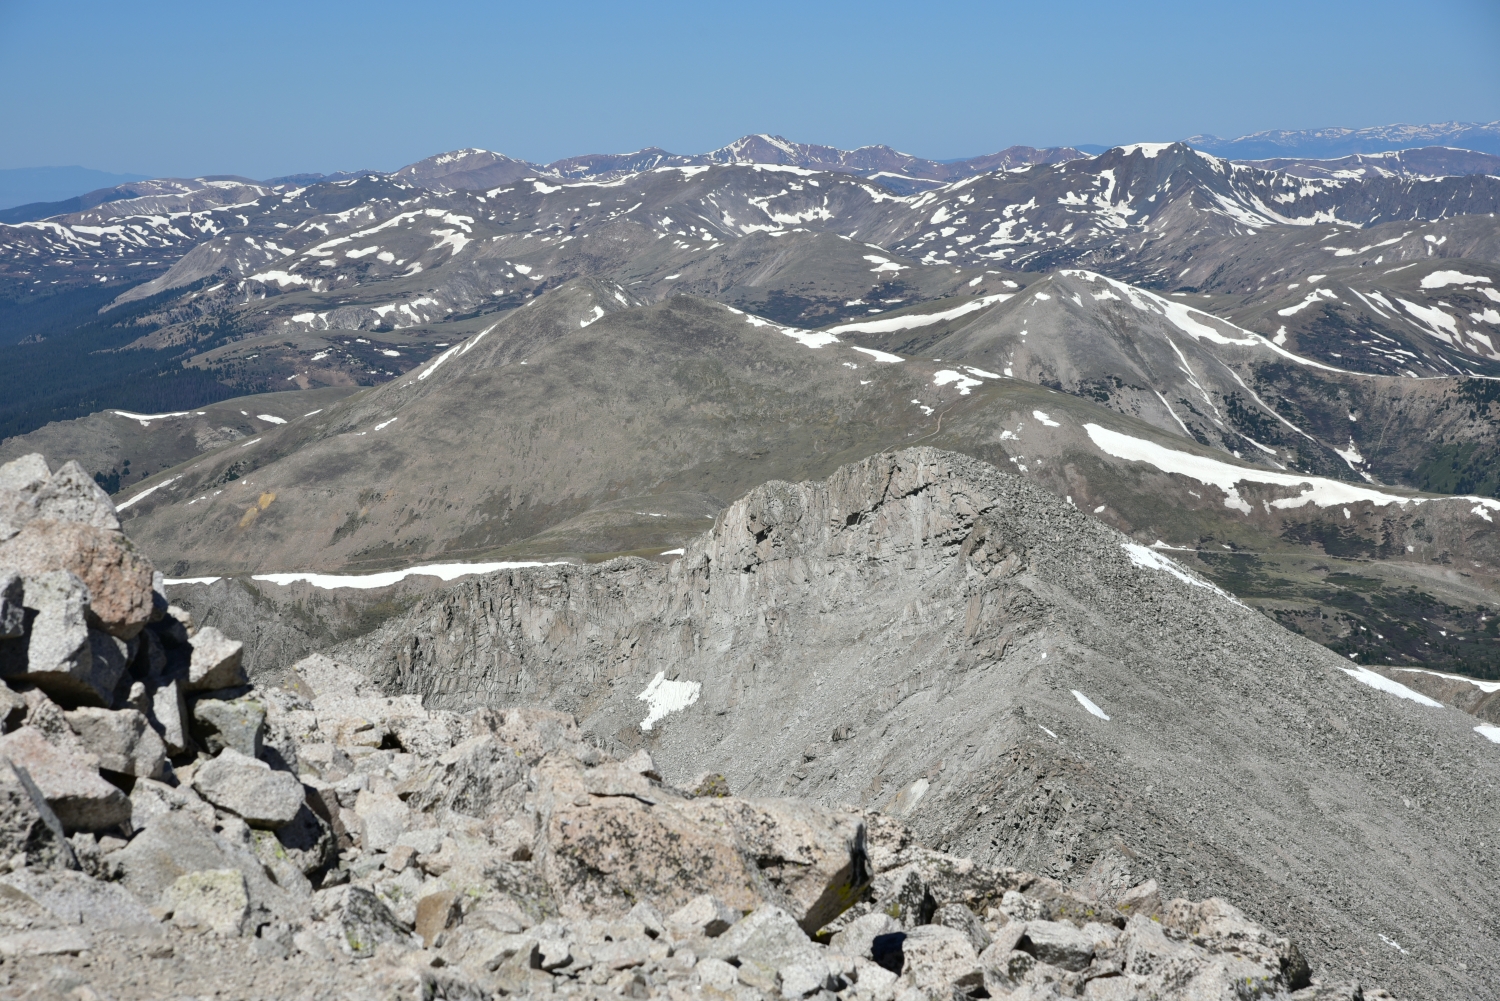
Aftering leaving the trees, we headed northeast toward Yale’s upper west slopes. Much of the remaining route was visible to us now. We followed a gentle trail on the shoulder of the mountain for a while soaking in the surrounding grandeur. A large boulder provided a brief break, as we snacked on a childhood favorite, pop-tarts. The gas station attendent the previous night had given us a hard time for our purchase of pop-tarts and barbeque potatoe chips. It was perfect on the mountainside this day. Near 13, 200 feet, a steep trail greeted us. We had nearly 800 feet to climb up in a very short distance to reach the ridge and final section to the summit. Nearly everyone we saw heading up this portion appeared to be on the struggle bus. It was a tough bit of work and the spot in which our exhaustion from the previous week began to really show. Seen below are photos of the shoulder of the mountain and struggle up the ridge.

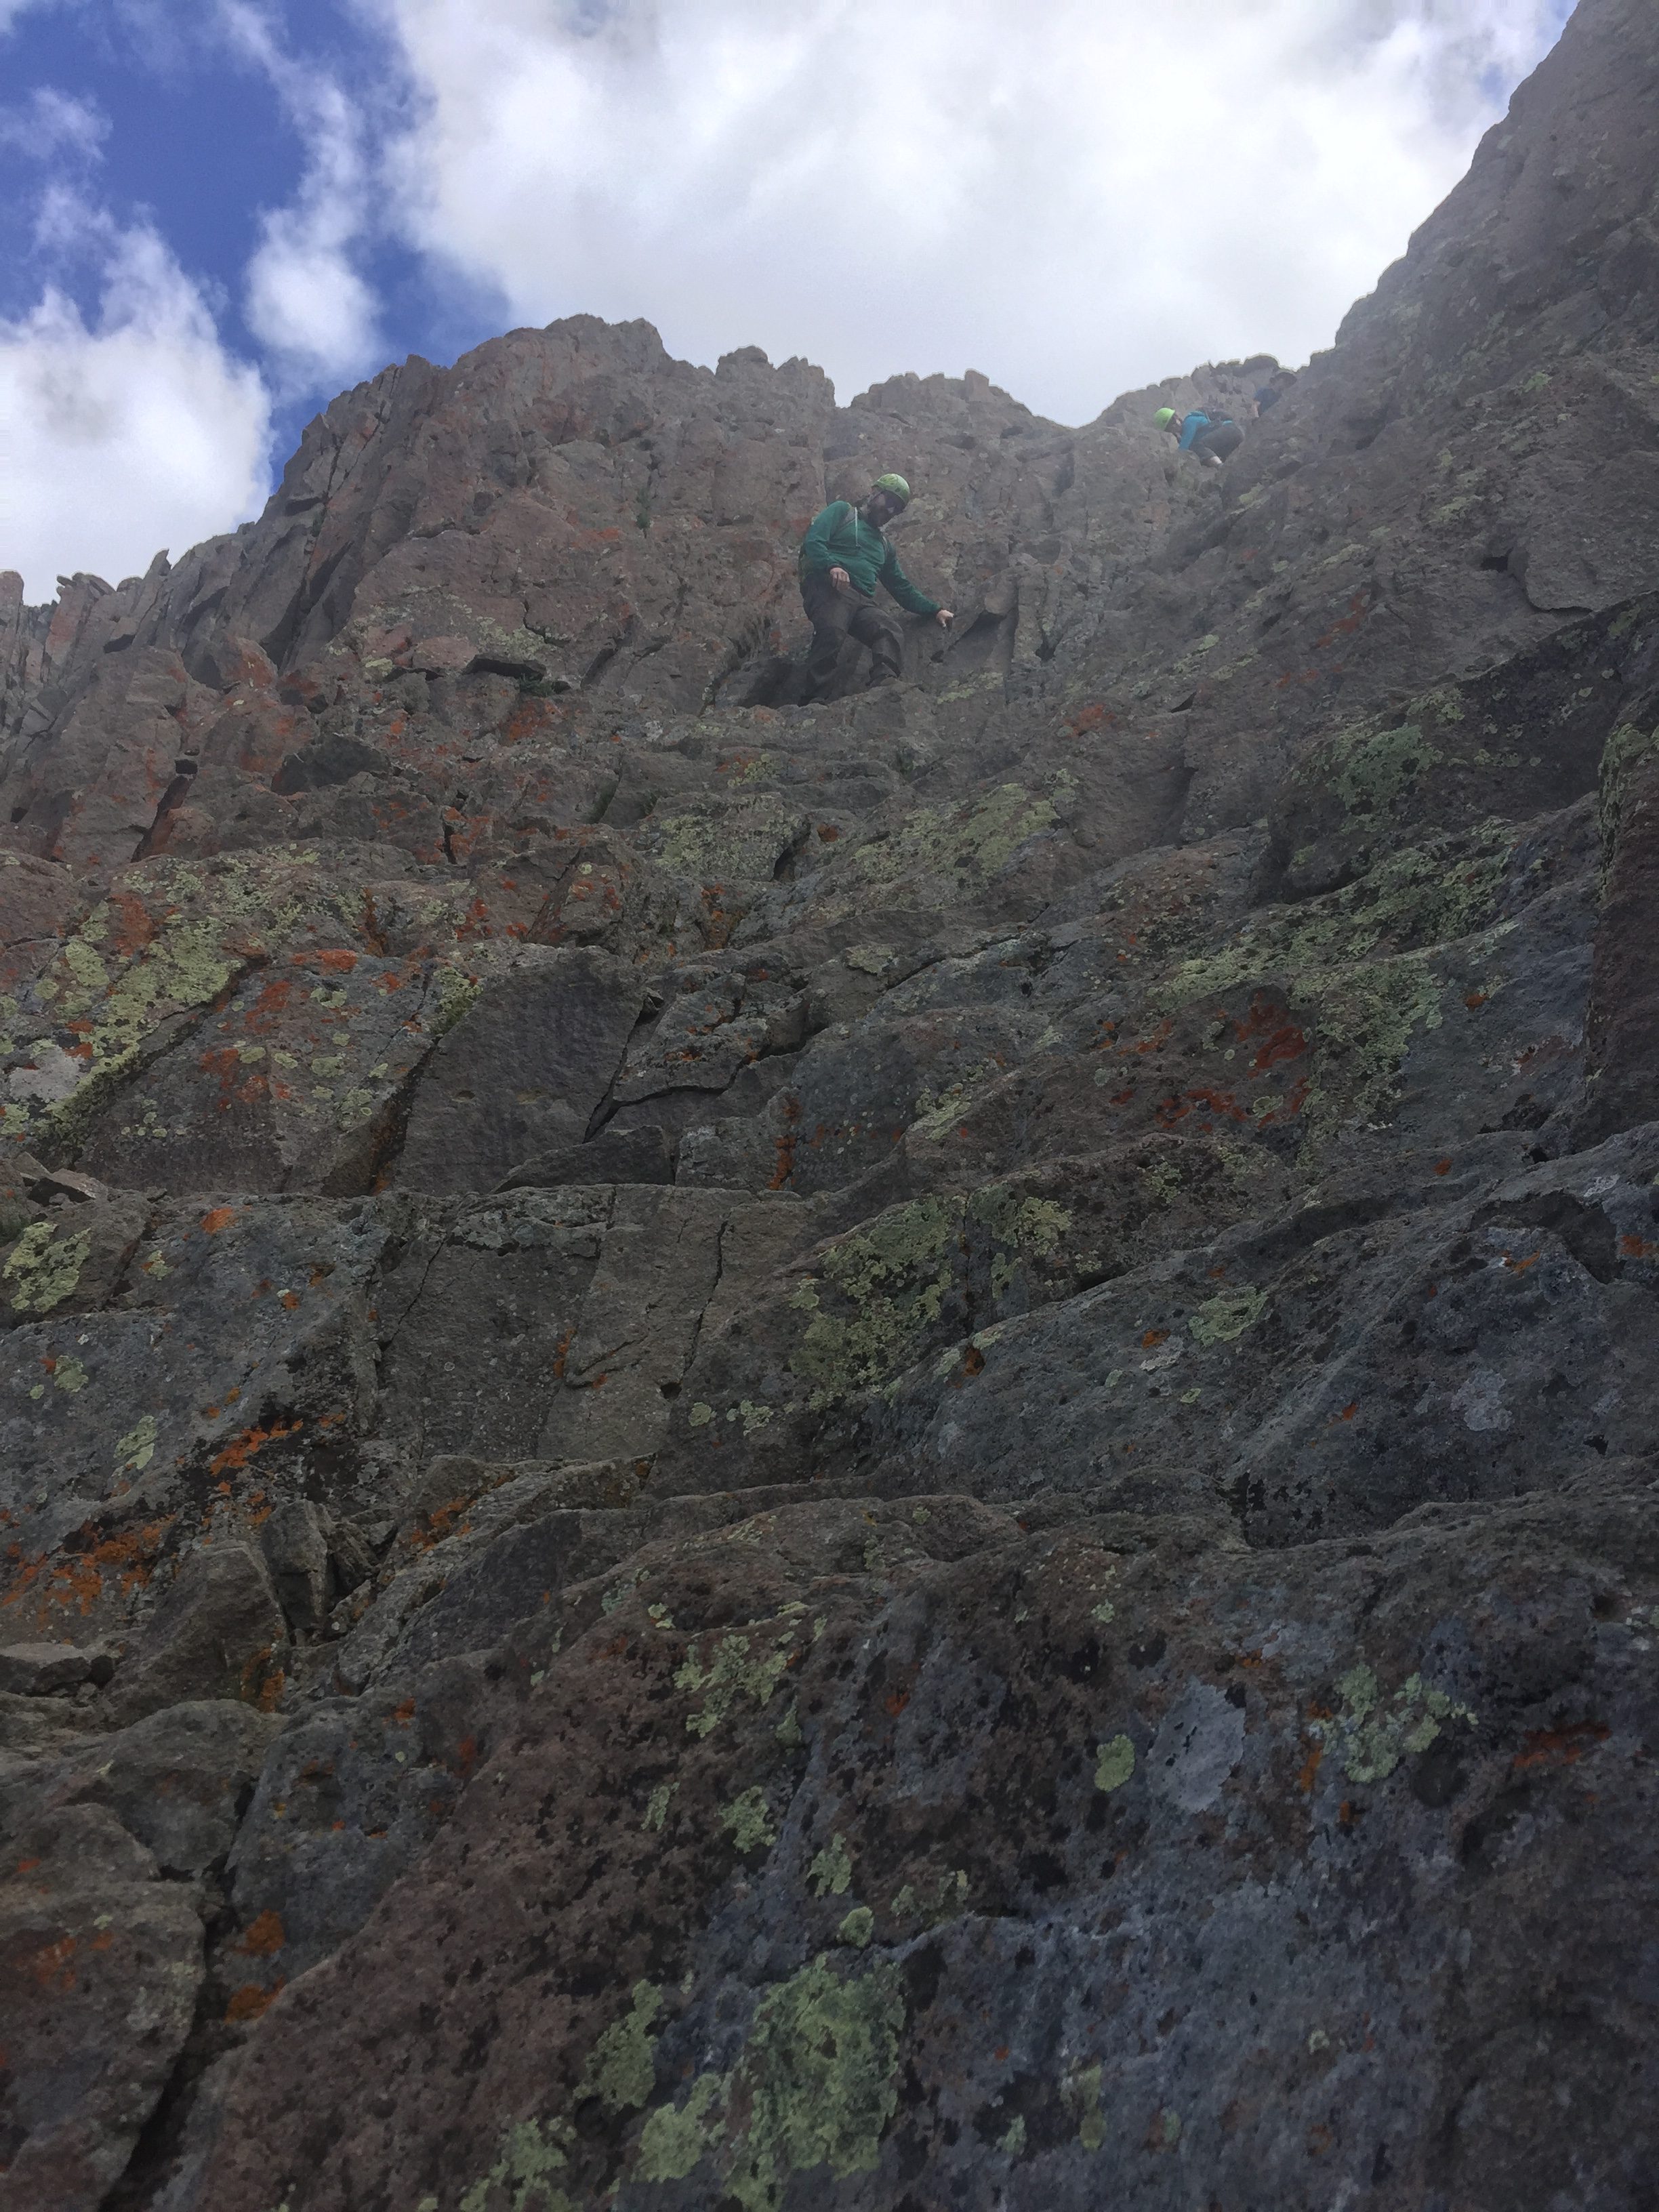
Once on the ridge, the trail to the summit disappears. There is several class 2 rock to navigate, and many places where the route can venture into difficult class 2 if chosen. It was much more fun and interesting than the rest of the hike, and we forgot for a while that we were tired and almost at 14,000 feet. We scrambled gleefully along the ridgecrest, primarily sticking to the right side. Several cairns were placed along the route to provide gentle guidance. They led the correct way for the most part. It only took about 15 minutes to reach the summit once we were on the ridgecrest. The summit is not really the most comfortable summit compared to the rest of the 14er tops we have visited. Jagged rocks protrude everywhere. Several other hiking parties were on the summit or got there shortly after us, and navigating around the rock was even more difficult dodging other people. We took a few photos, but spent very little time here. The clouds that were building caused a big drop in the temperature, and we needed to get moving.


As we carefully downclimbed the ridgecrest, the sleet began. It was cold and sharp to the skin, but was not heavy enough to affect our visibility. We were very thankful for this rather than a thunderstorm. Nonetheless, we moved very quickly because we still weren’t sure that a thunderstorm wouldn’t also move this way. As we reached treeline, the weather cleared for a while. Once again we were greeted with endless blue skies and greenery. On the way down, we stopped next to a hidden creek and small waterfall for lunch which consisted of bbq chips and chicken jerky. The trail seemed longer on the way down than on the way up as it always seems to. With about 1.5 miles left in the journey, it began to rain. For the first time in the life of our hiking packs, we were able to utilize our cool pack rain covers. Sometimes it’s the little things in life like the joy of using a neat feature on a day pack or the feel of the grip of hiking boots on smooth granite that add to our great experience in the backcountry. In the distance, we heard thunder and hoped that all the people continuing up the peak were okay. Shortly thereafter, we reached the truck. In total we hiked/climbed approximately 9.5 miles and gained a total of 4,300 feet. The Sawatch Range has 15 named/ranked peaks above 14,000 feet. After our summit of Mount Yale, we have now climbed 9 of them. While Yale wasn’t our favorite of this range (Mount of the Holy Cross is hard to beat here), it was certainly beautiful and well worth the journey. Seen below is a gallery highlighting the rest of the day and hike.


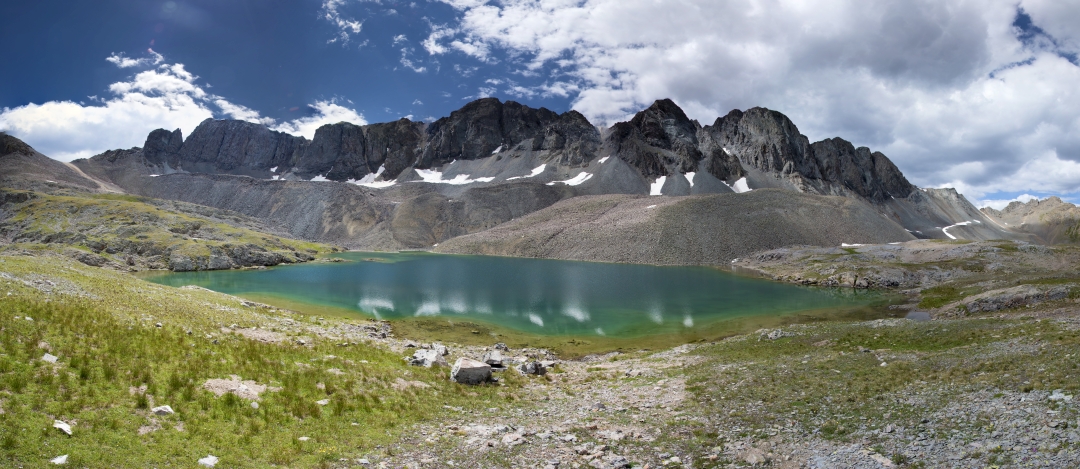
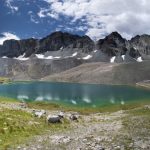
Handies Peak, San Juan Range (14,048 ft)
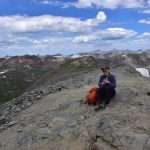
As part of our trip to Lake City in late August, we also reached the summit of 14er Handies Peak via the stunning American Basin. This time, we opted to leave a bit later in the morning in our summit attempt, as the route up Handies via American Basin is a much shorter, class I jaunt. Plus, our exciting class III scramble up Wetterhorn the previous day had left us a little bit exhausted. We left our Cabin in the light of morning this time, and set out on the Scenic Alpine loop to reach the trailhead. Per the detailed instructions on 14ers.com, we followed the road past San Cristibol Lake and then took the fork towards Cinnamon Pass. We had no idea that the adventure was going to actually start there, up that steep rocky road. We quickly gained elevation when the road forked. Dirt-bikes and ATVs flew past us, seemingly unnerved. If our ride were a bit smaller, I’m sure our confidence would have been just as high, but we were in the X-terra. As the elevation gain ceased, we realized that we were on a narrow, shelf road. Thankfully our current direction of travel allowed us to hug the side of the cliff, but the sheer drop offs on the left still left us tense. We prayed that another car would not turn the blind corners during this stretch. After a mile or so of intense sketchiness, the 4WD became more tame. Our truck now easily bumped along, passing the RedCloud and Sunshine 14er THs before getting closer to American Basin. We continued along this easier portion of the road for another 9 miles or so until the road forked to Cinnamon Pass on the right, and American Basin on the left. The truck took us about halfway to the upper 4Wd parking lot. At this point, we were incredibly anxious to get out of the vehicle. The magnitude of American Basin’s beauty mesmerized us, and we wanted to hike in this spectacular place as soon as possible.

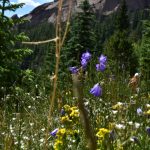
Even though it was late August, there was still a number of wildflowers in bloom in every color imaginable. We soaked in all the brilliant colors, as we hiked about half a mile to the upper parking lot and official start of the trail. From here, the total elevation gain is only 2,500 feet in a round trip of 5.5 miles. The trail steadily gains elevation here among throngs of flowers, almost as tall as we are. Looking ahead, we were provided impressive views of the jagged ridgeline in this glacial carved basin. The incredible scenery was enjoyed in almost solitude. Despite, it being a Saturday on an easier 14er, the trail was generally empty.

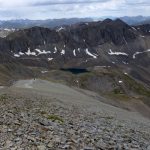
Aside from the outstanding beauty from the very second you reach American Basin, the first spectacular objective to see on this hike is Sloan Lake. After just 1.5 miles, a short social trail appears on the right that leads to the banks of this alpine wonder. We took a quick break at the banks of the deep, dark blue water to eat a snack and relax. This is truly, one of the most amazing places in Colorado we have ever been. All of the views were so dramatic. Standing on the banks of the dark expansive pool, we felt so small. The jagged granite towered above us. It was time to continue to the summit. Most of the remaining route was visible now, in the form of a faint line of switch backs drawn across the side the mountain. On other days, this would have been an easy ascent, but our legs were heavy from Wetterhorn. The remaining route felt physically hard, even though this is considered one of the easiest 14ers in Colorado.

The higher we climbed, the looser the trail became. The final push to the summit was very steep and full of scree just waiting for us to make a mistake and slip. The lack of available oxygen to breathe was more apparent today than the previous day. Never did we anticipate that reaching such an easy summit would bring us such joy. We could now rest our legs for a while and soak in all the beauty. We shared this popular summit with just two other hikers for a few minutes in the late morning, and even had it to ourselves for a bit. The panoramic view from the summit included the Grenadiers and Needles Mountains to the Southwest and Wetterhorn and Uncompahgre Peaks to the North. Seen below are photos from the top of Handies.
Rained looked inevitable, so we decided it was time to descend. The climb down was a bit difficult until the scree mellowed out closer to Sloan Lake. Once to the lake, we made quick work of the hike back to the car. When we reached the upper 4WD parking lot, we realized the rain clouds were just teasing us. The sky once again returned to a perfect blue, a perfect accent to the emerald green expanse of the valley below. When we reached our truck, a group of fellow hikers were nearby and offered us some of their watermelon, which turned out to be probably the tastiest watermelon we have ever had the opportunity to eat. There is nothing quite as satisfying as the crisp, coldness of this sweet fruit after 7,000 feet of elevation gain in two days. Though it was tempting to stay in the beautiful basin for longer, we needed to start the long 20 miles back to Lake City. We still had the scary shelf road to travel on before we could breathe a sigh of relief and feel truly accomplished. To our surprise, the road was much more crowded in the early afternoon. Several ATVs and other vehicles shared the road with us. As expected, the shelf road was intense, though not as bad as it seemed on the way up in the morning. There is some benefit to knowing what to expect to help ease the nerves. In fact, we even filmed it this time which can be viewed via this link. We reached Lake City in time for a delicious dinner at none other than the Cannibal Grill and Packer Saloon. (we got salad and pasta…). Another outstanding day in the San Juan mountains was complete.


Wetterhorn Peak, San Juan Range (14,015 ft)
On August 17th of last week, we decided to climb Wetterhorn peak. You might be thinking…”you went to Switzerland!?” But, no in fact, we made a relatively easy 5 hour drive to the San Juan Range of Colorado and set up “camp” in Lake City, Colorado. The 14er Wetterhorn in Colorado is named after its European counterpart in the Bernese Alps. Members of the 1874 Hayden Geological Survey recognized similarities between the distinctive summits of these peaks. Though more photographed, Swiss Wetterhorn only reaches 12,000 feet compared to our Wetterhorn at just over 14,000 feet. Our peak is is probably less photographed due to the relatively hidden nature of our peak in the rugged San Juans.
We say “camp” loosely as we stayed comfortable and dry in the Cannibal Cabins in Lake City to get some adequate rest. We’ll get to the name later, and the town’s odd obsession with a fellow named Alfred Packer. Our alarm went off at 4:45 am, and we quickly gathered our gear in the cold, dark morning. Though warmer than outside, we failed to turn the heat on in the cabin during the night and woke up to a crisp chill as we donned our climbing clothing. We hit the alpine loop in the dark and followed the gravel road for 9 miles before turning off onto the 4-wheel drive road, North Henson Creek Rd. Thankfully, the sun began to rise once we reached this terrain. The first two miles were relatively tame, but the final 0.7 mile to the upper trailhead was rough and narrow. It should be noted that there is some parking below this final section for vehicles that don’t have enough clearance. We were just fine in a stock Xterra though careful negotiation was required in two to three sections.
We began our ascent of Wetterhorn around 6:30 am and hiked easy terrain for the first 0.75 miles or so to a junction where we went right. We passed through some trees and saw a few campsites before the trail opened up to a gentle hillside. Around 12,000 feet, we reached another junction and followed the trail left towards Wetterhorn peak. At this point, we still had the trail completely to ourselves. It was so quiet and serene in the remoteness of the San Juans.

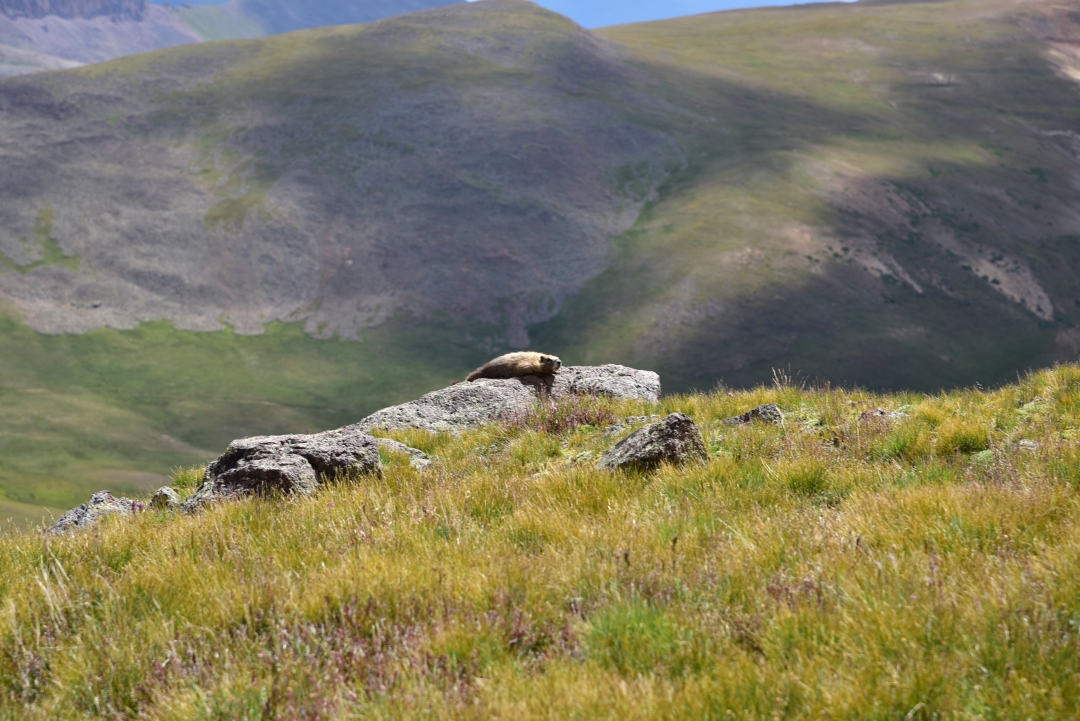
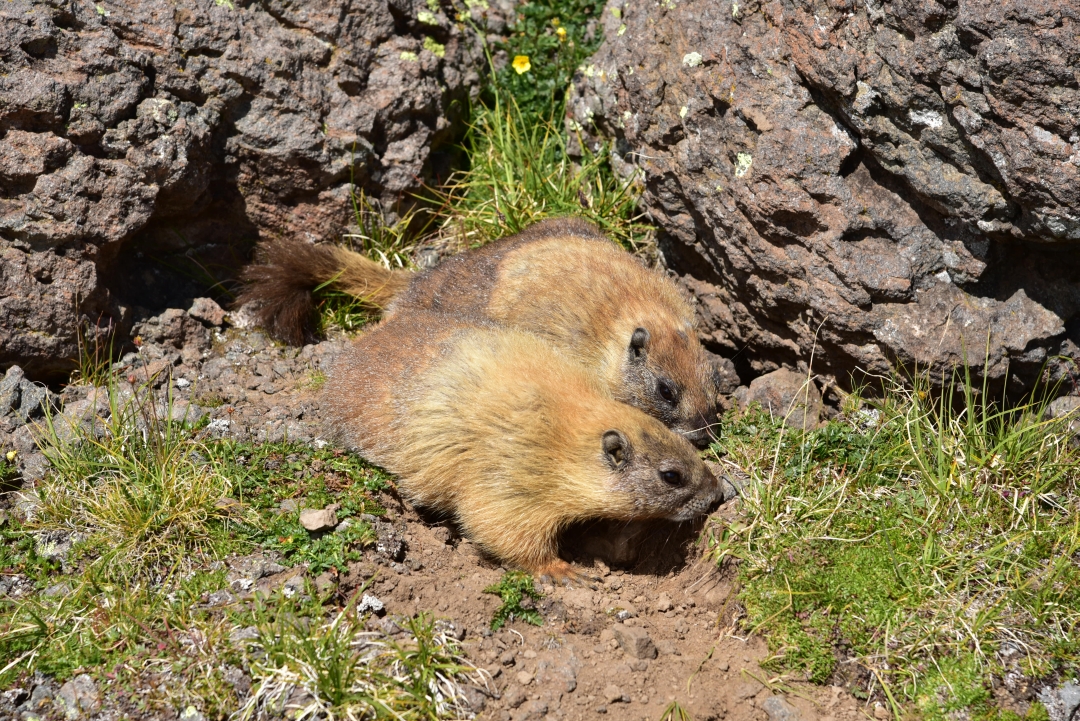
We continued to gain elevation, though it felt really gradual on this portion of the trail. As we reached a boulderfield, the terrain got a bit steeper, and the marmots began to make their presence known. They popped up amid the rocks and flora and stared us down. We also saw a chubby little Pika scurry in our path, its mouth full of a collection of various grasses. It was fun to see so much wildlife on the hike, however we were told by folks in town that these little critters (marmots) enjoy chewing the straps off of day packs and the handles off of hiking poles whenever you let your guard down. In between all the critters, we looked up and were greeted with outstanding views of our objective.

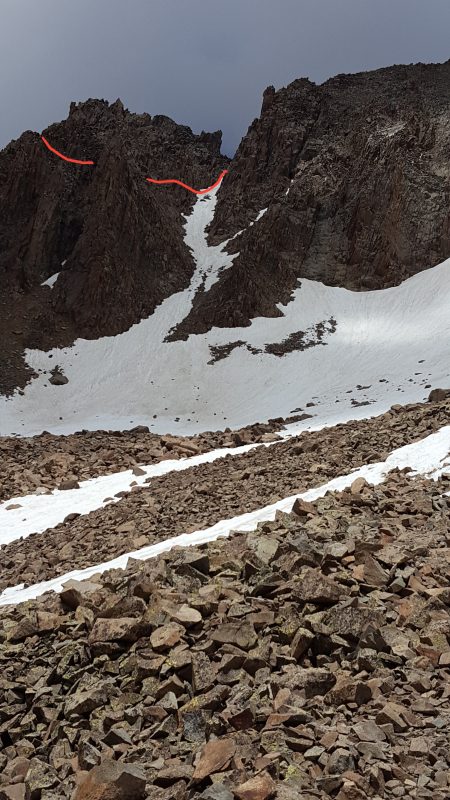
We continued upward through rocky terrain and reached the ridge to the summit and the “yellow” dirt that marks the start of the more difficult terrain. The yellow dirt was a collection of loose dirt and scree and not very enjoyable to ascend (descending it was worse). We quickly worked our way past the dirt to reach the part of the climb we had most been looking forward to: the class three terrain. Here, we were at approximately 13,200 feet and had less than a mile to the summit. We navigated the left side of the ridge on a faint, broken trail through difficult class 2 terrain before reaching our first class three climbing. We reached a “rock rib” which blocks easy passage. We climbed upward and bypassed it via a v notch on the left. It was easy, but fun climbing, and the notch was not difficult to spot, though we studied pictures of the terrain in detail before our attempt. There is also another option for bypassing this feature that we utilized on the way down. Instead of going through the v-notch, you can also climb over some rocks to reach the ridge crest. Both options were fun. Most this portion of the climb can be seen in our go-pro video as we really needed our hands and couldn’t take many photos.
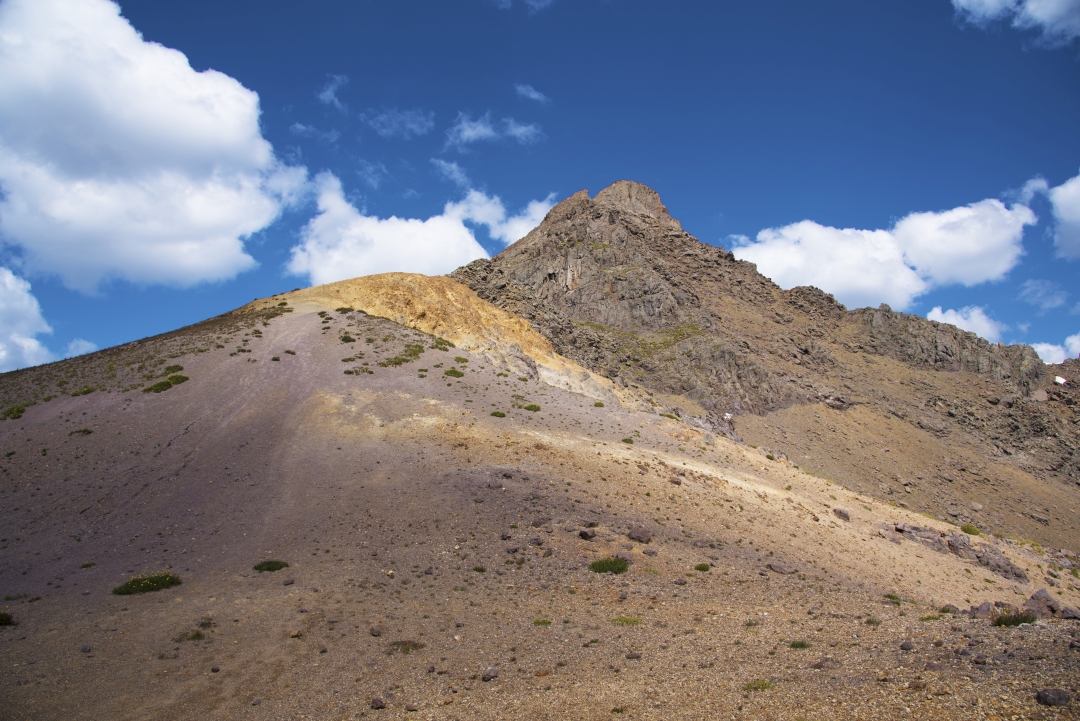

Once on the ridge crest we continued towards the “prow,”. A distinctive feature of this climb, the prow is a towering fin-like rock feature that mimics the prow of a ship. On the ridge crest, we stayed as high as possible and climbed over more class 3 rock to reach the area next to the prow. There was a faint trail skirting the left side of the ridge, but the rock was loose, and the bits of path filled with scree. At 13,800 feet, we walked passed the right side of the prow. Near the prow is a flat area to rest and chill out at if one is so inclined, instead of the continuing onward to the exposed final route to the summit.

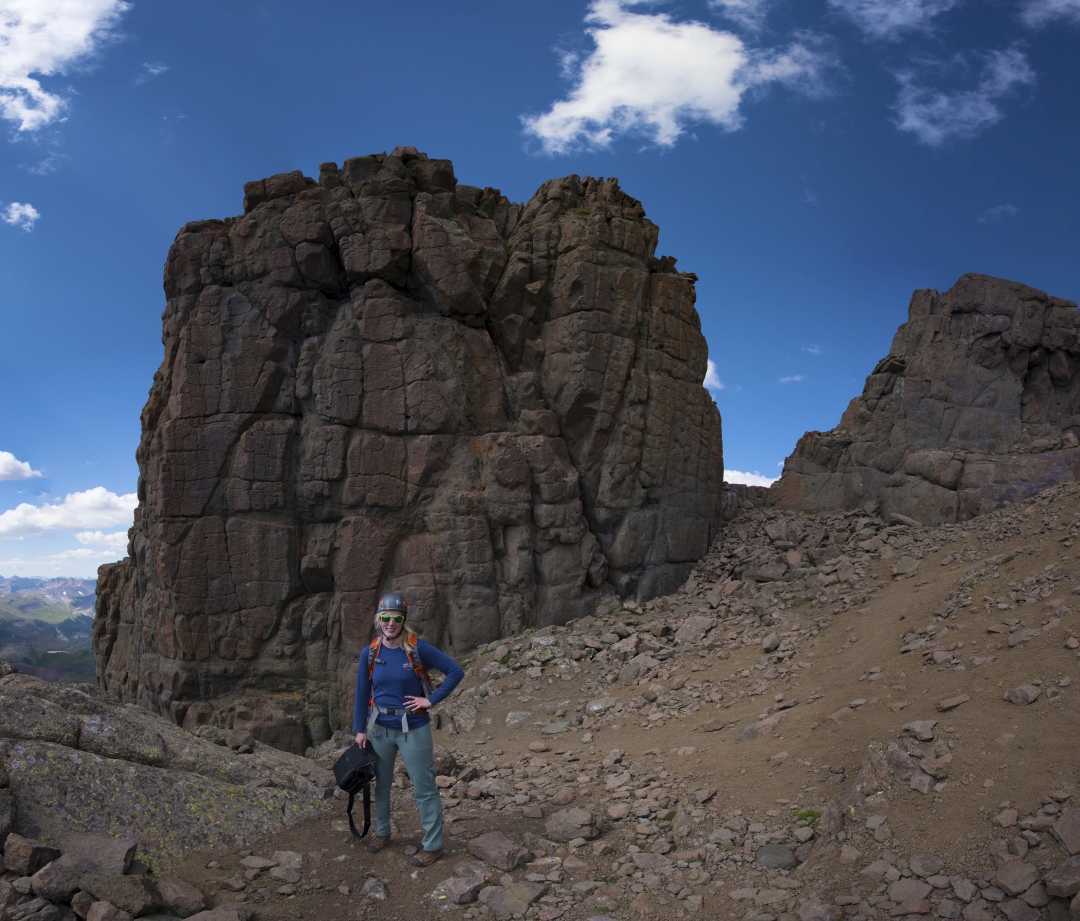
We continued past the prow to two notches leading to an open area below the summit block we can be seen above in the photo on the left. We climbed up and through this obstacle to reach a polished rock ramp slanting downward to a narrow ledge that marks the start of the over 150 foot “staircase” to the summit. The exposure here is quite intense but the rock is stable and climbing relatively easy. Essentially, it is a series of knee to thigh high ledges with plenty of solid handholds. Both of us wore helmets, as rock fall could potentially be a hazard from climbers above. Seen below is the ramp leading to the most exciting part of the climb and the exposure looking back behind it once you have reached the ledge to start the climb.
Our video we made of this hike begins here at “the Prow.” Check it out below!
About halfway up, the crux of the route mimics an amphitheater with several wider ledges in an arc shape facing the vast terrain. Here, we followed a narrow ledge towards the left and then proceeded to climb the final 50 feet up slightly easier terrain. The photos below are from climbing up the staircase. We popped up on the summit and joined two other climbing groups.

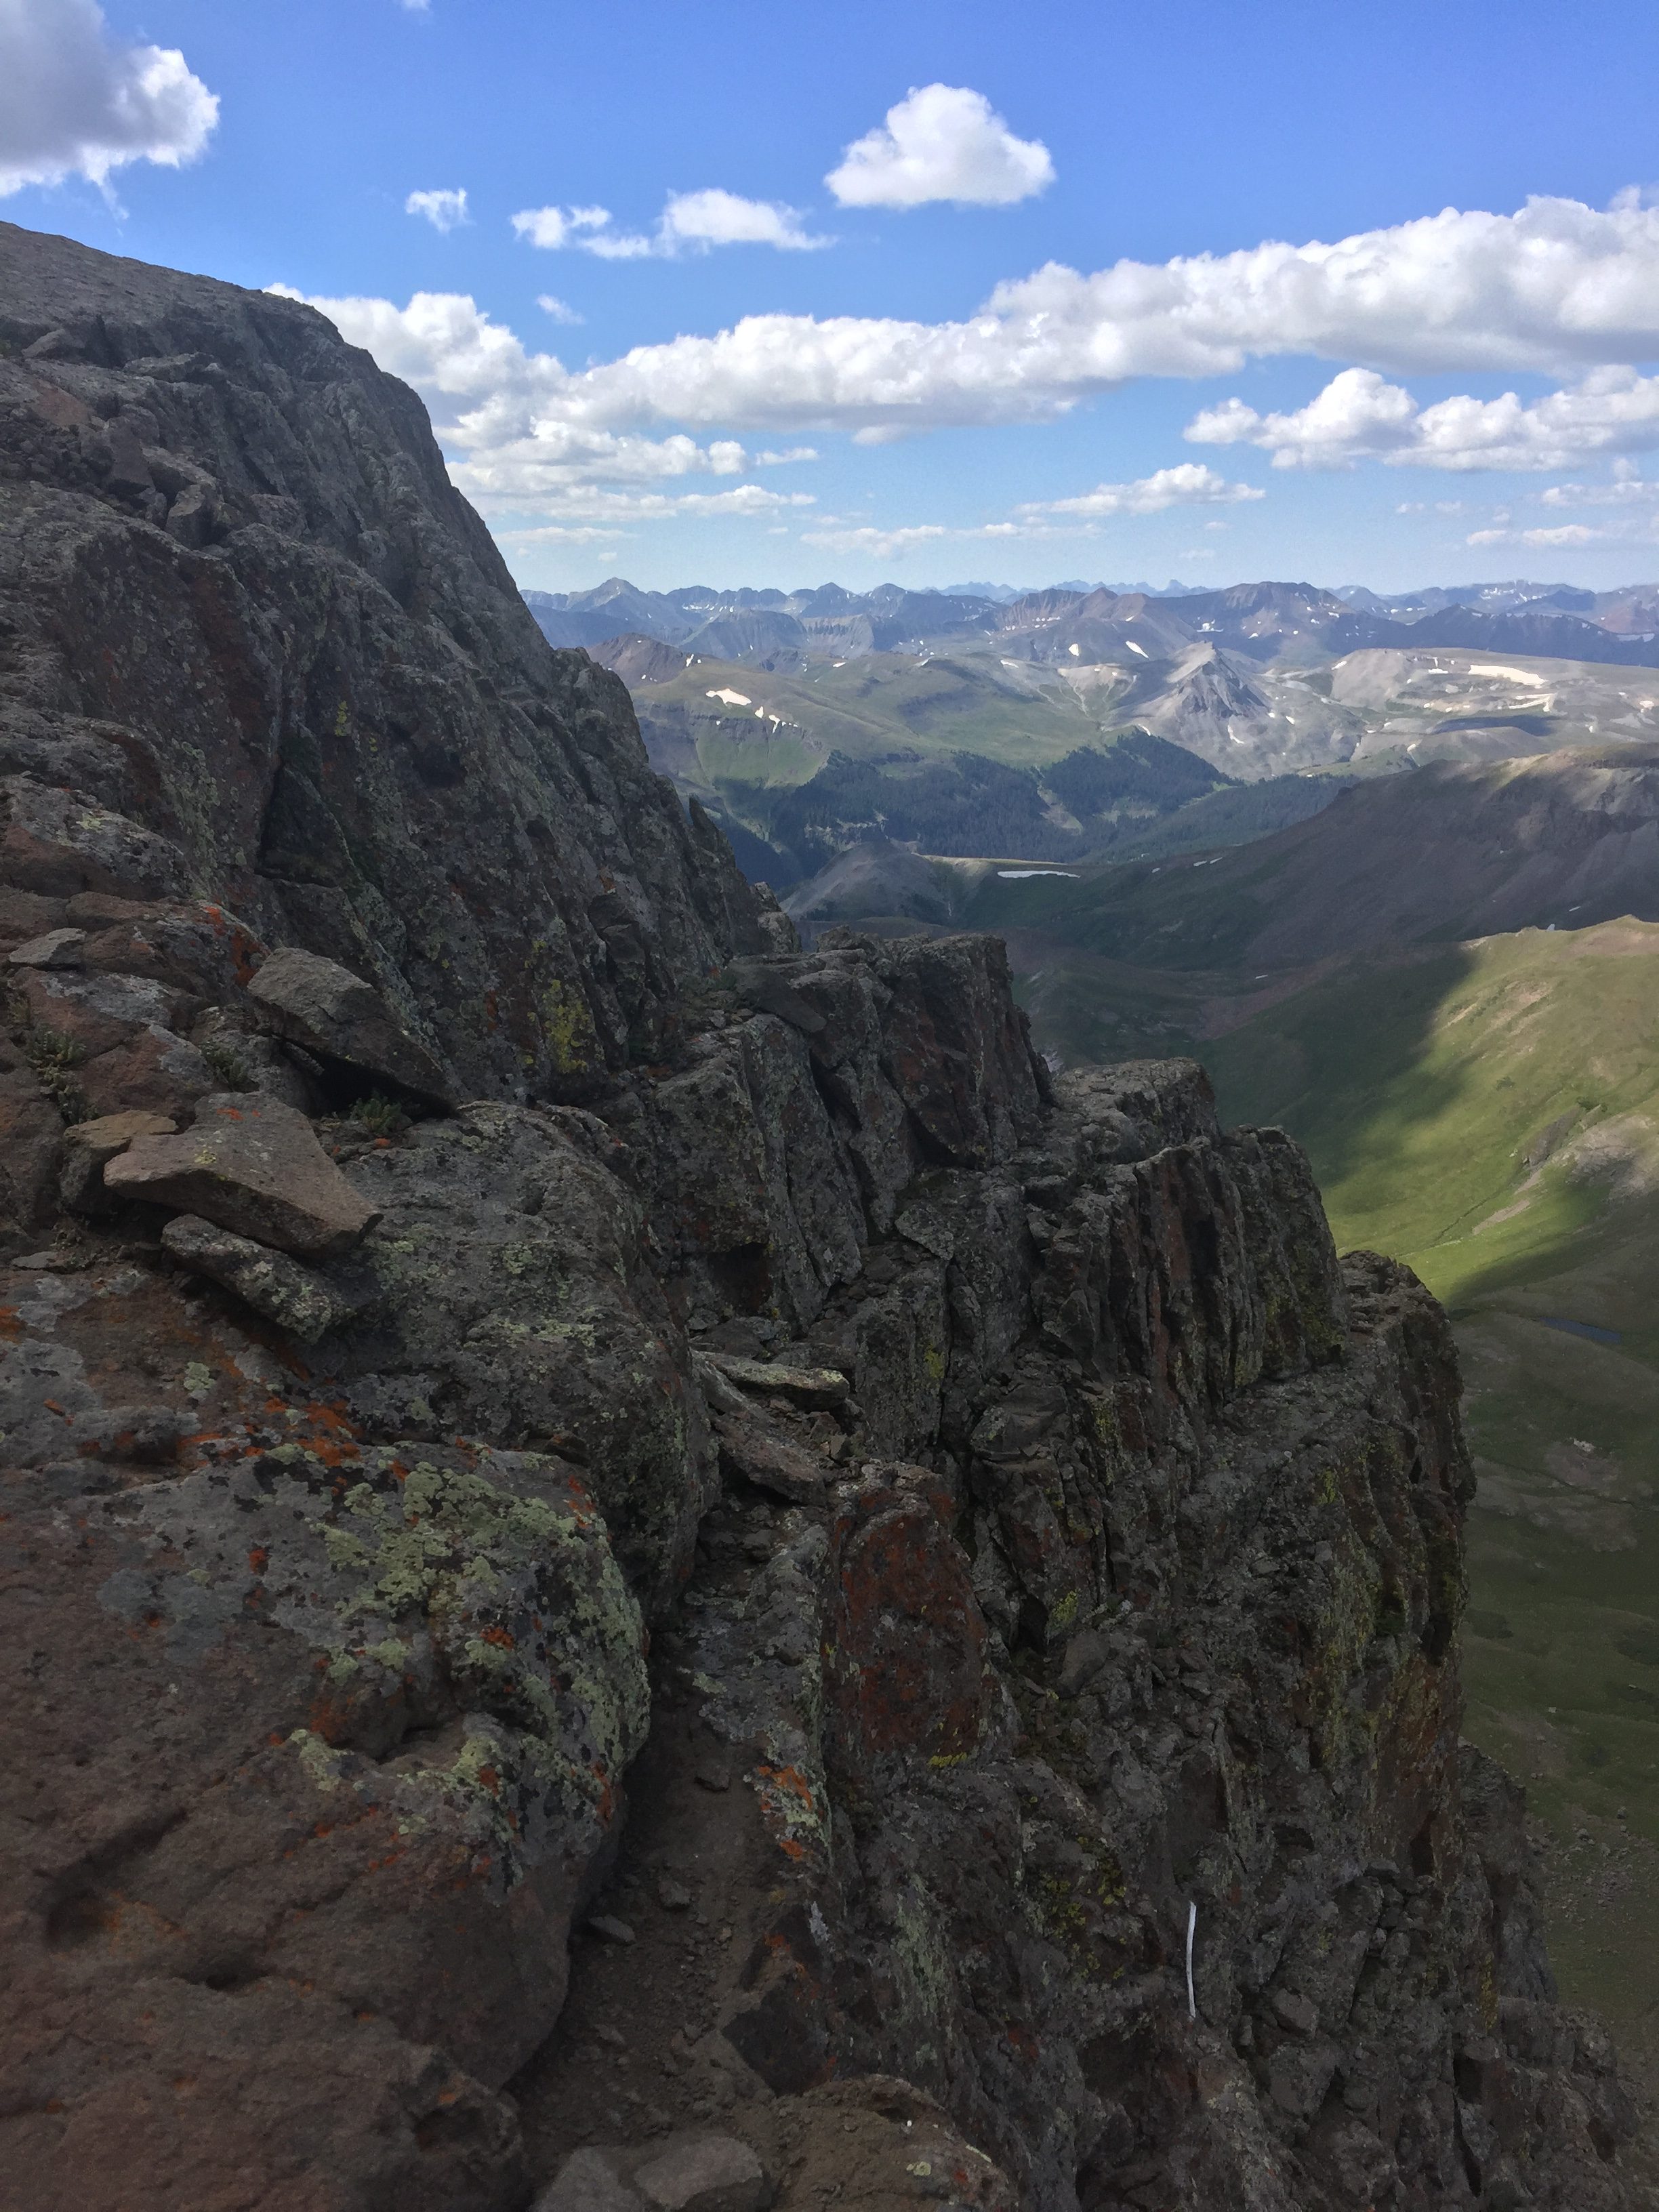
 We spent about 15 minutes enjoying the truly amazing views of the Uncompahgre Wilderness and the rest of the San Juan range. The colors were amazing. Bright green grass, red and yellow rock, and a brilliantly blue sky peppered with fluffy white clouds filled our vision in all directions. Despite enjoying our accomplishment and the wonderful scenery, the nagging thought of the down climb kept plaguing us. We waited for the other groups to safely descend the peak before we started down. The first 50 feet down towards the ledge didn’t require us to face inward to the rock, but after we reached the ledge and area that looked like an amphitheater, we faced inward to safely reach the bottom of the stairs. The downclimb felt harder than climbing up, but we managed just fine and reached the slanted slab in no time. Once we were on less exposed terrain near the prow, we paused for some food and photos that some fellow climbers took for us.
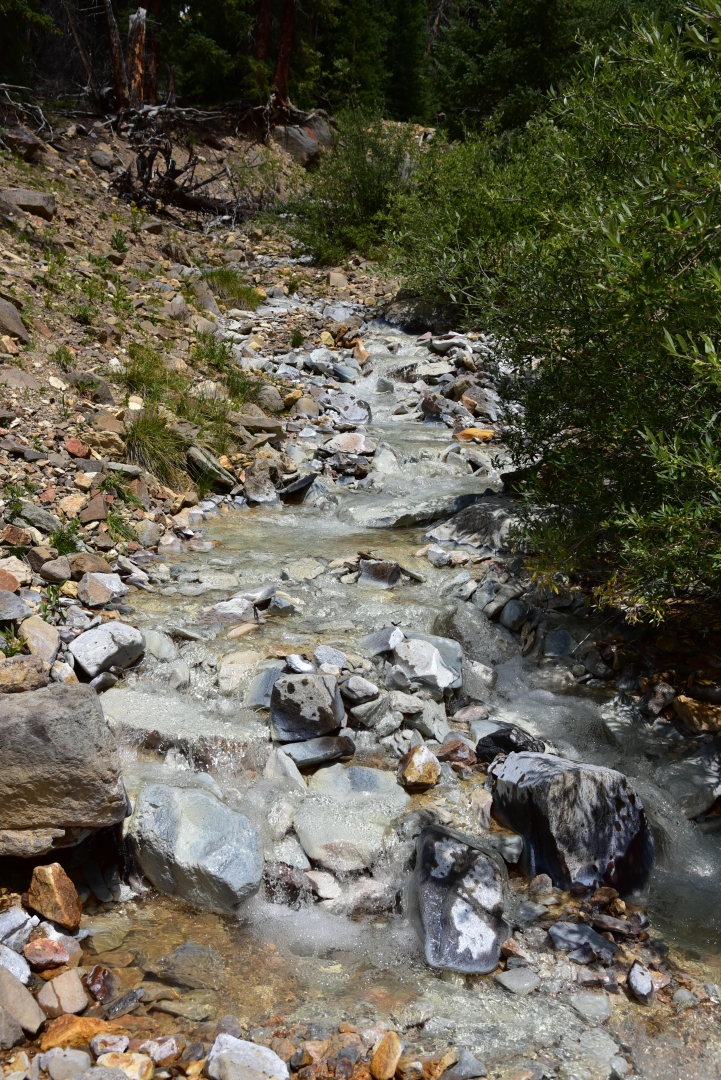
The remaining downclimb was uneventful, but nonetheless enjoyable minus the “yellow” rock section. Once off the ridge, we took our time getting back to the truck and took many photographs and enjoyed our time in the backcountry. On our way back, features that were hidden in the darker morning appeared to us more clearly. Several of the creeks we hiked by appeared a unique whitish blue color that can been seen below. We are still in the midst of researching why the water and rocks are so uniquely hued and will update at a later time.


We reached our truck, ready for some food and relaxation. Despite the relatively short hike and climb (approximately 7 miles RT, and 3,300 feet of elevation gain), tiredness set in. The peak was, after all, a bit mentally taxing with all the exposure. It took us about 45 minutes to get back to Lake City where we stopped at Southern Vittles for some amazing food. (Just about everyone in Lake City is from Texas) so they know good food.
Wetterhorn peak was an extremely fun class 3 climb with spectacular views. It provided much needed adventure and a step up from an everyday hike. Nonetheless, those attempting it should be comfortable with class 3 climbing and enjoy great exposure. There is a also a bit of route finding necessary on this peak to keep the terrain on the easy side.
Now, back to the “cannibal” cabins thing. Way back in 1874, good ole Alfred Packer (an American prospector) attempted to travel through the southwestern colorado mountains in an extremely harsh winter. Essentially, he took 5 men with him and only he returned to Lake City. He at first claimed that the group left him, but inconsistencies in his story emerged and eventually he admitted to living off the flesh of his companions to survive. Apparently the remains of the men in his group were found just outside of Lake City, and the town can’t seem to shake this event. There is a restaurant called Cannibal Grill and Packer Saloon and of course our cabins. Despite the creepy name, the restaurant and saloon are really fun with great food and an amazing patio with live music. The cabins are quaint and clean.
Stay tuned for our a trip report from our second peak of the trip, Handies Peak.
Fletcher Mountain (13,951 ft)
The allure of standing atop 14,000-foot peaks and sense of accomplishment at reaching each one in Colorado remains a goal for us though our perspectives have shifted over the last several years. Popular trails have become even more popular, and nearly impossible for seeking solitude or a trailhead parking spot for that matter. It’s been interesting to see the world trade the routine of daily commutes, happy hours and Netflix in favor of more adventures in the great outdoors. Though it is clearly a positive direction for our country to collectively share love and respect for these diverse ecosystems, overuse is inevitable and even heightened when leave no trace isn’t practiced. Reservation systems have been put in place and fees increased for many national parks and even some 14er parking (looking at you Quandary) in the hopes of managing more of the crowds though this is not without many issues including the loss of freedom and spontaneity but more importantly the development of access and equity concerns.
One way that we can help mitigate some of the overuse of popular areas is expand our areas of interest and explore all the nooks and crannies around us. We have started to transition our weekend adventures to trail running in less popular trails or exploring the hundreds of other majestic peaks under 14,000 feet that this state has to offer. In fact, there are 583 ranked peaks that fall between 13,000 and 13,999 feet in Colorado making seemingly endless options for varying degrees of adventure and solitude.
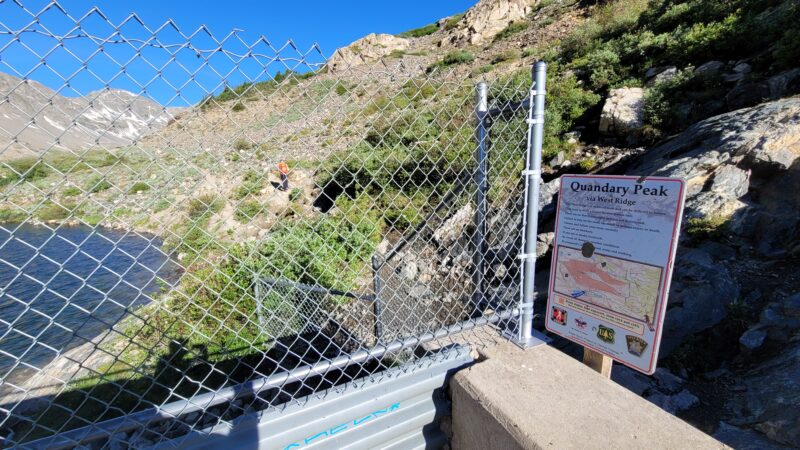
On July 9th , we decided to finally make our way up a nearby centennially peak in the Tenmile range, Fletcher Mountain, which sits majestically at 13,951 feet above sea level — a mere 49 feet from 14er status but therefore not on as many checklists. We decided to climb the class 2 southeast ridge of the peak which begins at the Blue lakes TH right next to the dam (seen above). Parking access at the Blue lakes TH is currently fee and reservation free allowing us to base our decision to climb on the predicted weather and our energy levels that day rather than whether we committed to something on the internet weeks ago.
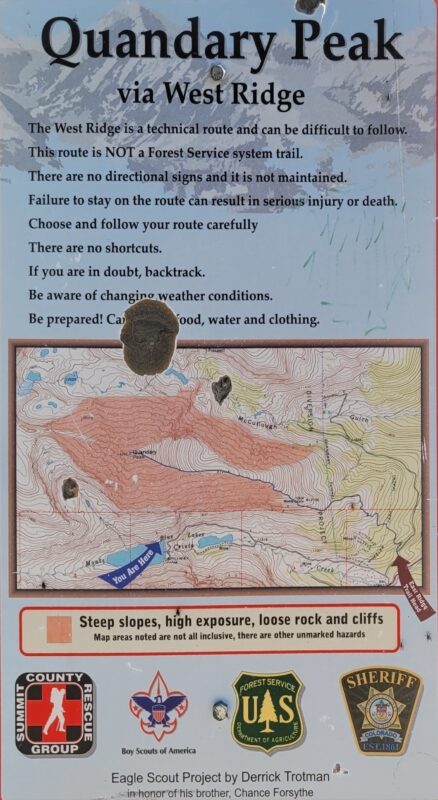
Trip reports we read promised us a short day and easy climb, but if there is one lesson that we have learned over the years is that everything is relative, and conditions can be quite different from month to month or even summer to summer. To start, our day began at the lower parking lot, because to our surprise, the gate to the upper large parking lot next to the dam was still closed despite summer conditions in and around the lakes. The extra hike up the road to the dam was only 0.6 miles (one-way) and around 350 feet of elevation gain, but already extended the day slightly longer than we had planned. Once we reached the dam, we followed a rocky path up and around the right side of the dam, passing by the warning sign for Quandary Peak’s West Ridge Route. This is a Class 3 exposed route up the famous 14er. Despite the extra challenges of this route, we suspect it might be gaining popularity as there is no reservation required and free parking.
We quickly followed the trail and traversed rapidly up the west slope and found ourselves high above the lake within 10-15 minutes of steep hiking. Be cognizant and follow the upper trail rather than the lower social trail that follow the lakeside. There is a trail restoration sign by the trail that incorrectly leads by the lake. We went the wrong way on a hike here several years ago and ended up bushwhacking up a steep scree slope to regain the appropriate trail. One thing to note about this hike, is that it is all truly an alpine experience. The trail begins above tree line at around 11,700 feet and quickly gains elevation making most of your day spent very high in one sense of the word.
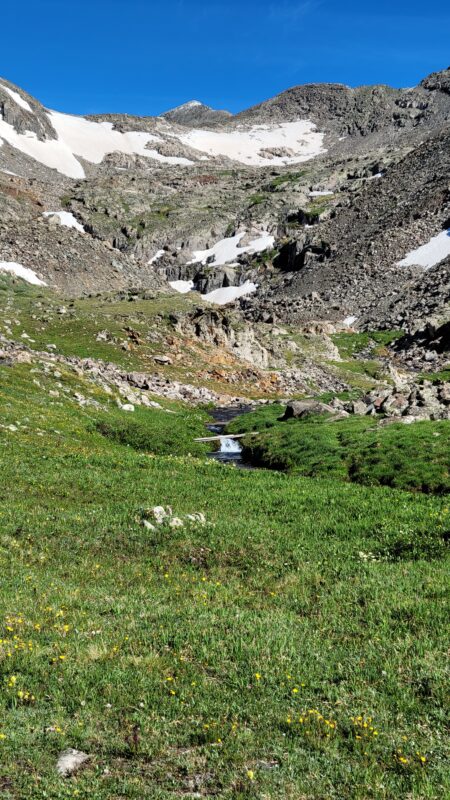

Once above 12,000 feet, the trail begins to angle northwest leading into a verdant basin, also known as
the Monte Cristo gulch. One thing we noticed about this hike was the abundance of water. Creeks
flowed everywhere, with the trail seemingly weaving in and out of rushing snowmelt. We carefully rock-
hopped over streams and deep mountain pools. There was some remaining mud, but nothing too
unmanageable. As we gained elevation in the basin, we also passed by some old mining ruins.
The skies remained a brilliant blue with very few clouds in sight as morning progressed along. We
continued hiking a wonderful trail through the basin as views began to open of the gully in front of us
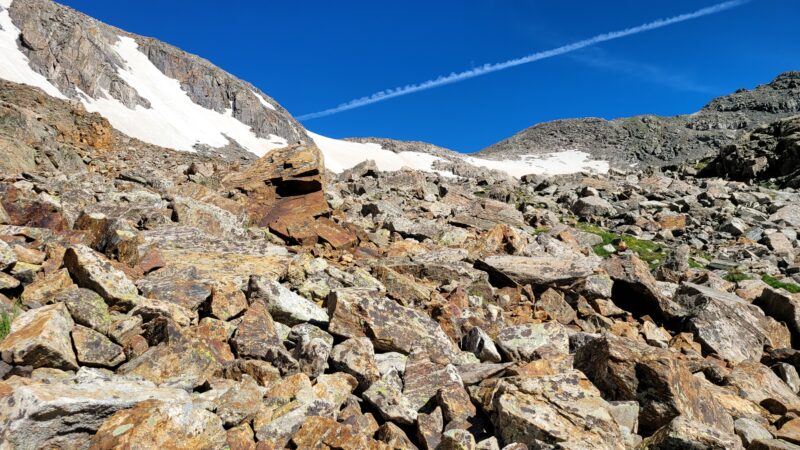
with Fletcher Mountain peeking out above all. Once we reached the gully, the trail sort of slowly
dissipated, and we had to spend a few minutes evaluating our options for ascending the steep rock.
There were still several snow fields in the gully that were too steep and slick to ascend without the
appropriate gear. We initially climbed steeply up a rust-colored creek in the center of the gully before
veering left and bypassing a snowfield. This allowed for some fun scrambling among the rocks as we
ascended higher. Carefully test all holds or talus before stepping as much of this rock was quite loose.
We did note several cairns as we made our way up the gully, but there were plenty of different options
for gaining the ridge allowing for variation in the effort and difficulty of this climb.
After much rock hopping, we veered west and exited the gully/basin around 13,100 feet which we noted was marked by a large wooden stick that proved quite useful for guiding us during the descent. Fletcher mountain was now in full view before us and to our dismay, appeared to be a large, very steep pile of rubble. We headed the obvious direction towards the southeast ridge of the peak gaining minimal elevation (roughly 100 feet) as we navigated uneven, rocky terrain on a large plateau. Unfortunately, we didn’t take the most straightforward path up the peak following the ridge, but instead tried to head straight up the south face. This didn’t save time and we soon found ourselves in a talus nightmare, climbing and hopping very large boulders, many that were not very stable. Eventually, we reconnected
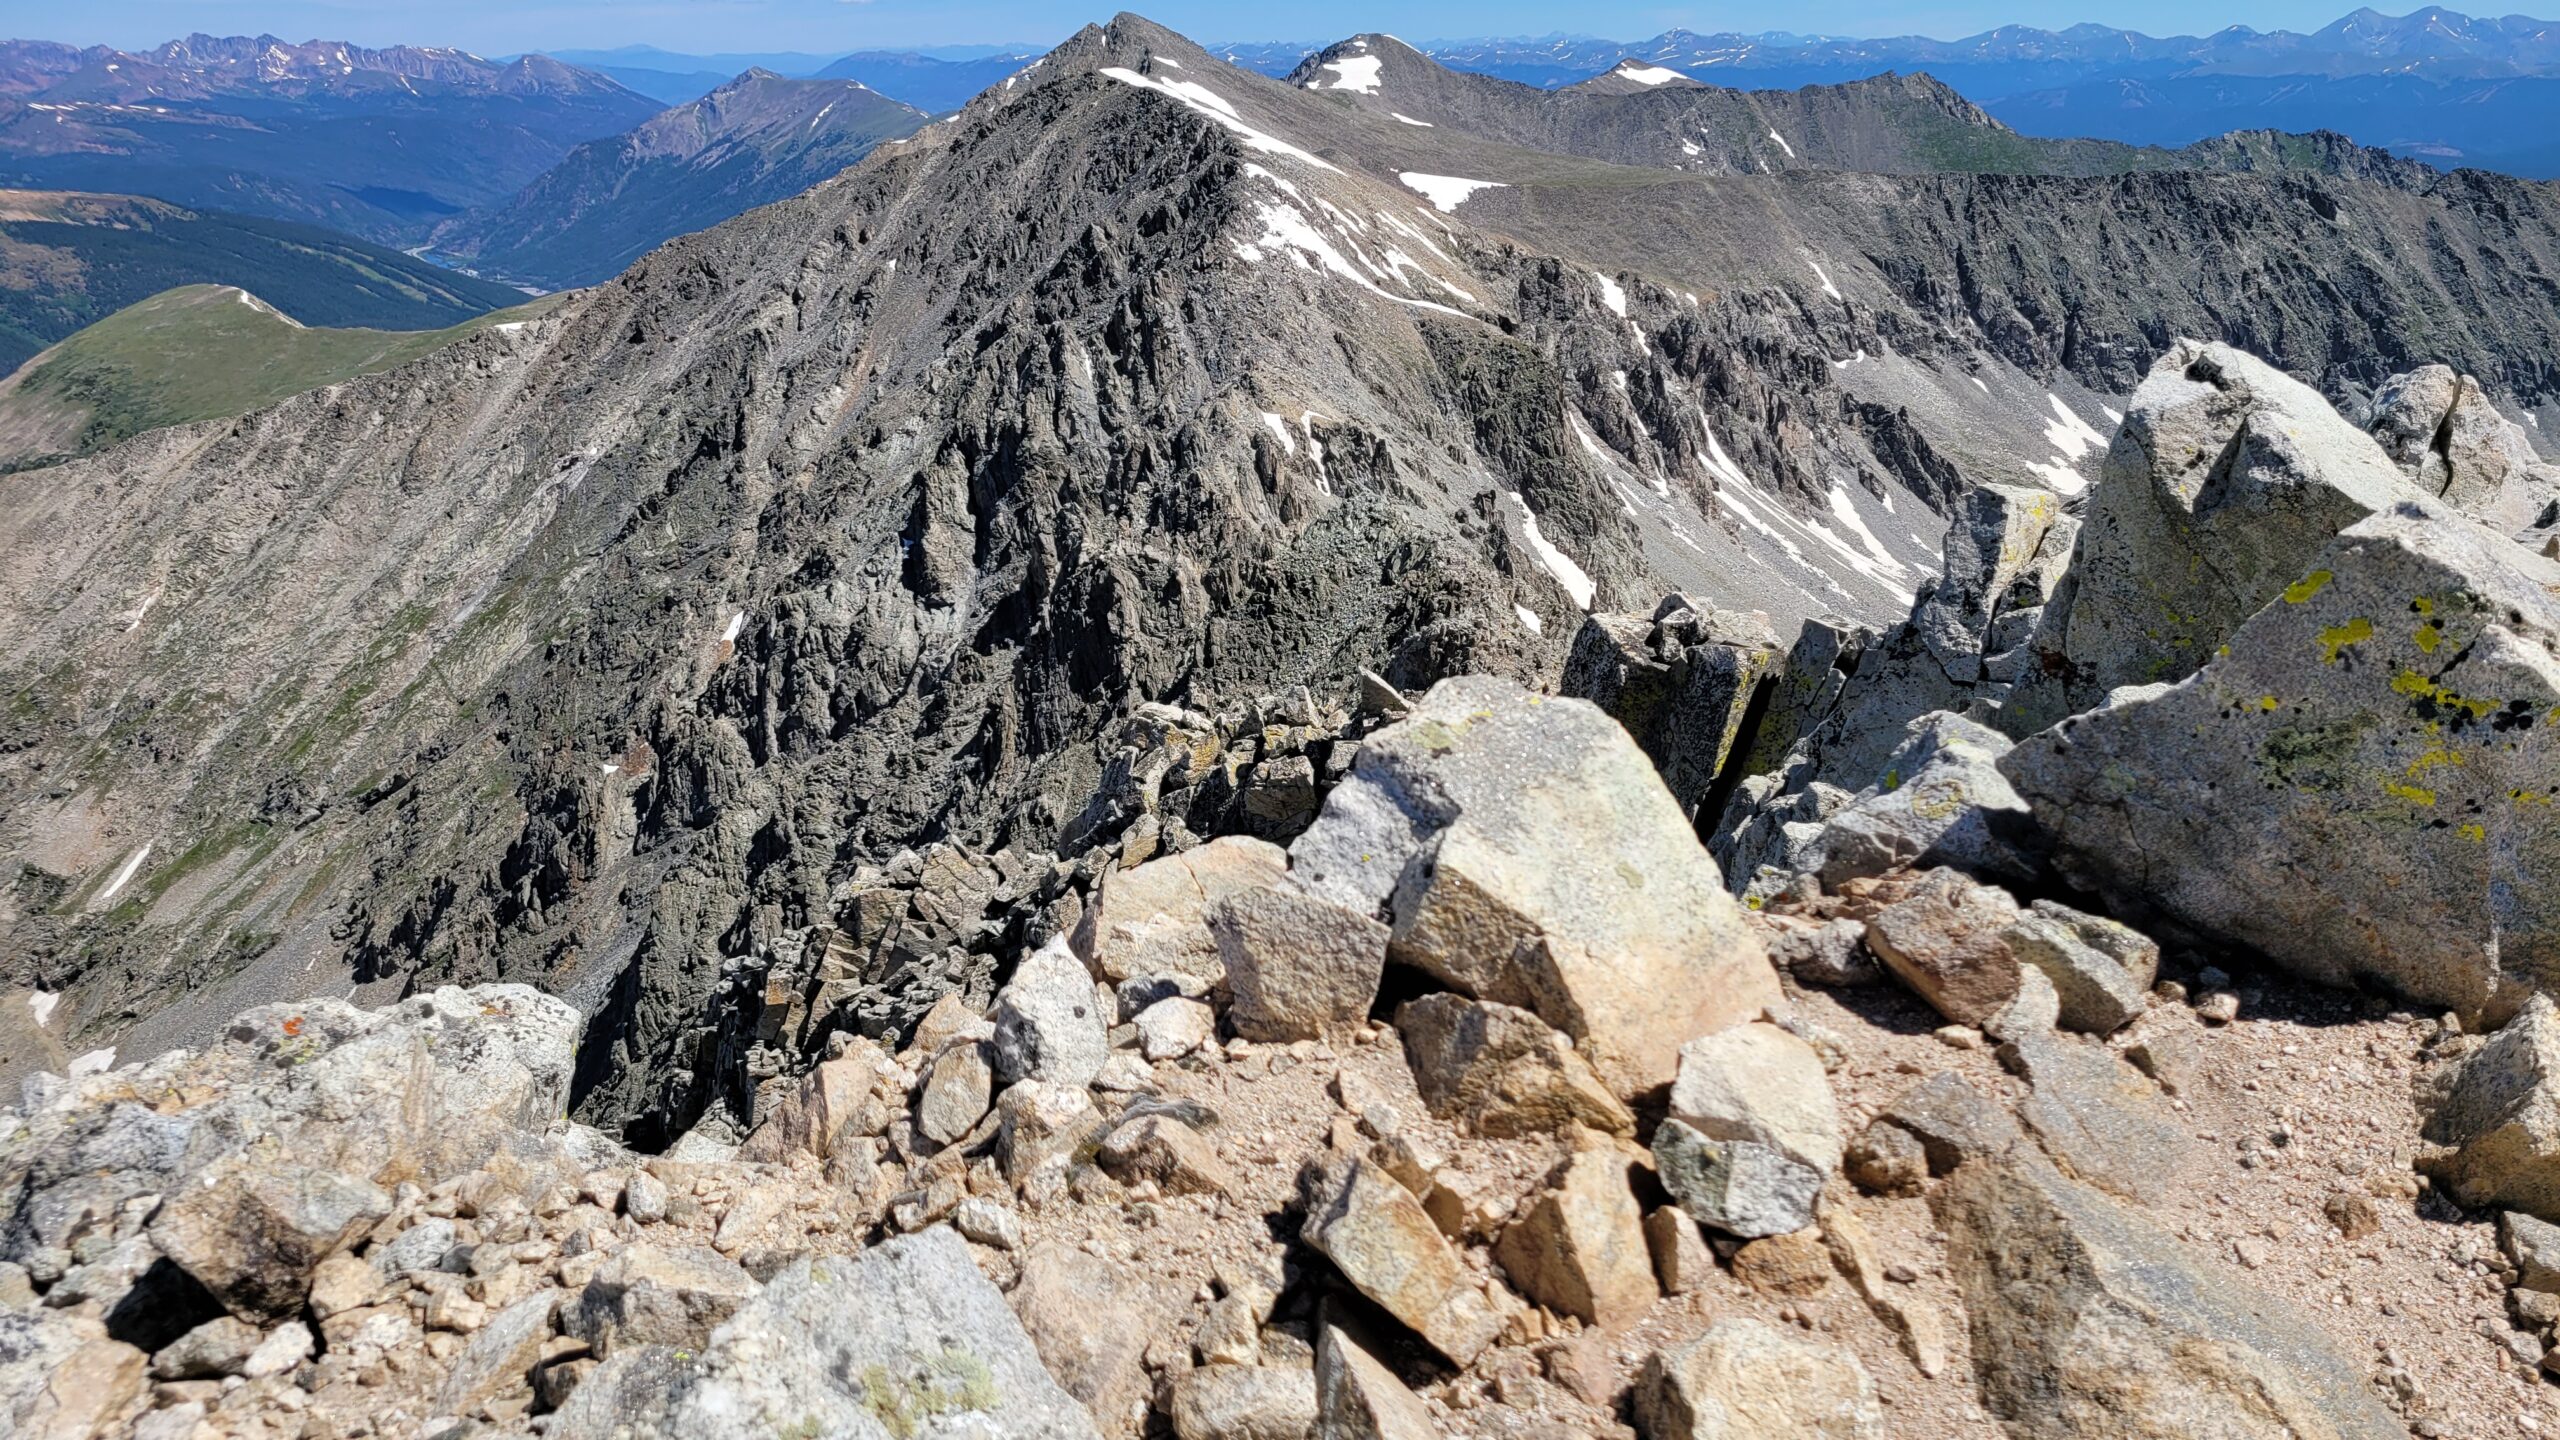
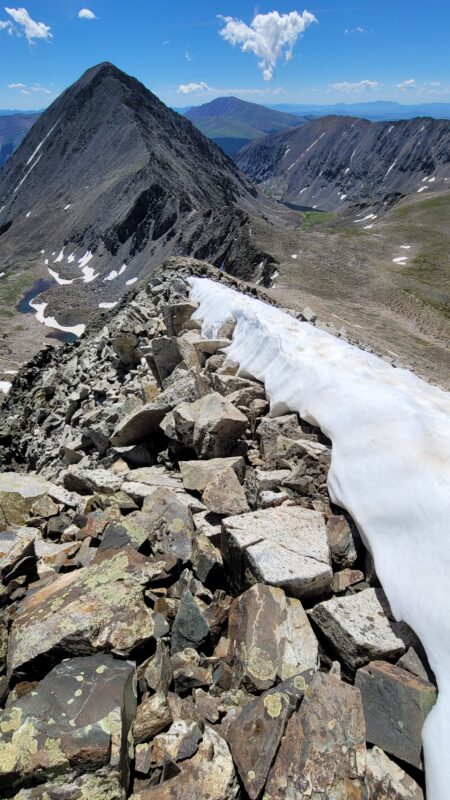
with the ridge only to discover it was covered in a slab of snow just shy of the summit. Here, we downclimbed a little to avoid the snow, adding a little more work to our summit adventure. Despite our heavier than needed workload, we made the summit and enjoyed spectacular views of the Tenmile range including Quandary Peak, Atlantic Peak, and the impressive east ridge over to Pacific Peak that we climbed last year. The basins and gulches were still holding some snow alongside their fresh wildflower blooms and alpine grasses making for an impressive explosion of colors.
There was no one that we shared the summit with, but we did enjoy looking over at all the tiny human
dots on the top of Quandary towards the east. After a few minutes of relaxation and snacking, we
decided to head back down. This time, we followed the ridge proper as closely as possible for our
descent. The snow just below the summit was avoided by staying slightly left of the ridge and very
carefully negotiating the rock as there were some serious drop offs below us. Once past the snow, we
followed a rough path through the large talus. While it was still rough class 2, this was a much easier
route option than we encountered on our ascent. Solitude was finally gone as we made our way down,
and we encountered a solo hiker and then a group of 3 making their way up the ridge. For perspective,
in a game of boredom on a descent of gray’s peak several years ago, we tallied 700 hikers seeking an
“adventure” and wildflowers on a pleasant July weekend. There was scarcely a moment in our descent
that we didn’t have to move the right of the trail. Though that was frightening example of overuse and
the strain on our natural resources, the number of hikers ascending Fletcher or Quandary and the few
playing in the gulch seemed to strike a good balance.
The sun was now high in the sky without a cloud in sight and beginning to bake us a bit in its warmth. Sunscreen is inevitably never applied as evenly or abundantly as needed and that was quickly become apparent as we hiked back through the basin. The cool, blue alpine streams beckoned us to dip our hats in the icy coldness for some relief. Though, thoughtfully, this sounds dramatic now as temperatures were roughly 70 degrees at the time.
As we reached the dam, we began our walk back down the road. It was now lunch time, and many families were out and about walking up the road to view the waterfall just below the dam. Mountain goats continue to find us this summer, and today was no exception. Down the road, we encountered a group of 10-12 goats hogging much of the road including a precious baby. We were not oblivious to the protective mother and kept our admiration at a distance.
As we reached the truck, we noticed a few late comers vying for our parking spot. Popularity is gaining at this TH too though an earlier start affords a spot and quiet for a while. The diet coke we had been saving was too warm to enjoy and we settled on the remaining bladder water that had been baking in the pack throughout our hike with its signature plastic flavor. Once in town, we made our way to Breckenridge Brewery for lunch. Oddly enough, on a Saturday at lunch, we pulled into a rock star parking lot right in front and were immediately seated when we walked in. Guess everyone was still out on the trails. How the times are changing.
Mount Parnassus (13,574′) and Bard Peak (13,641′) from Herman Gulch Trailhead
Introduction
Numerous trip reports exist on climbing the 13ers in this range; however, there appears to be a need for a more detailed description of this particular route of climbing Parnassus from Herman Gulch Trailhead via Watrous Gulch Trail to Woods Mountain Ridge trail to a bushwhack up to Parnassus, hike the ridge over to Bard, bushwhack south from Bard to connect with Bard Creek Trail which takes us back to Watrous Gulch trail and then back to Herman Gulch Trailhead. Most of this is pretty obvious, except the descent from Bard. So, we’ll go quickly through most of this, but focus on that aspect of the hike.
Part 1
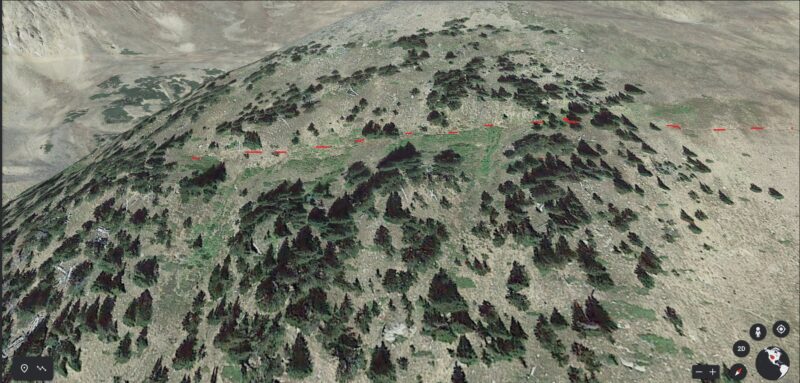
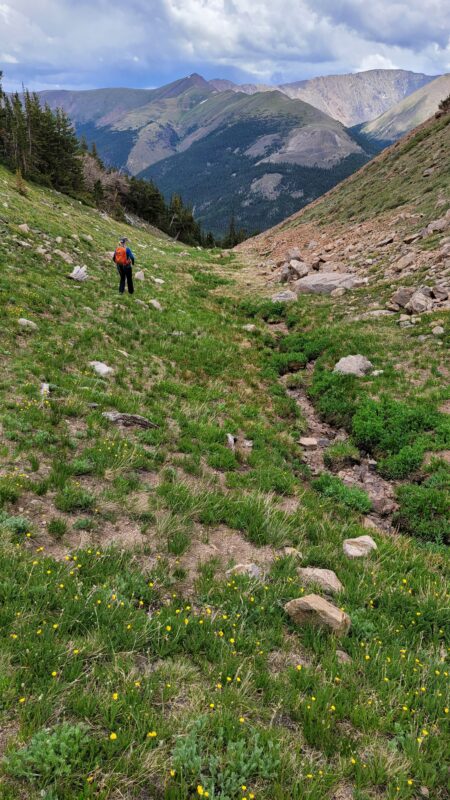
First things first. Herman Gulch Trailhead is close-ish to Denver, and thus, can be very busy. However, it is a nice trailhead with Port-o-Potties and nice parking just off I-70. From the trailhead you are on the CDT: Herman Gulch Trail very briefly before turning right onto Watrous Gulch Trail; there are signs here, the trail is large and well maintained, and it is obvious. You continue on Watrous for about 1.25 miles before reaching the Woods Mountain Ridge trail and veering sharply uphill to the right — towards an obvious saddle. It is a beautiful hike on a very well maintained trail and it has a little creek crossing with gorgeous views of the Front Range.
As you climb up the Woods Mountain Ridge trail you get some very nice views of Grays and Torreys, and we could even see the trail leading up to Grays’ summit. It is a splendid hike and there was still a nice trail that was never smaller than single track — it was pretty steep.

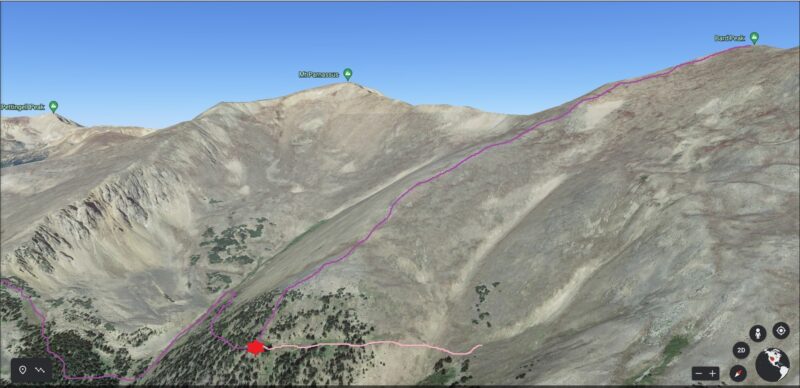
Saddle to Parnassus
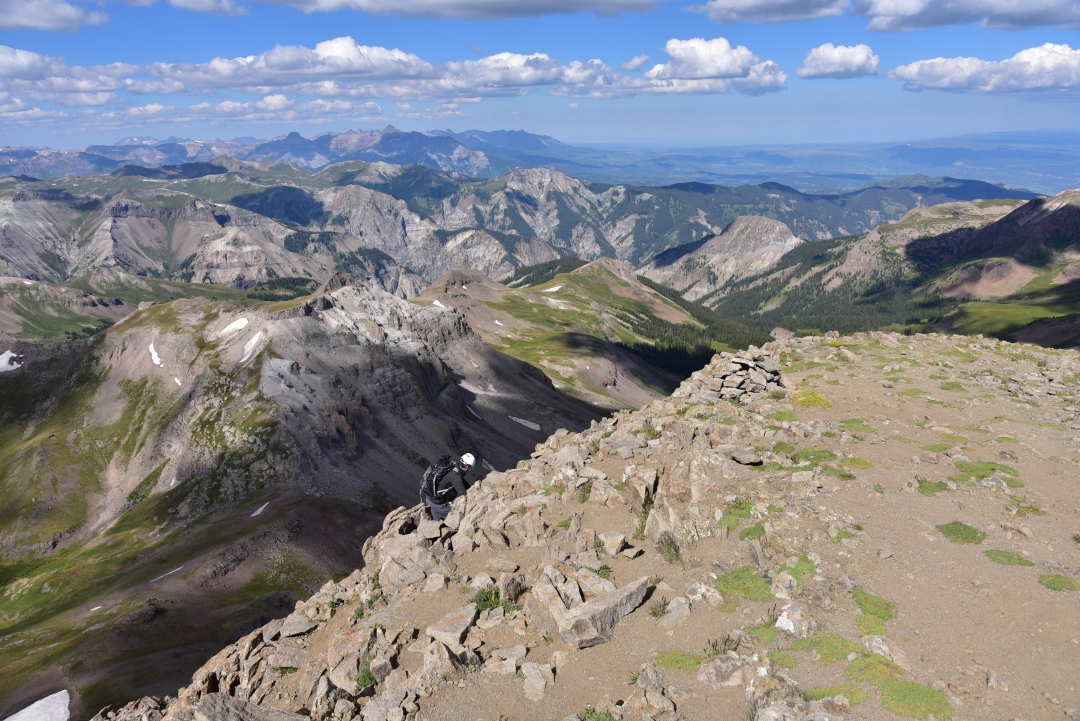
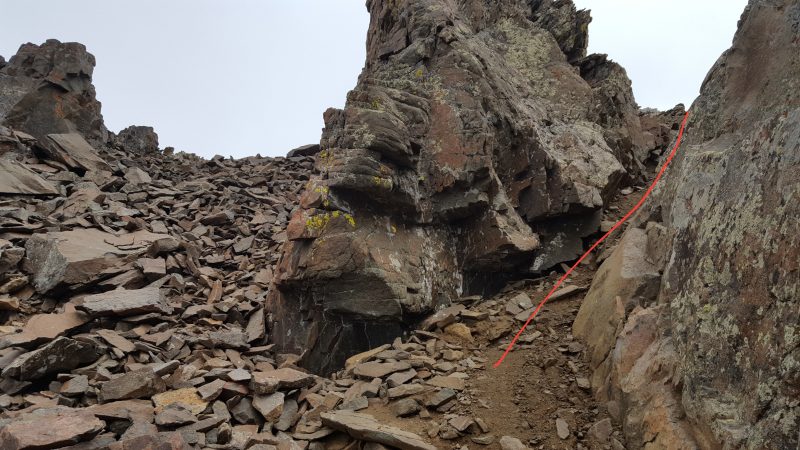
Anyways, once you reach the saddle, if you look to your left (climbers left as you reach the saddle) you will see a trail leading up to Woods Mountain (a 12er) and if you look to your right, you will see a large climb with no clear trail (see second picture below). You want to turn right and climb up to Parnassus.
Once you get up this beast, you are pretty much there. It isn’t really a false summit, per se. From here, the next route is more or less obvious (depending on conditions). You do have two options, though, on how you want to tackle Bard. You can maintain the ridge proper (which is what most people do), or you could stay a little lower and traverse around and then come up a saddle on the opposite side of Bard. If you take the second option, which isn’t as steep and is probably easier, then you do add some distance since you have to turn left once you reach the saddle and then gain the summit of Bard. Either way, there isn’t anything special to know, other than that the ridge can hold snow which can make this treacherous. There are some trails on the ridge, but they fade and you really can’t follow one trail across the whole ridge — so just pick a line and stick to it.
Parnassus to Bard
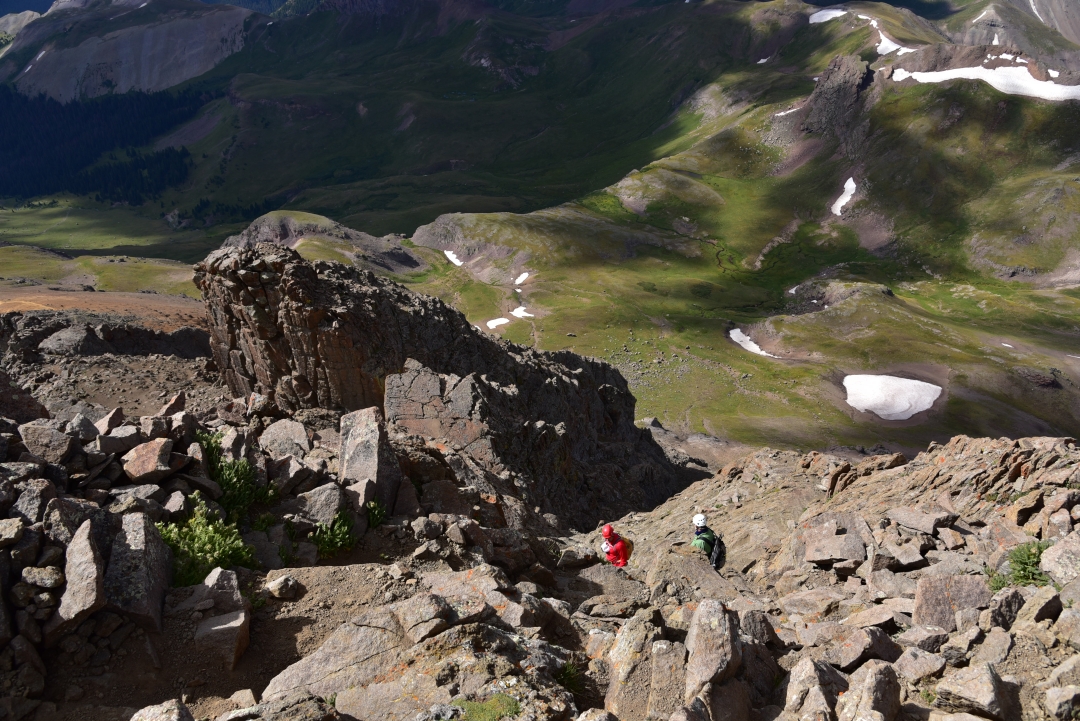
The ridge hike, as we mentioned above, isn’t that bad. And you’ll be at Bard in no time. Below are a couple shots of the hike.
You can see that there is a trail on parts of the ridge, and on other parts there is nothing. You can also see that even in July during a hot summer, there is some snow.
Choices Choices Choices…
Once you are on Bard, you have a few choices to make. Are you going to head north to Robeson and Engelmann or are you going to head back? If you are going to head back, then you have to decide if you are going to retrace your steps or if you are going to head south and try and connect with the Bard Creek Trail. We weren’t trying to nab any other 13ers, and we had seen other trip reports where the authors had climbed down Bard and connected with the Bard Creek Trail, which we thought looked nice. However, it wasn’t clear where to descend and what to shoot for, and this is where our trip report will focus some attention on our idea of how to do this. (I want to state, though, that the recommendation below is only if the conditions are similar to what we were hiking in — that is, relatively snow free.)
Bard Descent to Bard Creek Trail
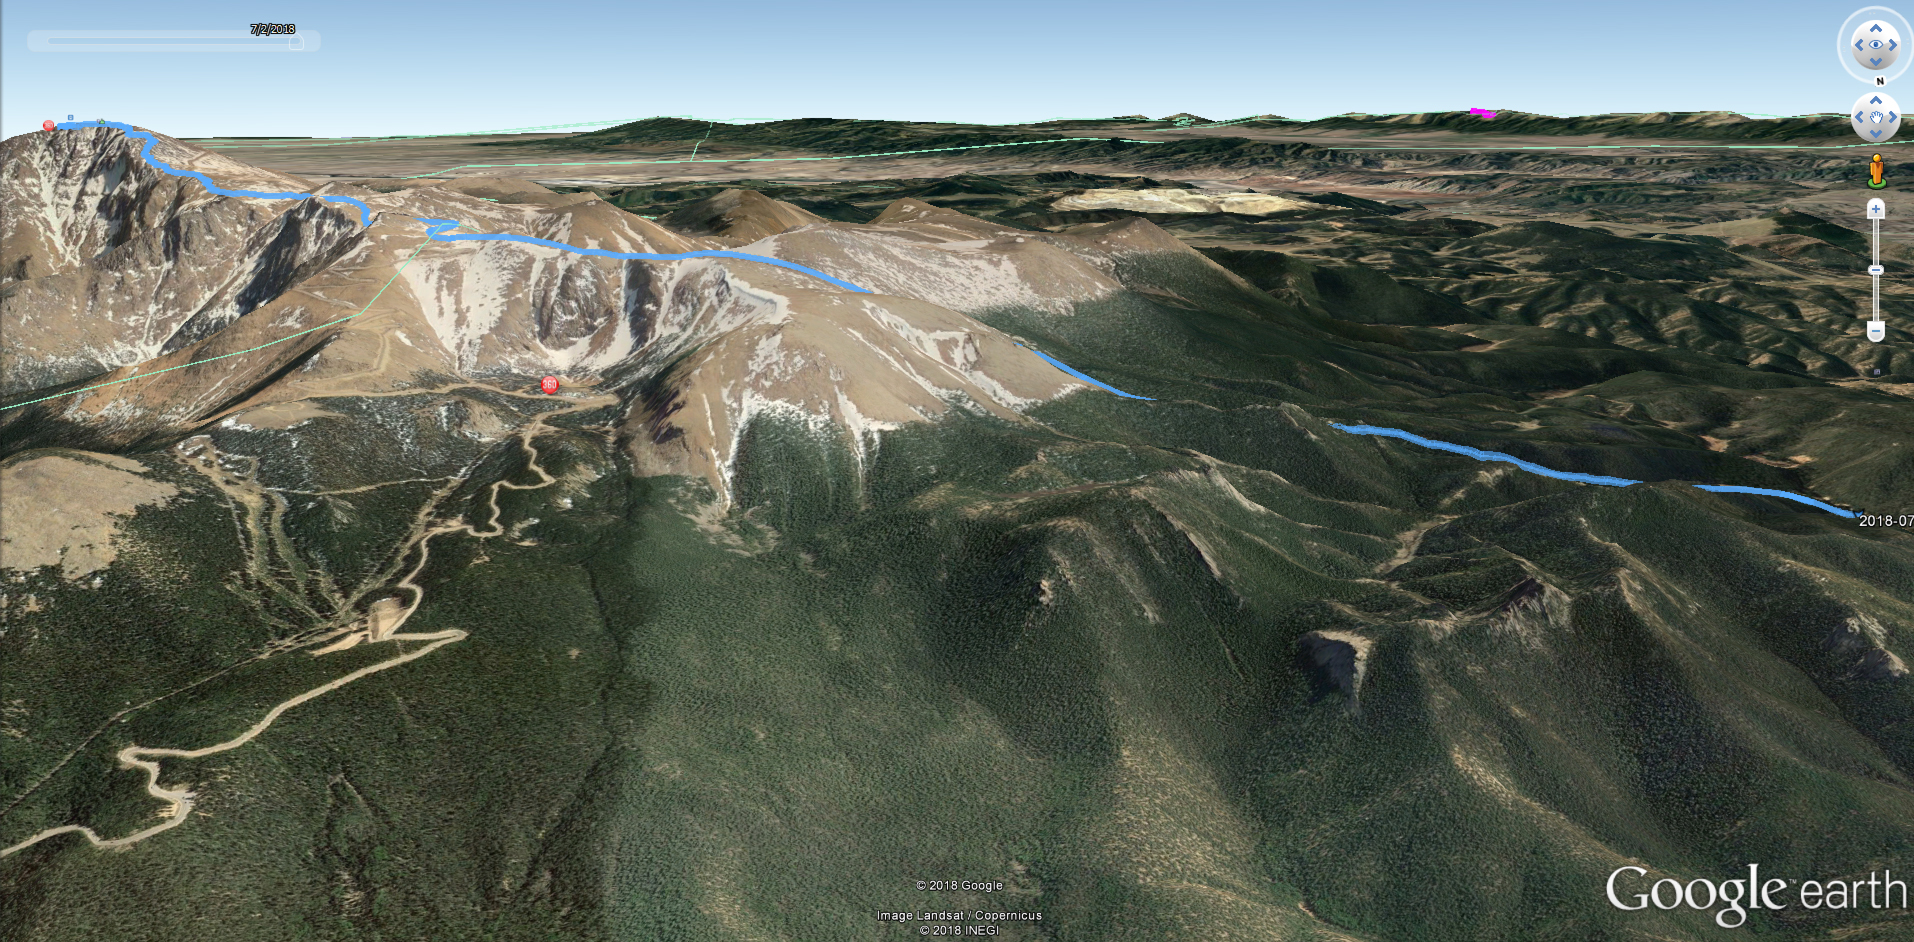
First, looking south from Bard you are going to see a large ridge that connects to Parnassus to your right, a smaller ridge to the left of that with a gully/cirque between them; directly below, you will see another gully/cirque and another ridge to your left. Our recommendation is to head to that smaller ridge to your right — you can even take the ridge down from Bard a bit to meet up with it. Going straight down from Bard is not pleasant. It is steep, loose and uneven — and it is about 1,400 ft. of elevation loss before you reach the Bard Creek Trail. Below are some shots from Google Earth and from our hike that show what I’m talking about.
Bard Creek Trail does go up and over two ridges if you choose to go this way. So if you retrace your steps, you are going to regain Parnassus which is 600 ft. of elevation gain. But if you go down to Bard Creek Trail, you are going to have to do some route finding and still climb out. Up to you. But it is hard to see what you are supposed to do from this angle, so I got Google Earth out and took some screen shots of what we think is the best way down.
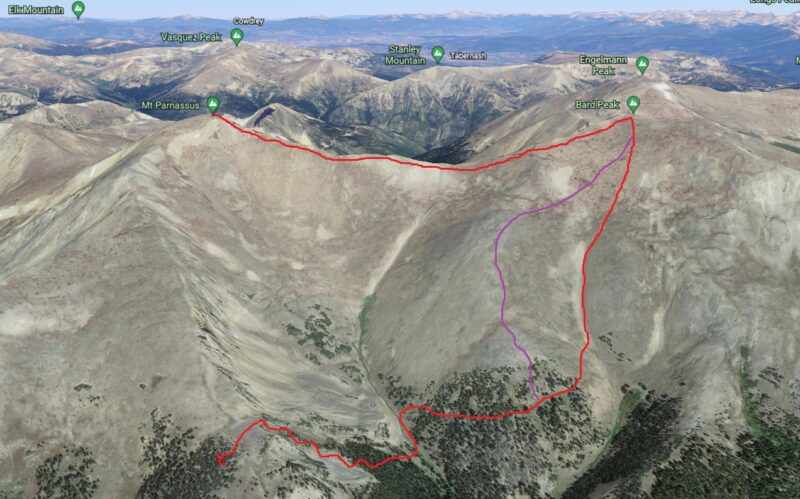
Bard Creek Trail to Watrous Gulch Trail
So, once you are down to the trail, you can relax a bit and then traverse around the ridge and down into the cirque/valley below. At this point, you again lose a trail, but you have cairns that do lead you in the right direction — which is just following the stream. (see below).
Eventually, you come to what looks like a camp site and just past that is a cairn that points into the trees. Take that path. From there, there is mostly a trail to the plateau.
Conclusion
All in all it was right at 9.5 miles for us and about 4,700 feet of elevation gain. As you can tell, depending on how you do this, your mileage and potentially elevation gain may be slightly different. I think this was a fun route and the descent from Bard made more of a challenge. But, it would have been nice to have better beta on this, so I hope this helps someone. I would like to one day do this again, and try the route we have proposed. If you try it out, let us know in the comments. Have fun out there and be safe.
Igloo Peak 13,060 ft. – Independence Pass
“It is not the mountain we conquer, but rather ourselves.”
Sir Edmund Hillary
Go Forth
Sometimes you just have to get out of the house, and yardwork just won’t cut it. Allyson and I headed up to the mountains with no real plans — only to get outside. We brought the tent and some supplies and we headed west. An initial idea was to go to Twin Lakes and find a campsite; but, alas, there were no campsites that we could see. The road kept on going and so we kept on following it. Eventually, we found ourselves on Independence Pass, which is the highest paved road in North America (or so I’m told).
We took a quick look around and noticed a trail that ran out towards some peaks off in the distance and our minds began thinking about whether we should head out on them. However, we didn’t have a campsite yet and so had no clue where we were sleeping. We ended up in Basalt, Colorado, and at dinner pulled up the forest services maps and found a promising site. Turned out that we lucked out and found a spot on a gnarly 4WD road. Below is the view from out campsite.
Decisions
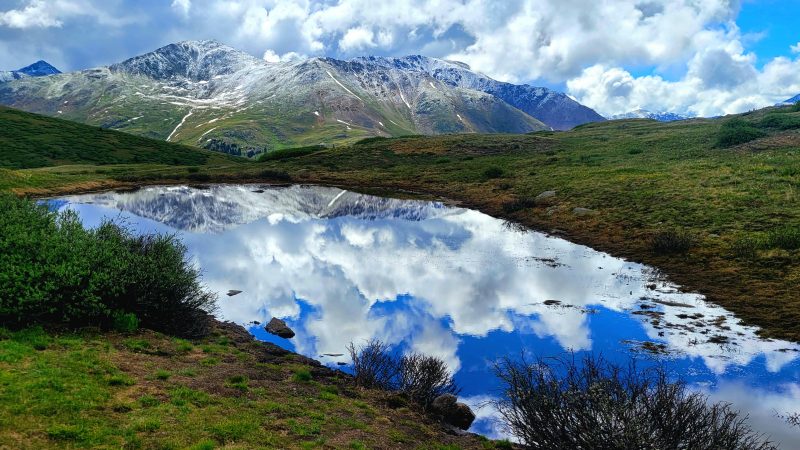
We got up the next morning and found ourselves heading back towards Denver by way of Independence Pass. In our minds we thought we might run at McCullough Gulch or perhaps paddleboard on Twin Lakes. But when we came upon the pass again we saw the title image of this post. Perfect reflections of the mountains and sky in calm waters with a freshly dusted vista of mountains. We decided that we would just run here on the trail we saw yesterday and see where it goes.
As is becoming our modus operandi we didn’t know the names of the peaks or really even if they were named. Just that they were there and we felt called to them. So, we started jogging up the trail, and it was pleasant at first. The grade was modest and there were very few people on the trail despite a very busy parking lot. But, then the climb became steeper and the elevation more noticeable. I took some pictures (below) to catch my breath.
We’re Doing This
I don’t think we really had a good plan on where we were going. Were we just exploring? Were we trying to go to the middle peak? The farthest peak? No one knew. We just headed out on the trail and figured we couldn’t get lost. But after the climb up to the first summit we knew we were going to at least the middle peak, which we later learned was named Igloo Peak and was 13,060 ft. tall.
My lungs were on fire by the time we hit the steep climb up to that first summit, but we were feeling good overall. The mountains looked beautiful and the weather was cool — much better than the 100 degree weather we had a few weeks ago in Denver. There were a number of wildflowers out, mostly little blue groundcover and yellow alpine Avens, but some alpine clover and other species. Below are some images from the first section.

Igloo Peak
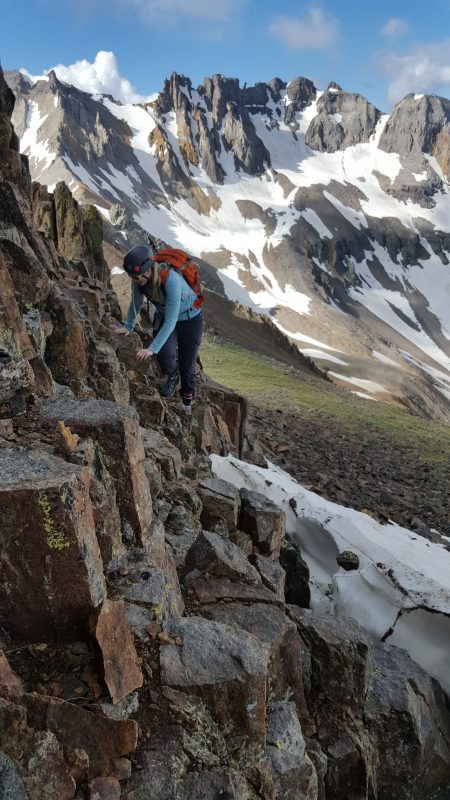
Eventually, we came to a rock tower and thought, does this go? And not only does it go, it has a trail along the backside. The trail was loose rock and scree, but a trail nonetheless. We continued on and found ourselves at the peak of Igloo. The trail, sadly, did appear to stop; or at the very least it became a tad sketchy. Later, I read that if you continue on the ridge proper to Mountain Boy it is a dangerous class 4 climb on loose rock — so I’m glad we turned back. There were other trails and we speculated, apparently correctly, that one could climb down and approach from lower down. Below are some images from the summit of Igloo and the rock tower with Allyson on the trail.
Heading Back
The jog/hike was a nice surprise; and we didn’t expect for the peak to have a name. But like most things in life, now we have even more to explore than we did before. If you go north from the Independence Pass TH there is another trail that goes to other 13ers; and we will have to come back for Mountain Boy, which we didn’t even know existed. And now we have seen Grizzly Peak (the tallest 13er at 13,988 ft.) and countless other 13ers. The area could provide weeks of exploration. Not only that…but we do have to go back and paddle Twin Lakes and explore the Independence ghost town.
So we headed back down and continued on our adventure. Overall the route is about 5 miles RT with maybe 1,300 ft. of elevation gain (or thereabouts). I’d say that over 90% of the trail is runnable, but that last section before Igloo is too loose (at least for me). Happy adventuring!
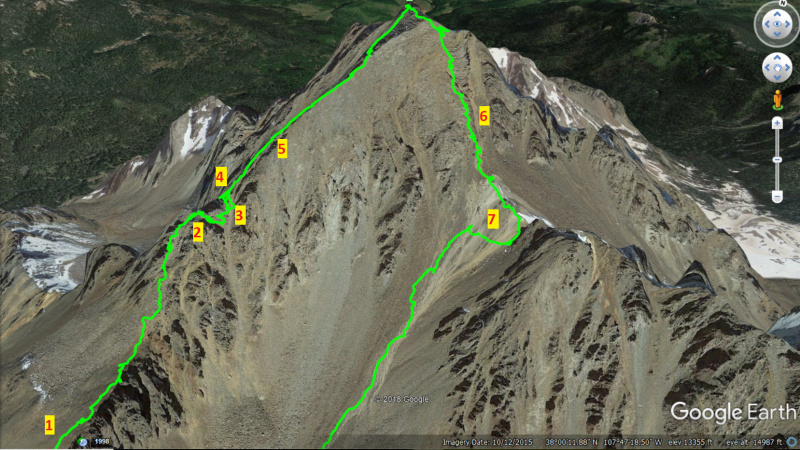
Mt. Sneffels via Southwest Ridge – Beta
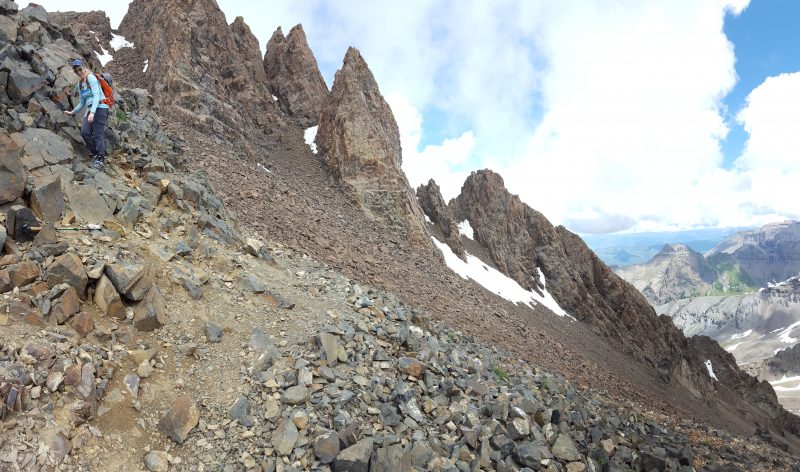
This post is primarily a beta post for those interested in climbing Mt. Sneffels via the Southwest Ridge and descending the standard route (South Slopes). The approach is relatively straight forward and will not be discussed. The post is broken down into 7 sections; each section is numbered from the GPS image below.
Section 1
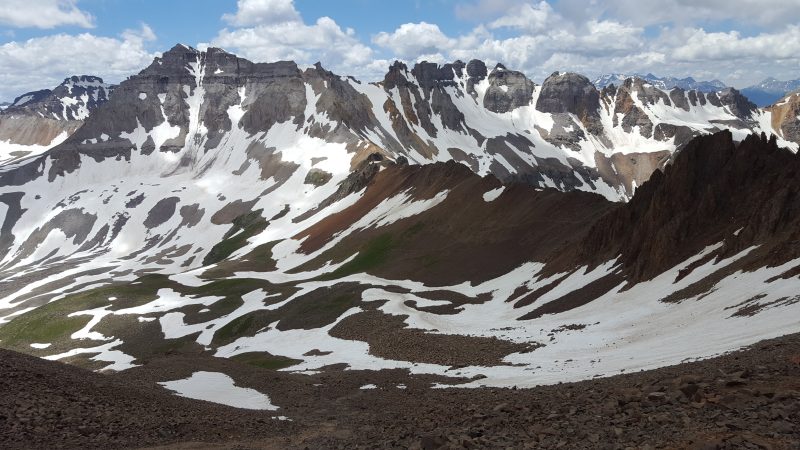
Turning right onto the ridge you see the Pinnacles; we also encountered a large snowfield with steep snow. Traction and an ice-axe are recommended. Crampons are overkill, but some people used them. This year (2019) was particularly snowy, and the mountains are holding lots of snow. In previous years, this area would not have required more than a helmet, but this year the snow posed some risk. A few images below give an idea of what it looked like.


Section 2 – 3
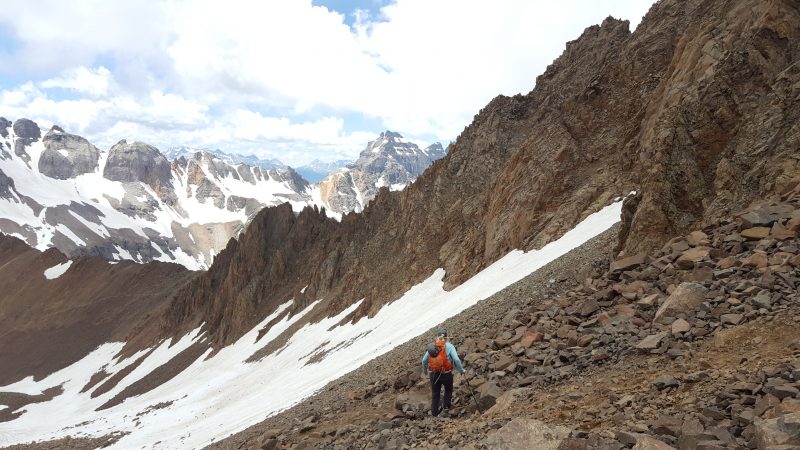
Once up the talus above the snowfield there is a path that appears to go left, however, this route does not go. Instead, veer right and downclimb an obvious trail that becomes loose and steep. Once down veer left and aim for the large gully ahead of you. This year, as mentioned earlier, left a lot of snow, and the gully was filled with snow. It was very steep and climbing on the snow felt risky; luckily, climbing up the left side of the gully allowed us to avoid the snow completely. After climbing up the gully cross to the notch seen in the pictures below.
Section 4
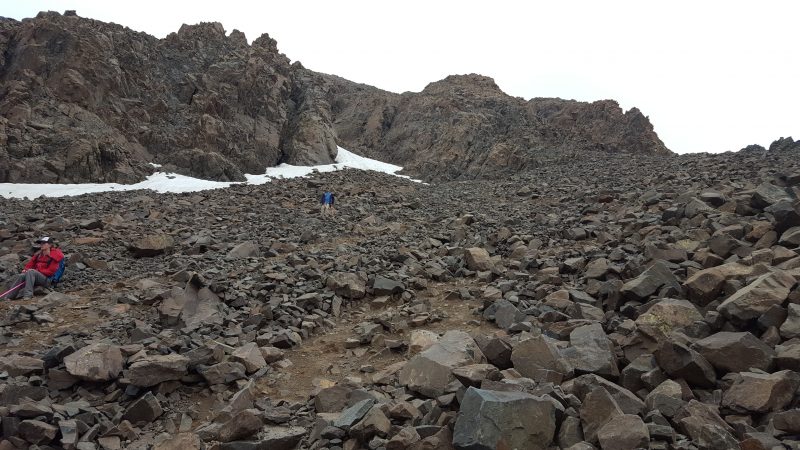
This felt like the crux to us. There is a notch you climb up with some vertical climbing which require some climbing moves. The rock was wet in areas and slick, which made it more difficult; however, it was very doable. I wouldn’t rate the moves as harder than VB or maybe an easy V1. Once up the two “bouldering” sections the climb becomes much easier. It is possible that there was an easier way up and we missed it, possibly to climbers left — we ended up climbing climbers right.
Section 5
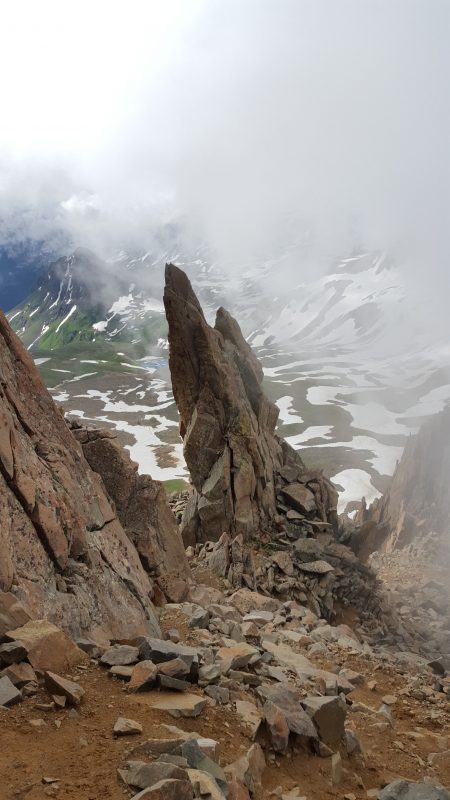
Right after you see the “kissing camels” rock formation veer right. It is easy to miss this ramp out of the gully, see below.

Section 6
Once to the summit the way down is relatively obvious (although no true trail exists). Follow the ridge down the south slope veering left until you find the cairned v-notch. Downclimb the class 3 v-notch into a steep gully. Again, snow filled a large portion of the gully and traction and protection (ice-axe) were good to have. Allyson kick-stepped part of the steeper and slicker part of the gully. This is the last nasty snow section.
Section 7
Lastly, once to the saddle there is a trail that leads over a very small rock outcropping. If you follow this it leads to a cliff wall on the other side and goes down. However! The trail runs out and you are left on steep, very loose rock and dirt. The better option is to not even cross the saddle and stay down-climbers right. This gully is insanely slick in the middle and very steep; it was incredibly difficult to traverse over to the right side of the gully. Once on the correct path, it was steep and loose, but very doable. It was our least favorite part of the hike.
Conclusions
Mt. Sneffels was one of the most beautiful climbs and basins we have been in to date. But it does pose a few dangers. Even if the snow hadn’t been crazy this year, rockfall is still an issue. Helmets are a must, especially for the south slopes where there were far more climbers. We heard a large rockfall and climbers screaming rock from a distance on the south slopes. I would encourage climbers to wear a good helmet on these routes.
The southwest ridge was fun, but it was a true class 3 climb with some good exposure. It would not be a great first class 3 due to the creativity needed to navigate some of the terrain (such as around snow, etc.). The hike itself, though, is not long, and it is very fun.
Happy Trails!!