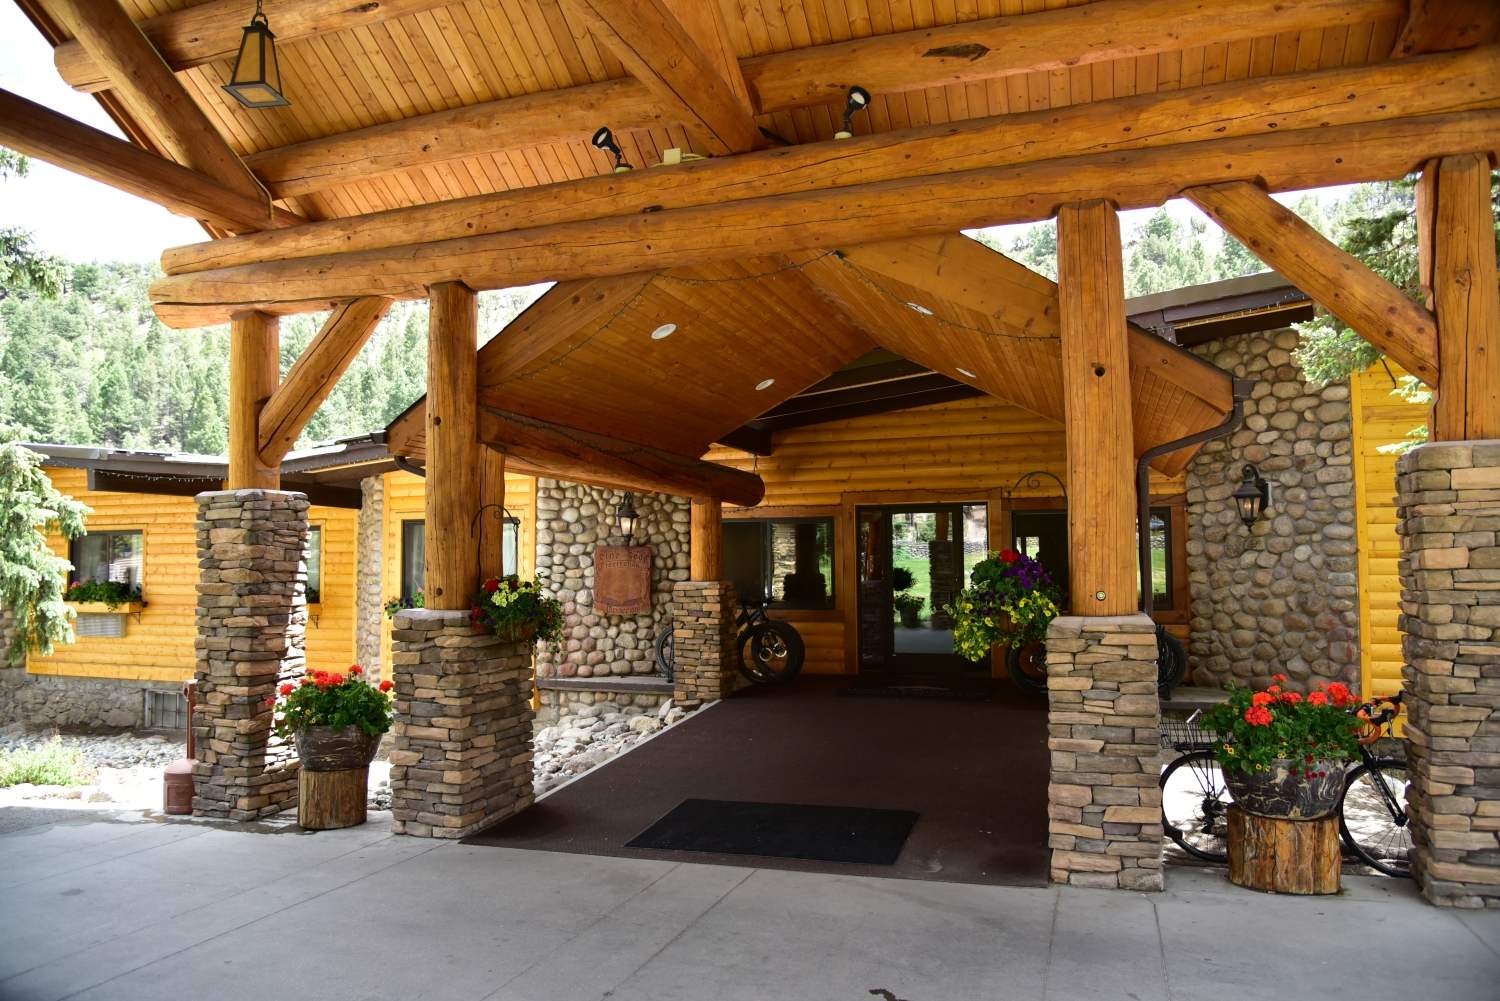
Take a Walk
A Quest into the Wild
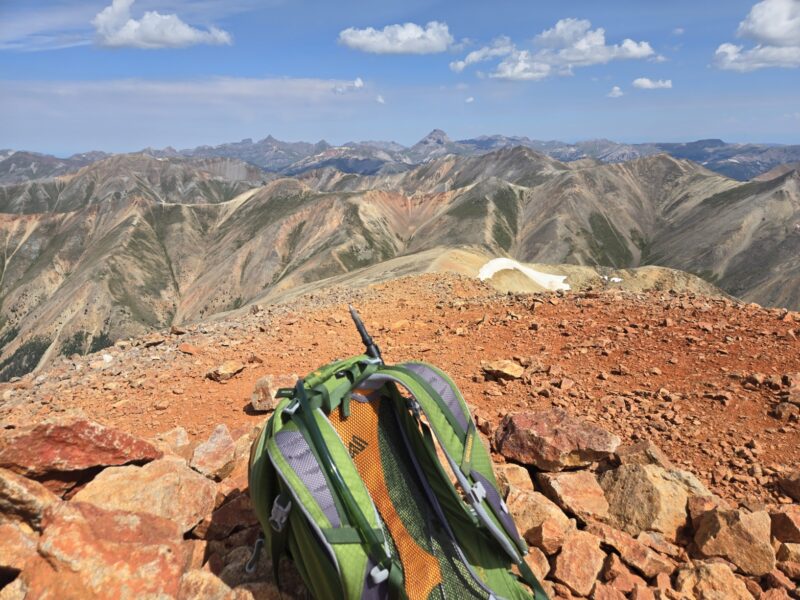
Bald Mountain (13,703′) East and South Ridges


We were inspired to write this blog post due to the lack of information on the web about Bald Mountain. This is a challenging hike due to the fact there is no real trail after French Pass and it is quite steep with loose scree and boulders in many areas. Let’s get into it.
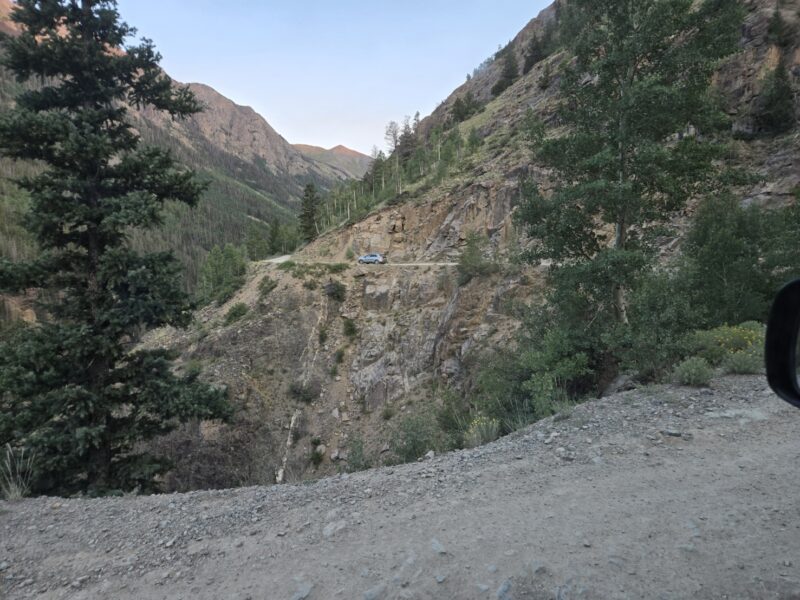
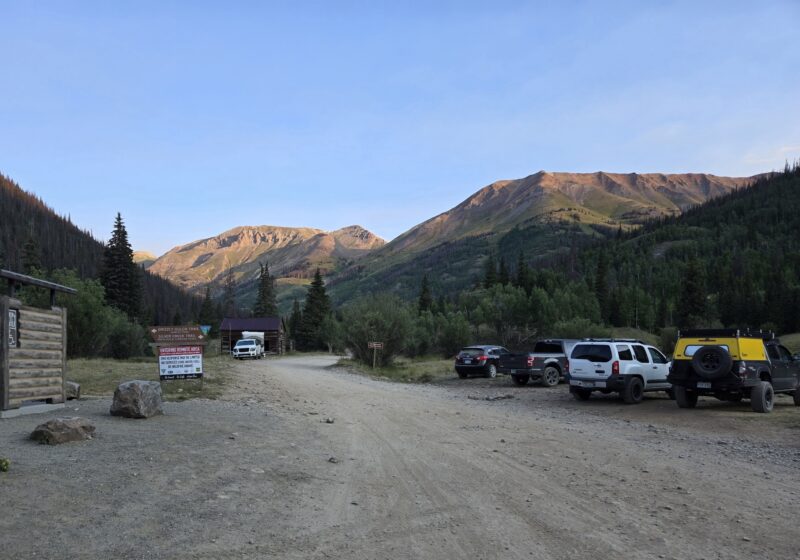
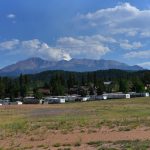
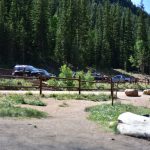
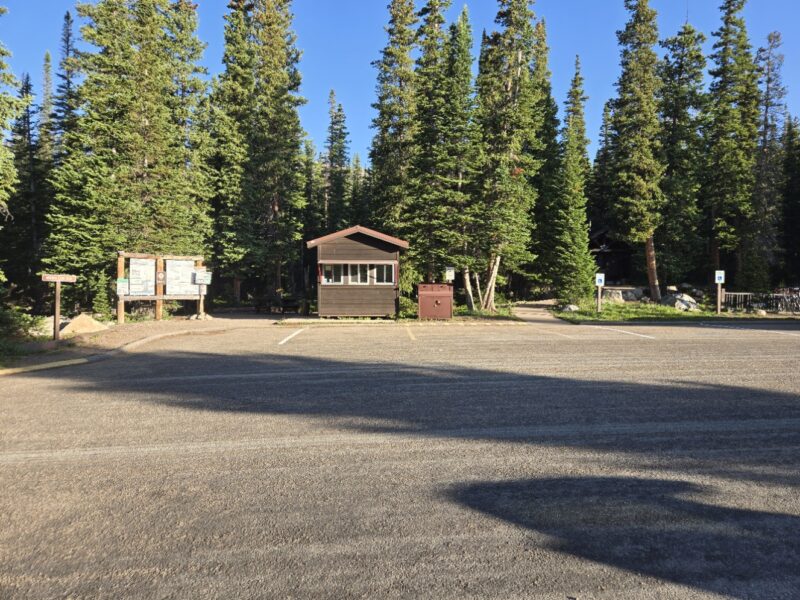
To get to the trailhead you take 285 out to Jefferson and follow the Michigan Creek road. It gets a little bumpy as you get closer to the trailhead, but just for a few miles. It is a 2wd road, but nice to have good tires and shocks. It is a small parking lot, and the campground nearby is popular.


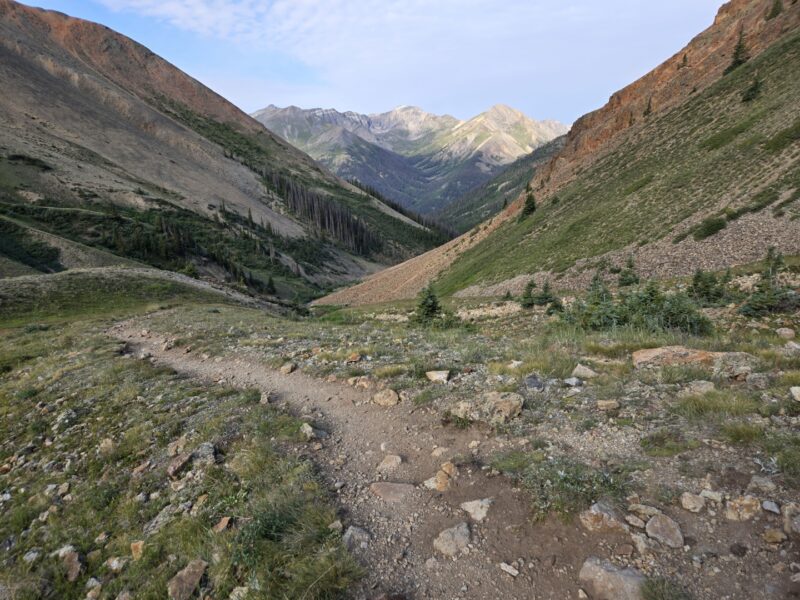
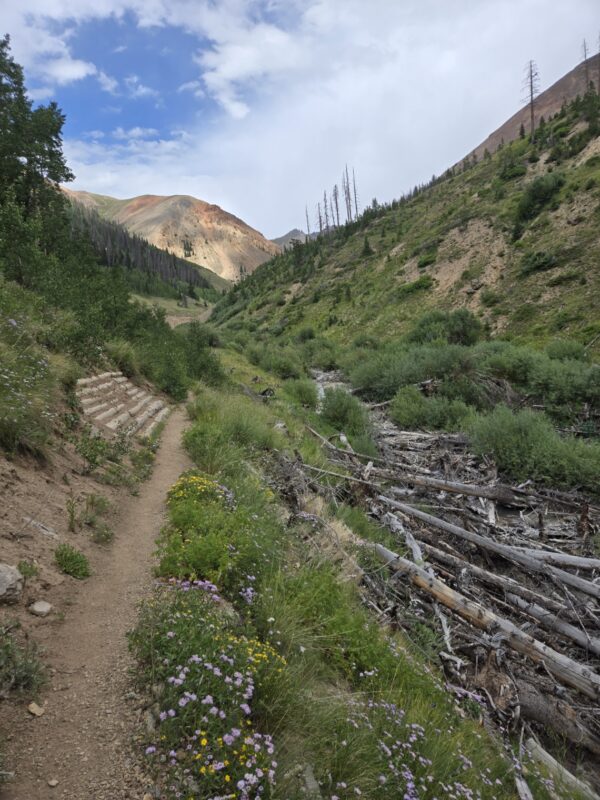
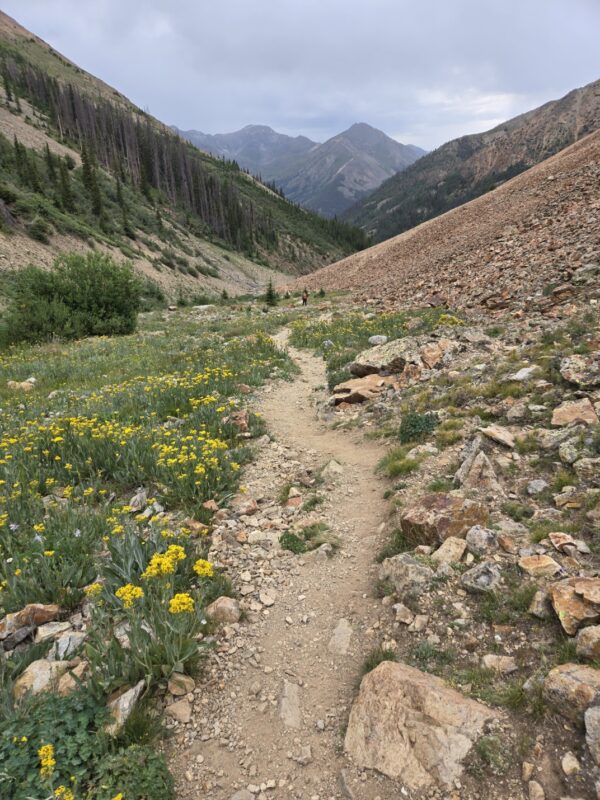
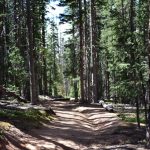
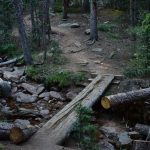
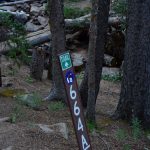
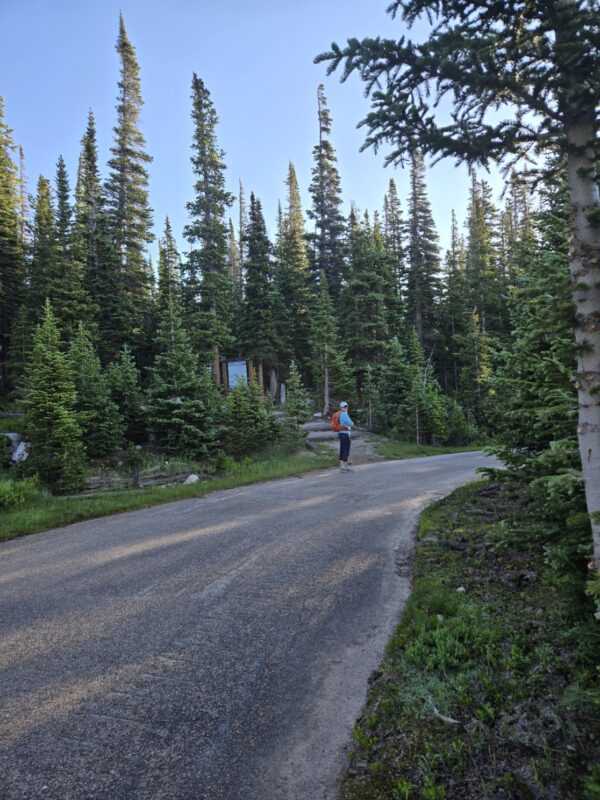
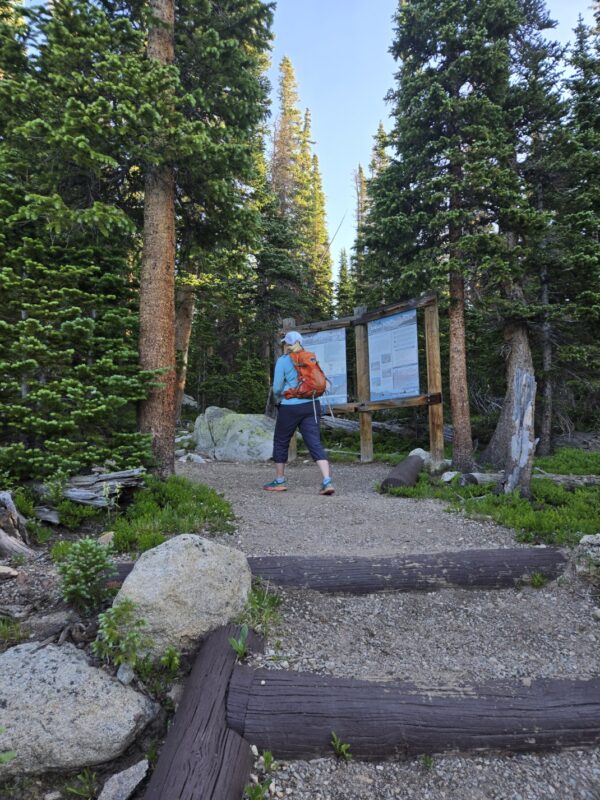
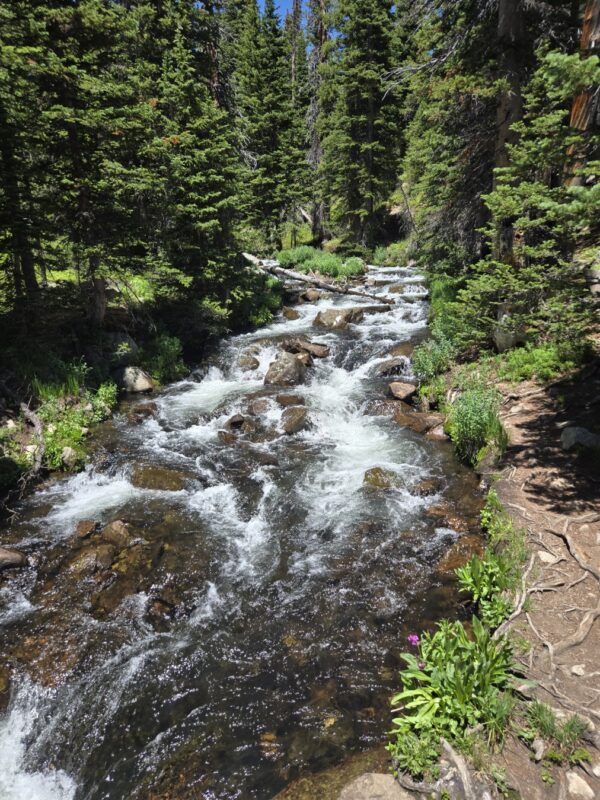
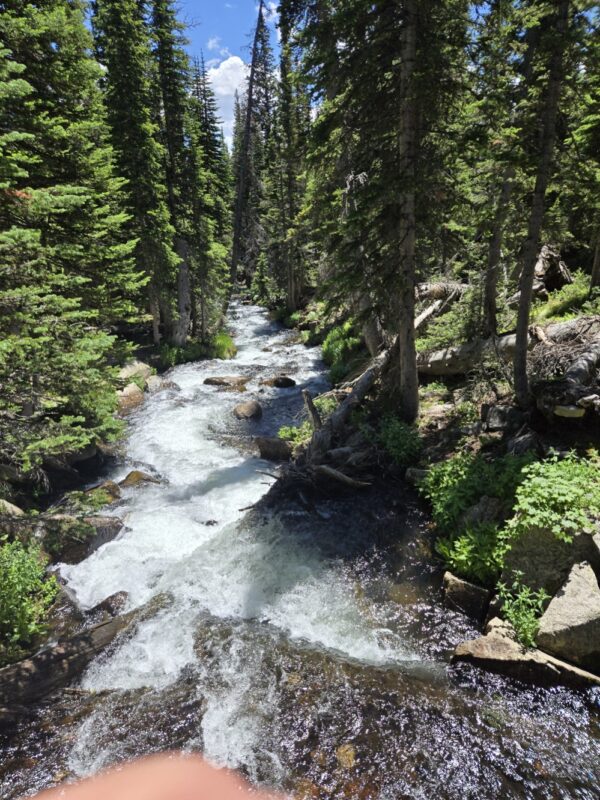
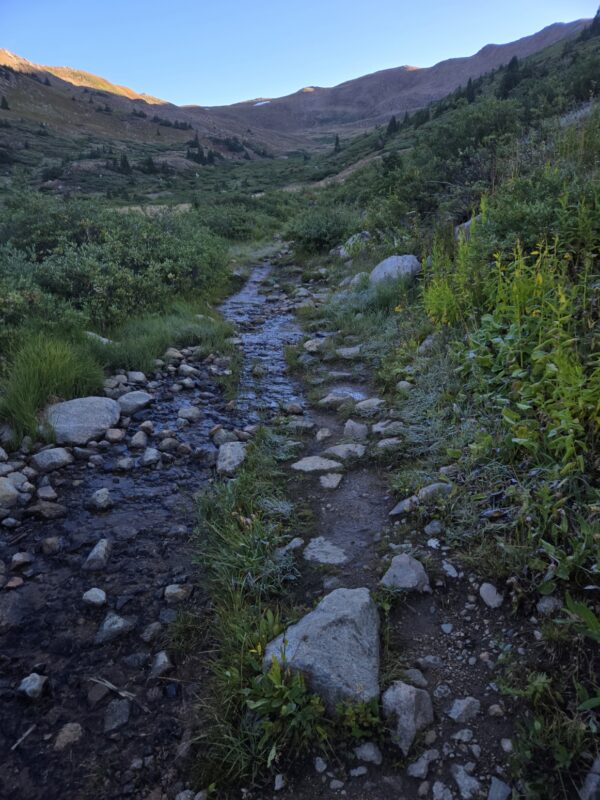
Following French Pass Trail (trail 651) you immediately see a post in the ground and the trail slits. It doesn’t matter which way you go, they reconnect with each other quickly, but the trail to the left is nicer. Hike this trail about 2 miles through lovely pine and aspen trees with wildflowers until you drop down and lose about 100 ft or less of elevation. At this point, you have to cross the creek. There were some logs here that were a little wobbly, but stable enough to get across without getting wet.


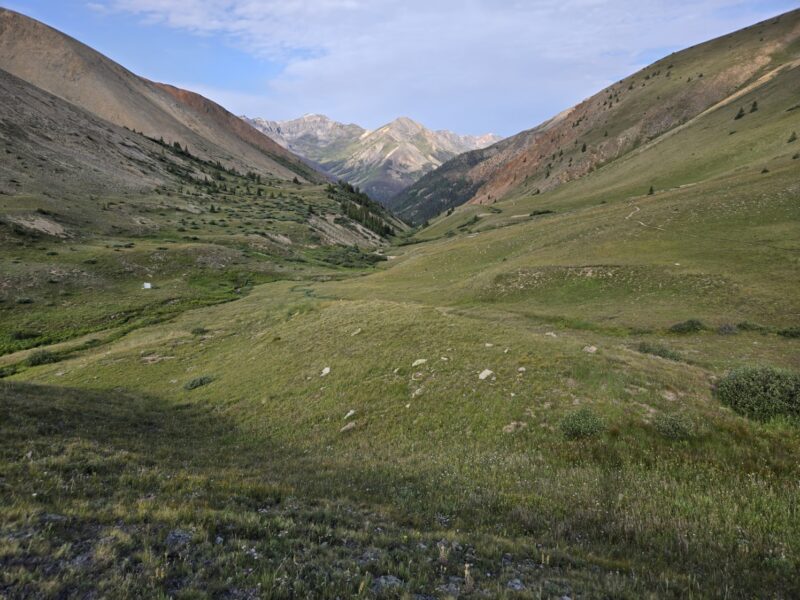
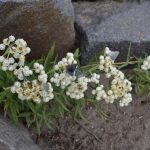
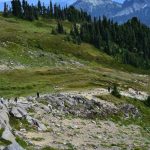
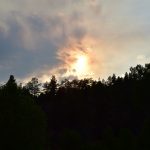
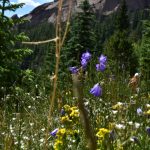
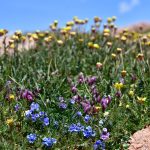
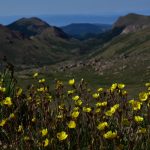
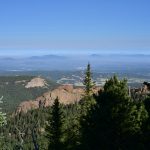
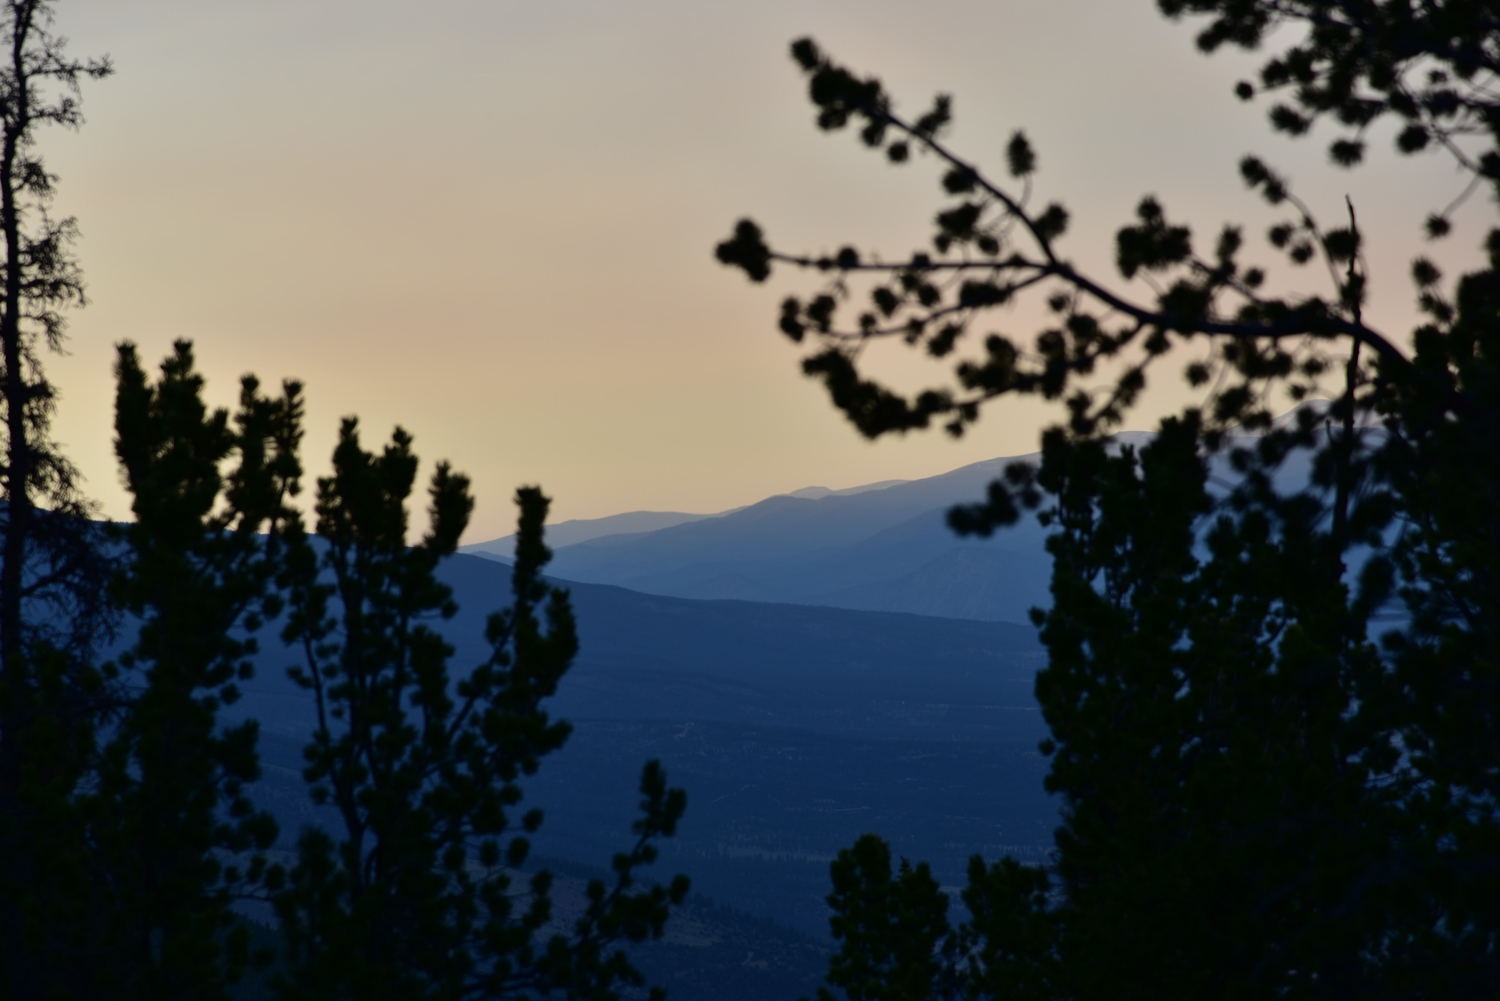
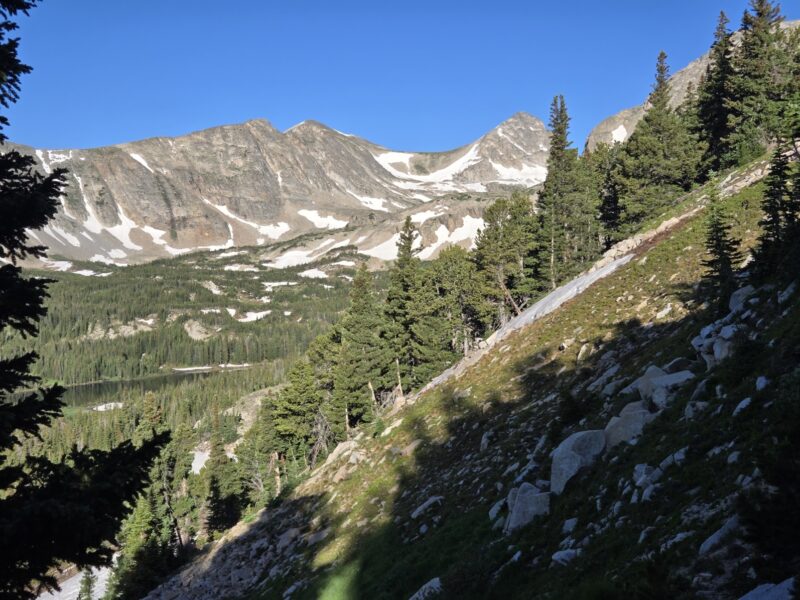
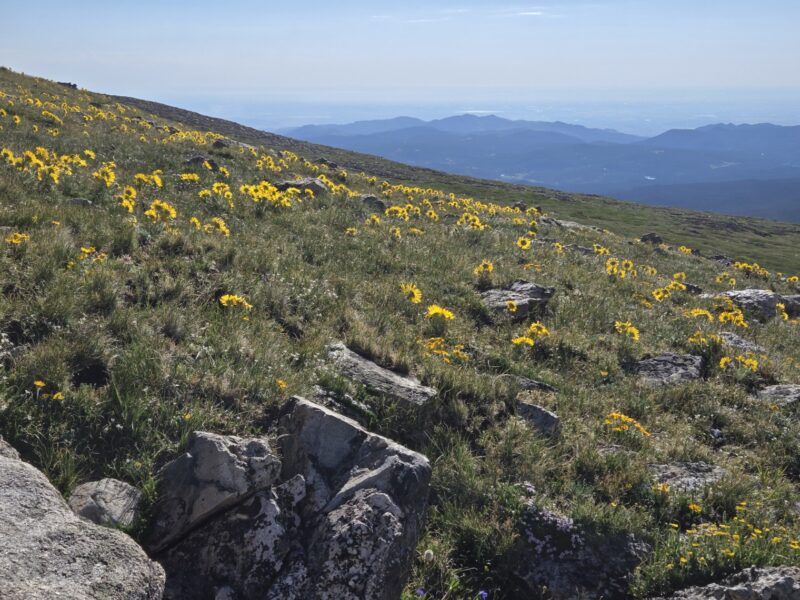
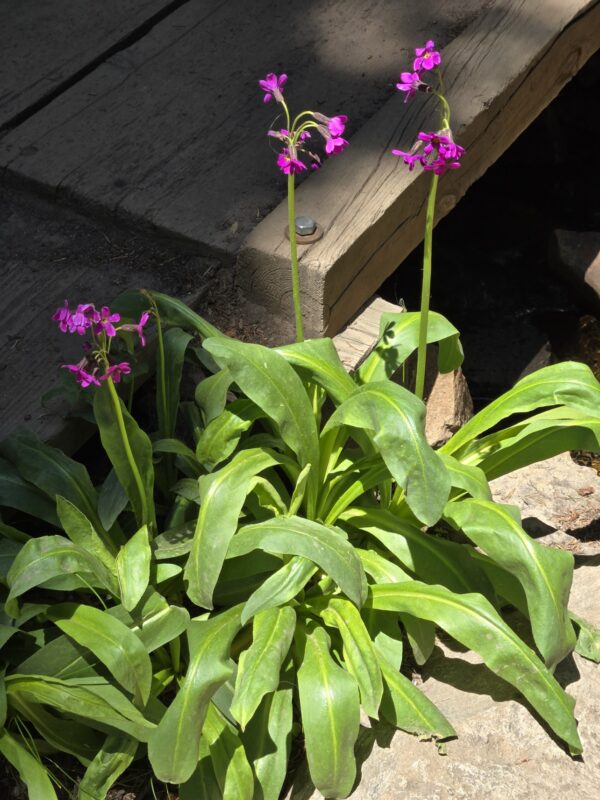
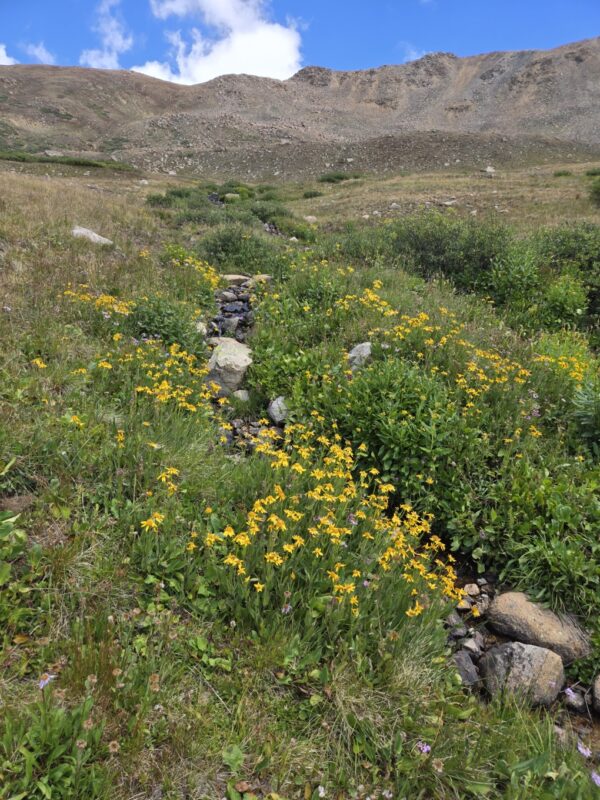
At this point, the trail goes up and quickly passes treeline. You begin to get a good view of the east ridge you will be climbing and the rest of the path up to French Pass. It is a lovely hike during this stretch and there were plenty of wildflowers and butterflies. It was pretty sunny, so don’t forget your sunscreen.


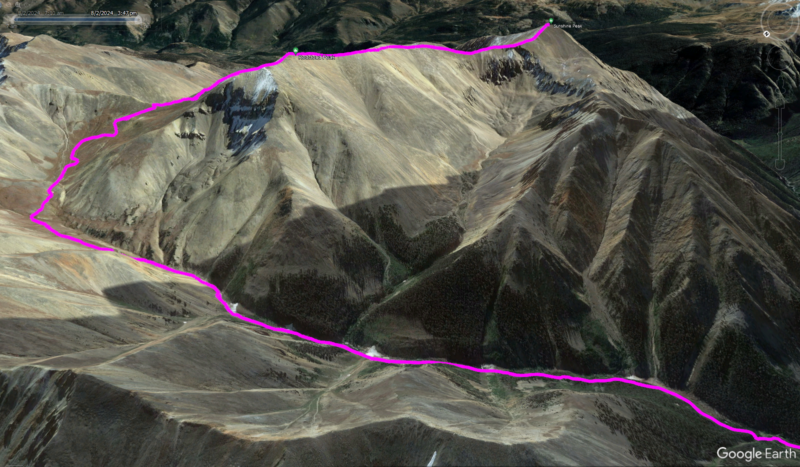
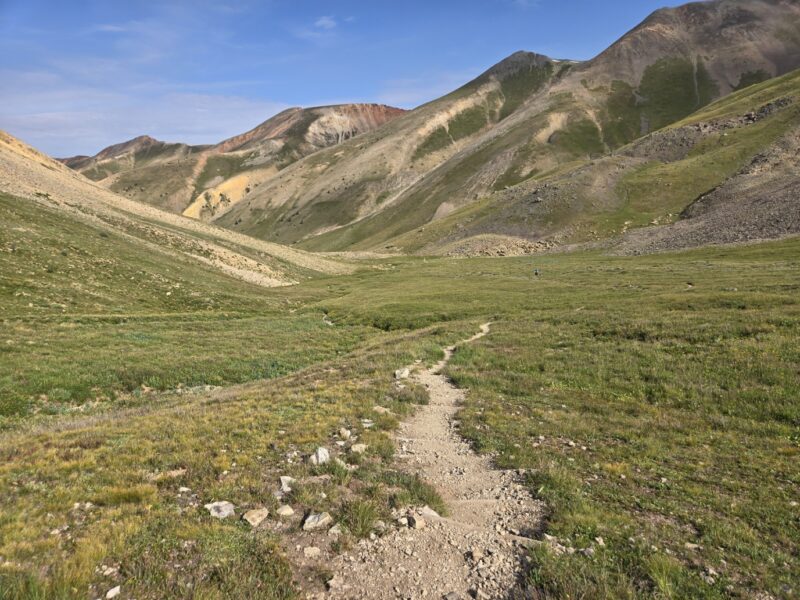
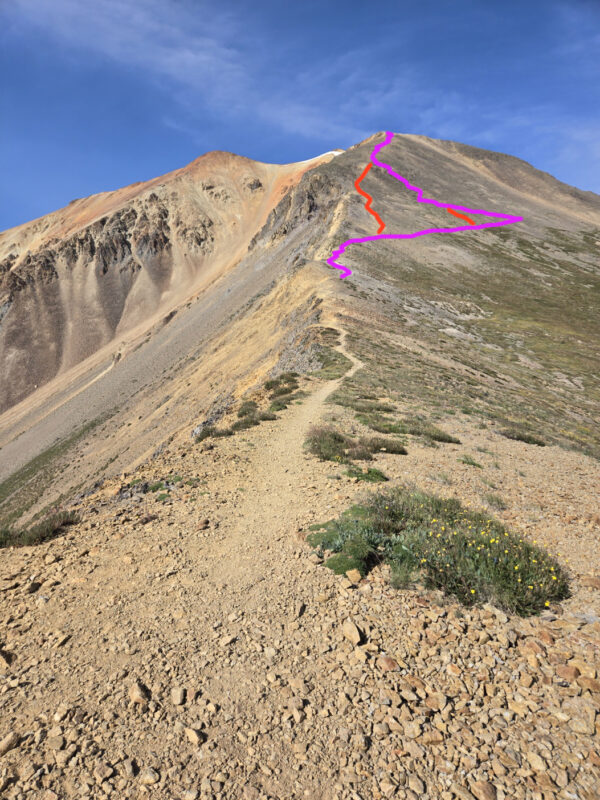
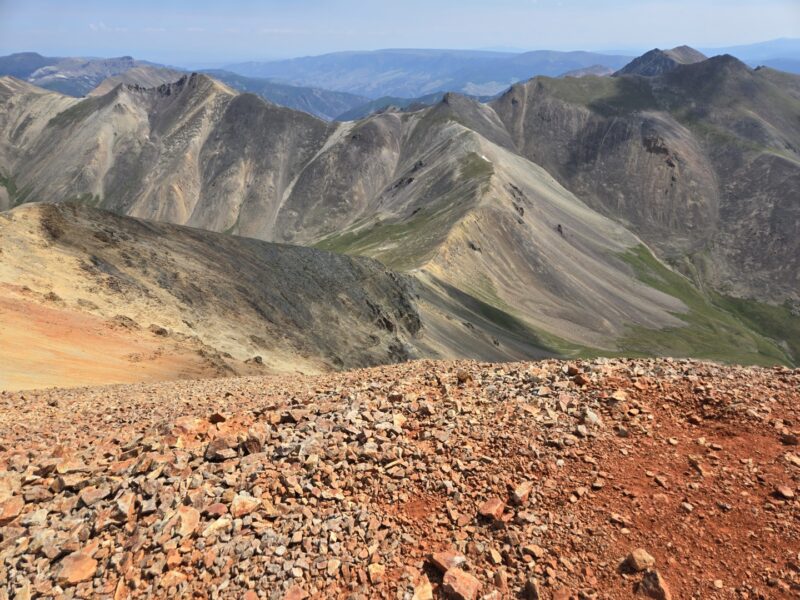
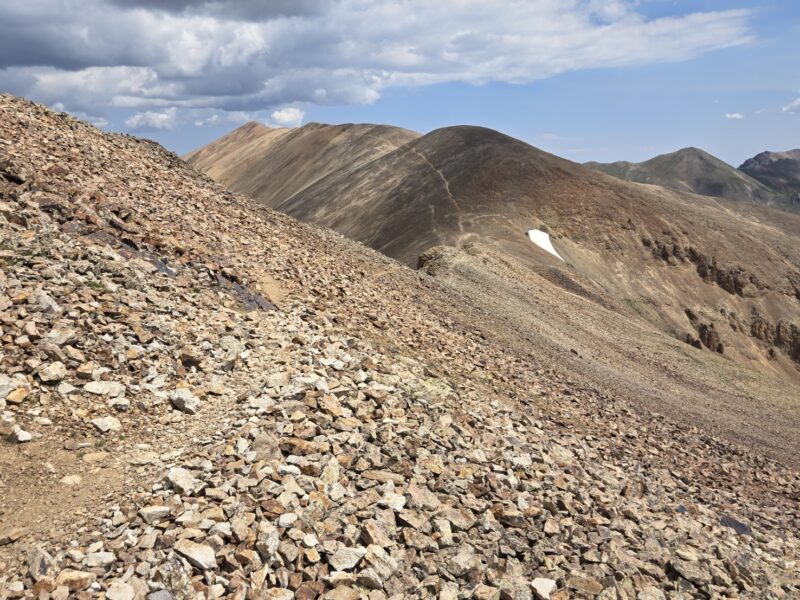
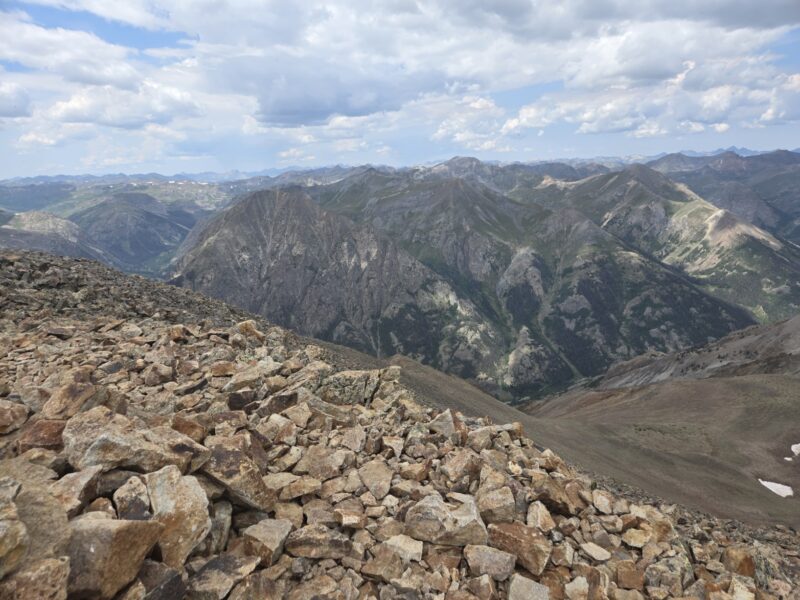
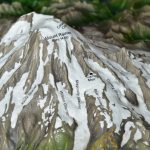
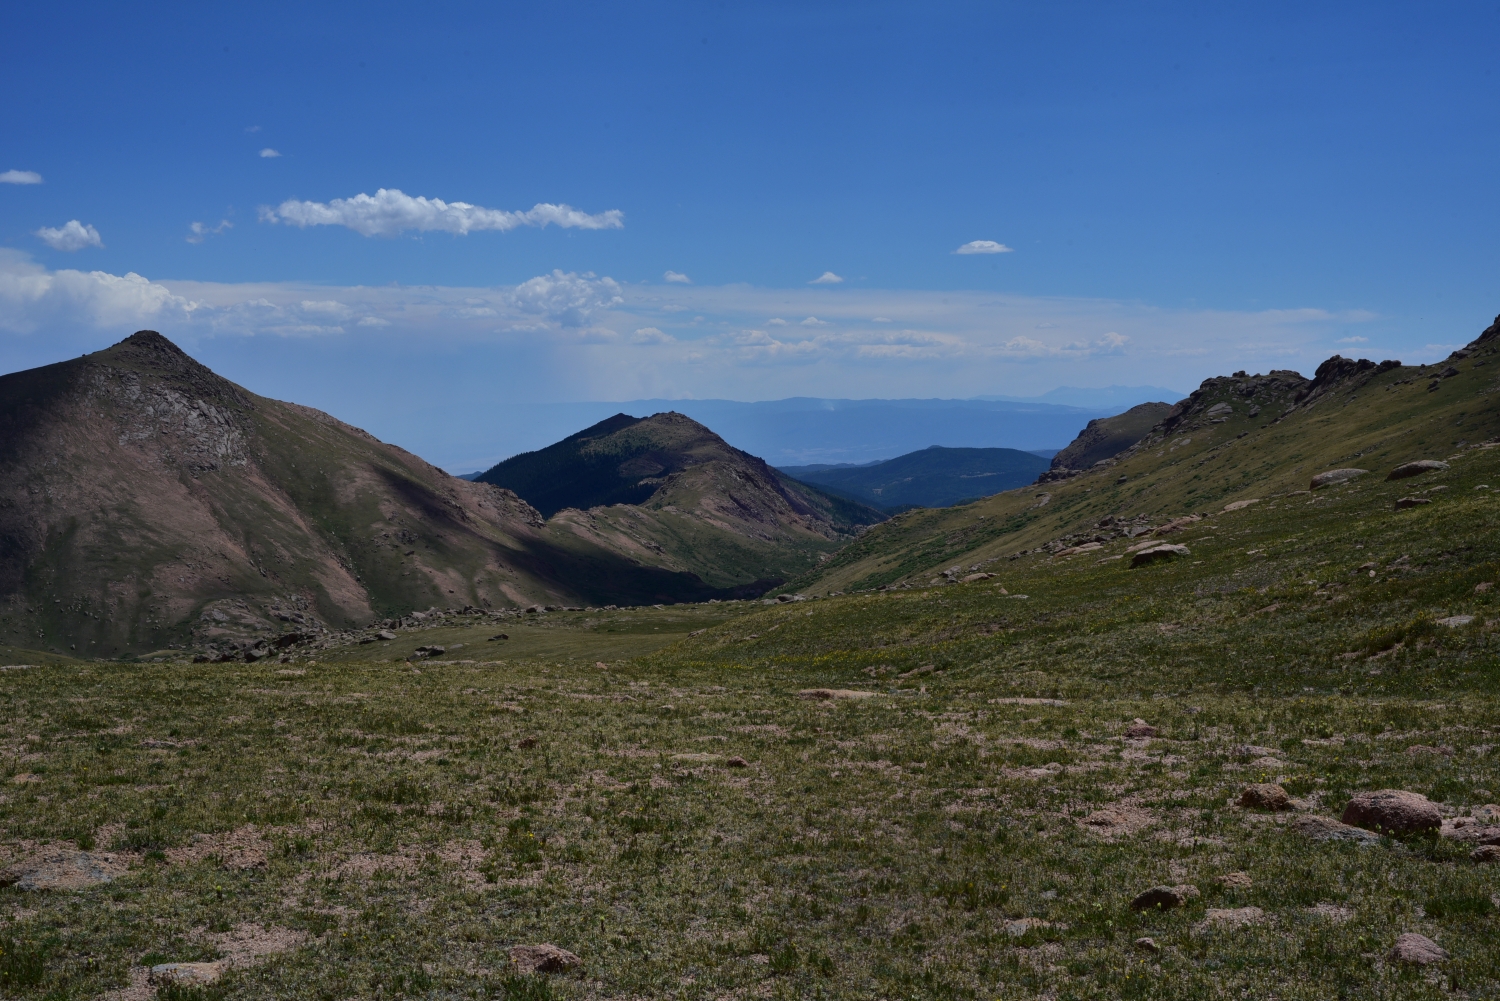
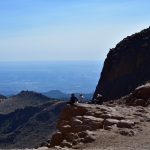
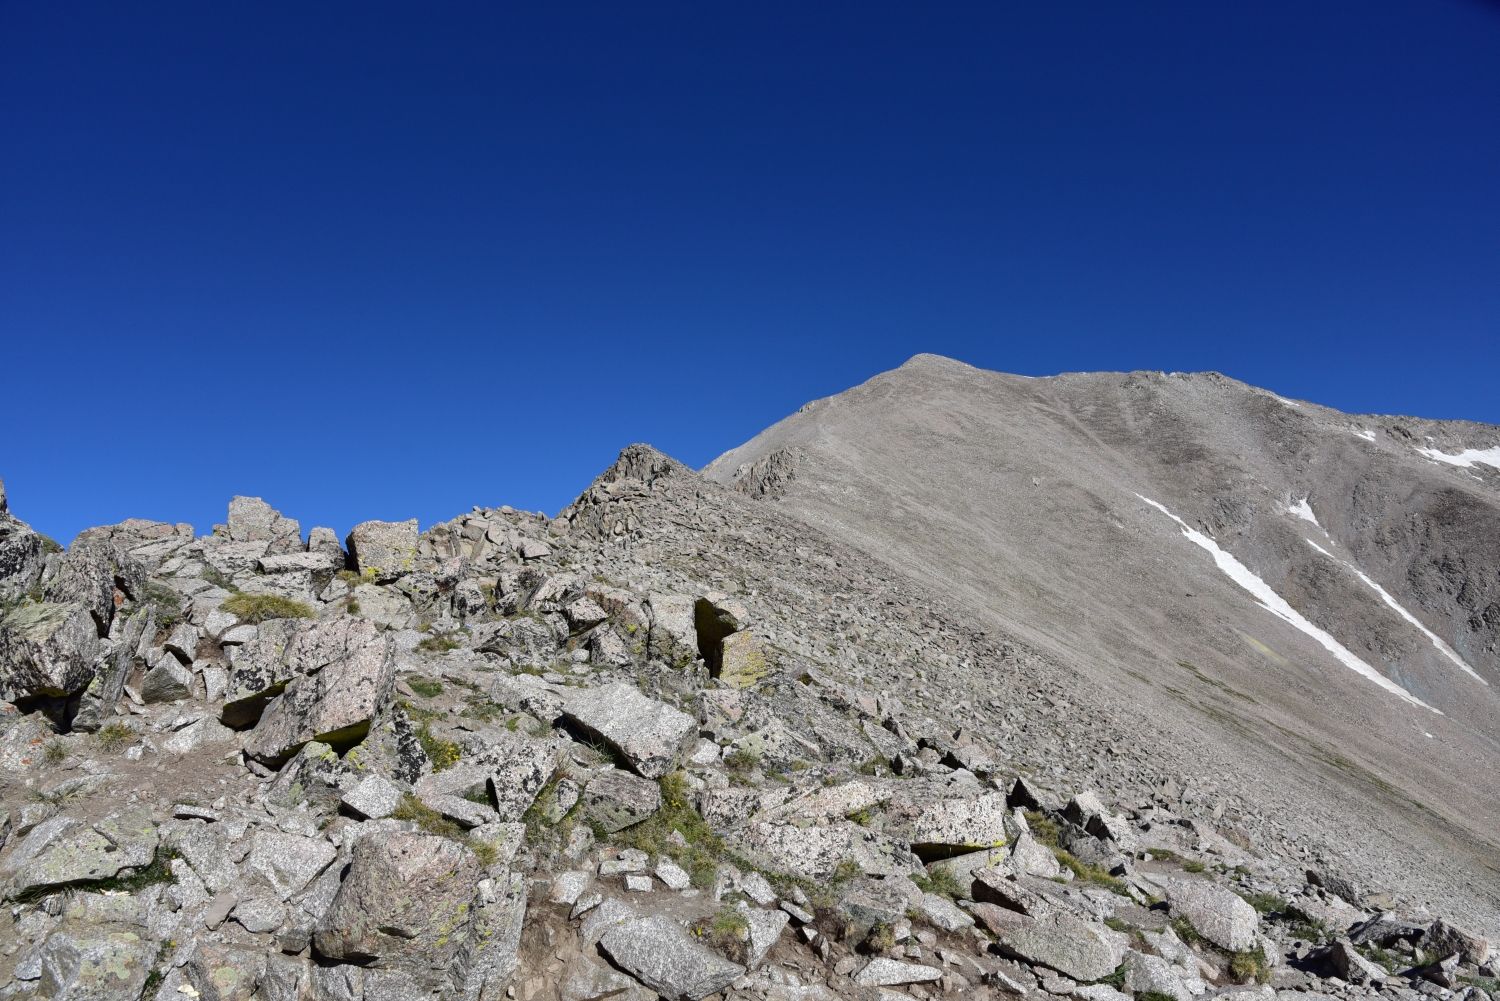
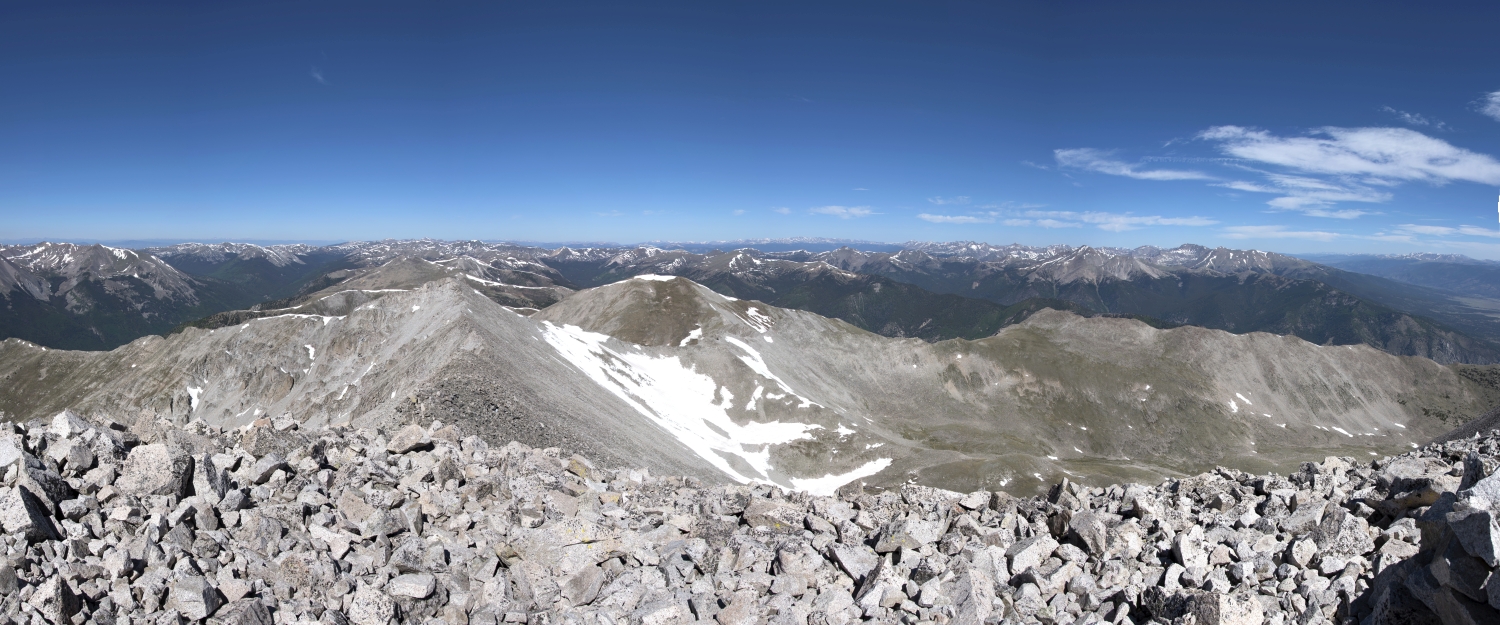
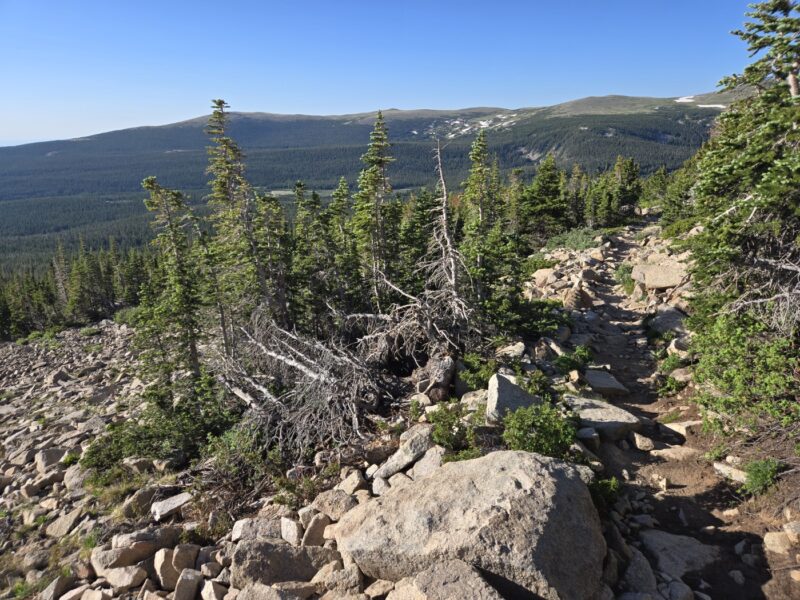
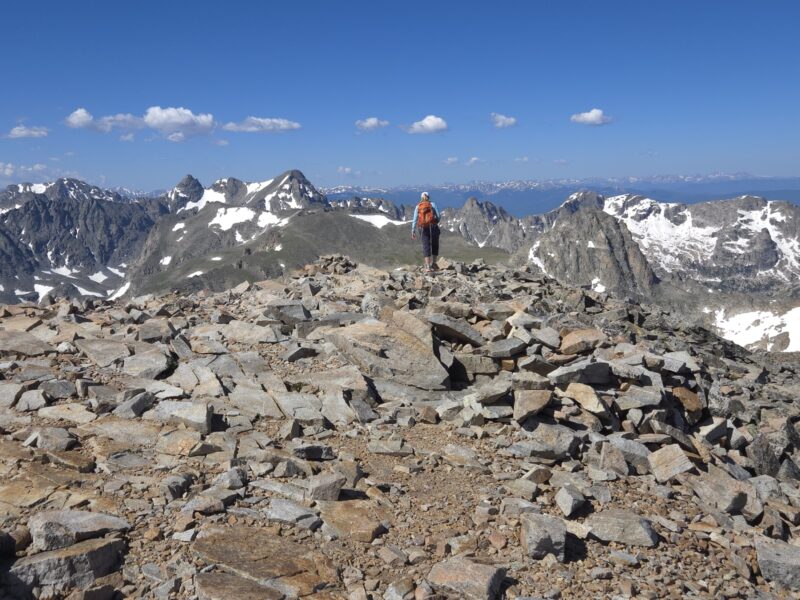
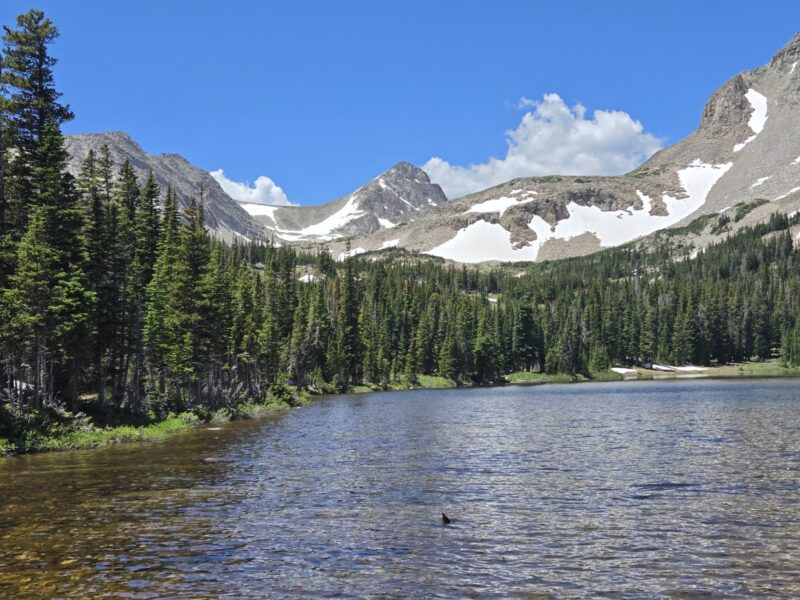
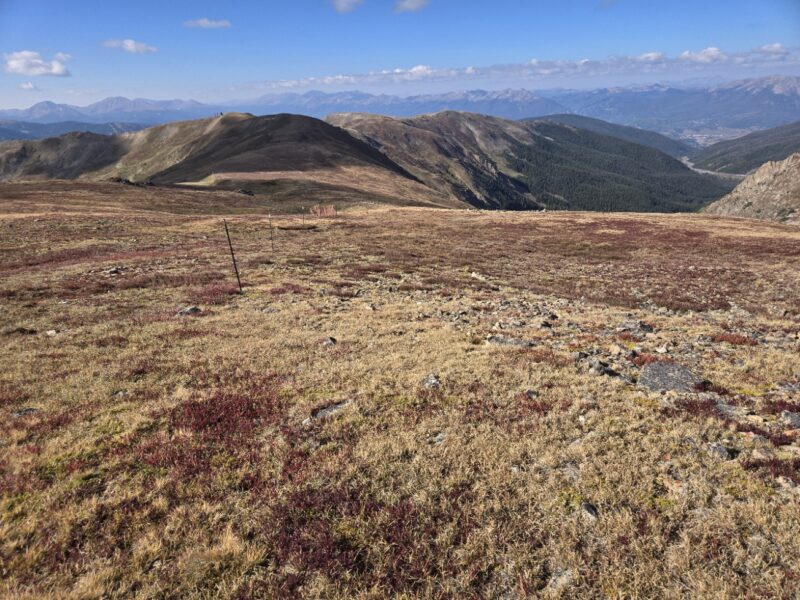
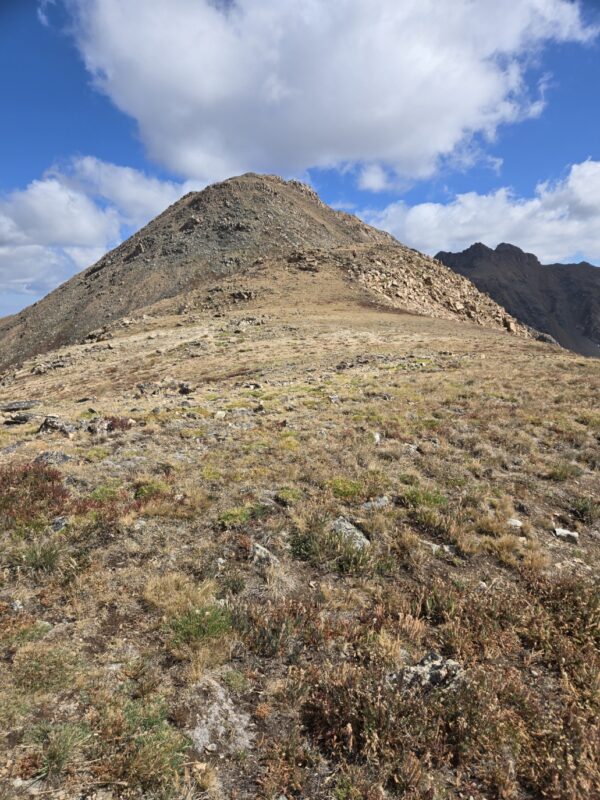
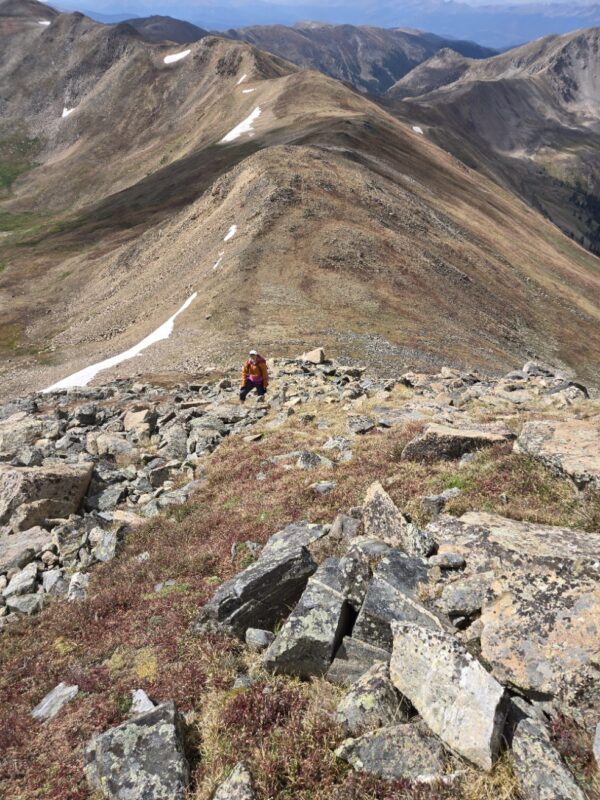
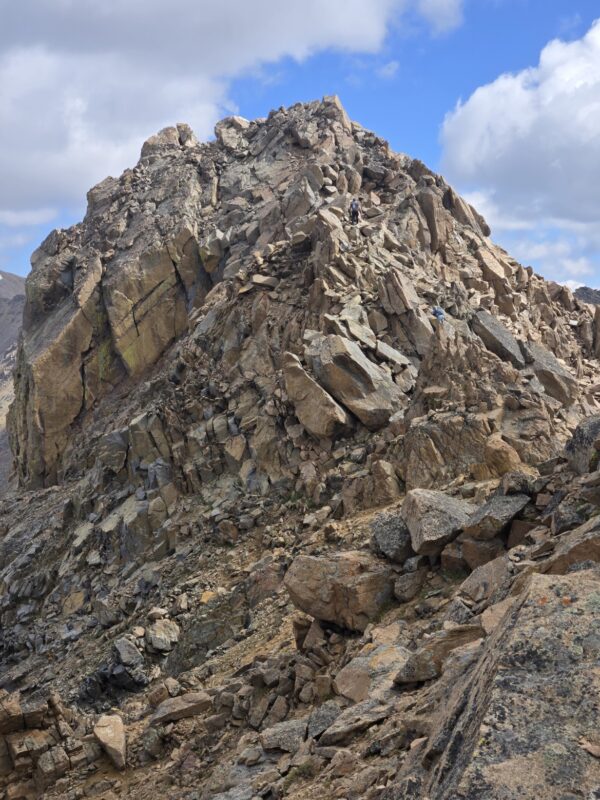
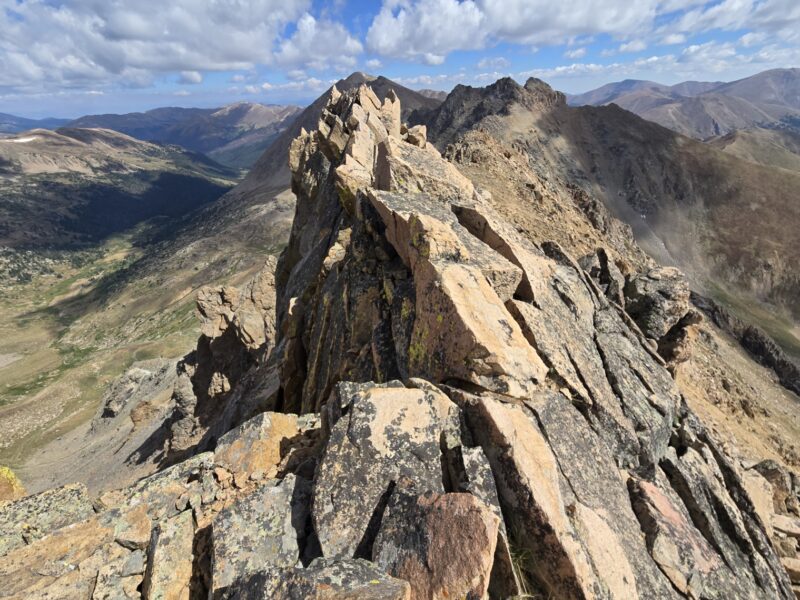
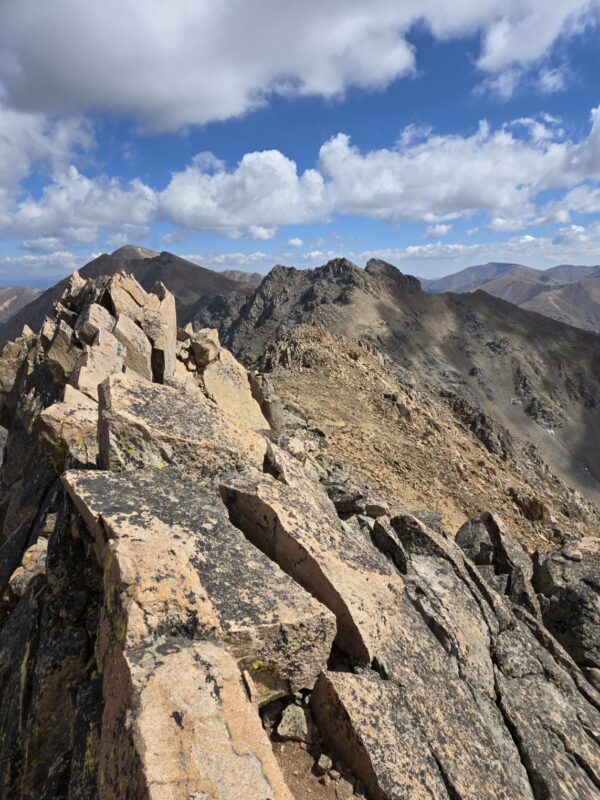
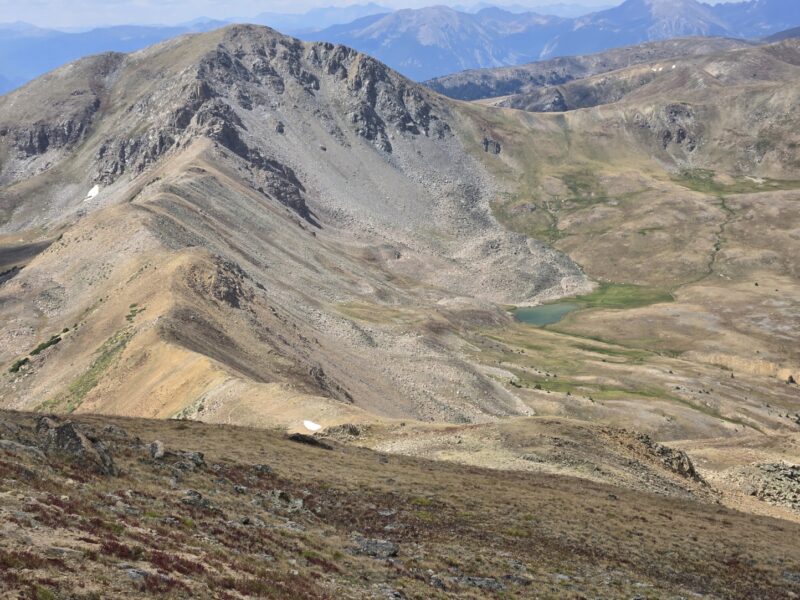
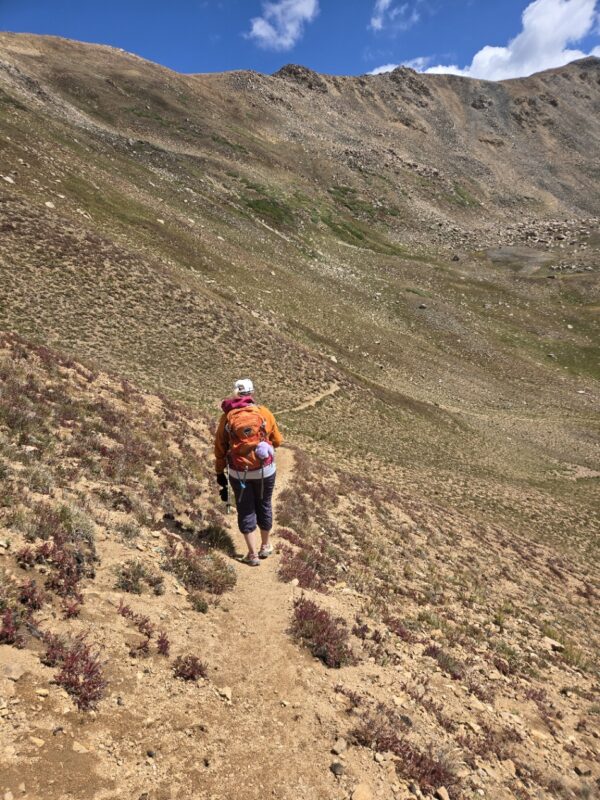
This hike is unique, as many others mention, in that you start on the east side of the continental divide, and then cross the continental divide and summit on the west side of the continental divide. This can be useful for visualizing what you need to do to get to Bald Mountain. The east ridge, which you’re looking at in the images above and below, is the continental divide. You will hike up the east ridge, but then leave it and hike north on the south ridge of Bald Mountain. If that doesn’t make sense, take a look at the map at the end and that should help.
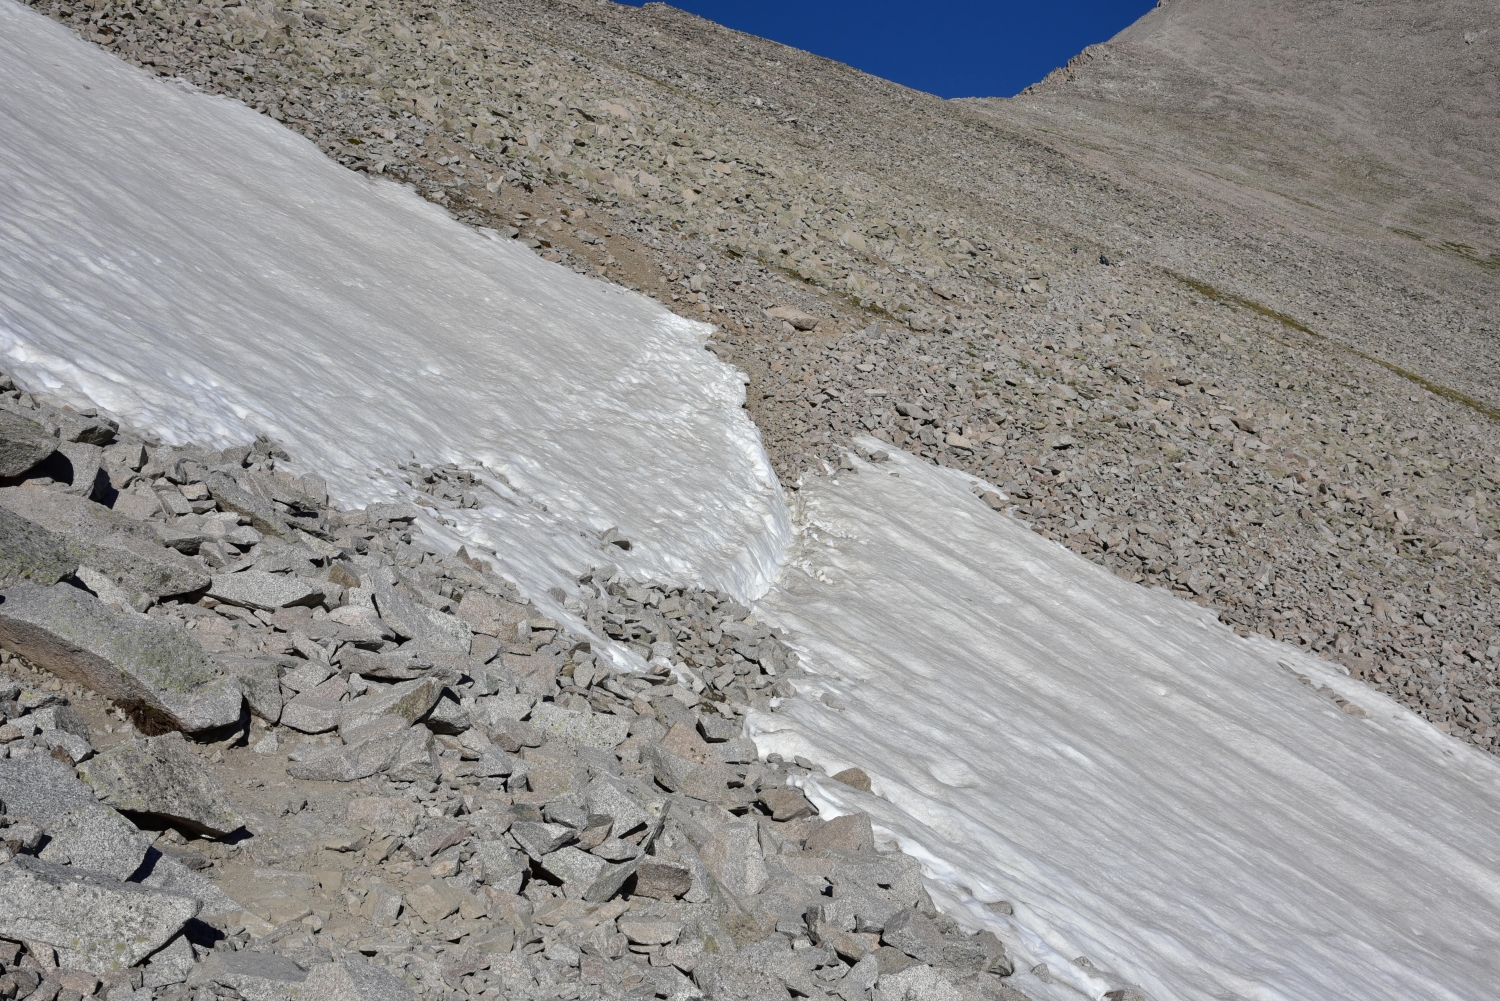
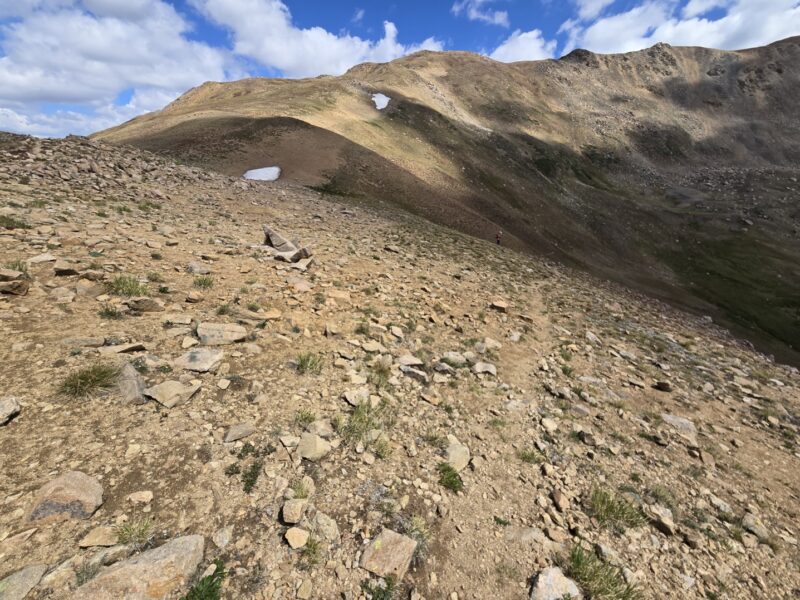
As you near the final push to French Pass you’ll notice that you need to hike up the south facing side of the east ridge. This holds some snow and when we climbed on June 28th there was still a good patch of snow on it. It was not too bad, but the fall line wants to pull you down to the climbers left. It is not that steep, but poles would be nice and microspikes could have been helpful but weren’t necessary.


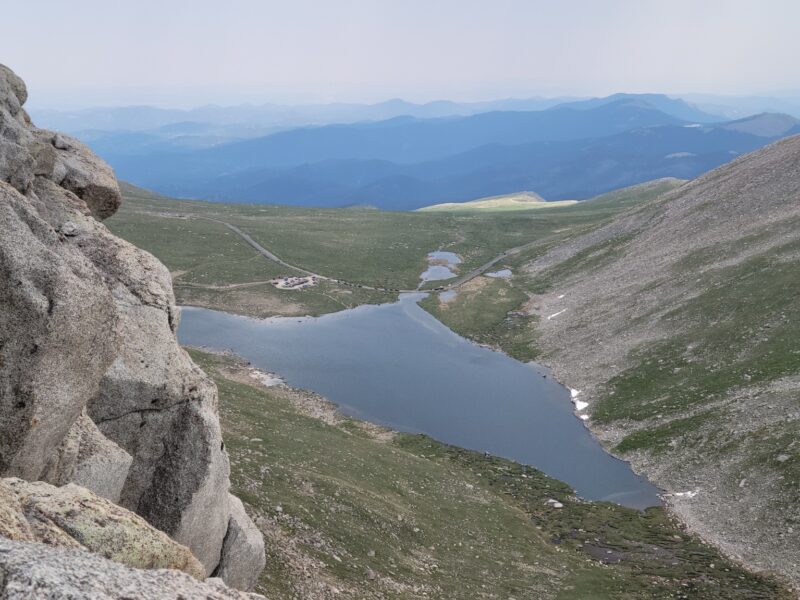
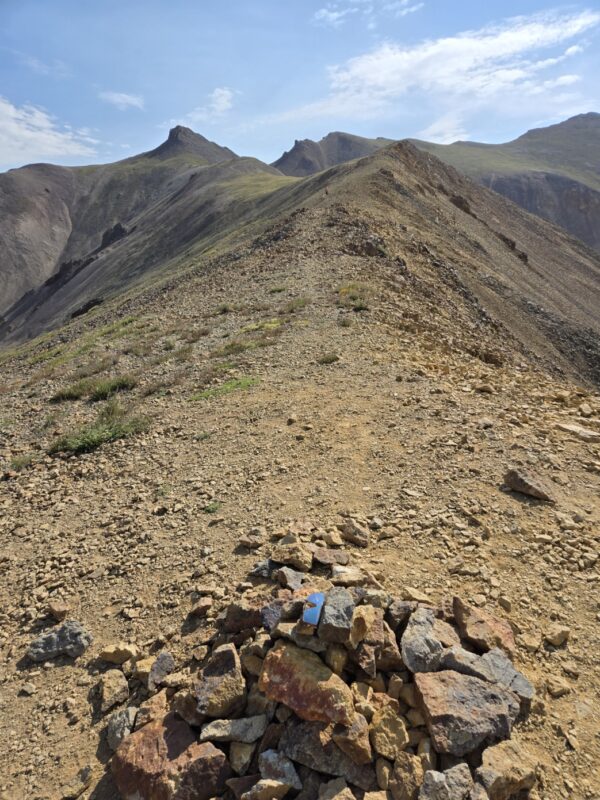
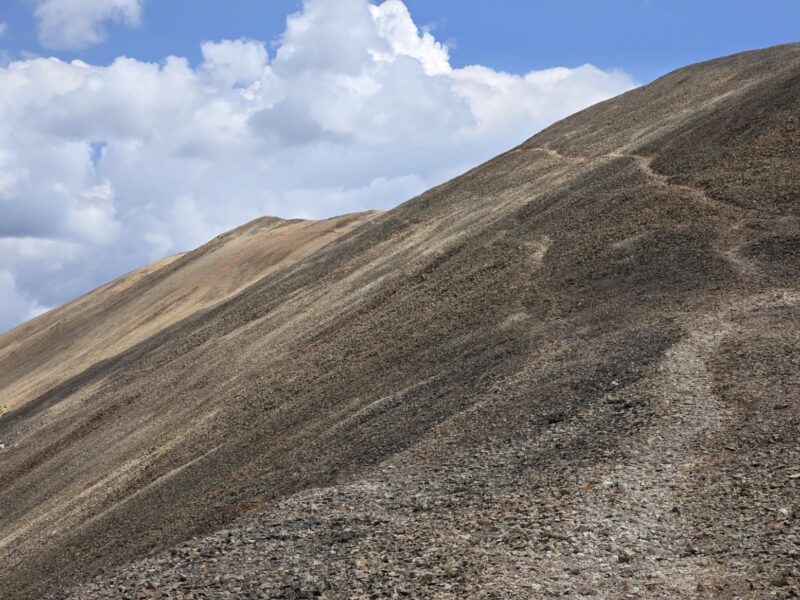
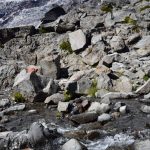
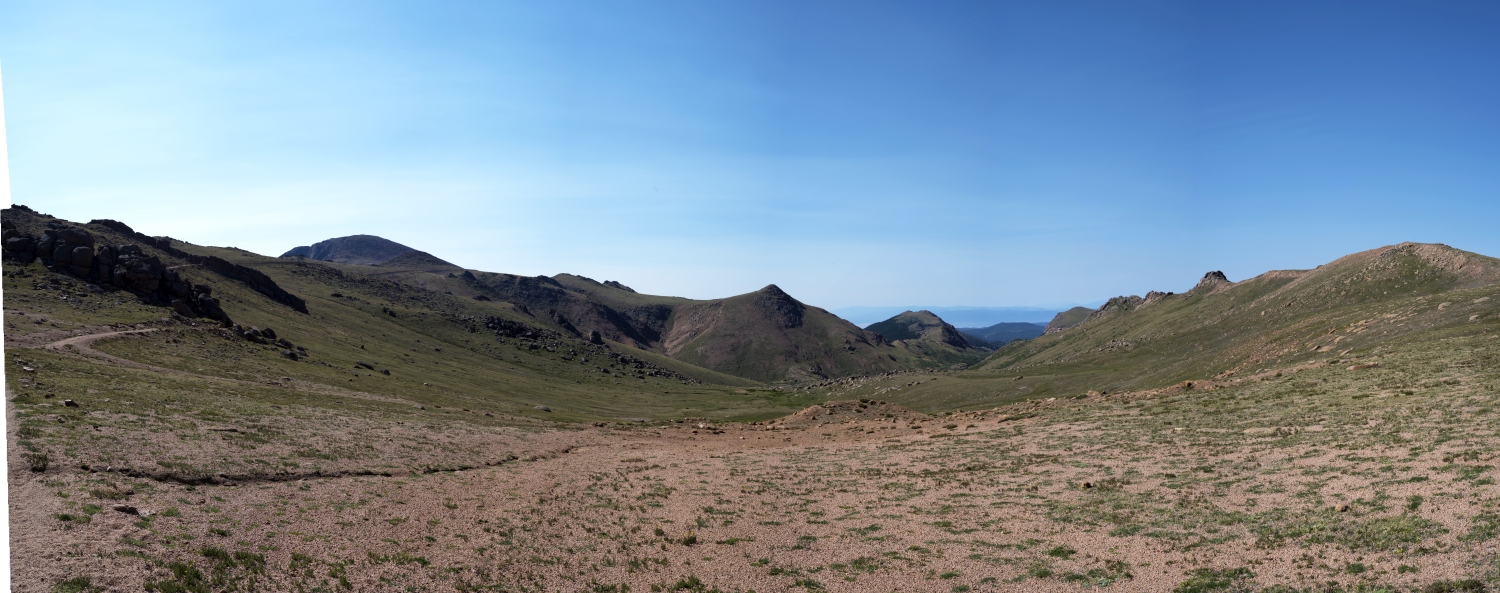
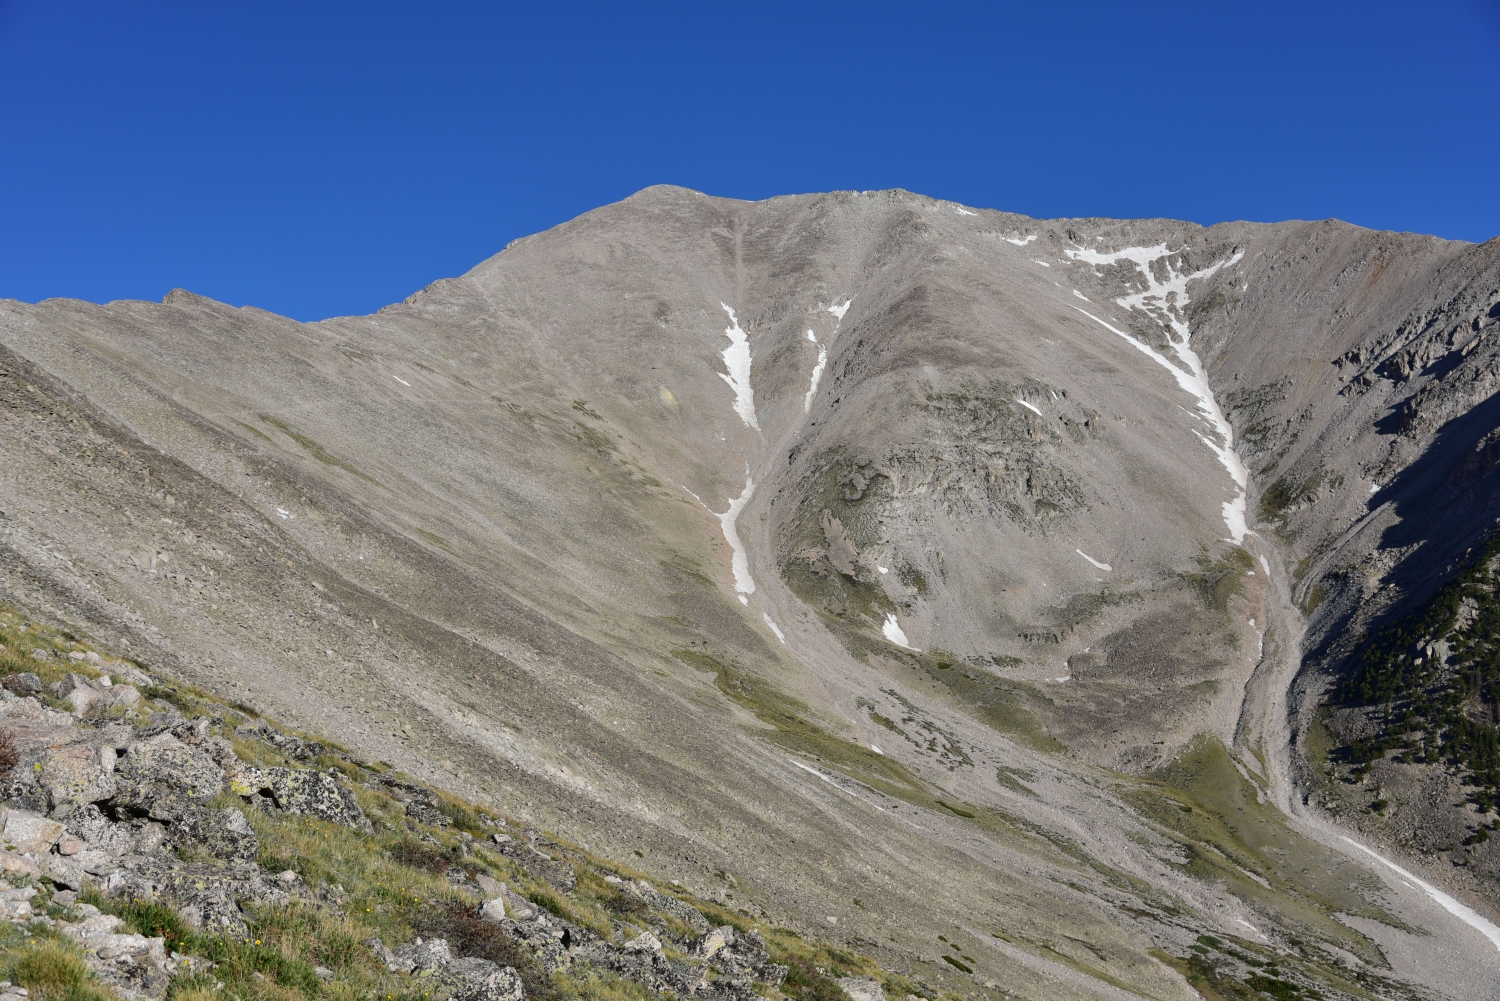
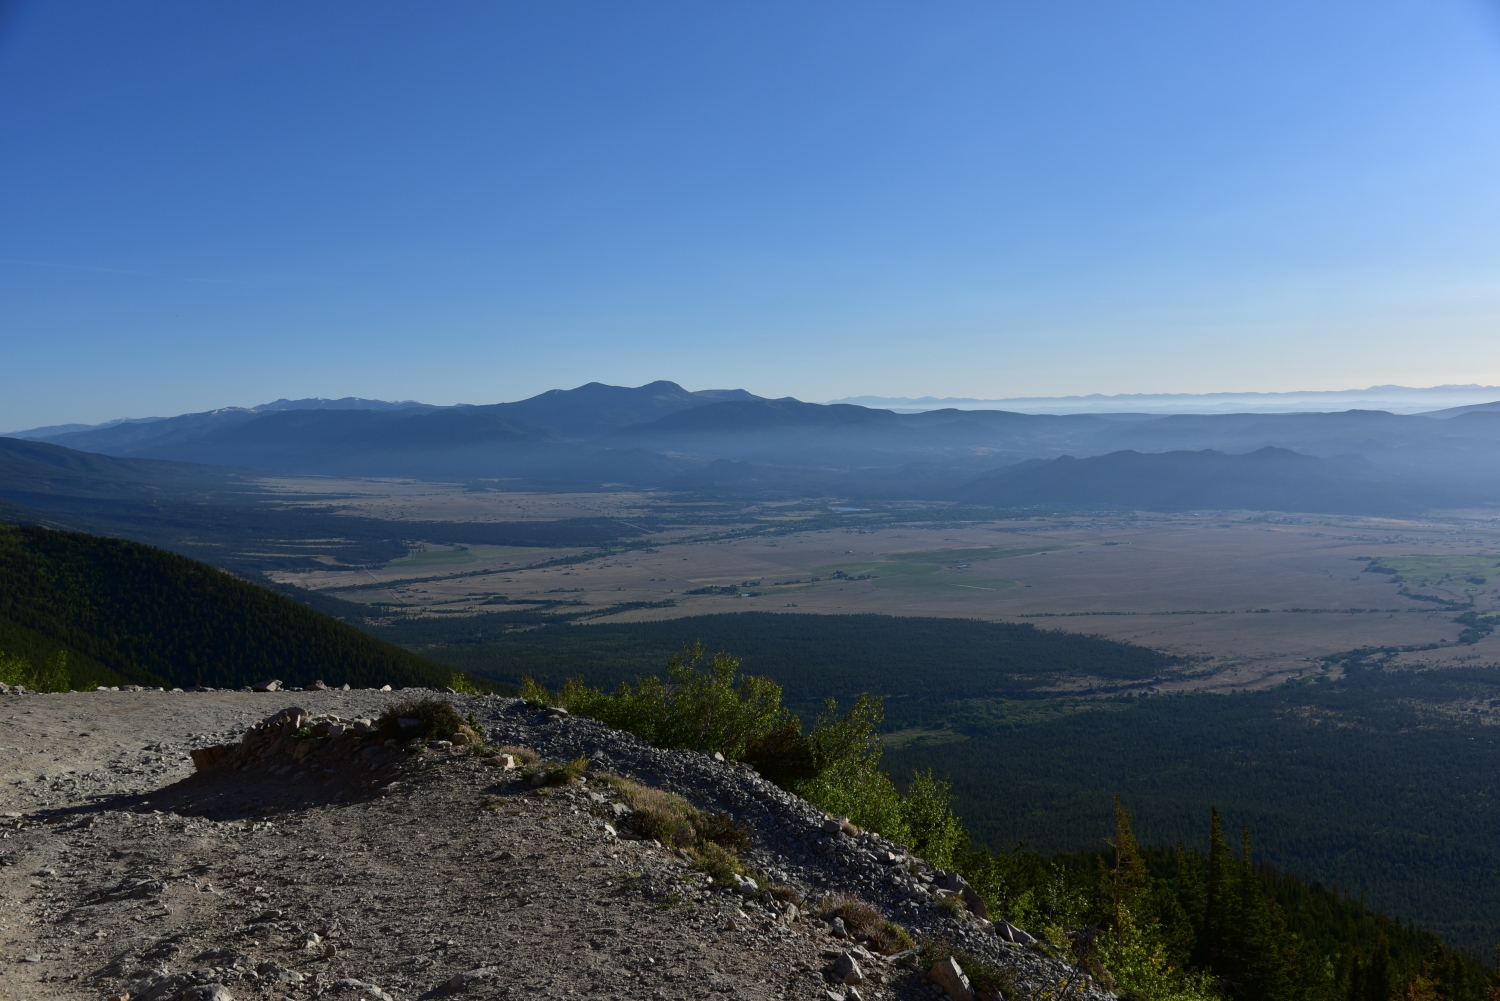
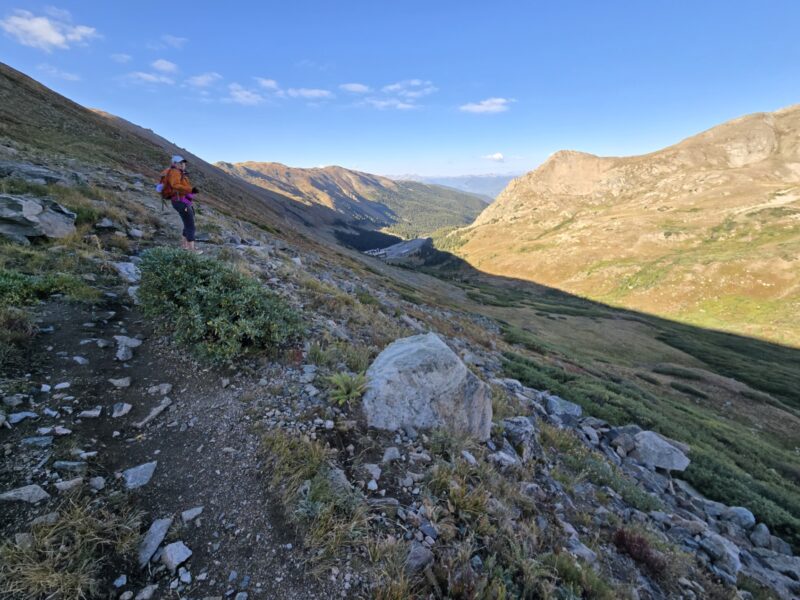
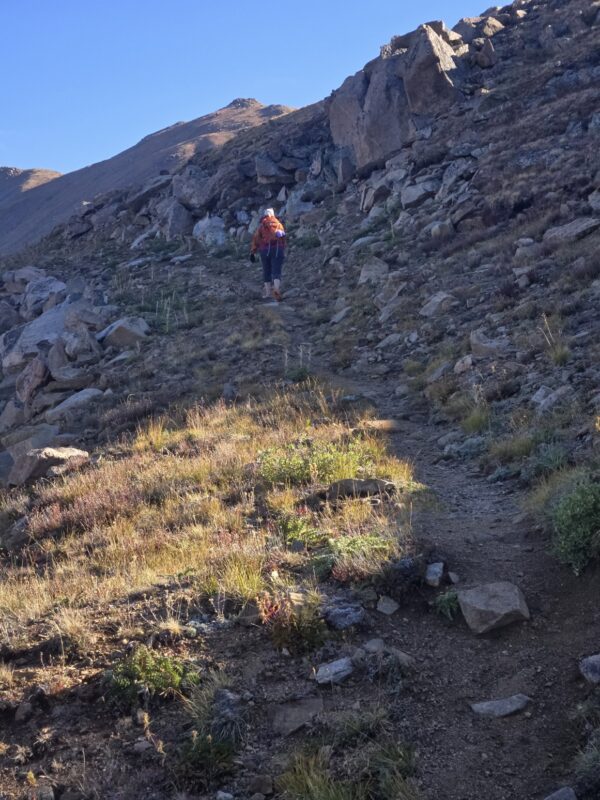
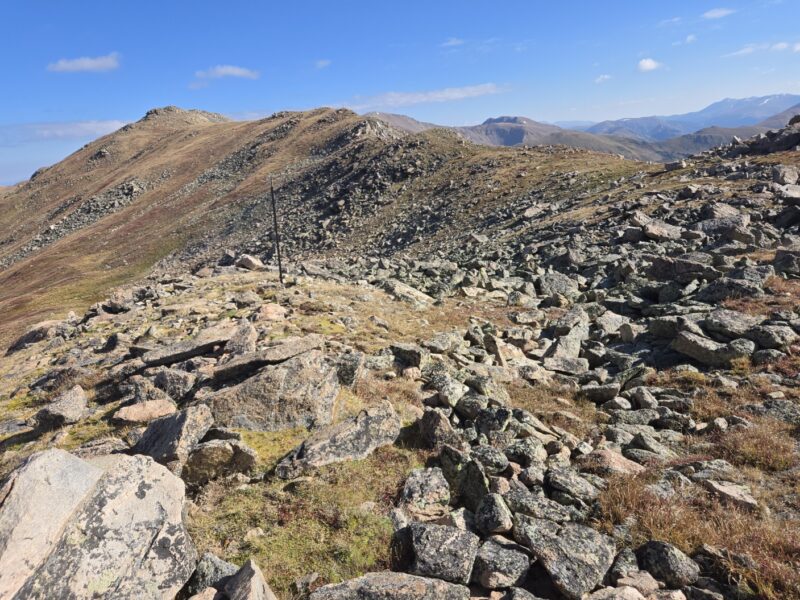
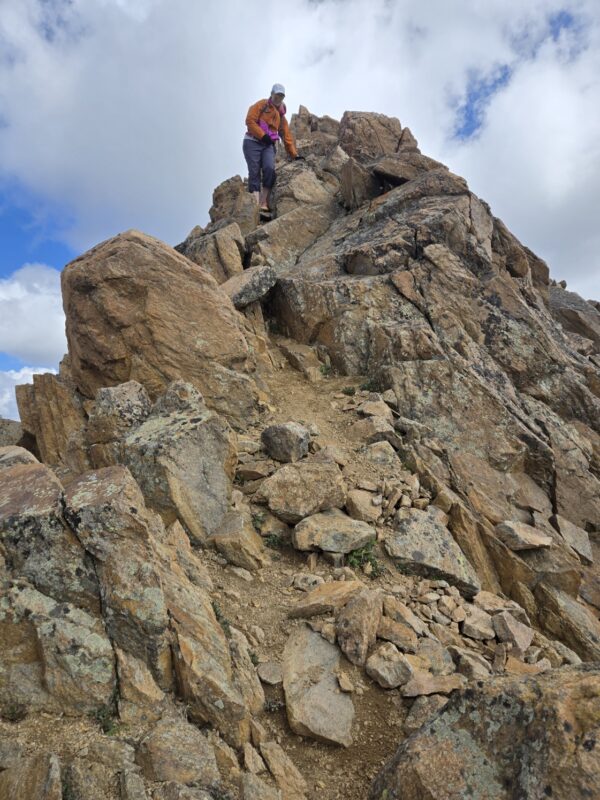
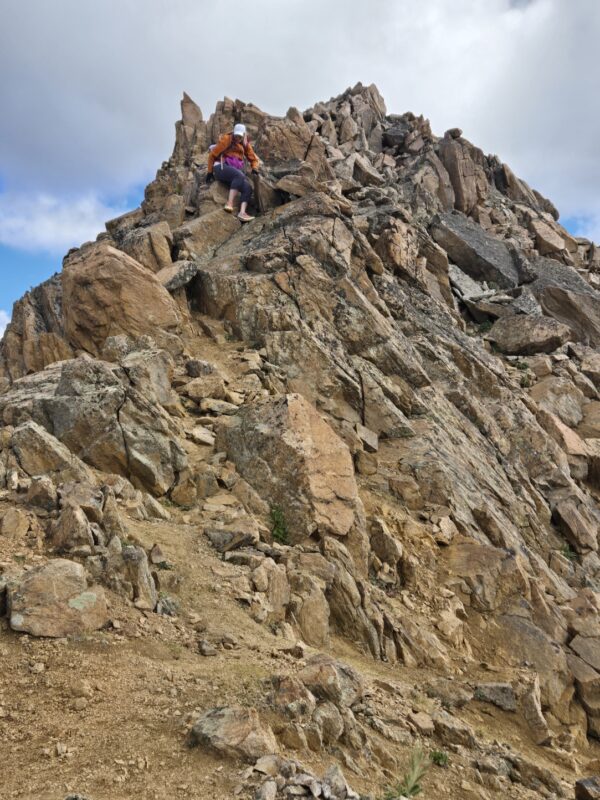
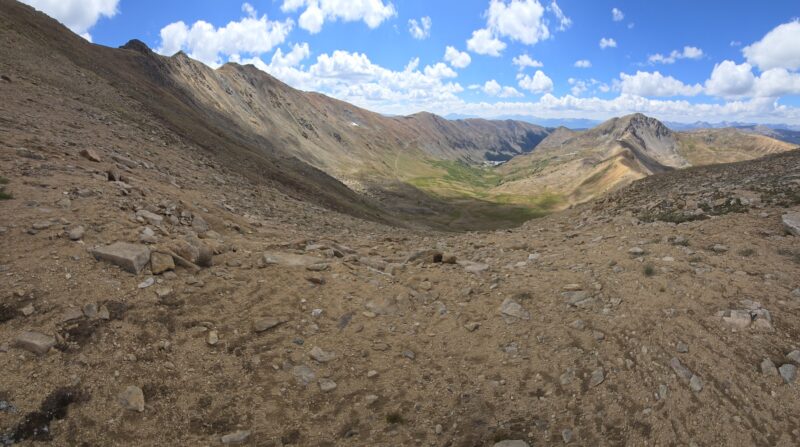
Once you’re up the snowfield you are almost to the pass and have been around 3.2 miles. At the top you’ll see a large pole in the ground — this is where you’ll turn left off the trail. But before you turn take moment to look around. When you’re ready, head up the east ridge — there is no trail here. The first section is a series of wavy ridges you have to cross. Aim for the ridge proper and traverse as necessary to avoid the steep grade.


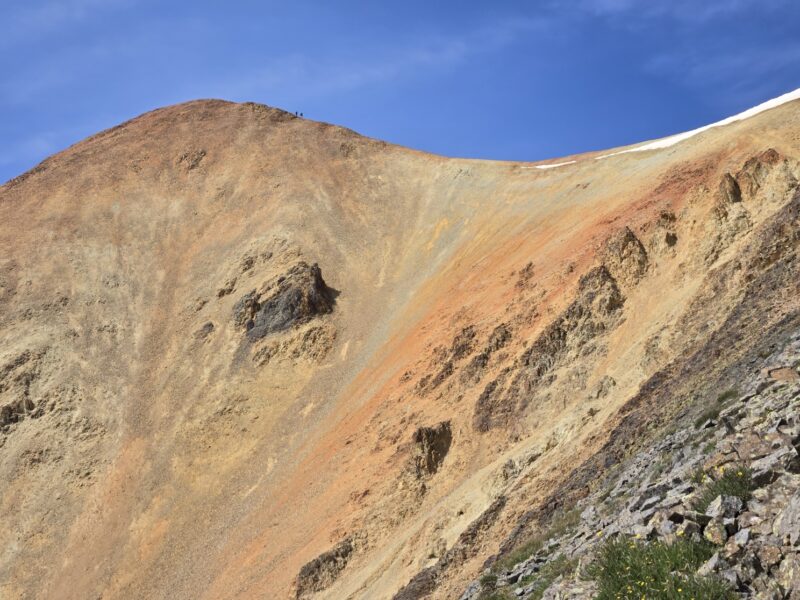
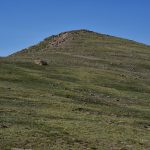
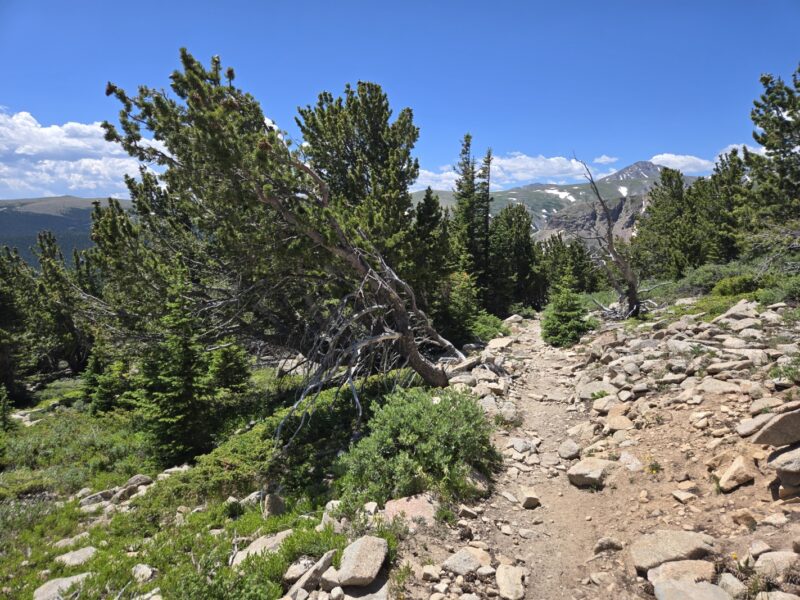
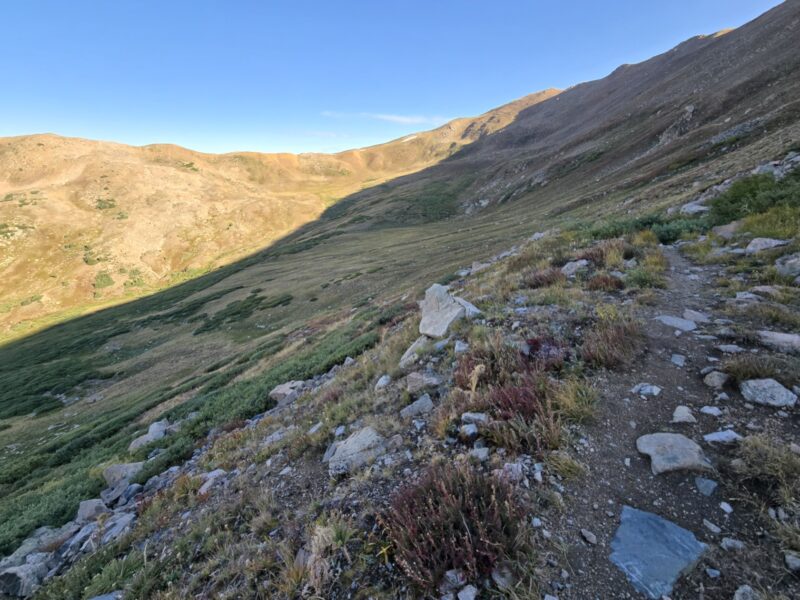
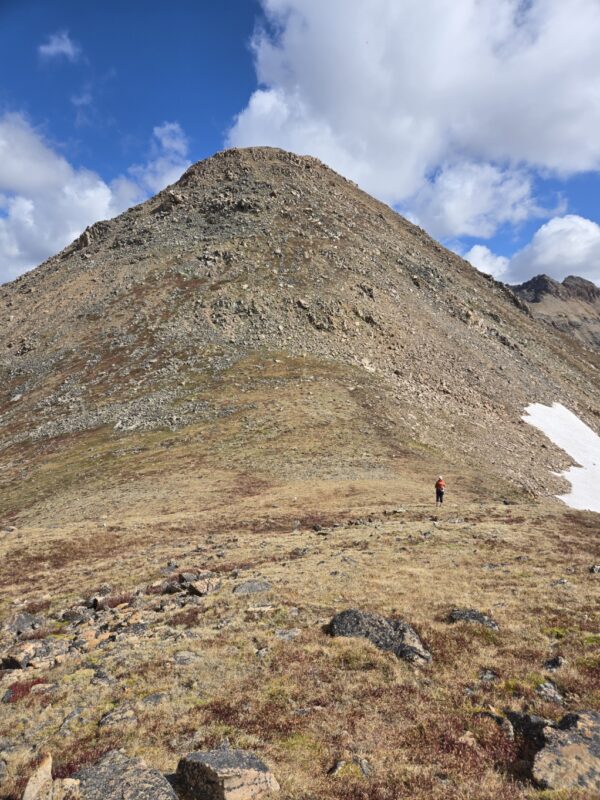
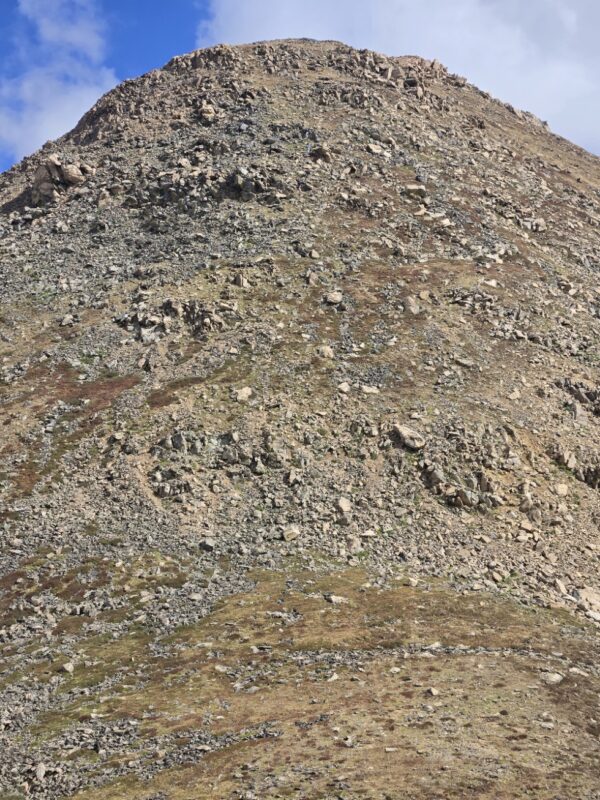
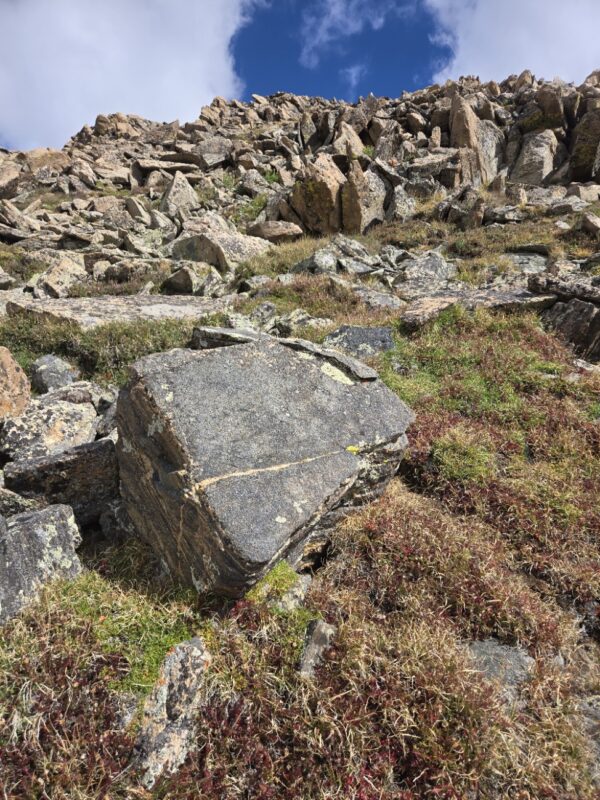
As you head up the ridge, the ridge proper is the easiest line for the beginning of the ridge. The grade varies but is generally around 35-40% for much of this section — so take your time. There was an obvious section of rock on the ridge that looks orange. It was around this section that we had to make a decision on how we were going to approach Bald Mountain’s south ridge. The ridge becomes scree filled with loose boulders as you progress pass that orange section of rock, and it made sense to push towards the south ridge, so we began to traverse.
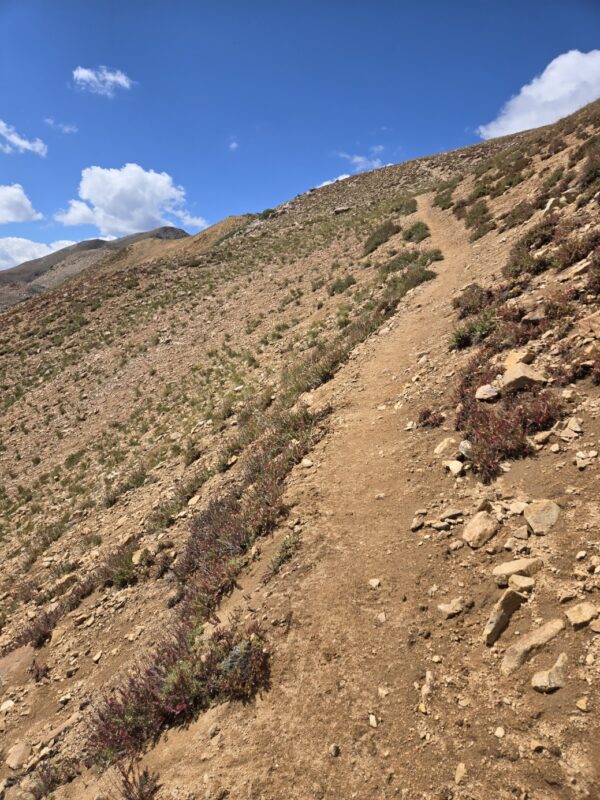
If you look at the images below, then in the first image, you can see the rolling ridges in the beginning and then the ridge you want to aim for. In the second image, you can see the orange rock section where we decided to start traversing.


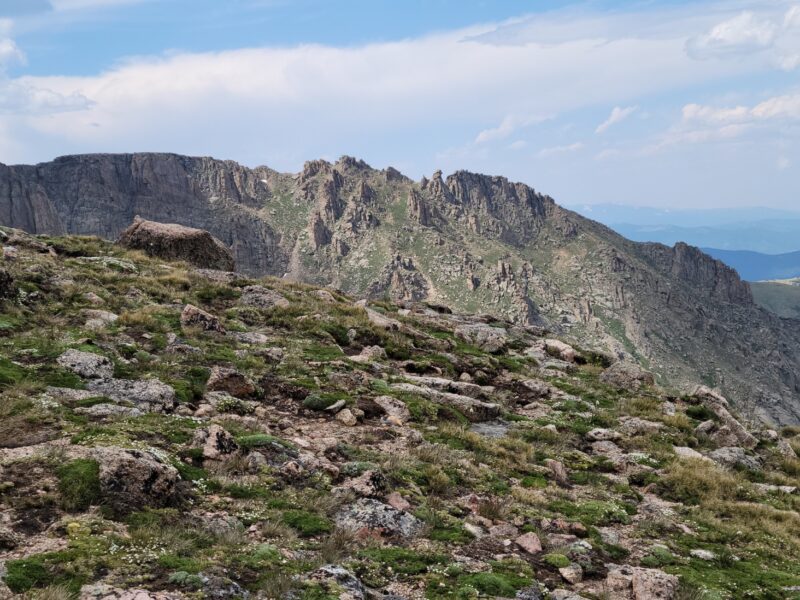
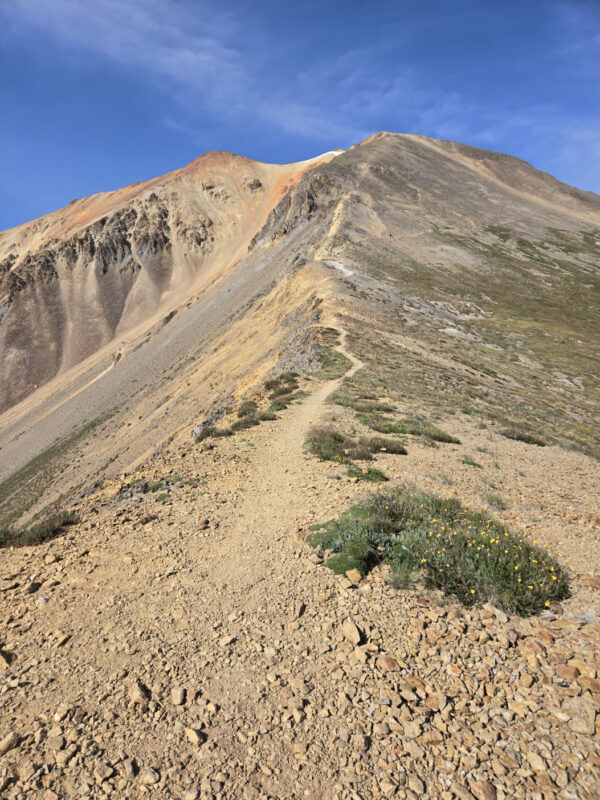
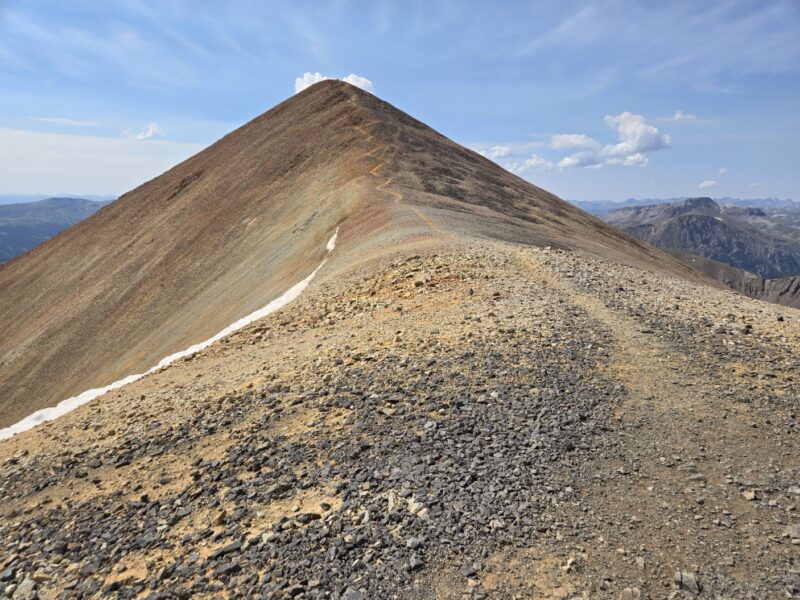
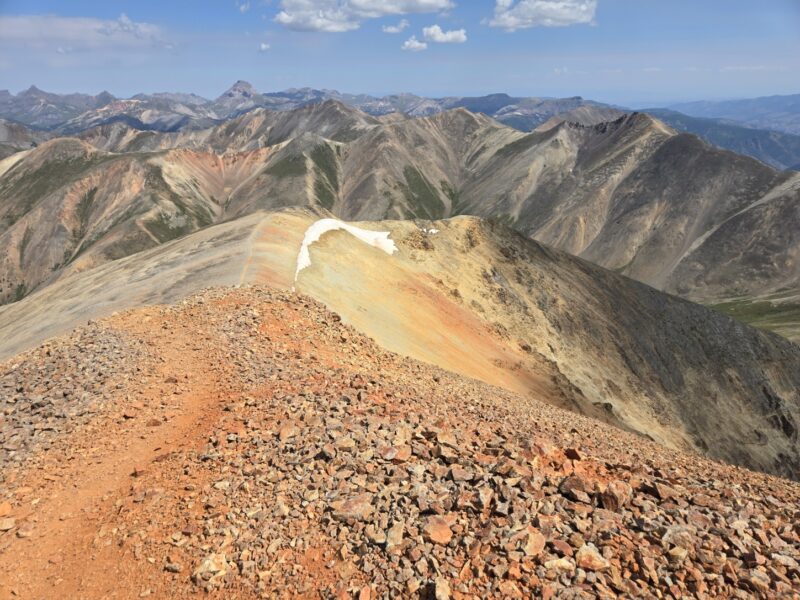
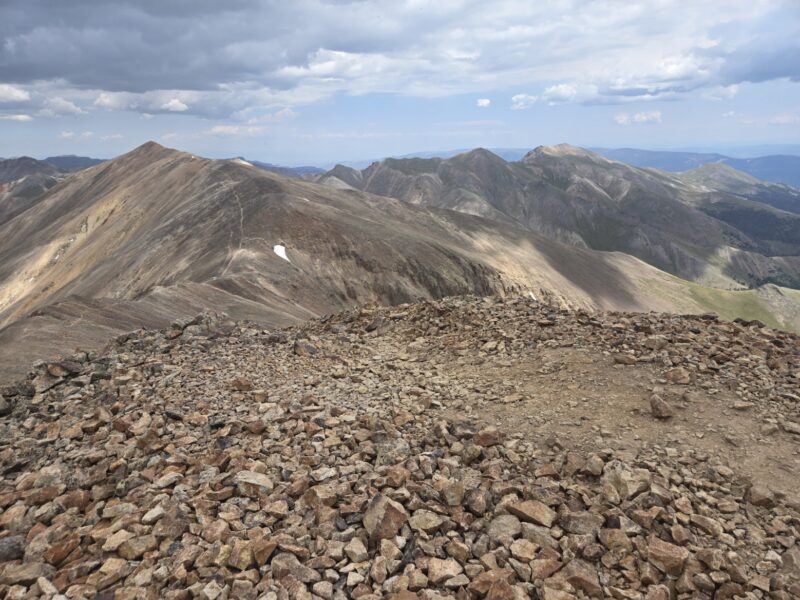
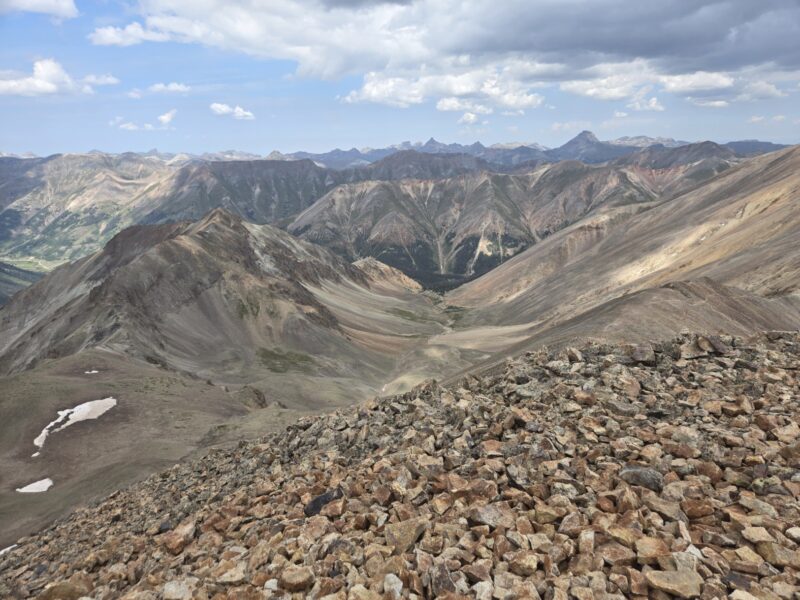
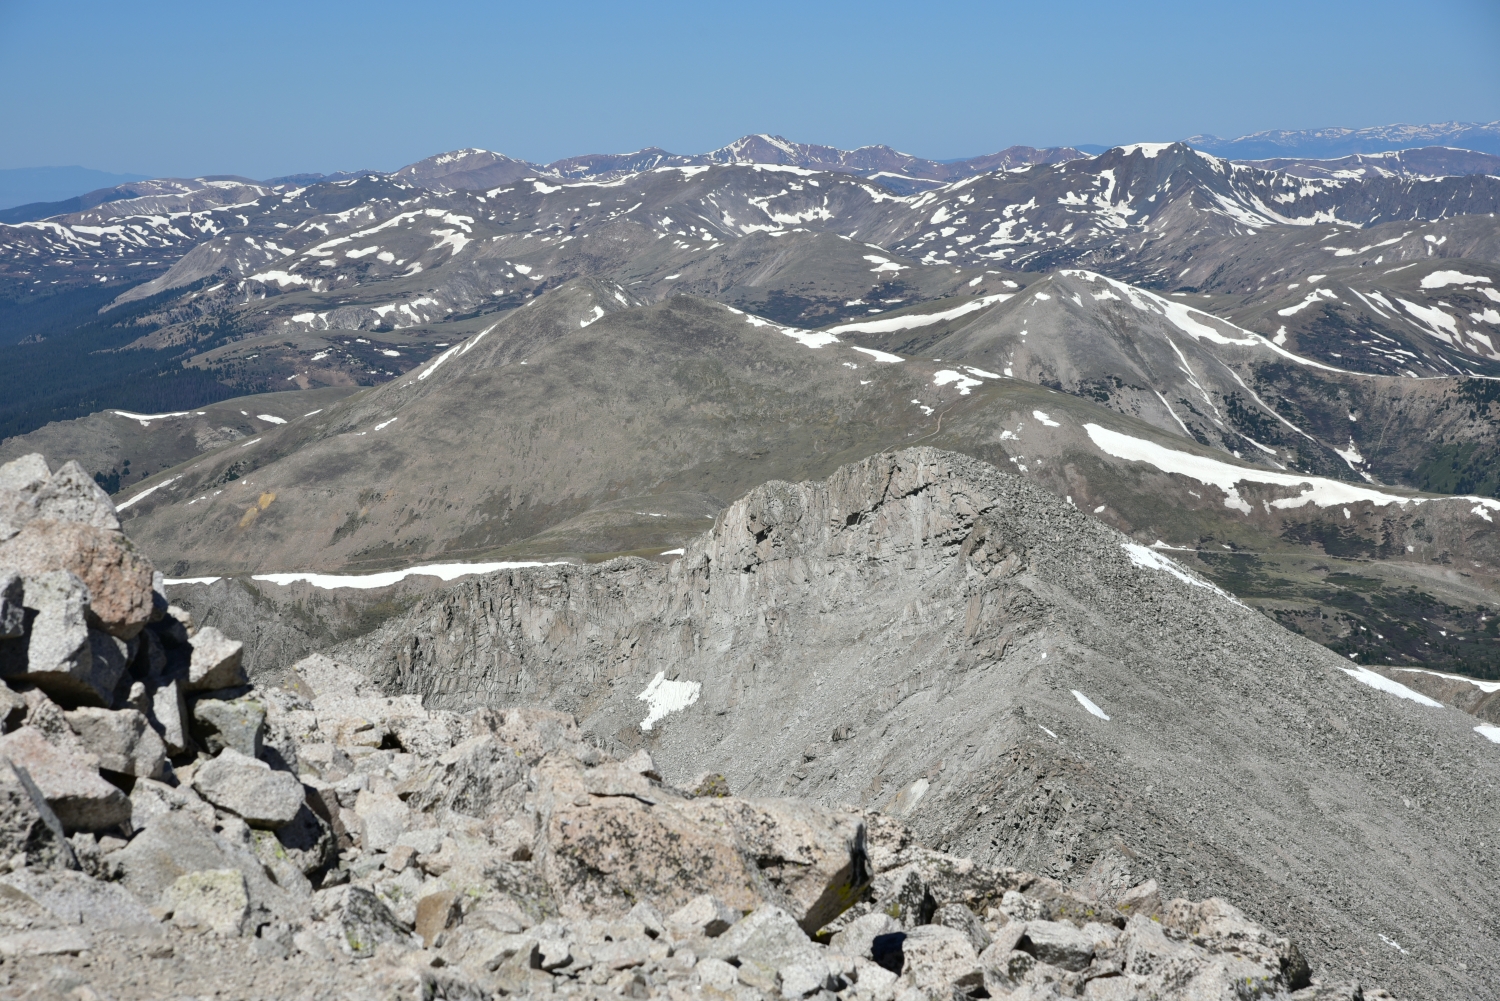
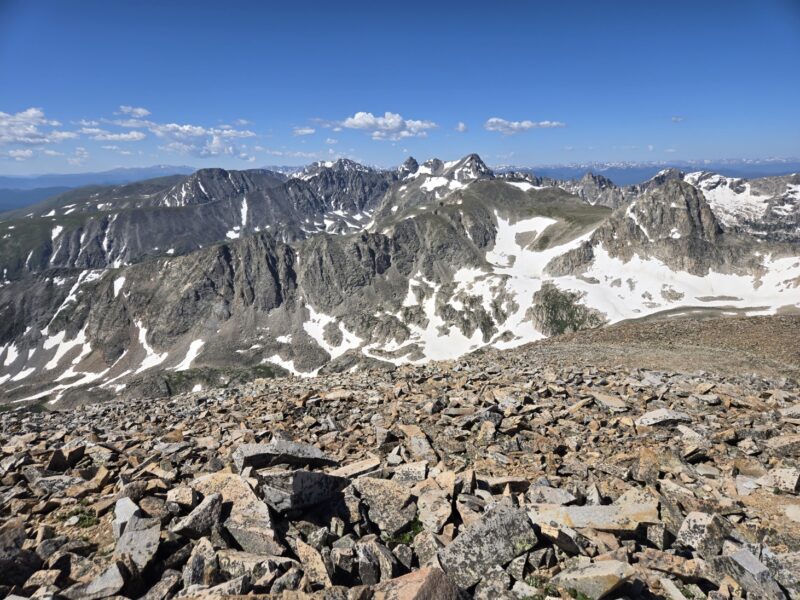
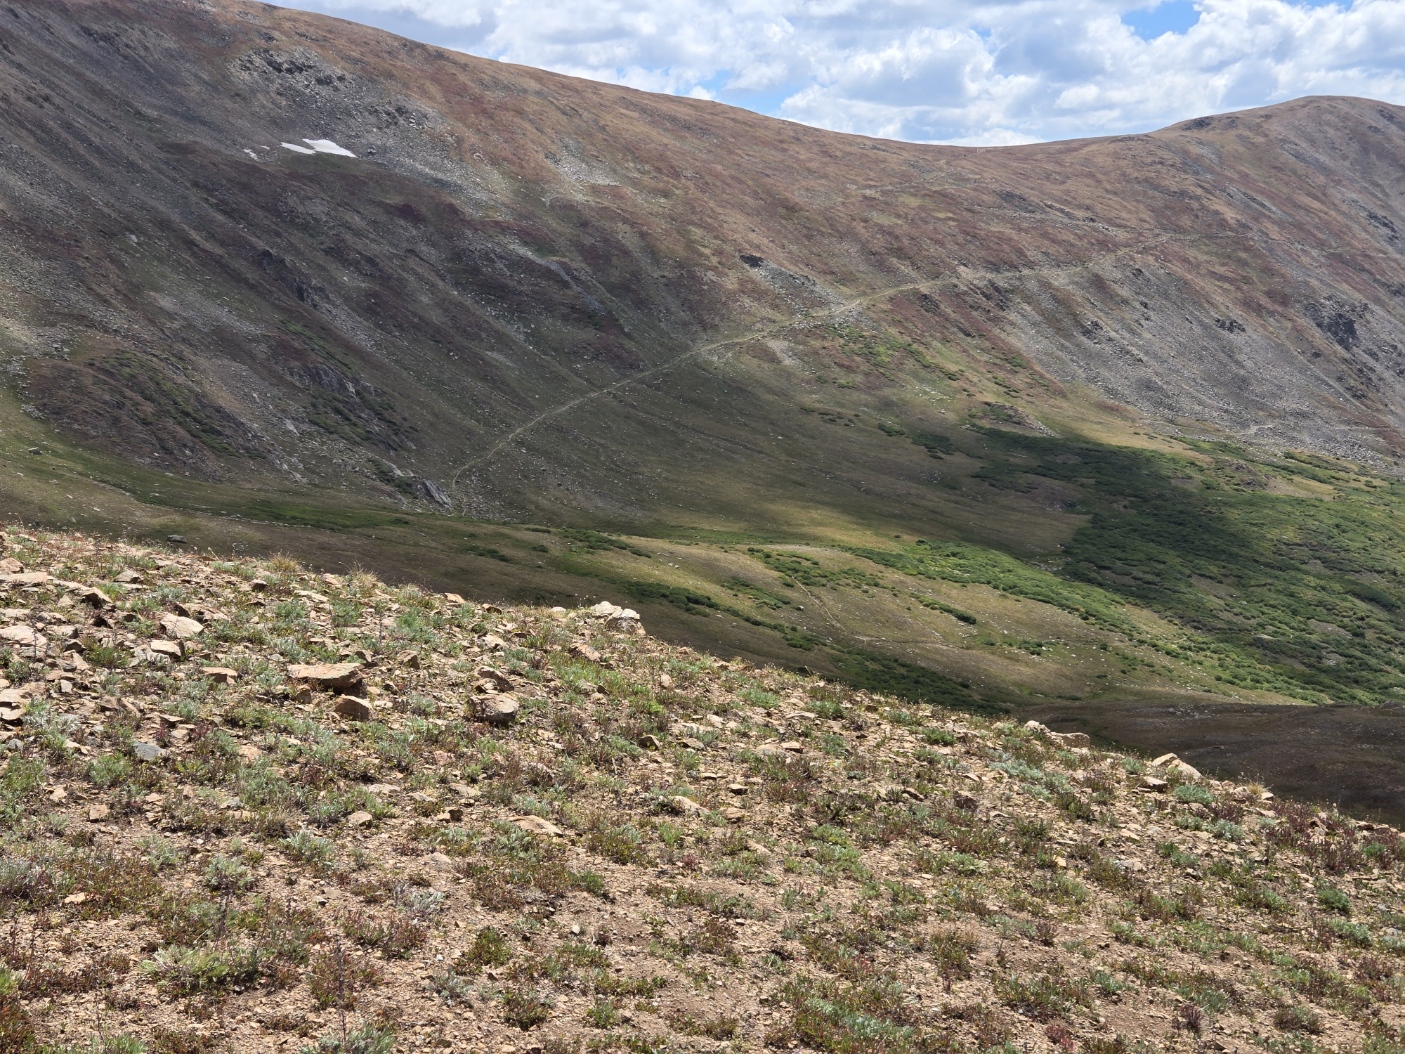
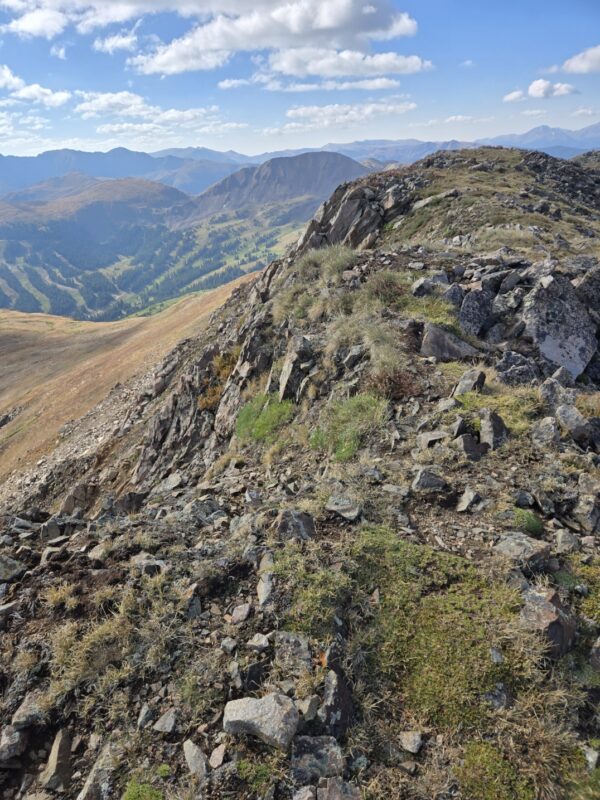
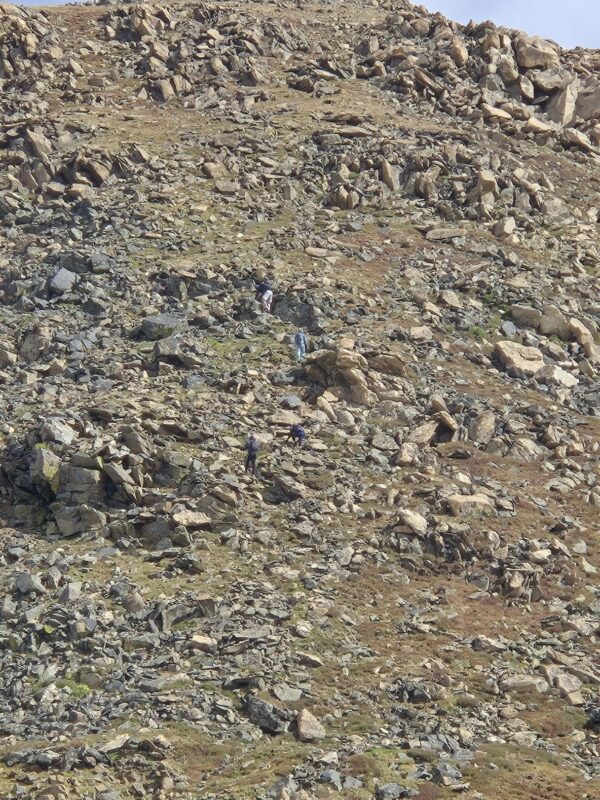
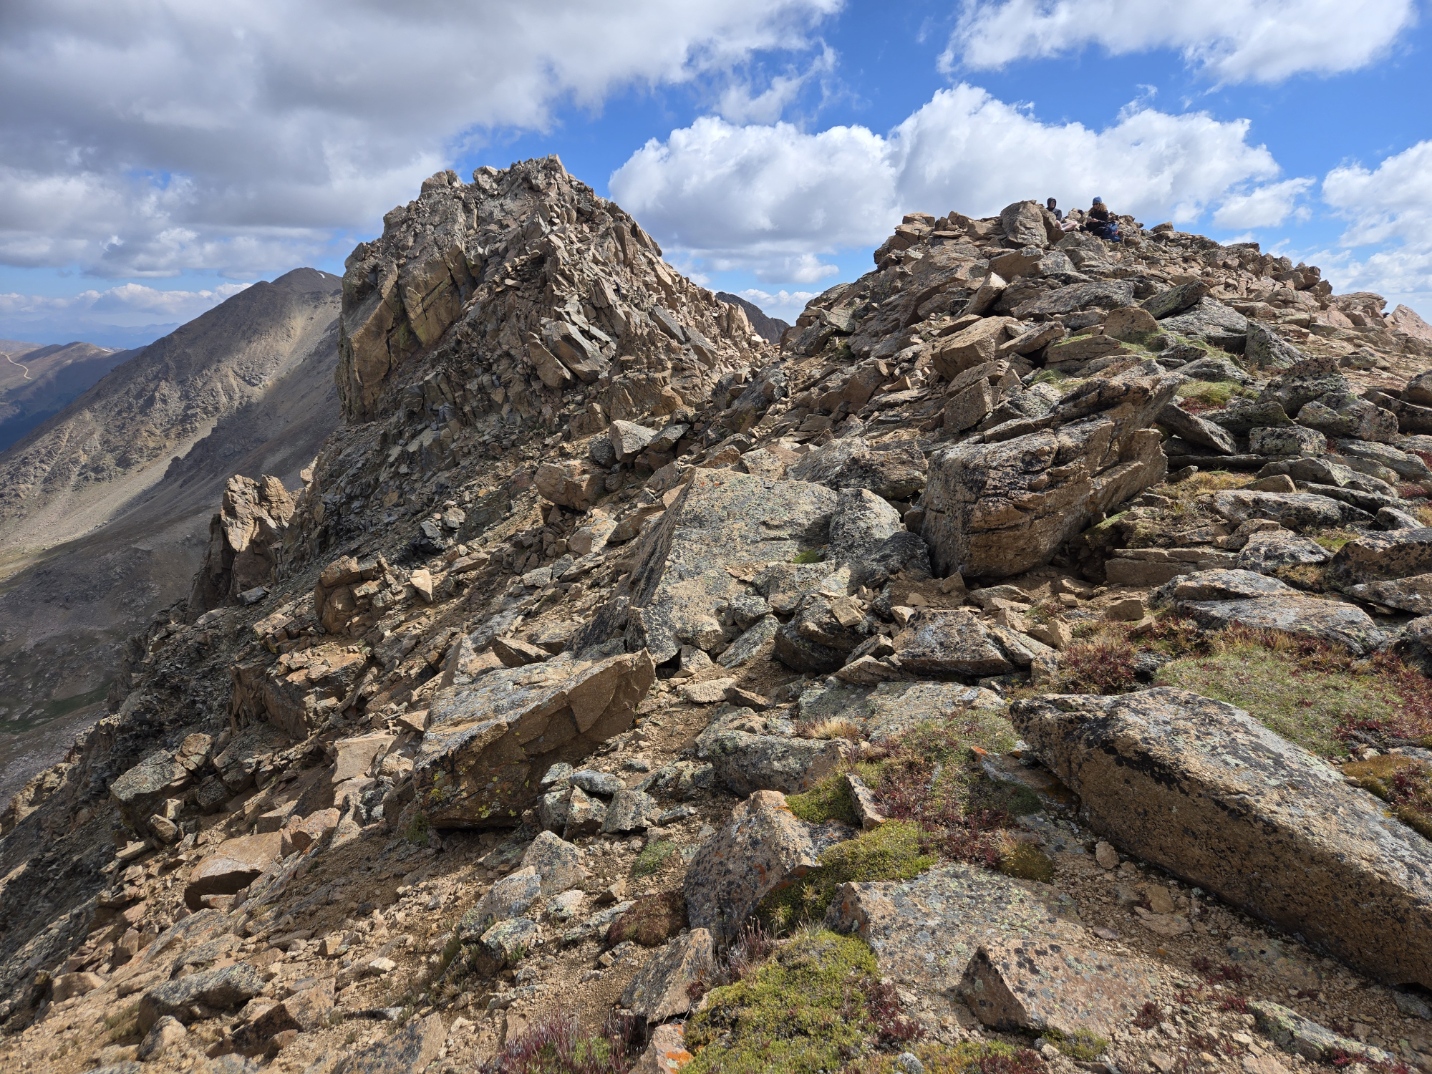
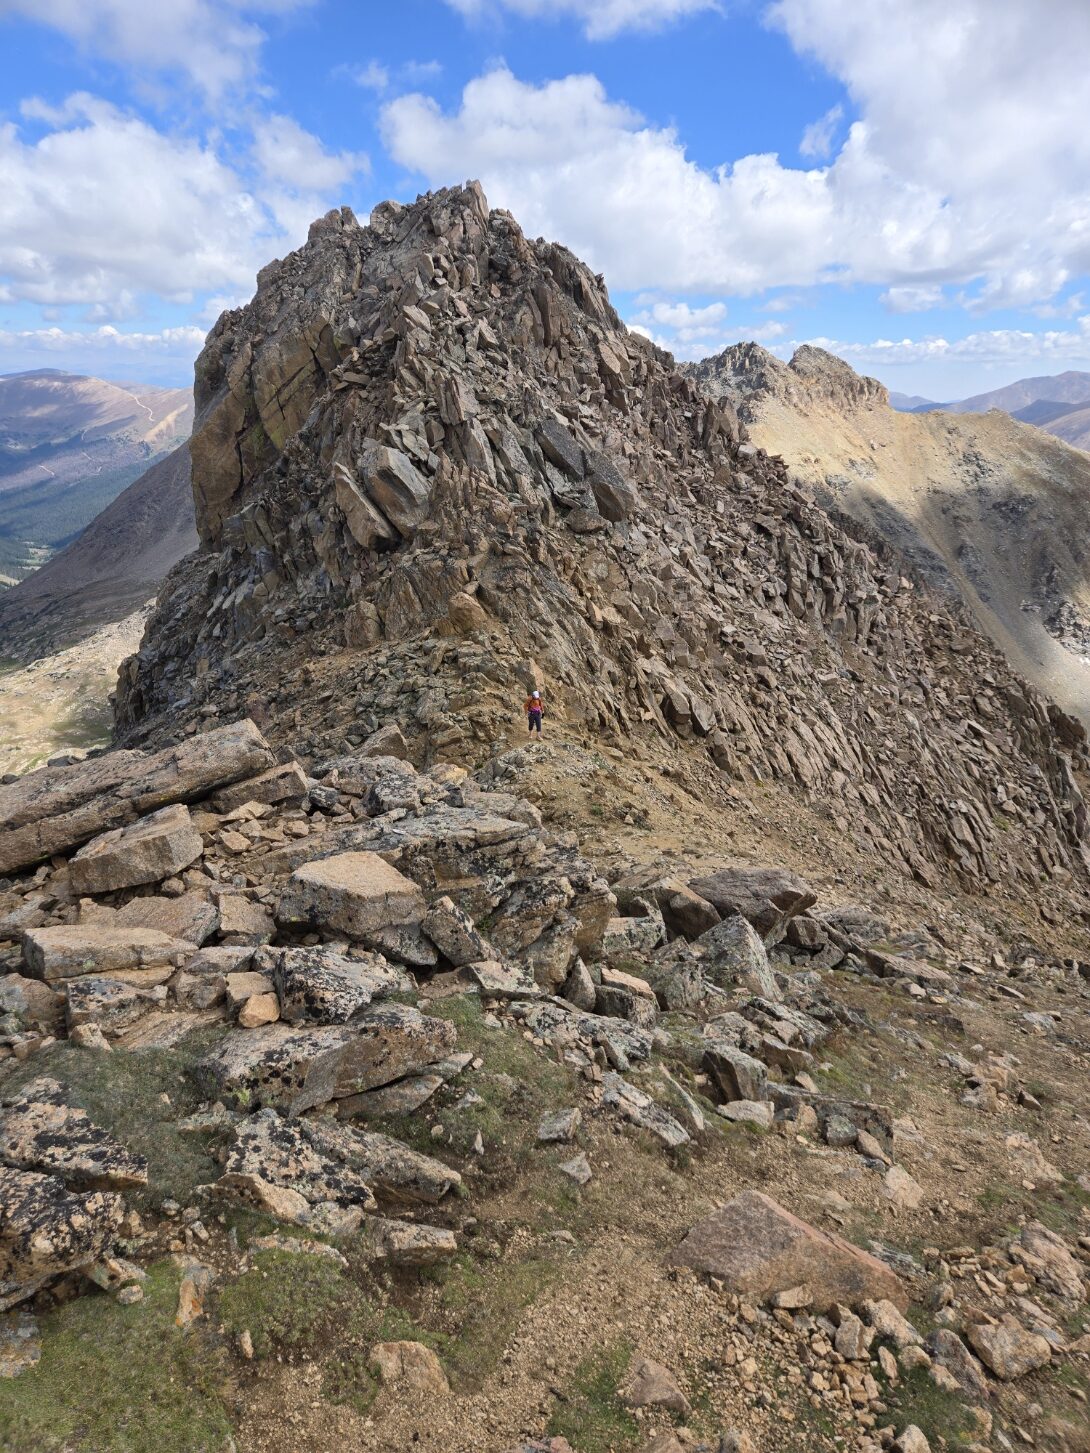
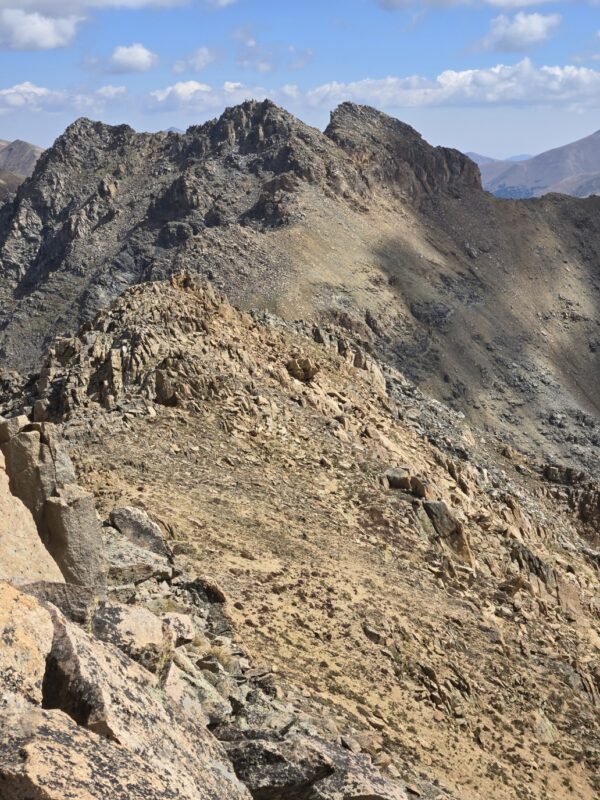
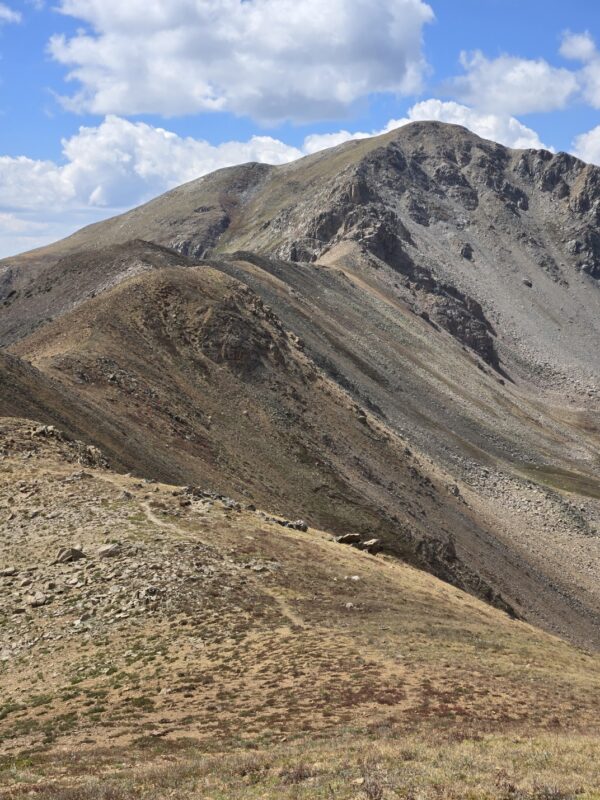
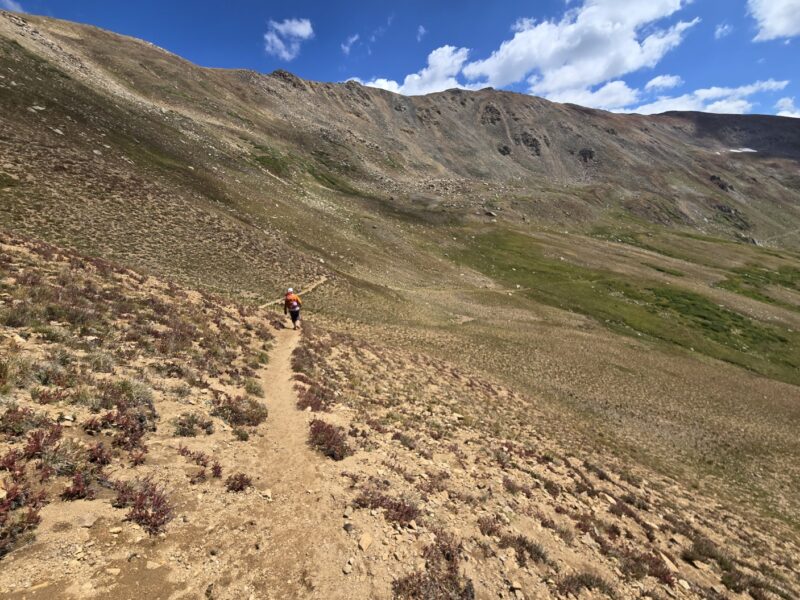
I sadly didn’t take many pictures here. But hopefully I can give some pretty good descriptions for you. First, we ran into another couple and they decided to traverse quite low and come up to Bald Mountain’s final push on the ridge. I don’t think this is the best route as it crosses lots of loose boulders and scree. The issue for all of us was that the ridge was still holding a bit of snow on the east face. I noticed a grassy area which looked like a good way up and followed that towards the ridge. As the grassy area gave way to steep scree I began to traverse over towards the ridge proper. Once there, I was able to see that there is an actual trail on the ridge. If you look at the image below, taken looking back at the south ridge from just below the summit, you can see the trail on the west side of the snowfield and the ridge. This was the best route.

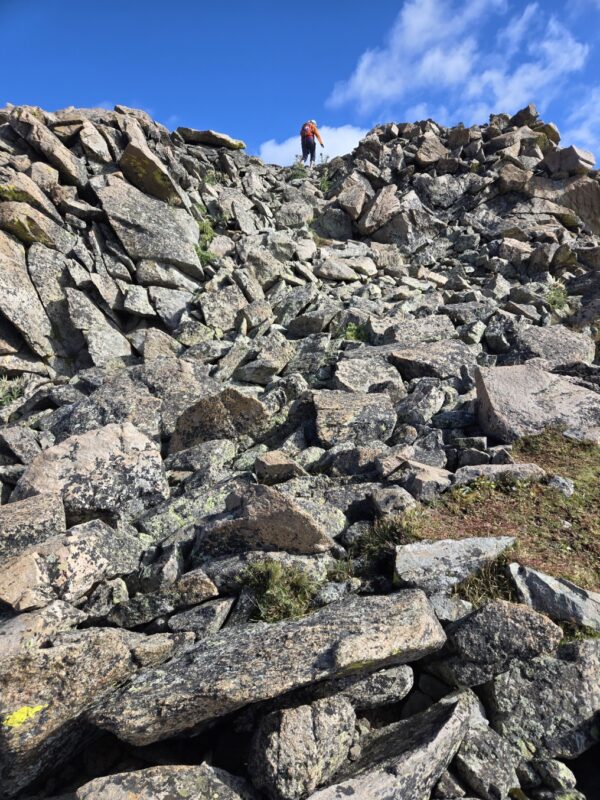
You can somewhat see the route the couple took below the snow field. You can also see the strip of grass that I ascended. We went back on the ridge and noticed that it kept going and there was a sign up towards the peak. We didn’t go investigate because it looked like a storm might be coming in, but probably related to the continental divide trail. We did drop down on that scree filled gully towards that strip of green grass. It was surprising not as bad as it looked.
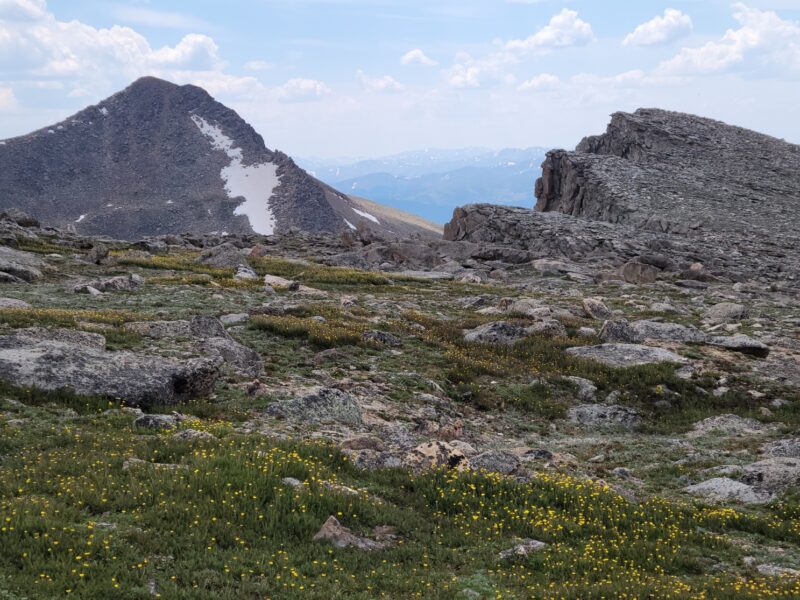
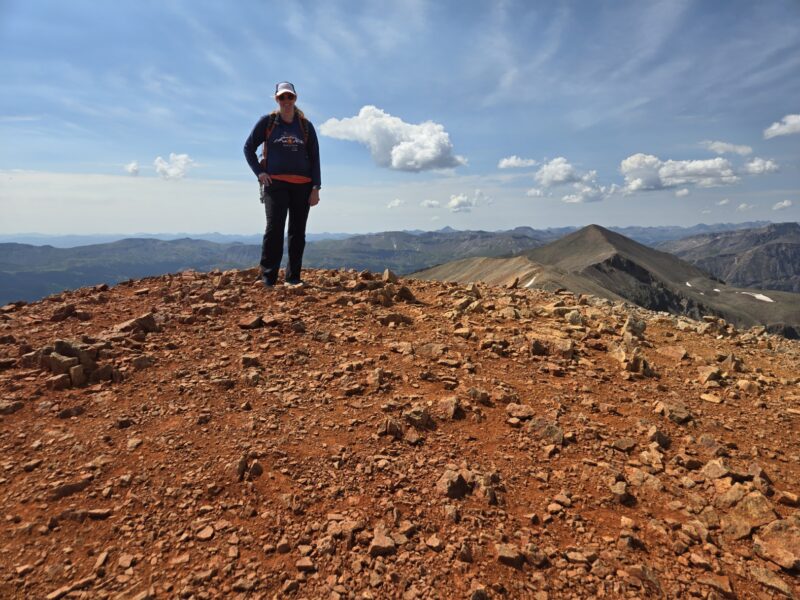
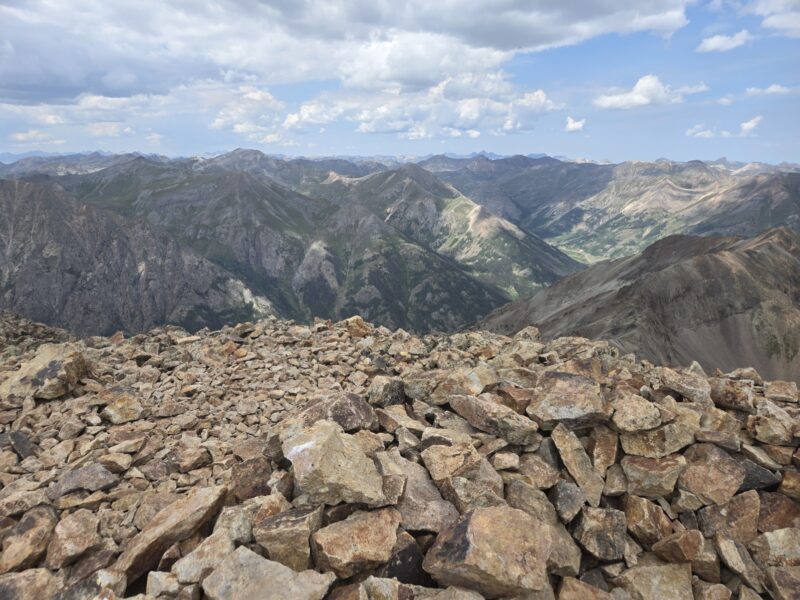
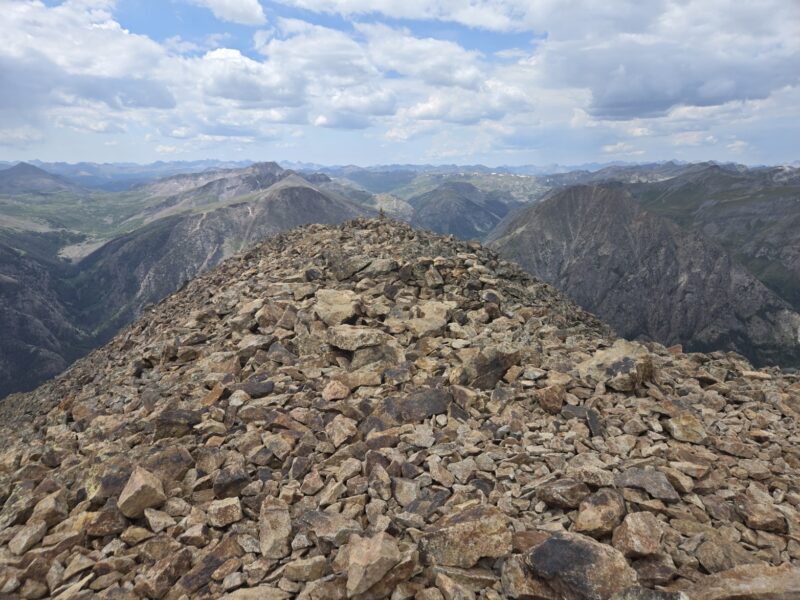
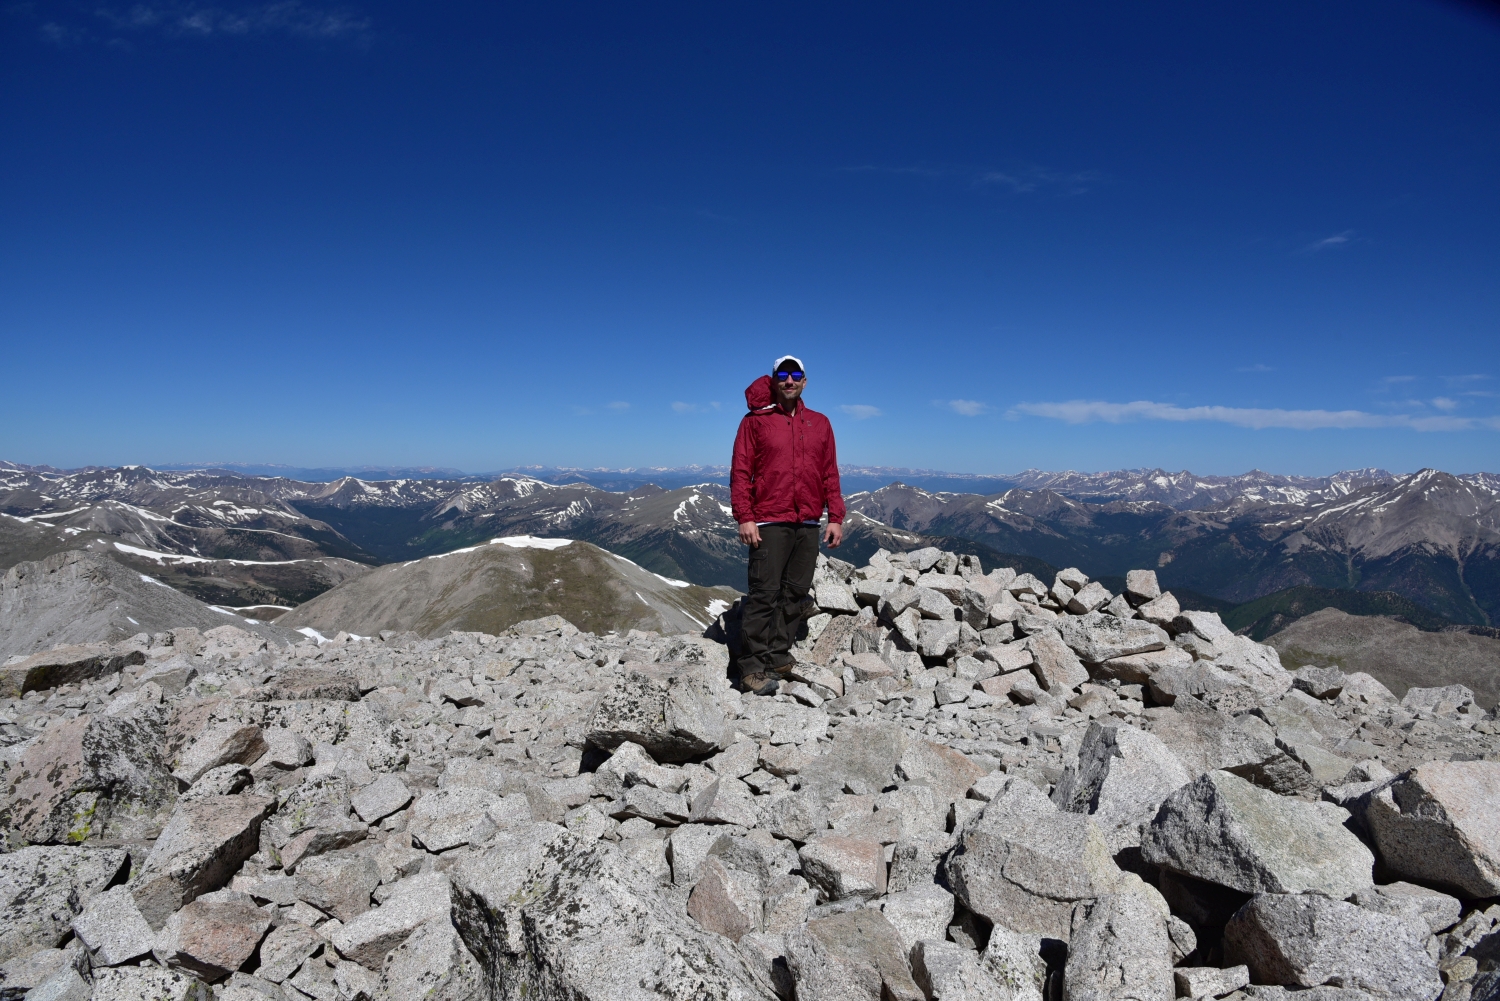
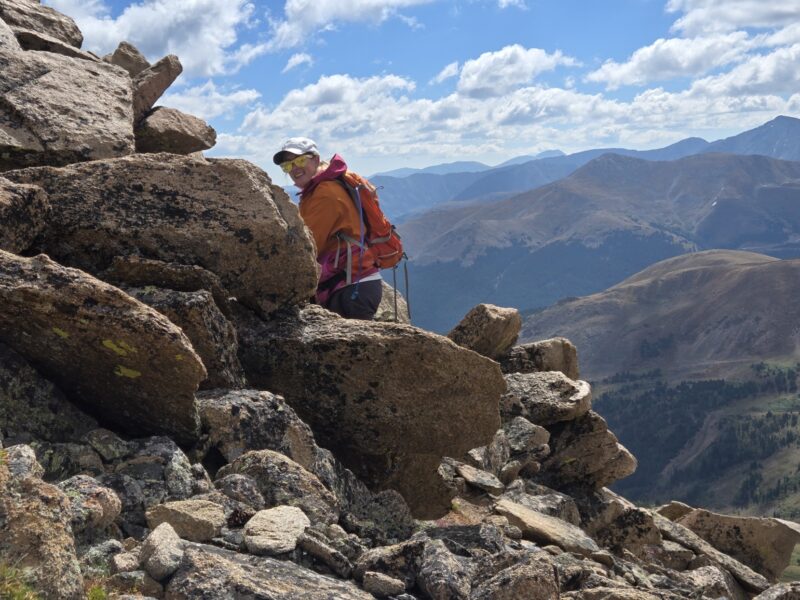
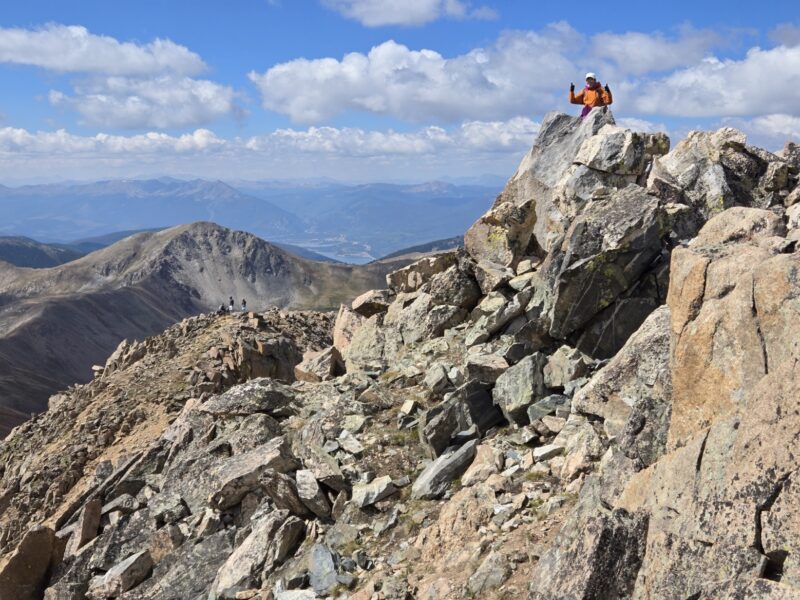
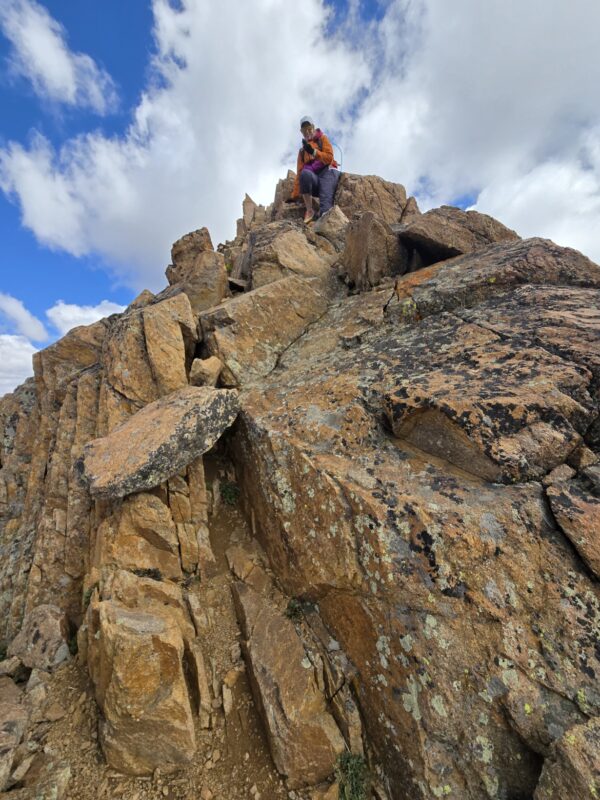
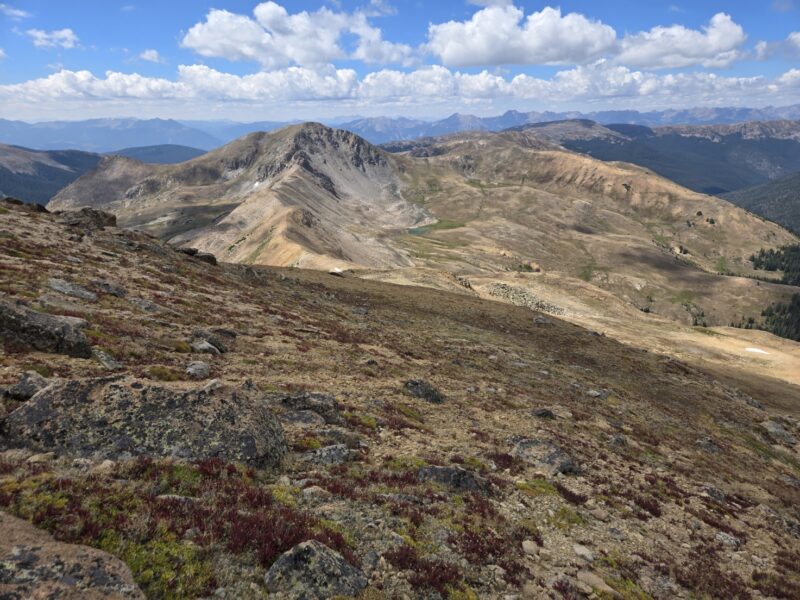
The summit was really nice. You have tons of prominence and can see so much. We were able to see Breckenridge, numerous peaks we’ve climbed in and around Breck, Grays and Torreys, and you can even see Mount of the Holy Cross (image below).


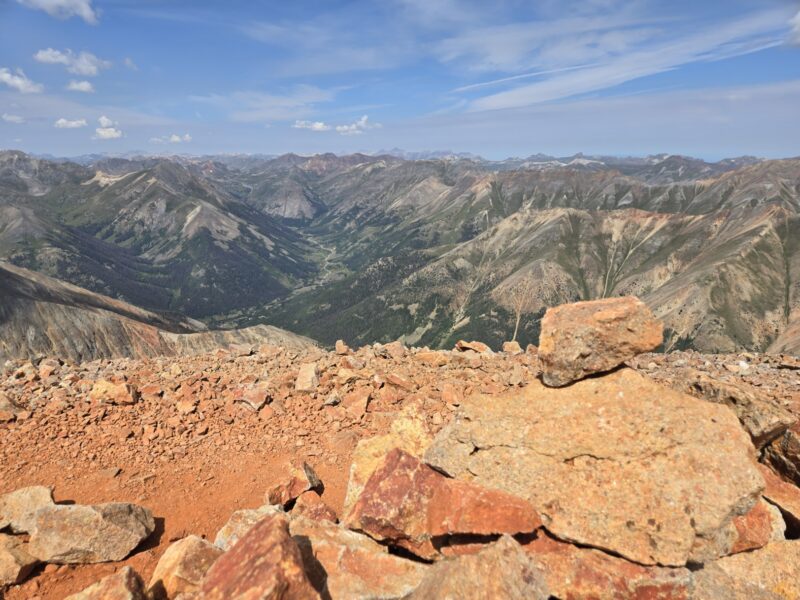
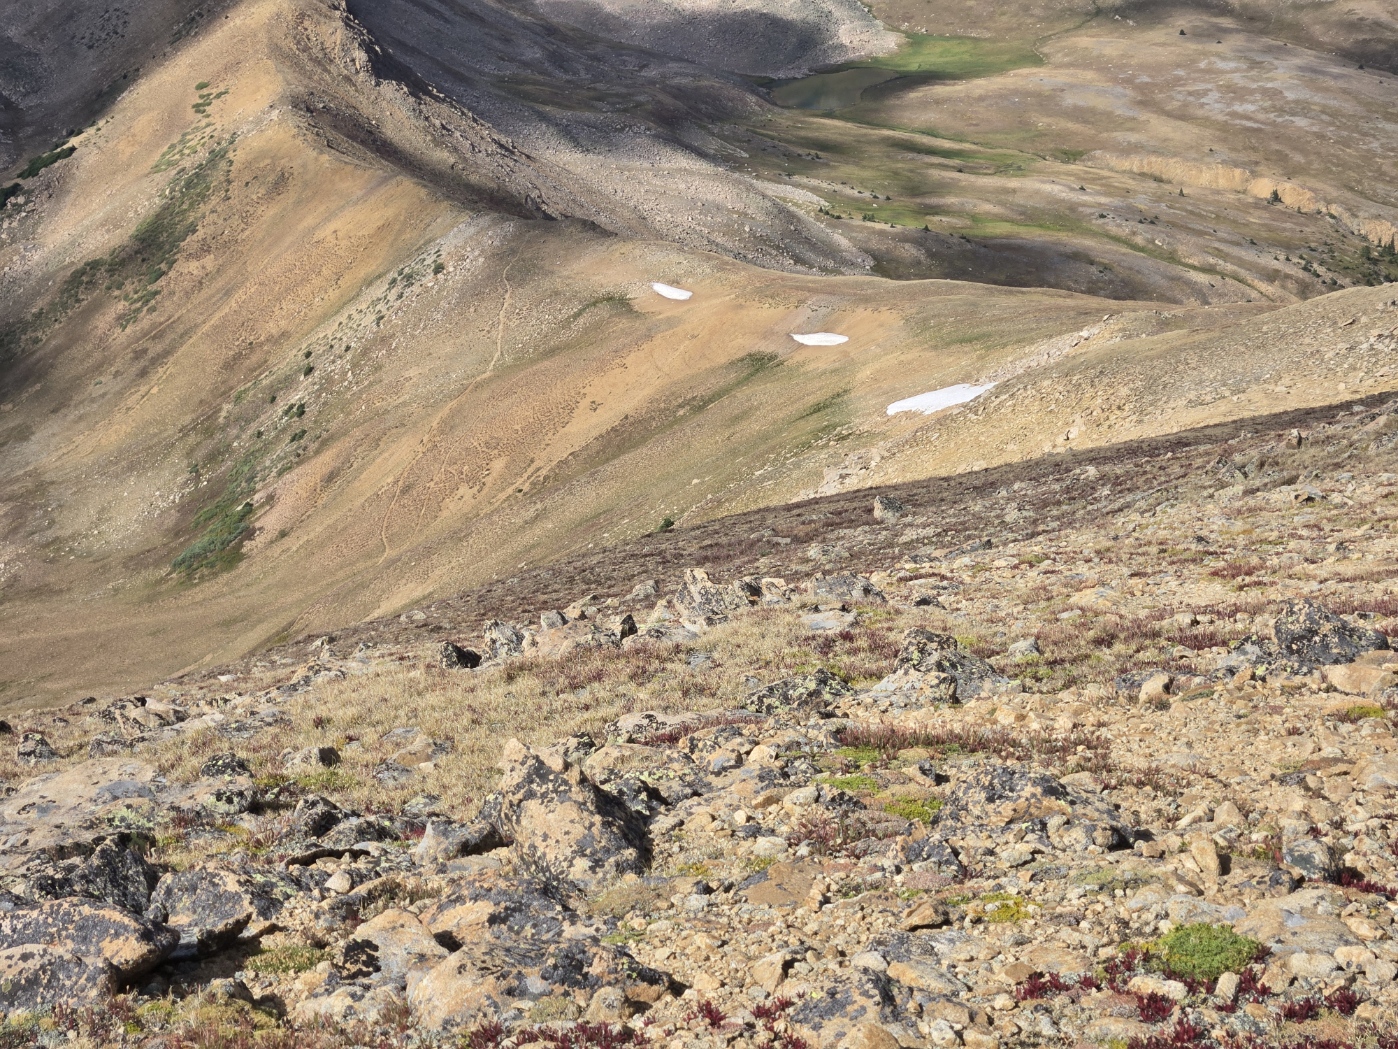
After the ridge and getting down the scree gully, the rest of the way down was pretty straight forward, but tiring on the quads! Below is a gallery of some images from the hike and a Strava map of the route. Keep in mind that snow conditions will change how this route


Note, I would probably traverse over and up to the ridge proper a little more directly, but the snow can make that impossible. Have fun out there and stay safe!
Redcloud and Sunshine Peaks
Stats: 12.25 miles with 4,800 ft elevation gain; Class 2; climbed 8/2/2024.
This will be the first post in a while for our blog. We have been climbing and getting out there, but life just seems to have happened. We did climb Mt. Blue Sky and Bierstadt this year as well as some other hikes to get ready for Redcloud and Sunshine. It was a long day and we were a little tired coming back to Redcloud from Sunshine. I gave it a difficult rating for length, but we’ll have to think about a better rating system for our hikes, since they are so diverse. But let’s get into it.
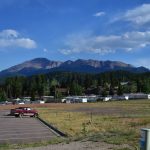
We stayed in Lake City, Colorado, for this hike and drove in on Colorado 30. It is a pretty nice road and I’ve talked about it before for the hike on Handies Peak. The shelf road is still in pretty good shape and I’d say that a vehicle with good clearance can make it to the trailhead just fine. I never used 4-wheel drive in the X-terra, which we’re still driving. For fun, here’s a picture of that shelf road and of the trailhead parking lot.
Be careful on those turns, since it is only wide enough for one car and someone is going to have to back up. Anyways, we got going at 7:11 am with a solid weather forecast and decent looking sky. I’ll say that the first quarter mile or so is pretty steep with not much of a warm-up. It is through some trees and you can hear the creek on your right. But a solid trail and I’d say it doesn’t surpass class 1 until you get to the first saddle. I have some shots below that look back towards the trees from the trail, except for the one in the middle which is looking up towards the basin.
As you can see in the satellite image I put up of the hike, you make a ‘U’ shape around the basin as you head up towards the first saddle at around 13,000 feet. It was a beautiful basin and the trail was very, very nice. Lots of wild flowers were still out. We were feeling strong and loving the cool mountain air. Below are some images from that portion of the hike.
After hiking through the basin area you begin to head up steeper terrain towards the first saddle. It provides pretty views looking back at what you just hiked. At this point, you have hiked about 3 miles and it is hard to believe that Redcloud is only 1.5 miles away, though you can’t see it yet. Making your way up to the saddle you will see a large cairn at the top. Once there when you look right you will see two peaks with a saddle. The peak on the left (the big red one) is Redcloud. You are at about 13,000 feet and can see most of the remaining route to Redcloud. The images below show the view towards the remainder of the route as well as looking the opposite direction towards other non-14er options for hiking.
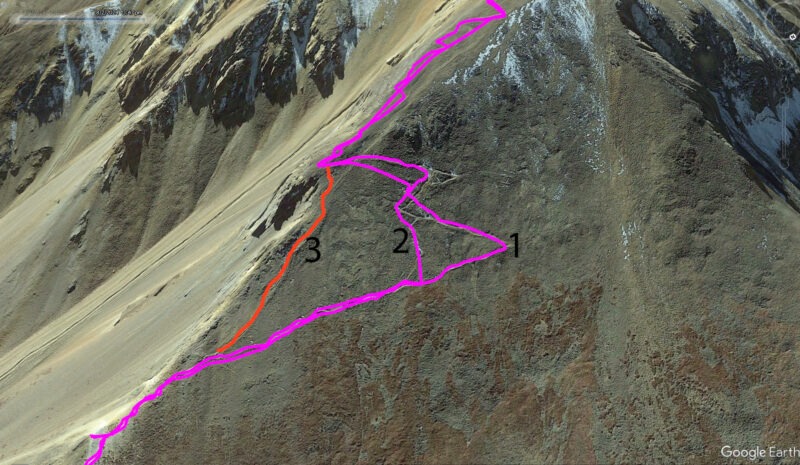
This is where I’d say the climbing changes from class 1 to class 2. This is due to some route finding you have to do going up to the false summit. I’m going to post below an image of the GPS as well as an edited picture of the hike up, since it is a little confusing as noted by a few other hikers. Alright, so there are two signs that say “Trail” with an arrow pointing to the correct (or official) route. The signs are at the base and top of the route labeled 3 in red on the image on the right, which is why that is not the “correct” way. The official route is the path labeled 1 in the image on the right. Route 2 is what we accidentally took on the way down when we turned too early on a byway trail. It was very loose and rotten and not a good path. I will say I saw hikers on all 3 of these and let’s face it, none of them are going to get you into class 4/5 climbing, but in an effort to minimize erosion and keep the trails nice I’m posting this here. Bill Middlebrook has similar images on 14ers.com.
Once you get up to the false summit you can see the last 100+ ft of the climb. It looks kind of cool with all the red dirt and rocks, and you can look back towards the saddle for a cool view. Honestly you can look anywhere and you have amazing views. This is a really awesome peak. The big image is the remaining route. You are at about 13,900 feet here and have hiked about 4.25 miles.
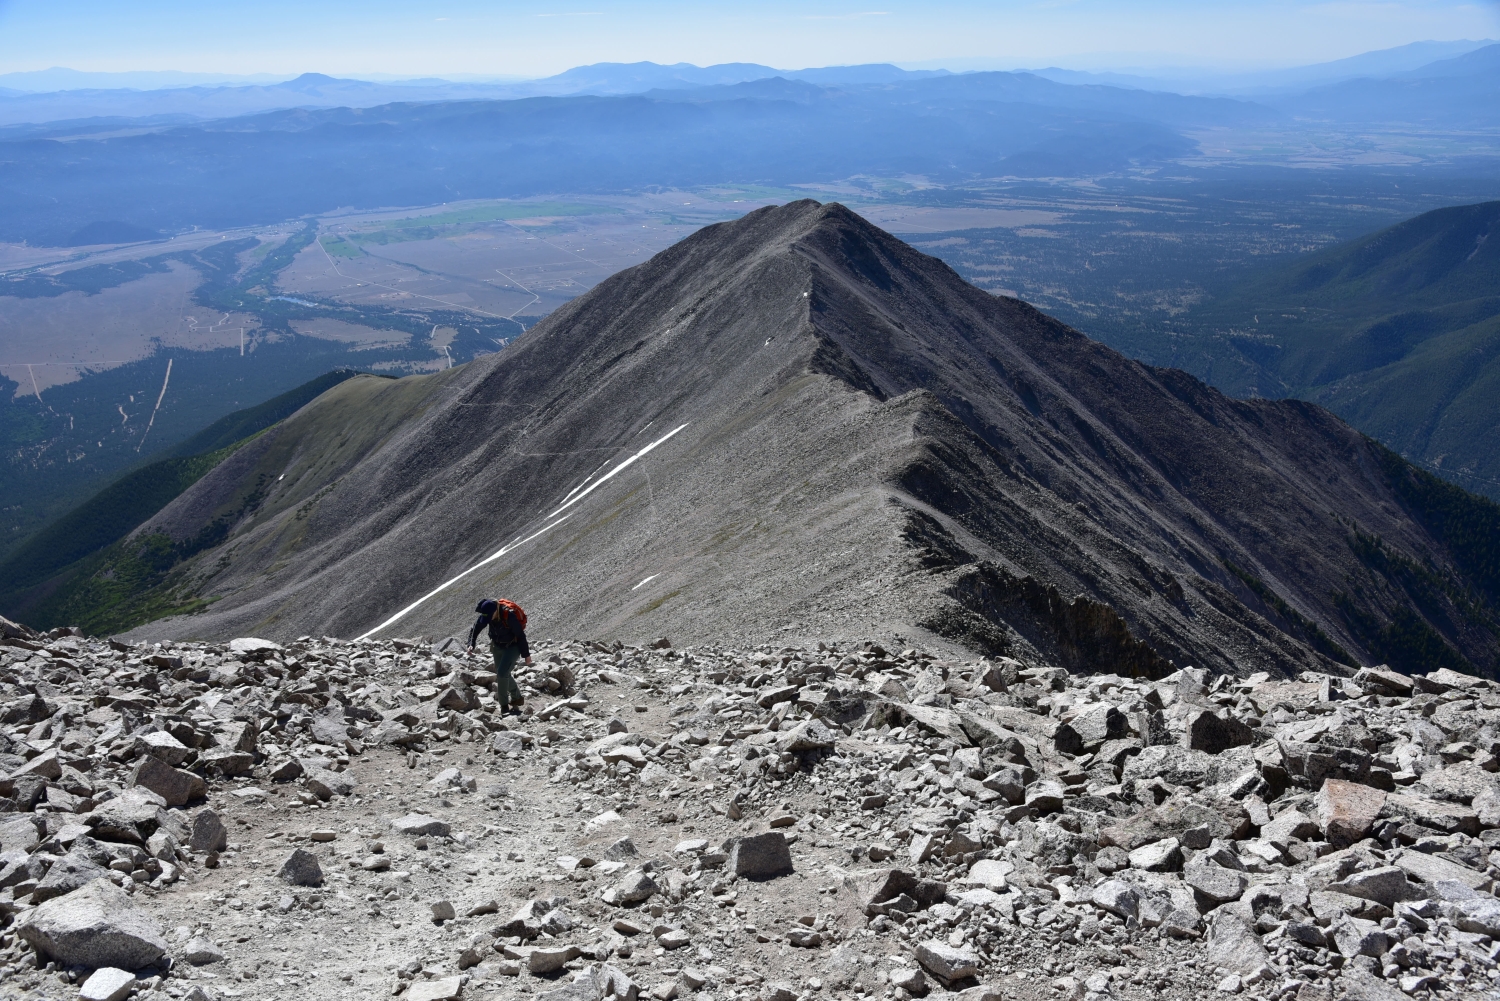
The summit was so red! It was really cool. I could imagine how on a foggy and cloudy day if you just saw that red up in the sky it could look like a red-cloud. The summit has a little rock shelter but not much else. It is flat and not very rocky, easy to walk around. You can see the route to Sunshine from here, but part of the route is obscured by a hump in the middle of the route. But I do have a picture with Allyson that shows Sunshine in the background (top left and top middle show Sunshine). It took us about 3 hours and 30 minutes to summit Redcloud with breaks, which covered 4.5 miles and about 3,700 feet of gain.
From here the trail is pretty clear and is class 1 hiking — albeit at 14,000 ft. We were feeling pretty strong and the weather looked good so we decided to go for Sunshine. I will say that headed up to Sunshine I realized I was feeling pretty fatigued, and wondered if I had made a mistake! The ridge hike over to Sunshine is a little rocky at points, but never exceeding class 1 in my opinion. It is 1.5 miles one way and adds 3 miles and 1,100 feet of gain total. I am going to post some images below of that section. Since it’s easiest I think to see the route from Sunshine I’m going to post some shots in order looking back towards Redcloud along the hike. The first image is closest to Redcloud and so forth until you get to the big one which is looking back from the summit.

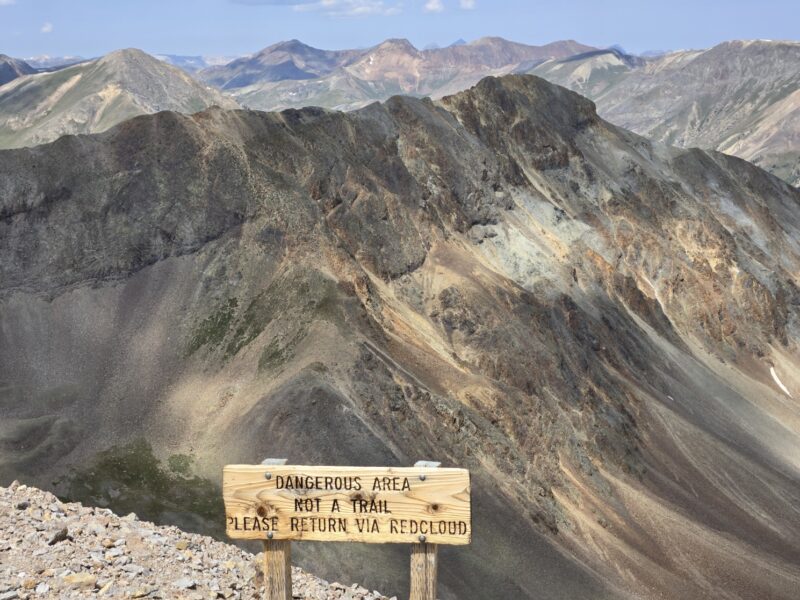
When you get to the saddle between Redcloud and Sunshine there is a sign that tells you not to descend the gully. Don’t descend here, if you want to make a loop then check out the notes further down. I’ll put a pic of the sign with a cool shot of Sundog (a 13er) in it.
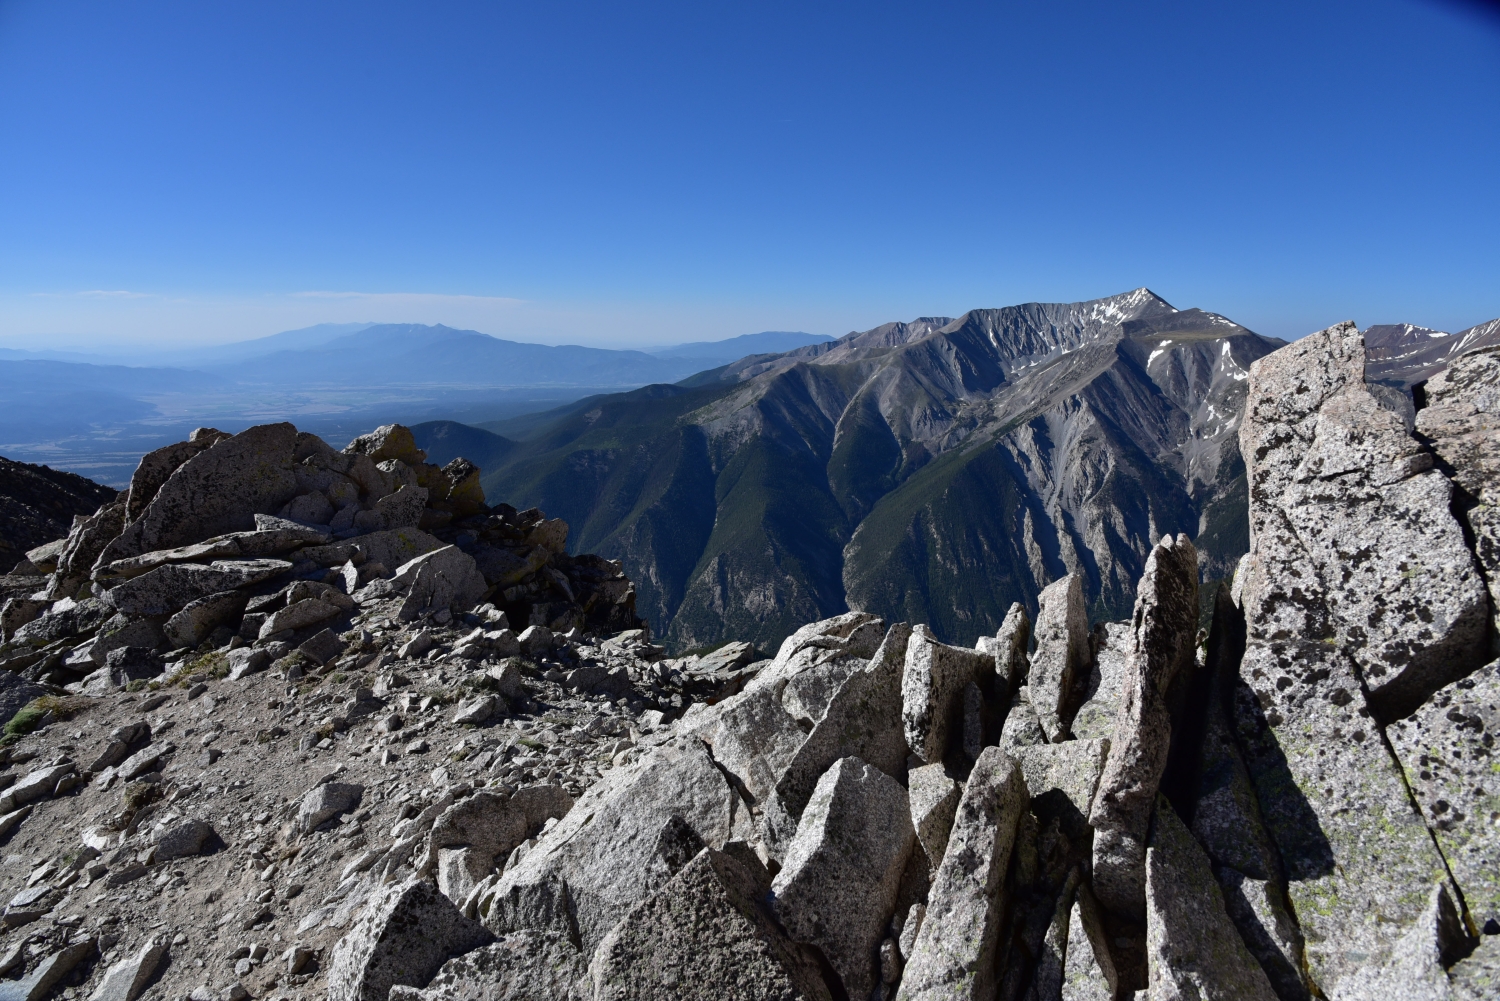
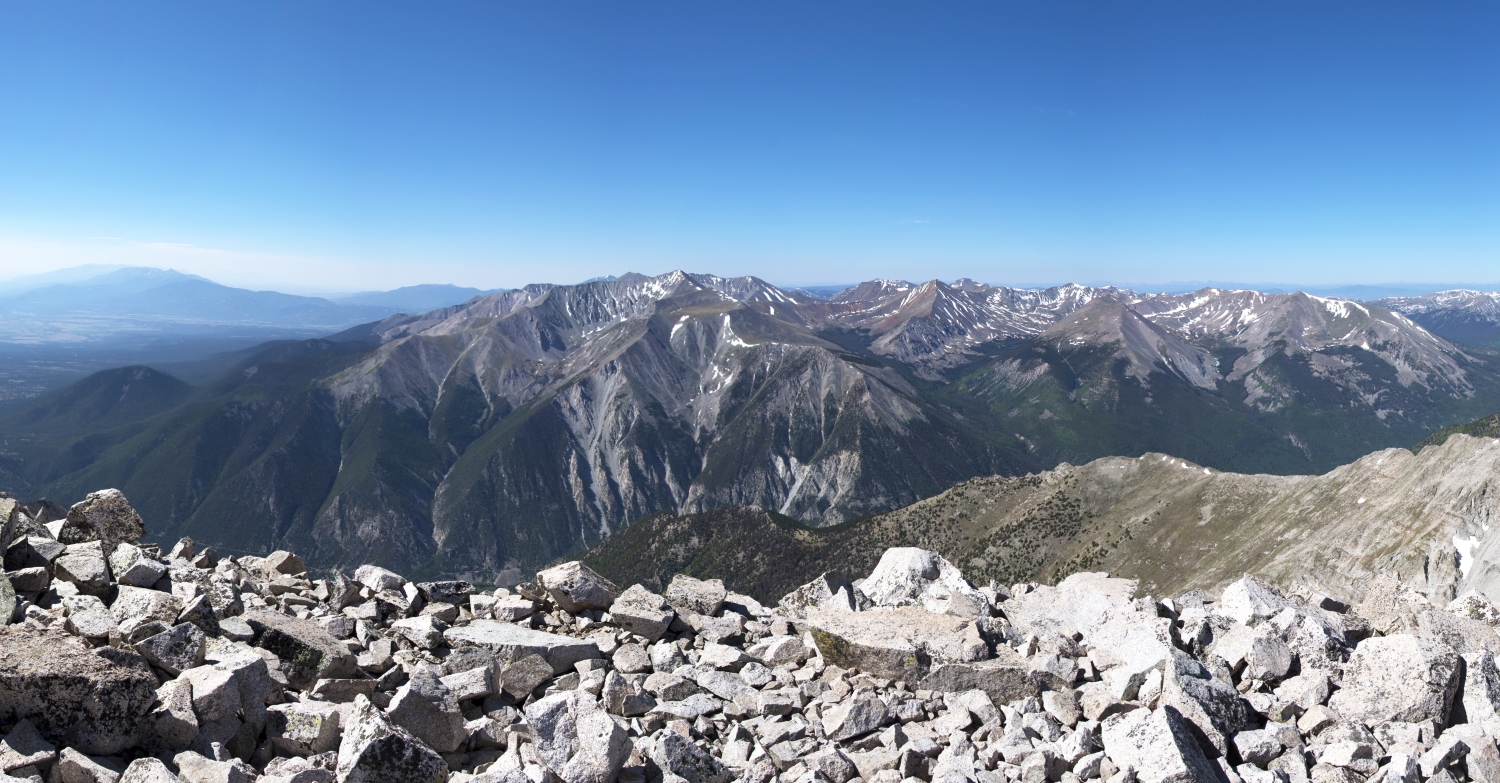
The summit of Sunshine was nice, but not red at all. Just shows how dramatically different summits can be even when their neighbors. You can see Handies off to the northwest and Uncompahgre to the north. Below are a few pics.
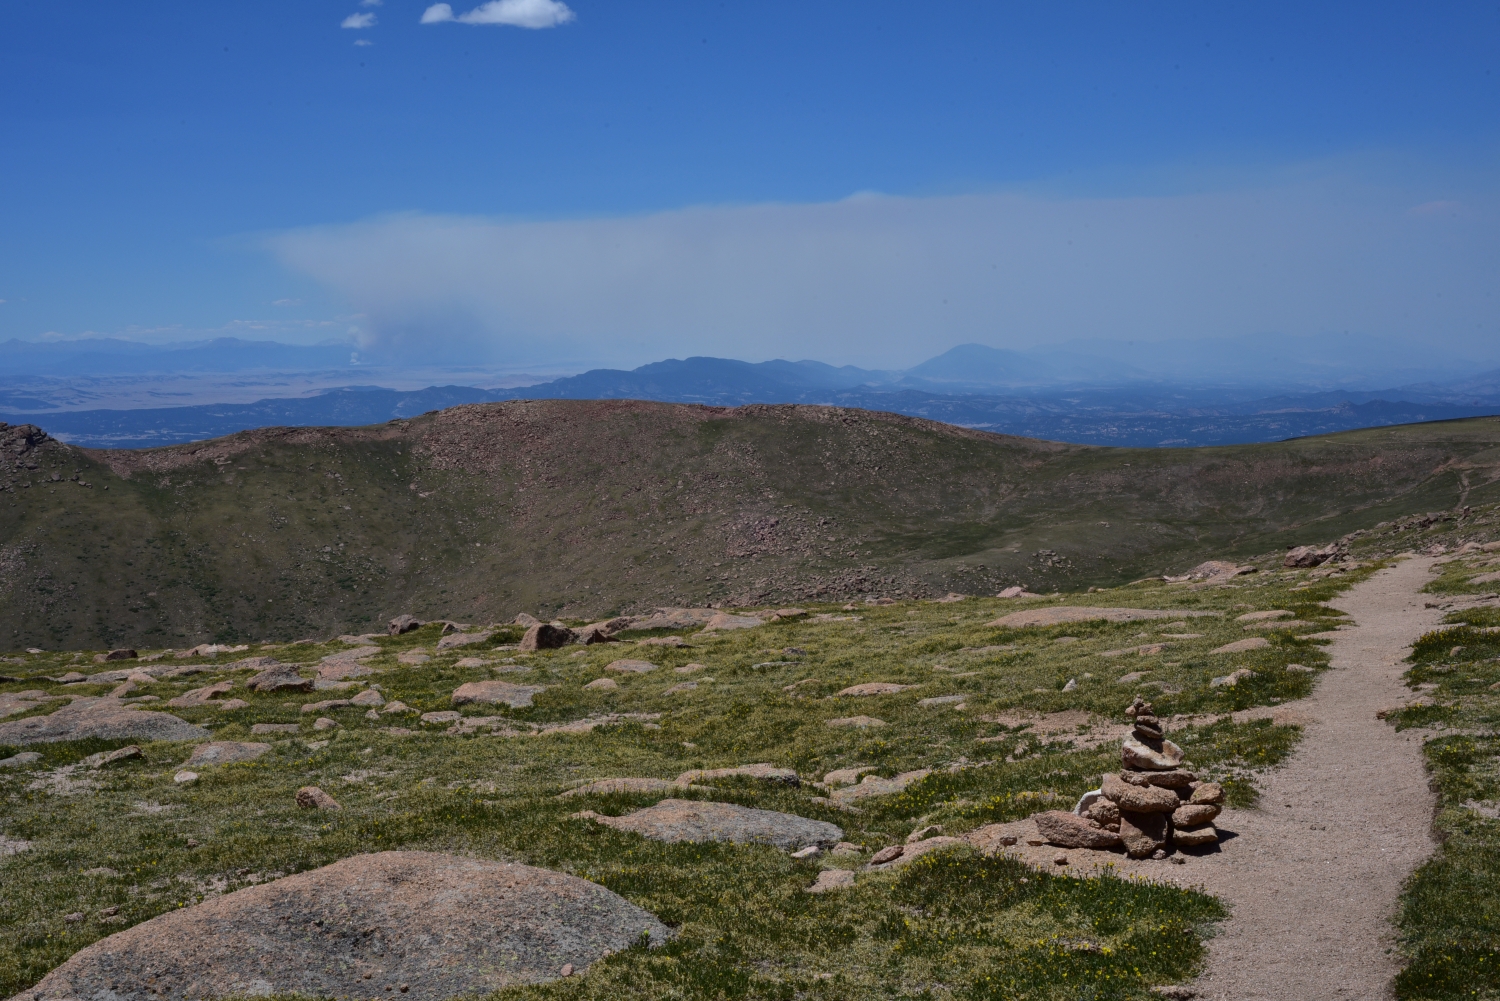
On Sunshine Peak we noticed some clouds rapidly forming, and it was around noon, so we hustled on back to Redcloud (the weather folks were saying chance of storms maybe after 3pm but probably more like 6pm). The hike over to Sunshine and the hike back to Redcloud took almost exactly an hour each — so maintaining about 1.5 mph with breaks. Once back on Redcloud, we opted not to linger too long before making our way to the 13,000 foot saddle. However, as discussed above about the route finding heading up/down from the false summit, we turned too quickly and ended up on a very steep and nasty segment. However, back at the saddle point we felt we were in pretty good shape and were feeling more energized after eating and drinking a bit.
Naturally, once turned around on Sunshine the rest of the hike was just the first part but in reverse. You can make this a loop, but it is reported it is much harder and can get you into trouble if you don’t know the route well. To make it a loop, you’d take the Northwest Face route, which is described on 14ers.com, either down from Sunshine or to summit Sunshine. I’m thinking I’d want to try summiting Sunshine first, then hiking to Redcloud, and then going down the standard route. But hikers do it in reverse. I do have an image that I marked up to show which gully you’d drop into (14ers has much more information on this so I’d go there if you plan on doing this route).
There is somewhat of a trail down Sunshine to the West that leads to the flat section you see in the image. There is a trail that leads over towards the ridge with the x’s and checkmark. You want to find the gendarme between the checkmark and the big x and hike down to the right of it. If you’re coming up you’d hike up to the left of it. The green line/arrow shows the route to go to Sundog Peak, which is a 13er.
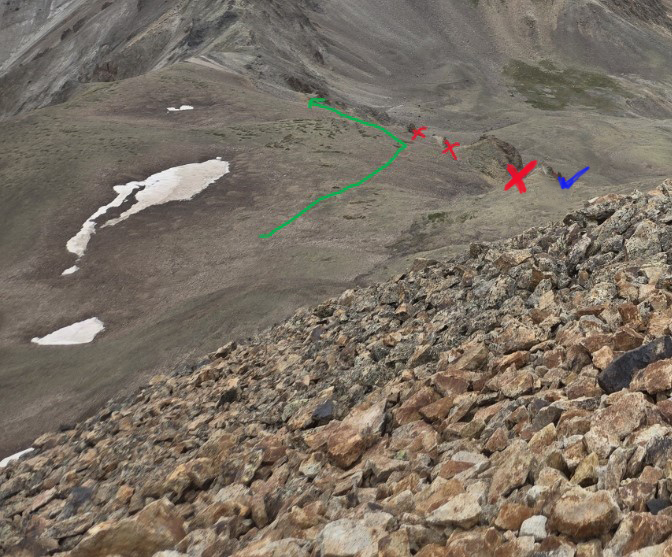
Given that we haven’t done this route. I’d go to 14ers or another site/trip report for more info. But since I was looking at it thought I’d post this pic and mention it as a possibility.
Alright, so we had reversed it and headed back. Unfortunately for the area it did not rain, despite threatening clouds. We noted that the water towards the top (above maybe 12,000 feet) looked pretty clear, but that lower down it looked like it was polluted potentially with mining run-off. I’m not sure how safe it is to drink (luckily we were good on water). I want to post a few nice pics below to showcase the hike.
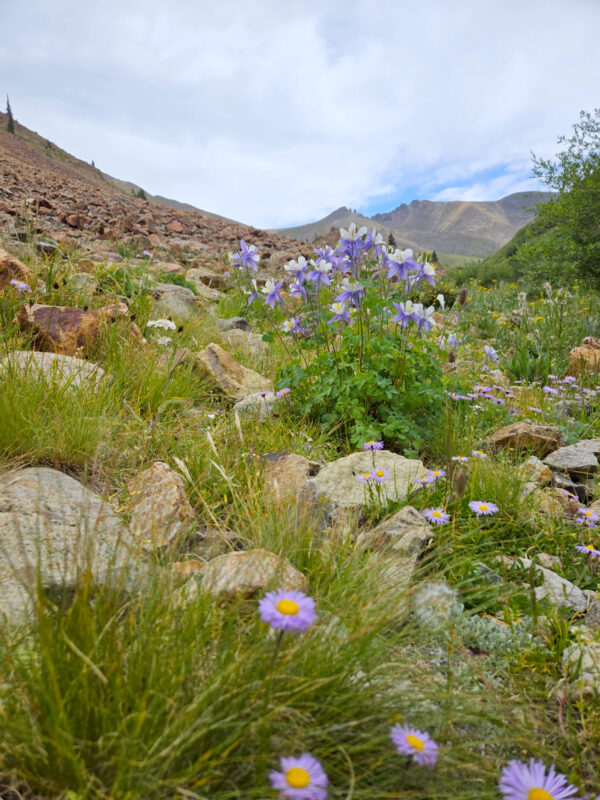
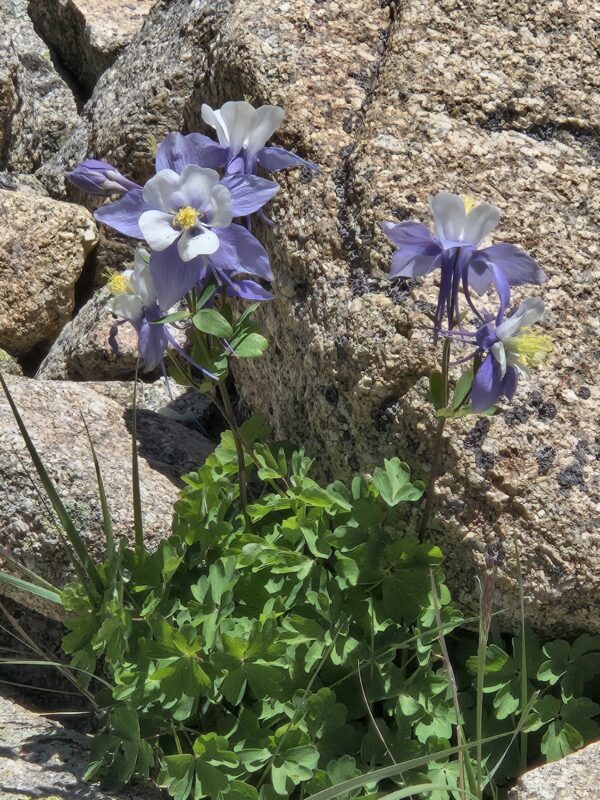
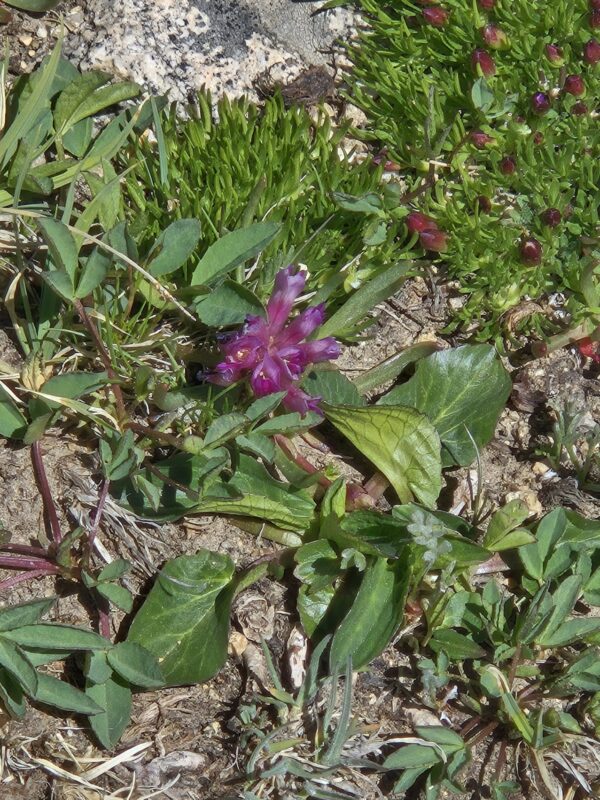
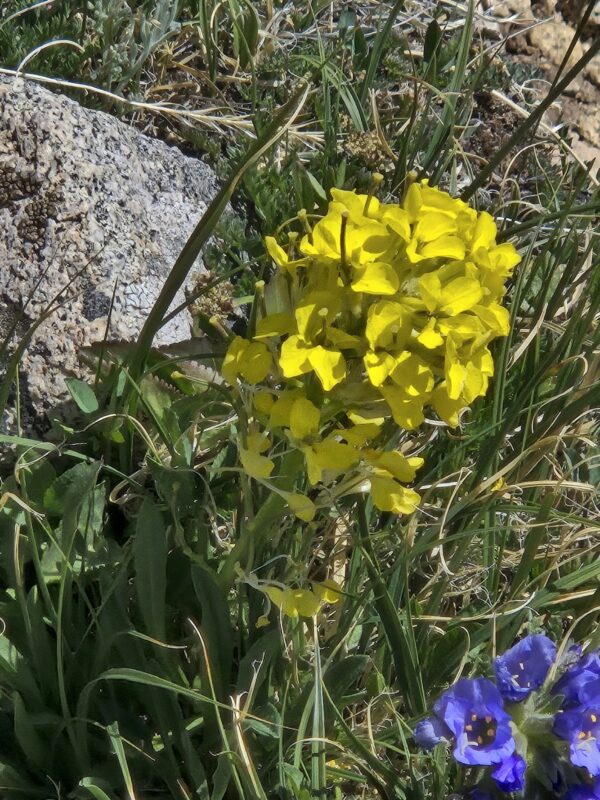
Really beautiful columbines on the hike with mountain daisies.
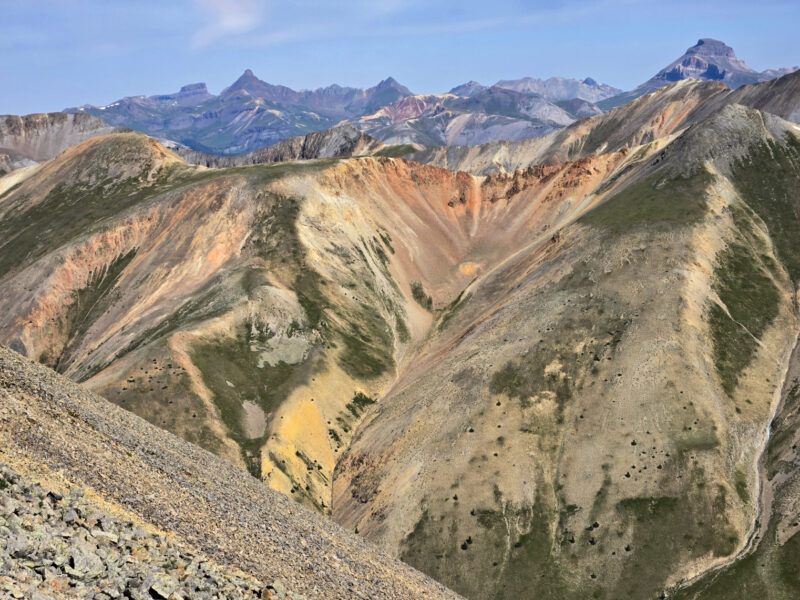
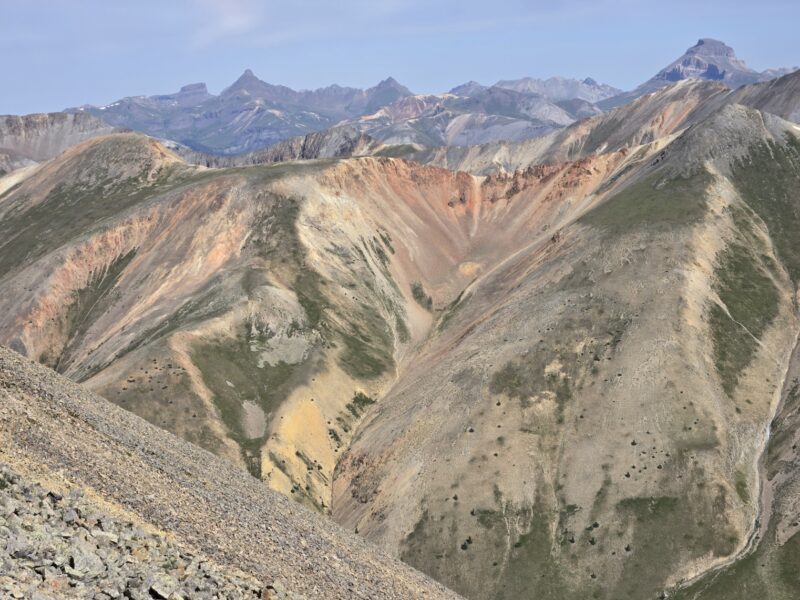
Just such a cool vista with Uncompahgre in the top-right corner of the image. Taken near the false summit of towards Redcloud.

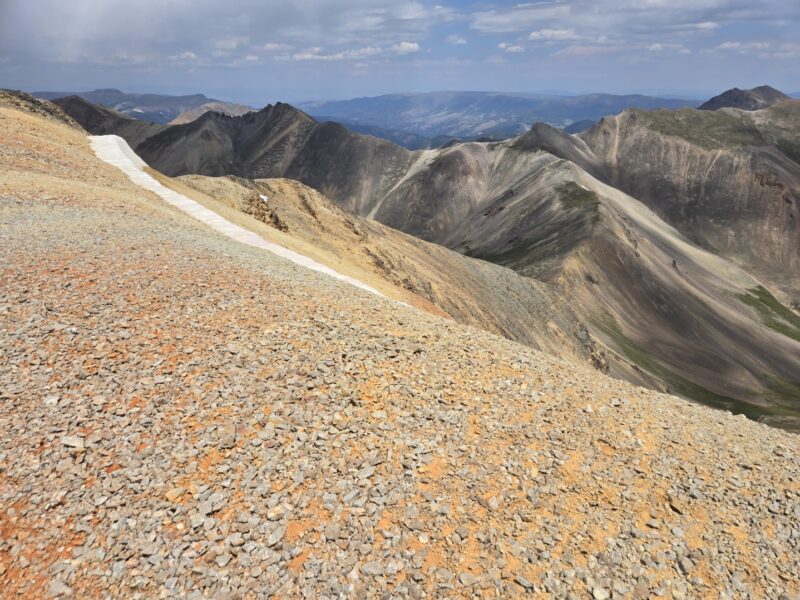
Highlighting the vivid colors on the hike. Taken near at the summit of Redcloud.
Thank you for reading. Our GPS lost us at a few points and at a particularly long section near Sunshine Peak. So the stats are based on 14ers and my own estimates. Be safe and have fun out there!
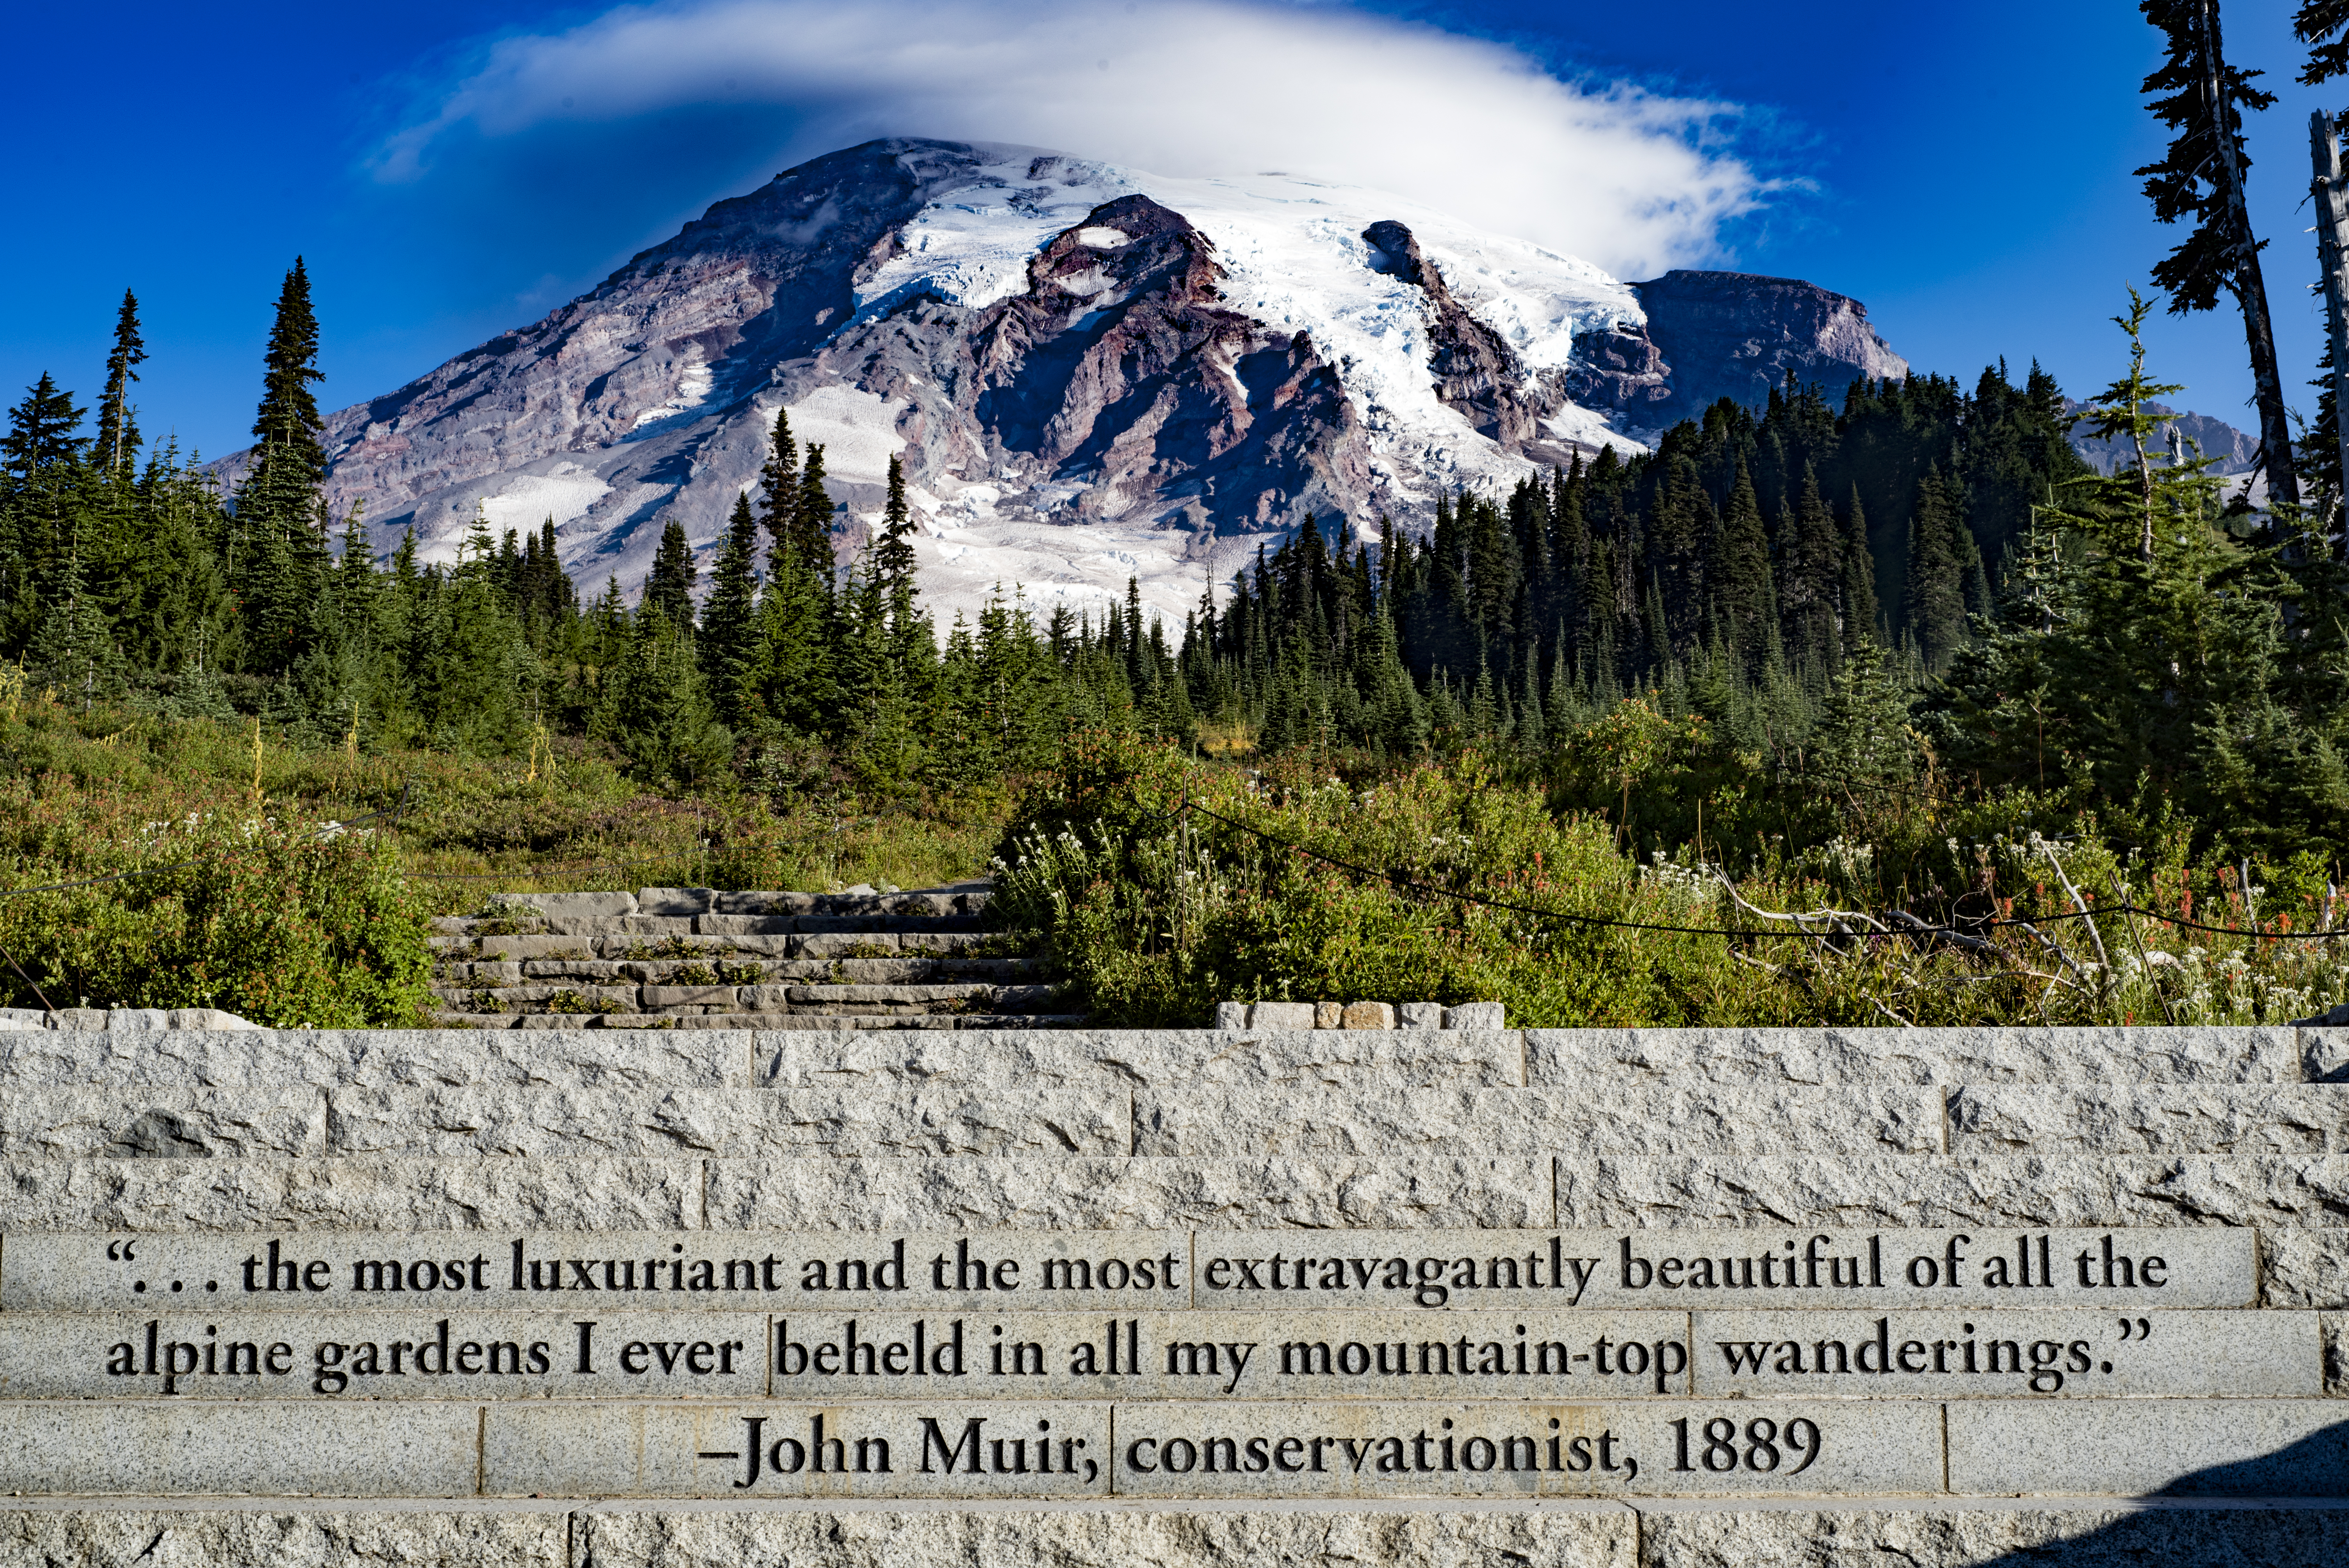
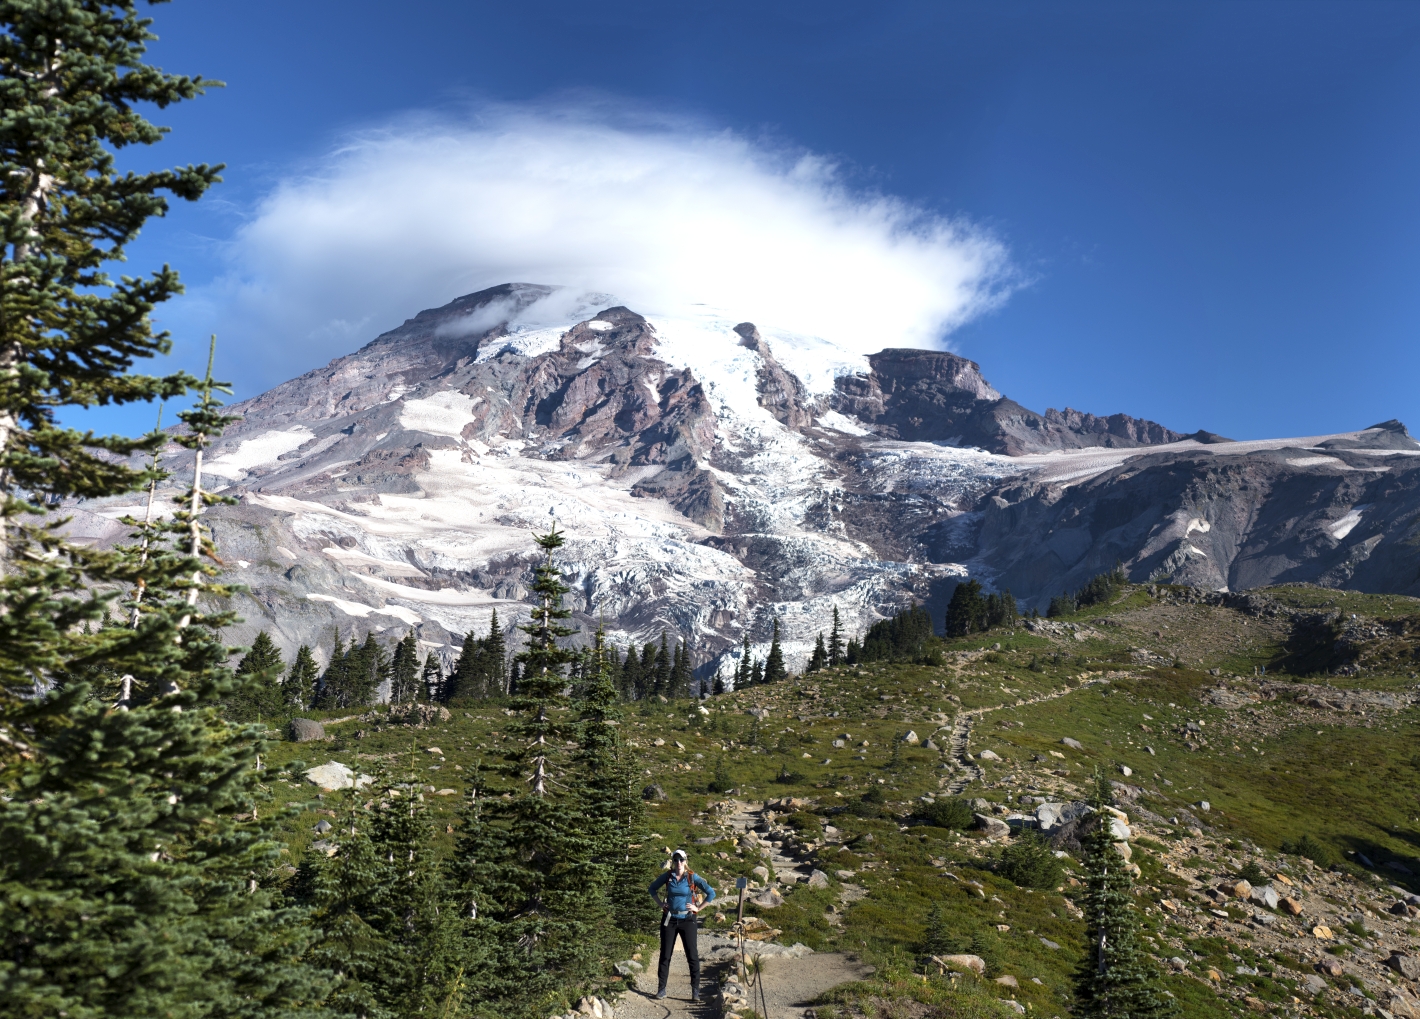
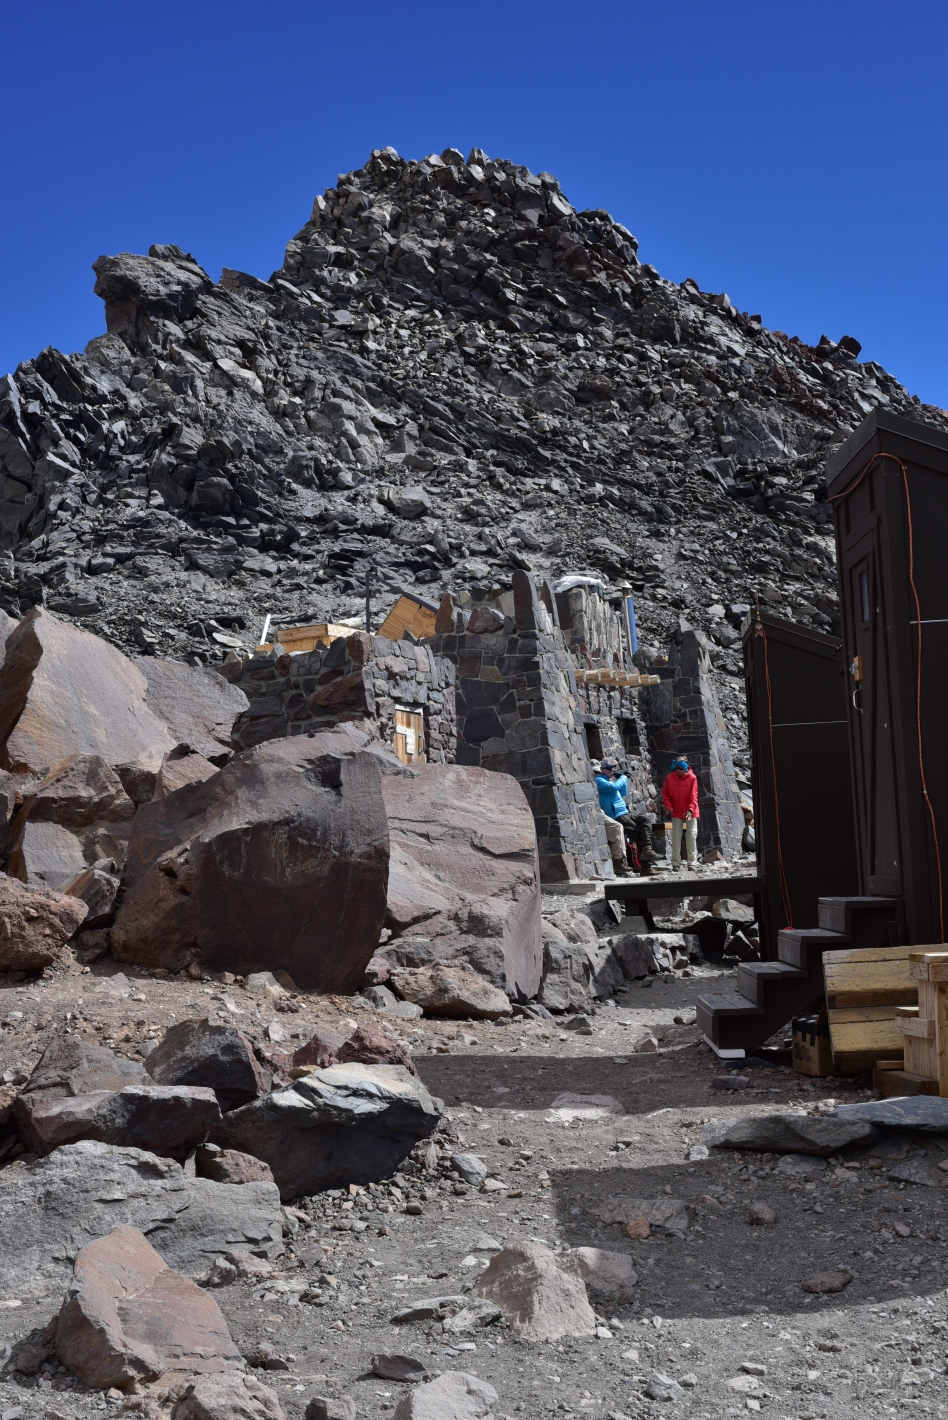
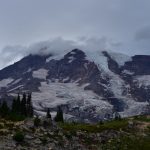
Camp Muir, Mount Rainier 10,100 ft
Some Background and History
A rich geological and human history both contribute to the wonder of the stratovolacano that is Mount Rainer. The peak was forged by fire and years of lava, ash, and pumice piling up, layer upon layer, eventually forming a summit cone, a consequence of thousands of years of volcanic activity. Close to 6,000 years ago, the peak had a violent eruption which knocked off the cone, and subsuquent years of volcanic activity left the peak with two overlapping craters at the top. It is the largest peak in the Cascade Range and sits prominently above all other peaks in the nearby vicinity at a stunning 14,411 feet above sea level. For perspective, the others sit around 6,000 feet. The mountain face is constantly changing as fluctuations in the weather and temperature shift and melt its heavily glaciated regions. Every few hundred years, small to moderate eruptions occur, with the most recent occuring in 1894. Importantly, the mountain is still an active volcano.
The Mount Rainier region has always pulled humanity close, providing natural resources and in more modern times, recreational ones. Native American tribes have gathered for millenia to hunt and gather resources here. The first recorded ascent occured in 1870 by Rhode Islander, Hazard Stevens. The park was established in 1899, and the true infrastructure began to take shape following the creation of the National Park Service in 1916, though the road to Paradise had been in place since 1910. There has been some tumultuous history of the park through the years, that we won’t go into here, but relative stabilty has been achieved since the 1960s. Visitation continues to boom, with 1.8 million visits recorded in 2016. The number of attempted climbs of Mount Rainier is also large. In the last 8 years, there have been between 10,000 and 11,000 yearly registered climbers.

Our Trip
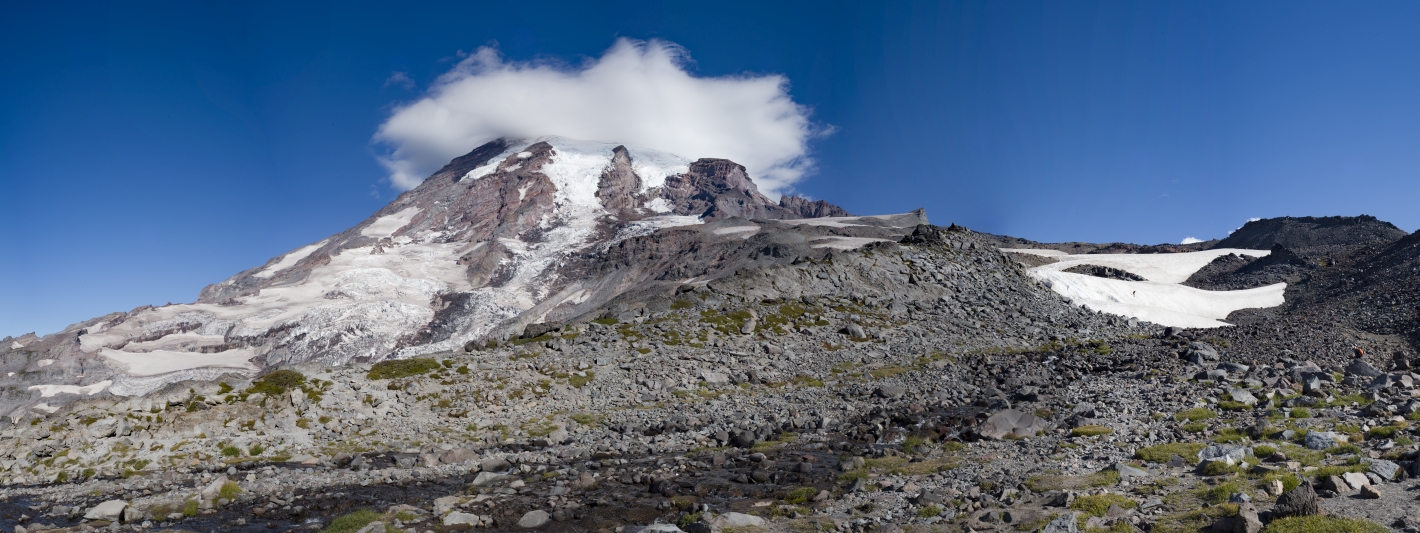
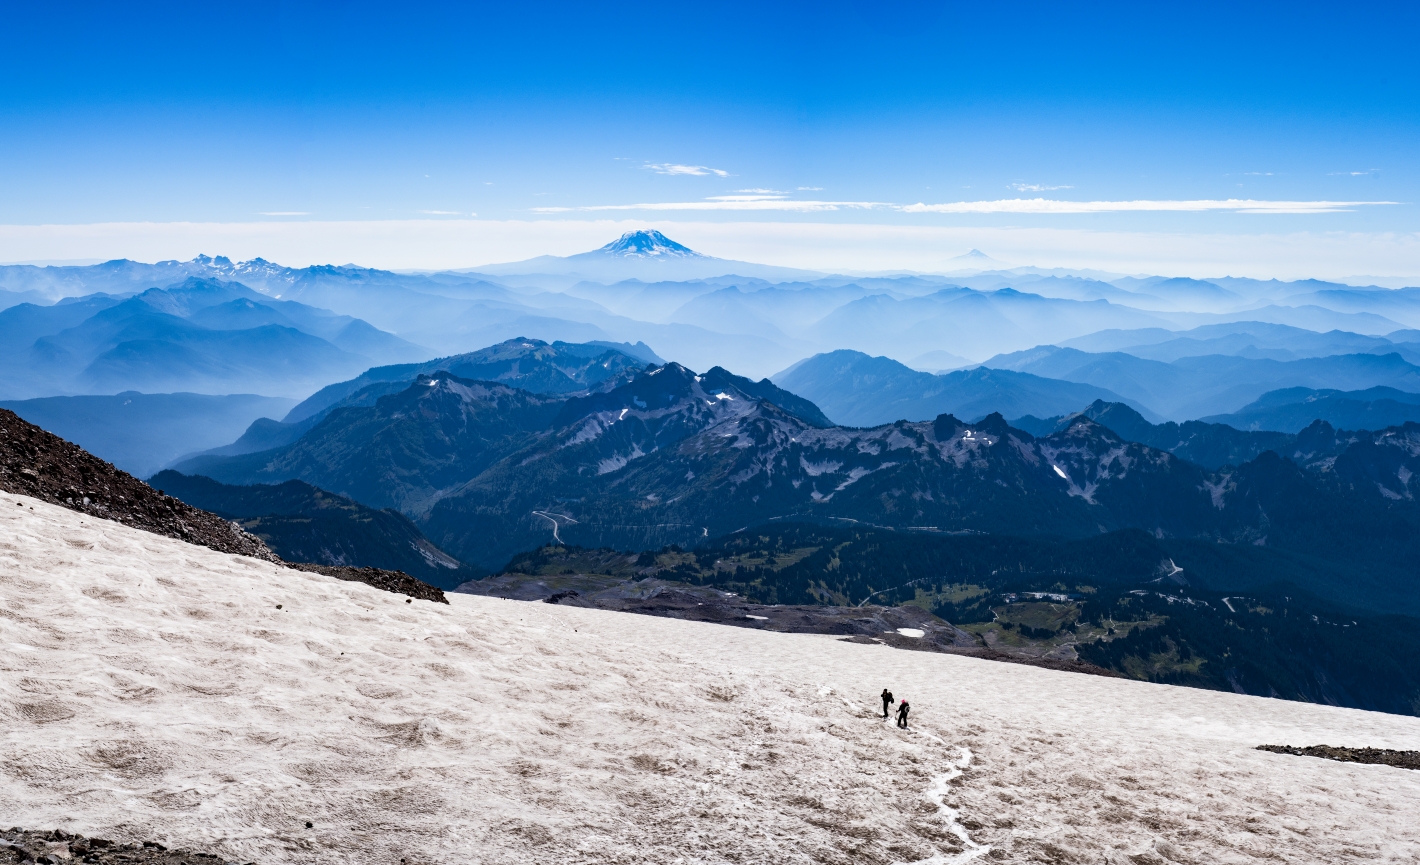
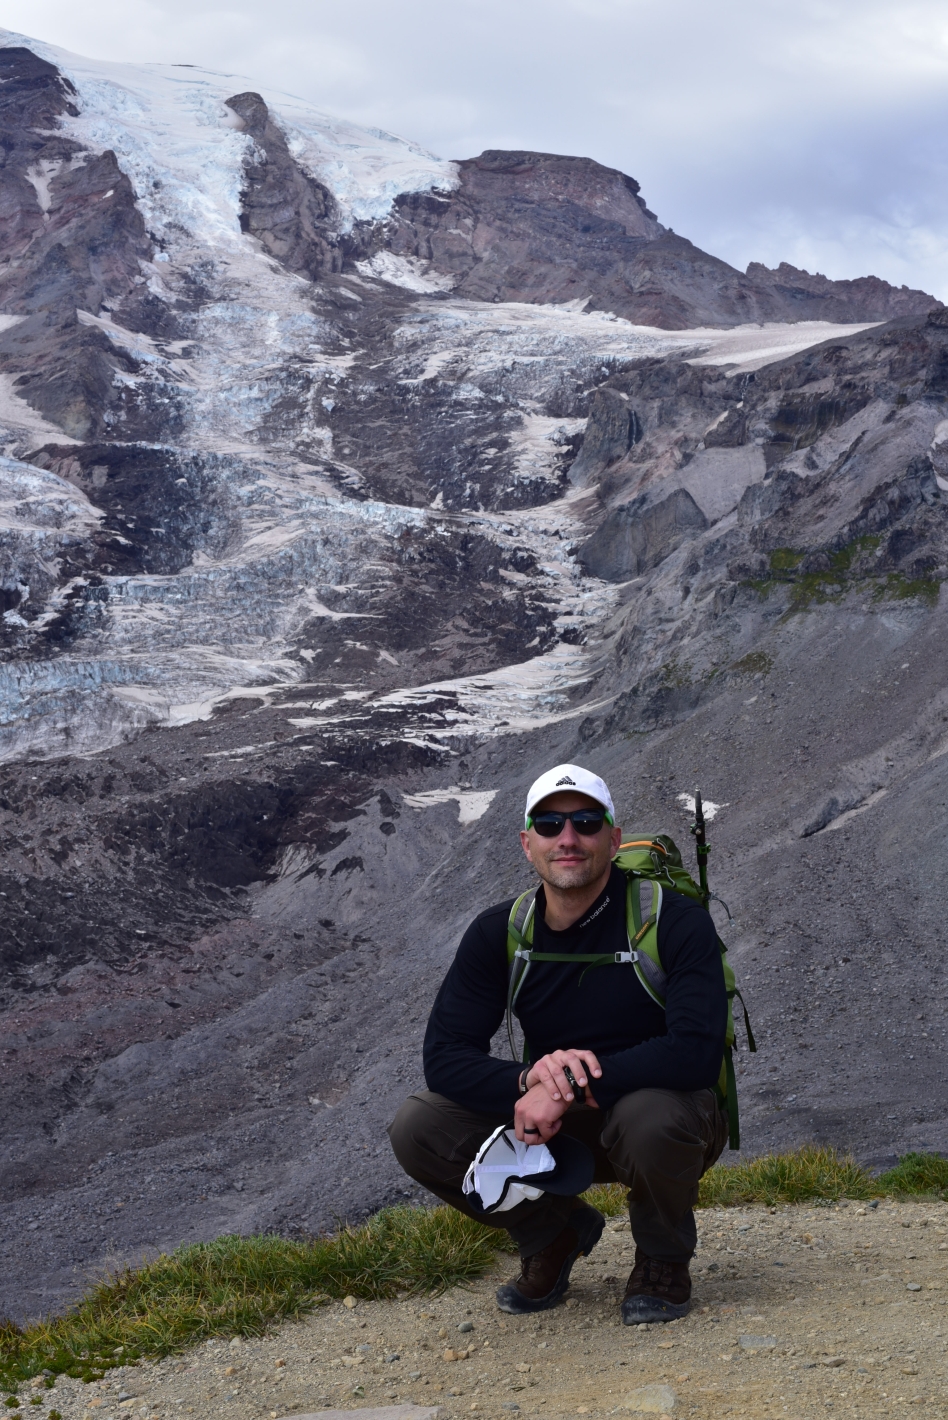
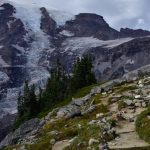
We have not escaped the allure of Mount Rainier and decided to plan a visit to the mountain in mid-September as part of a week long excursion to the Pacific Northwest. Though we did not decide to make an attempt at the summit as we had insufficient time to secure guiding resources, we did want to go halfway and visit the famous Camp Muir. Camp Muir, named after the famous alpinist, is nestled at 10,100 feet above the Muir Snowfield and on the edge of the Cowlitz Glacier and serves as base-camp for those planning a summit attempt. Reaching the camp requires a mix of trail hiking and traversing the unmarked Muir Snowfield. The one way trip is roughly 4.5 miles with close to 4,800 feet of elevation gain from the Paradise Visitor Center. The National Park Service recommends the trip for only experienced hikers as there is no marked path up the 2.2 miles of the snowfield and white-outs are frequent.
Skyline Trail
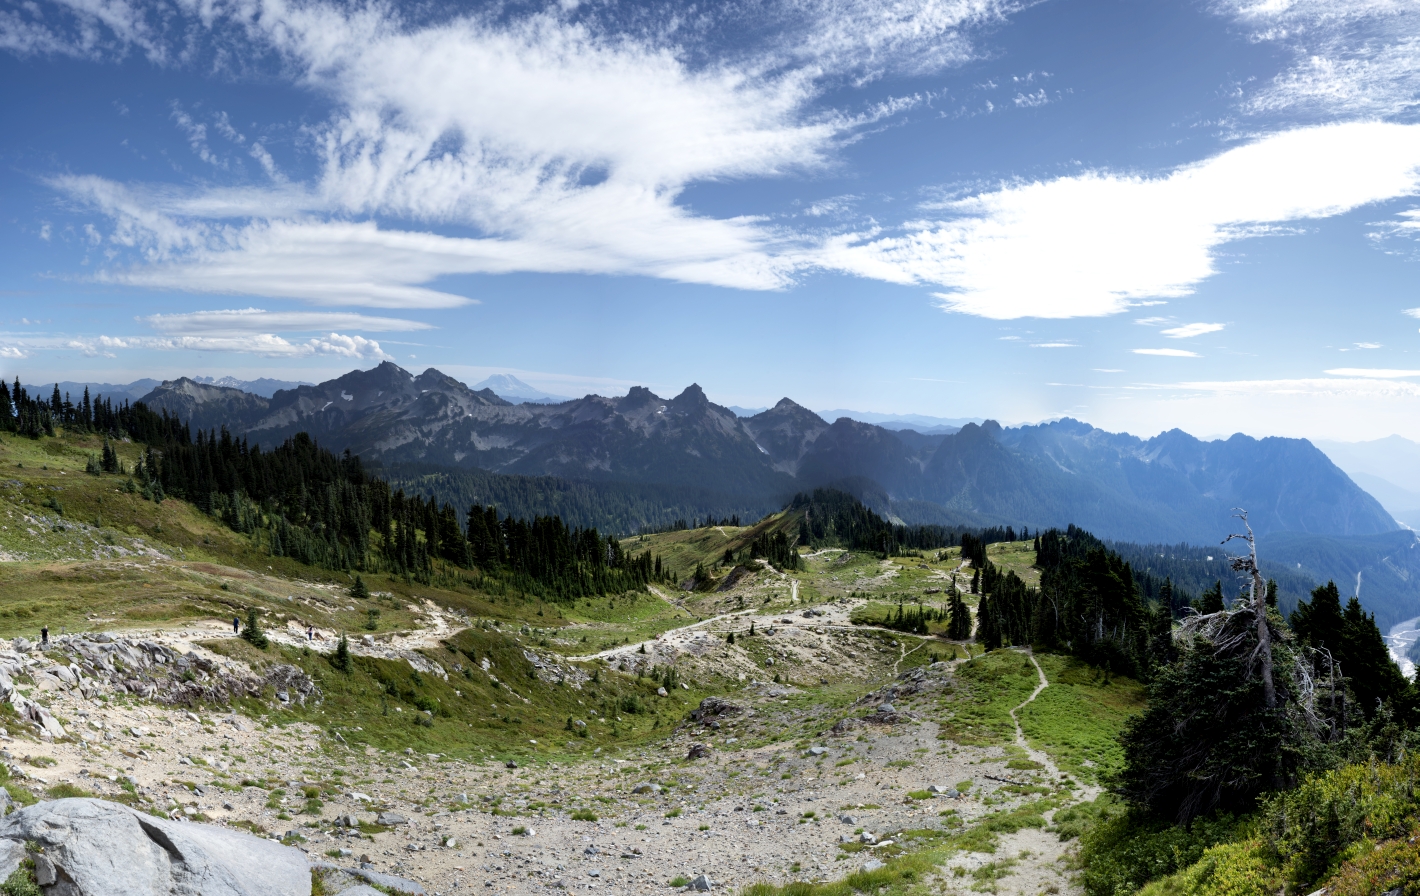
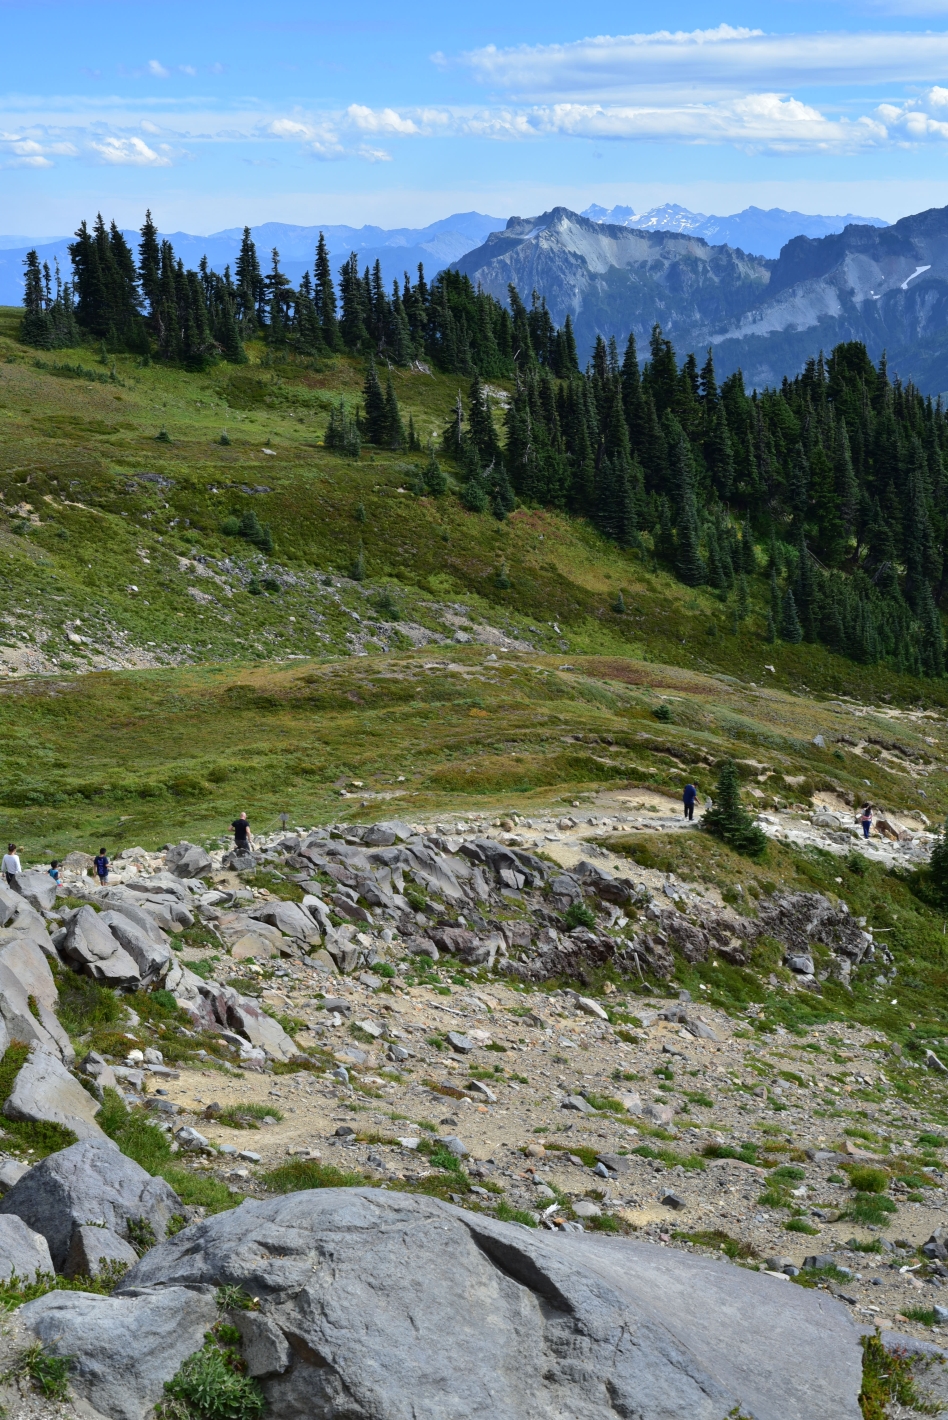
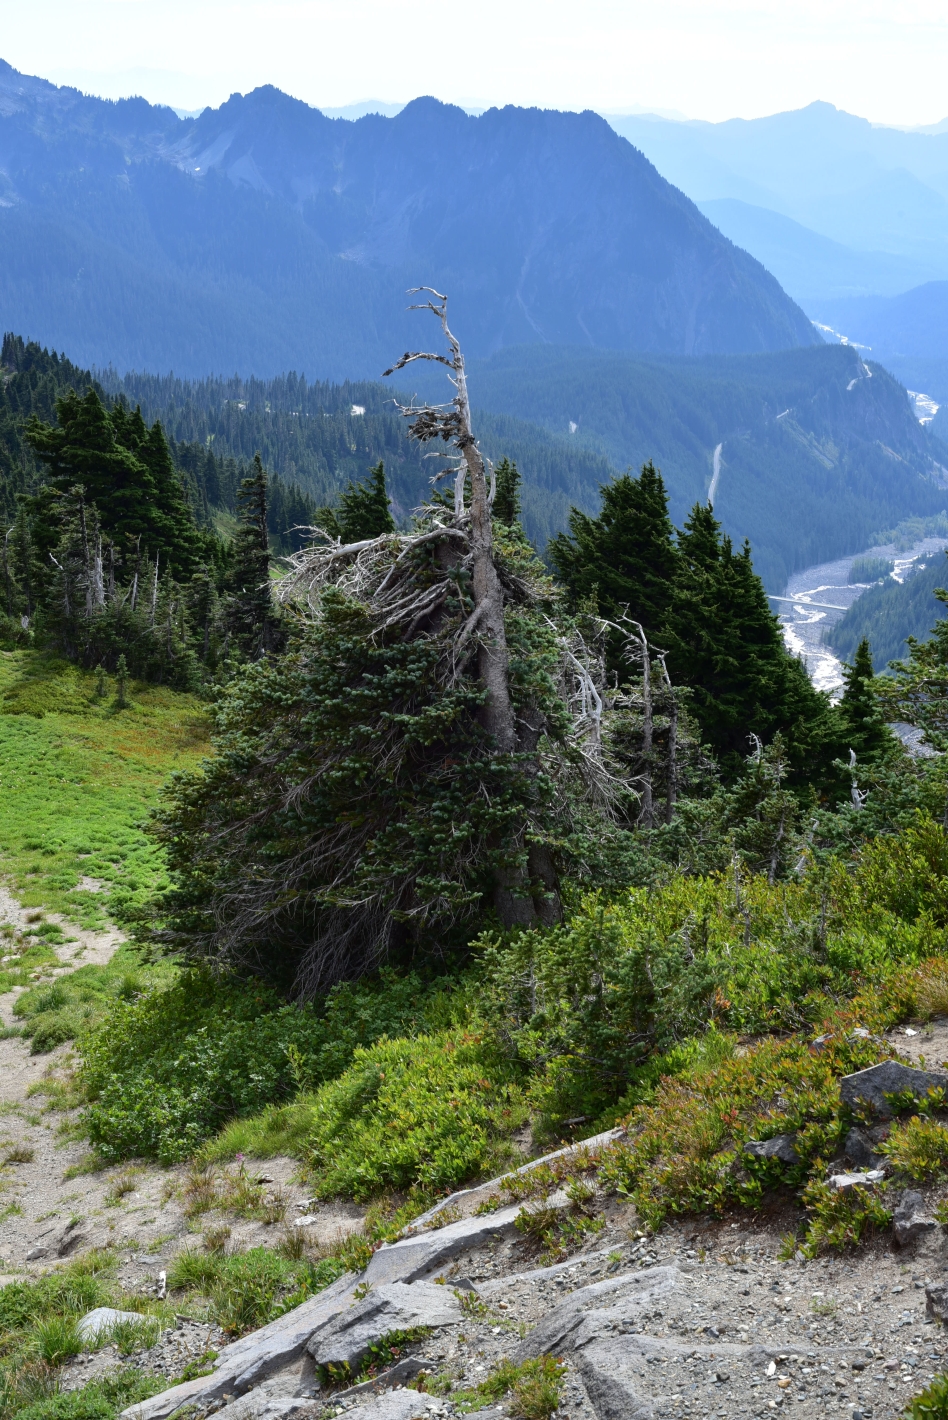
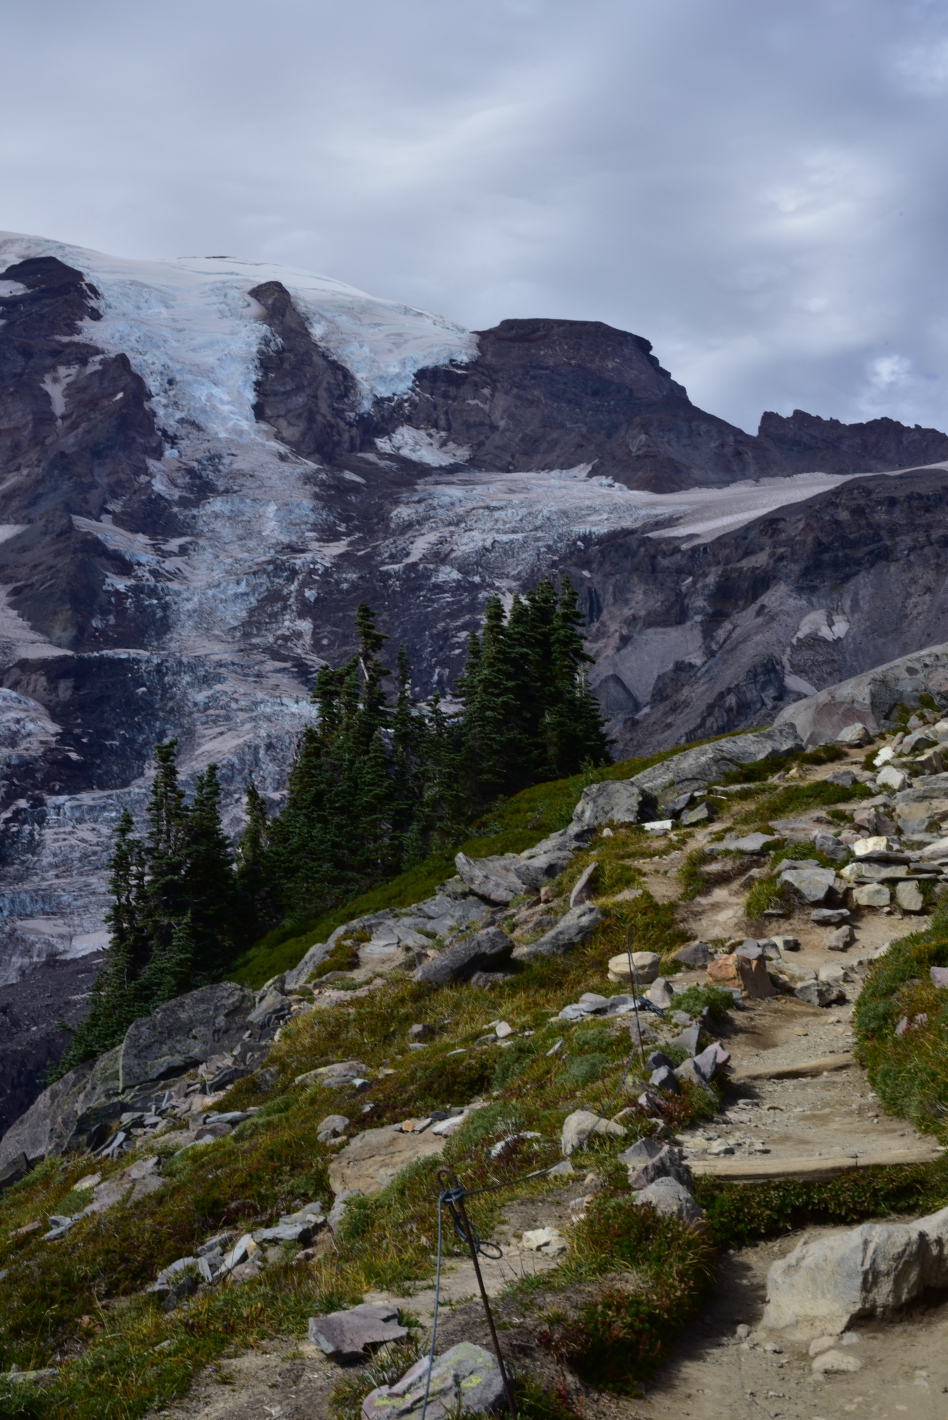
On September 6th, we flew in to Sea-Tac and immediately drove down to our quaint cabin nestled in the woods approximately two miles from the park entrance. After a good night’s rest, we arose at dawn and made the short drive into the park to the Paradise Hiker’s parking lot. Blue, clear skies were abundant, and we began our journey on the Skyline Trail. The trail is an extremely steep and well-paved path for the first 10-15 minutes of hiking before it turns into a much more pleasant gravel/dirt path. There were several signs along the way to direct us to the direction of Camp Muir on this portion of the hike as many side trails exist to gain different vantage points of the the nearby glaciers and the mountain. Near mile 1.1, there was a junction in which both routes go the correct direction. Going left leads to Glacier Vista, overlooking the Nisqually Glacier to the west which also has a waterfall. Going right bypasses the ridgetop and takes hikers on a more direct route. Of note, the trails do reconnect fairly quickly. On the way up, we bypassed the overlook and continued toward our objective. At approximately 1.6 miles, we saw the sign for Pebble Creek and followed it to the creek at about 2.1 miles. We climbed over the creek and past McClure rock. Looking down at our GPS, we noted an elevation of about 7,300 feet. The trail had now ended. It was time to throw on the spikes. We entered the snow.
Muir Snowfield
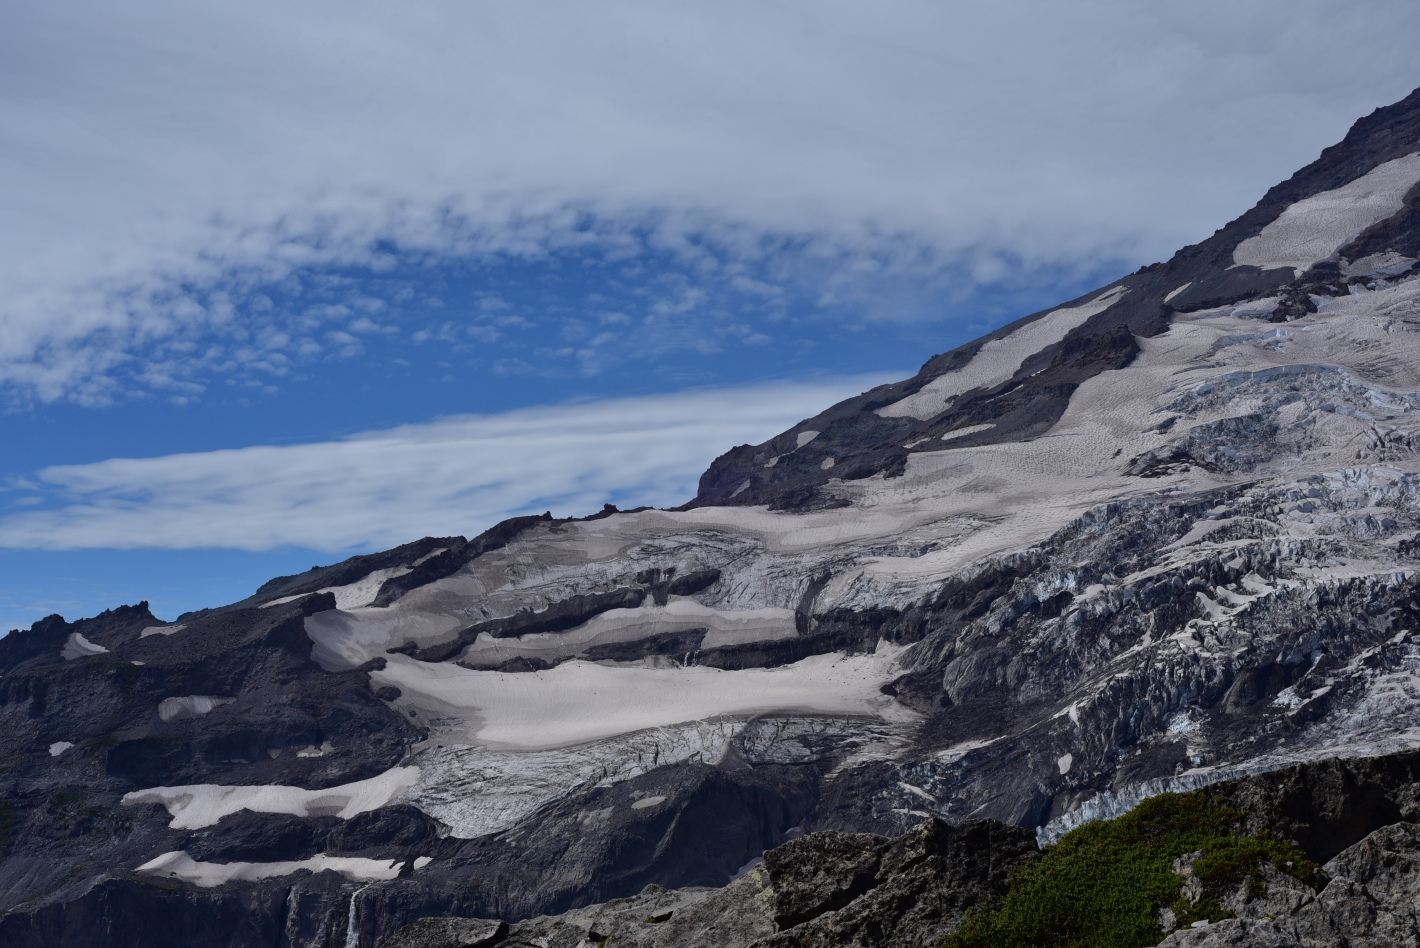
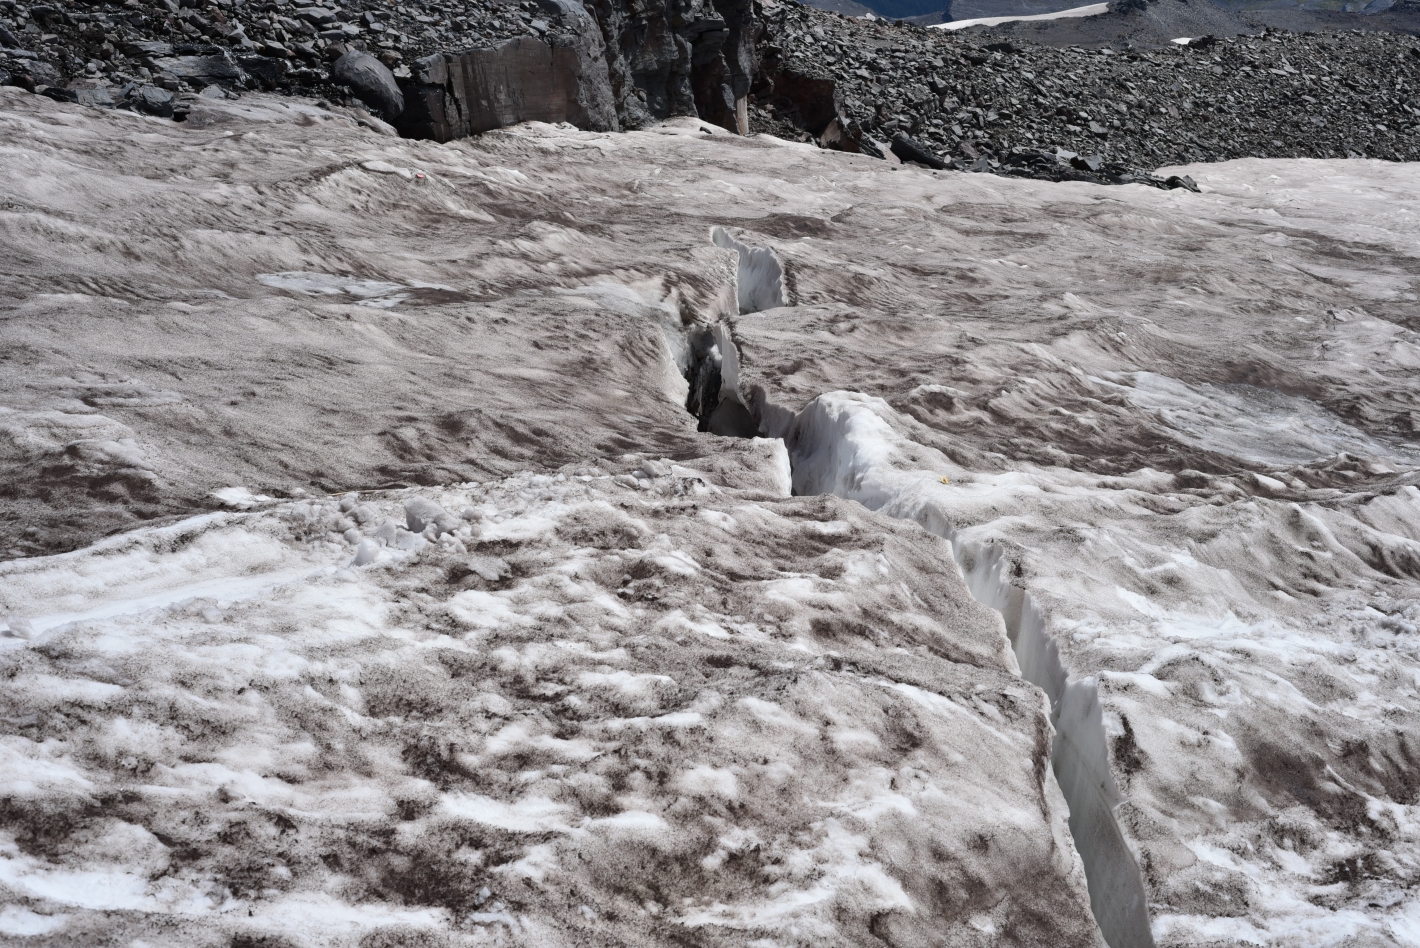
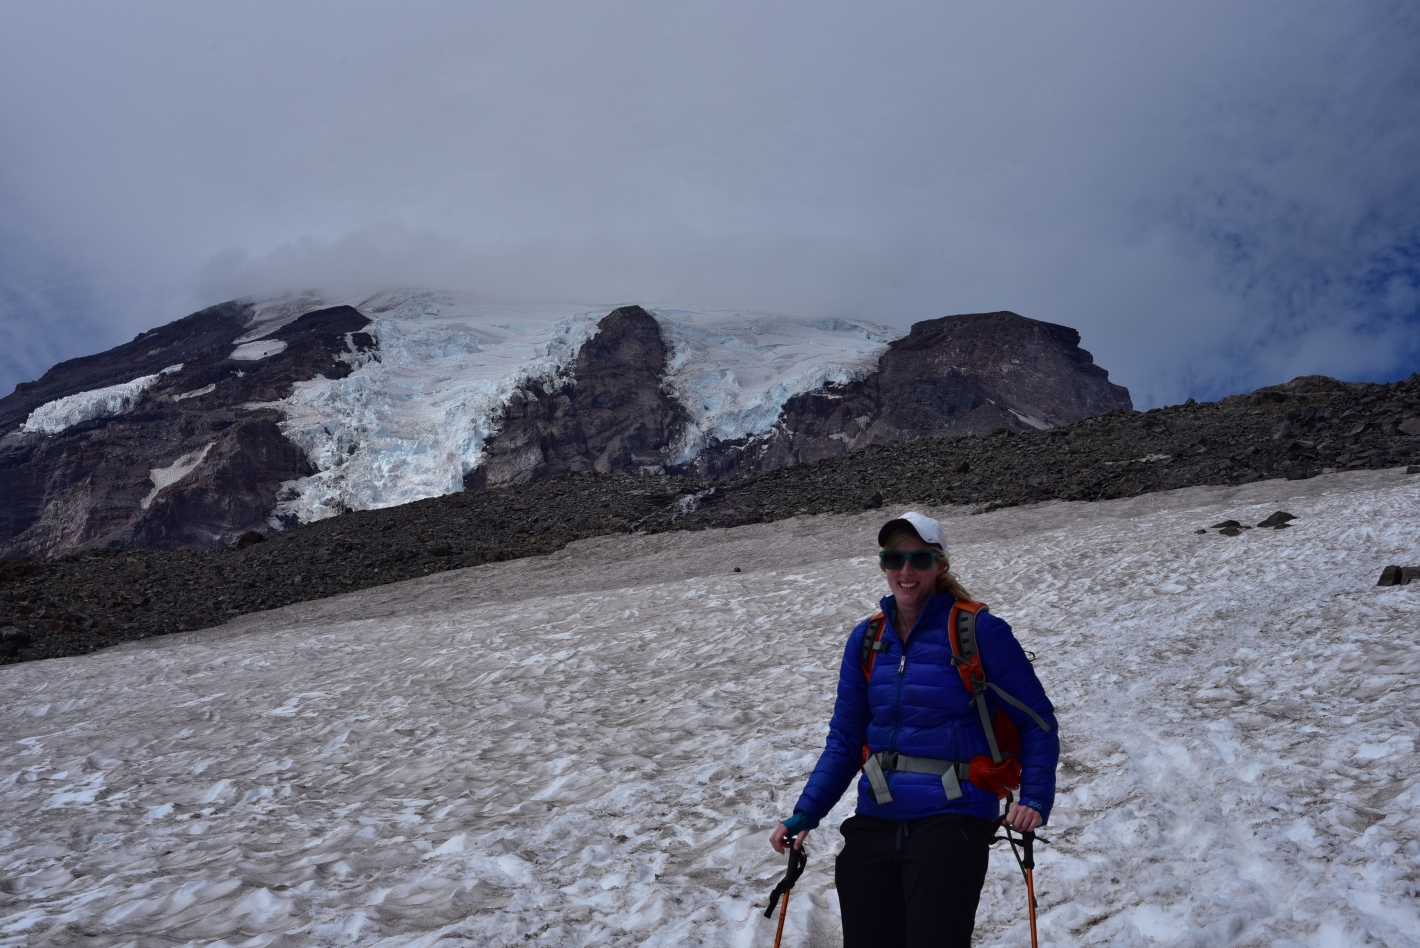
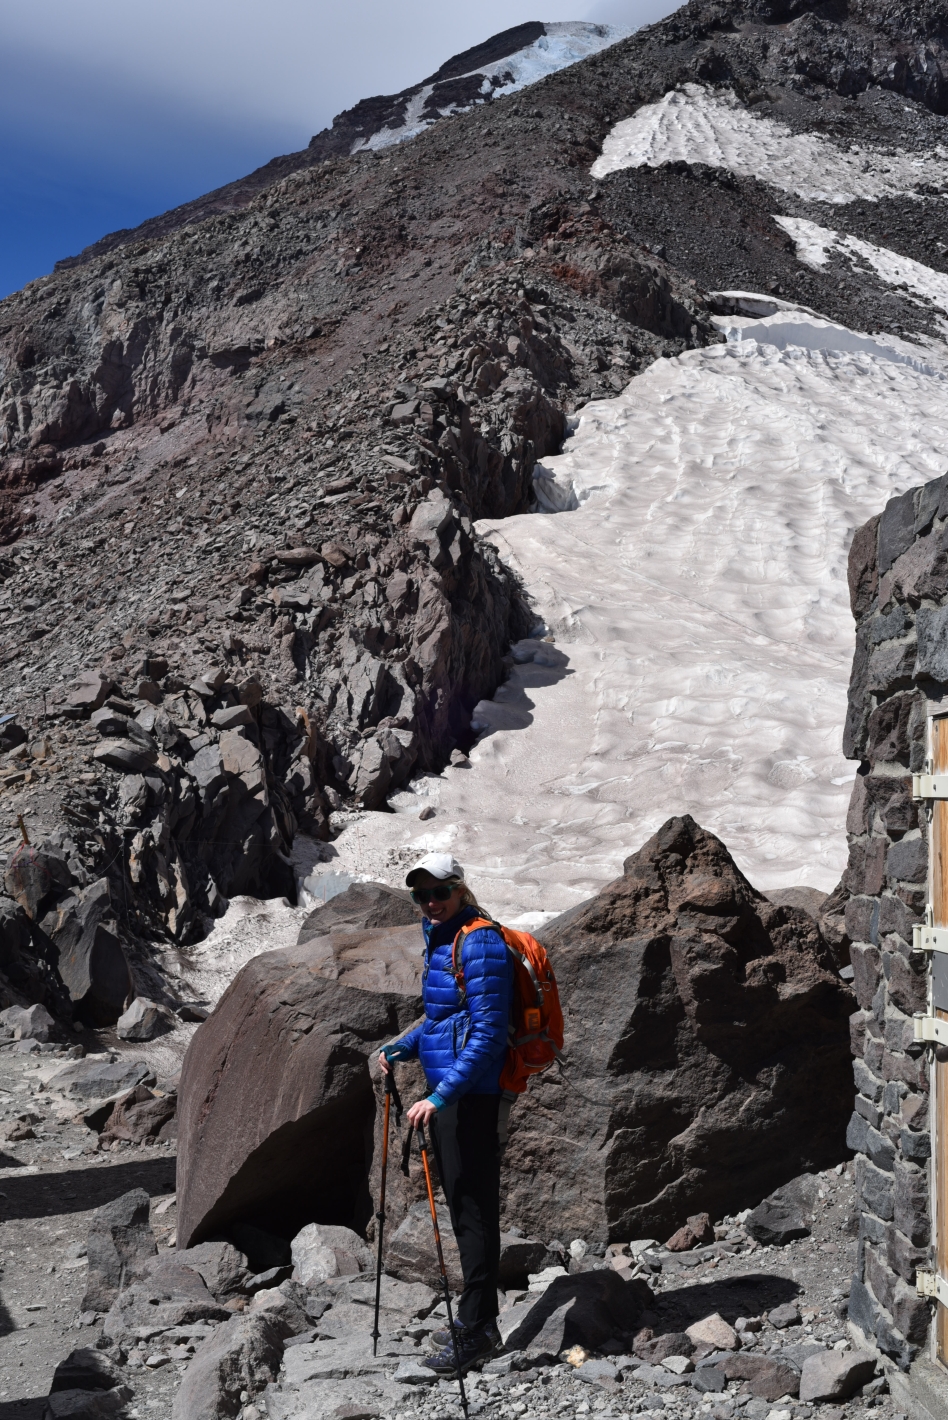
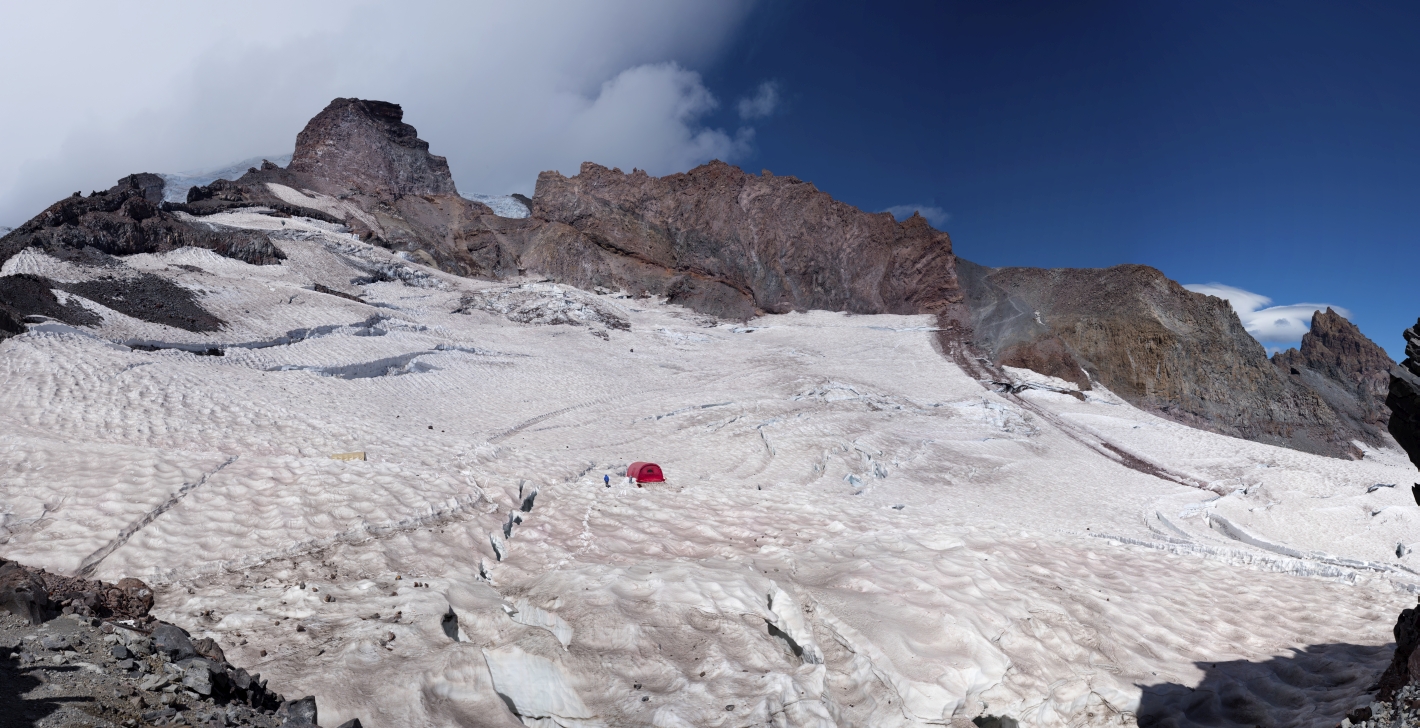
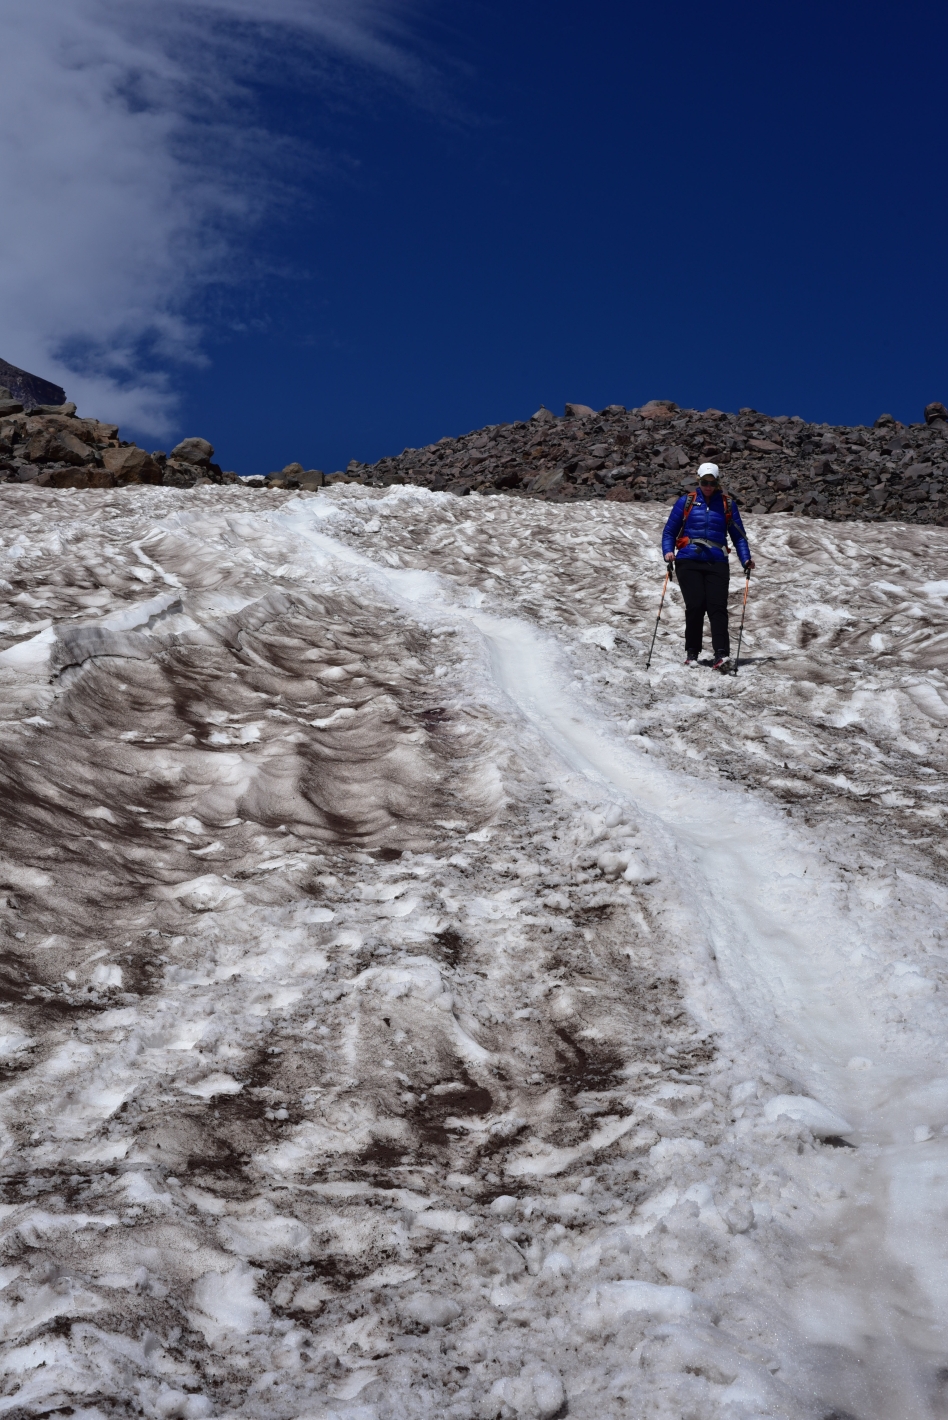
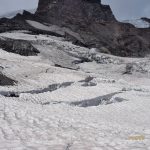
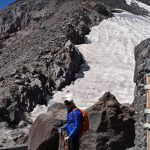
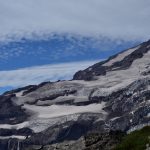
Our spikes grabbed the snow easily, and we proceeded upward and closer to the upper reaches of Mount Rainier. We took the most obvious path forward and kept near earlier bootpack and some glissading paths. Camp Muir was not yet visible. The snowfield appeared to stretch for miles and miles. Intermittently, there were some brief breaks in the snow via small sections of rocky outcroppings. We used one once to sit and dress a blister since it was preferable to sitting in wet snow. The snow was a strange redish muddy color in places. We’ve been told this is common in late summer due to pumice and ash. At 8,600 feet, we noted the turn off for the ridge that connects to Anvil Rock, a 9,000 something foot detour on the way to Camp Muir. We had our goal in site and did not choose to venture on this scenic path this time around. In the remaining mile on the snowfield, we acsended roughly 1,500 feet. It was intense. We kept checking the GPS thinking that it must be off or something. Surely we are higher in elevation with only a mile to go we thought. There were several wire wands in the snow with florescent tape marking the best path forward, which was helpful considering a few crevasses had started opening up on the snowfield. One we noted was 3 feet wide in places. Camp Muir and the snowfield are nearly completely surrounded by glaciers, and there are several warning in place by the National Park Service reminding hikers and climbers of the dangers of climbing the snowfield. Sadly, this hike has claimed a few lives when conditions turned poor. Backpacker magazine ranks the hike as one of the 10 most dangerous in America.

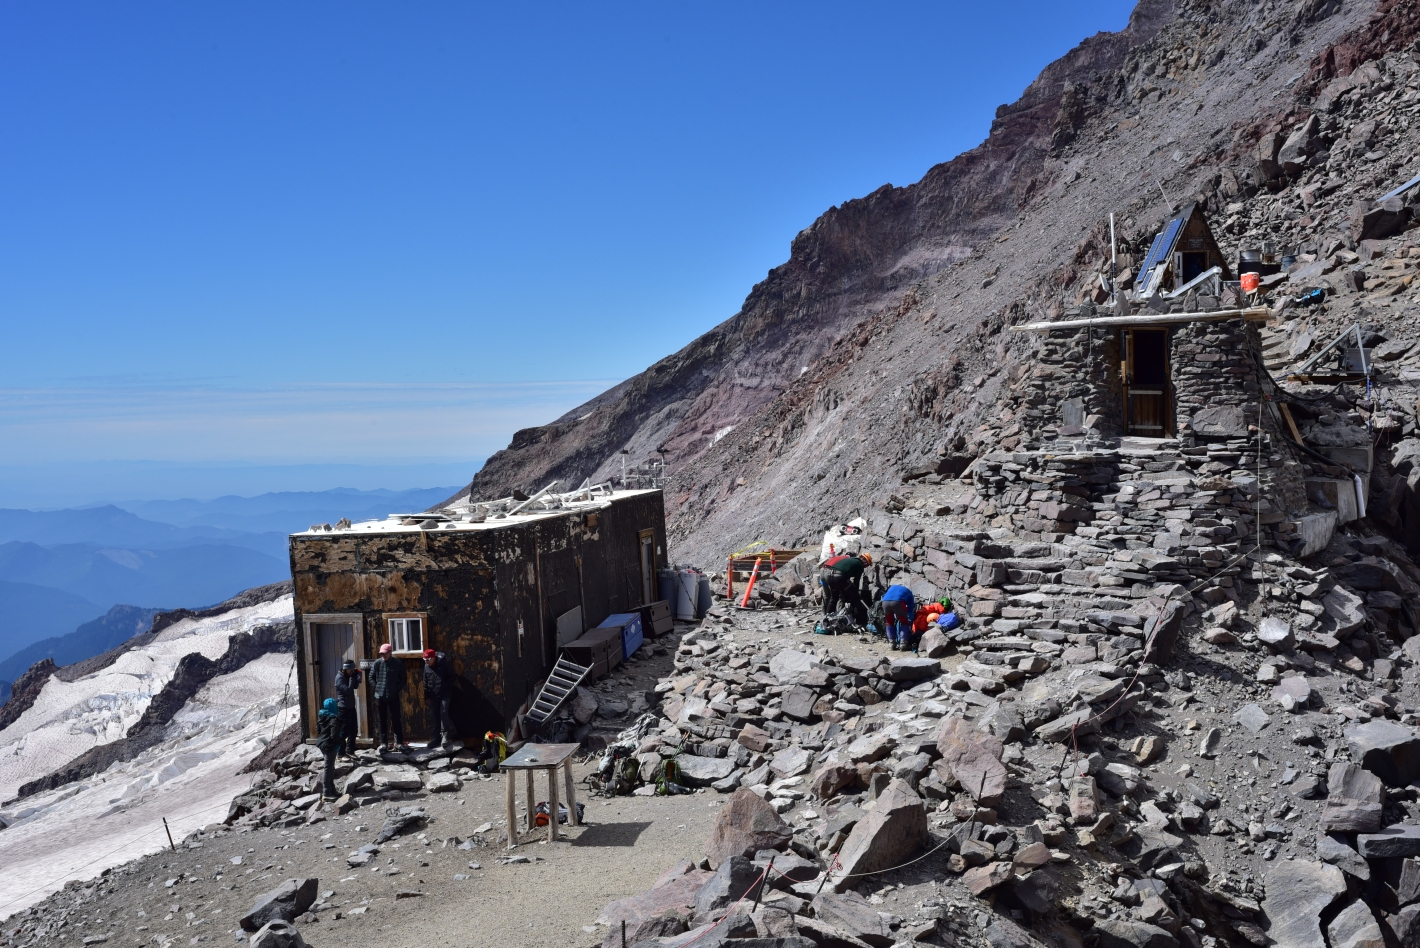
Camp Muir / Cloud Camp
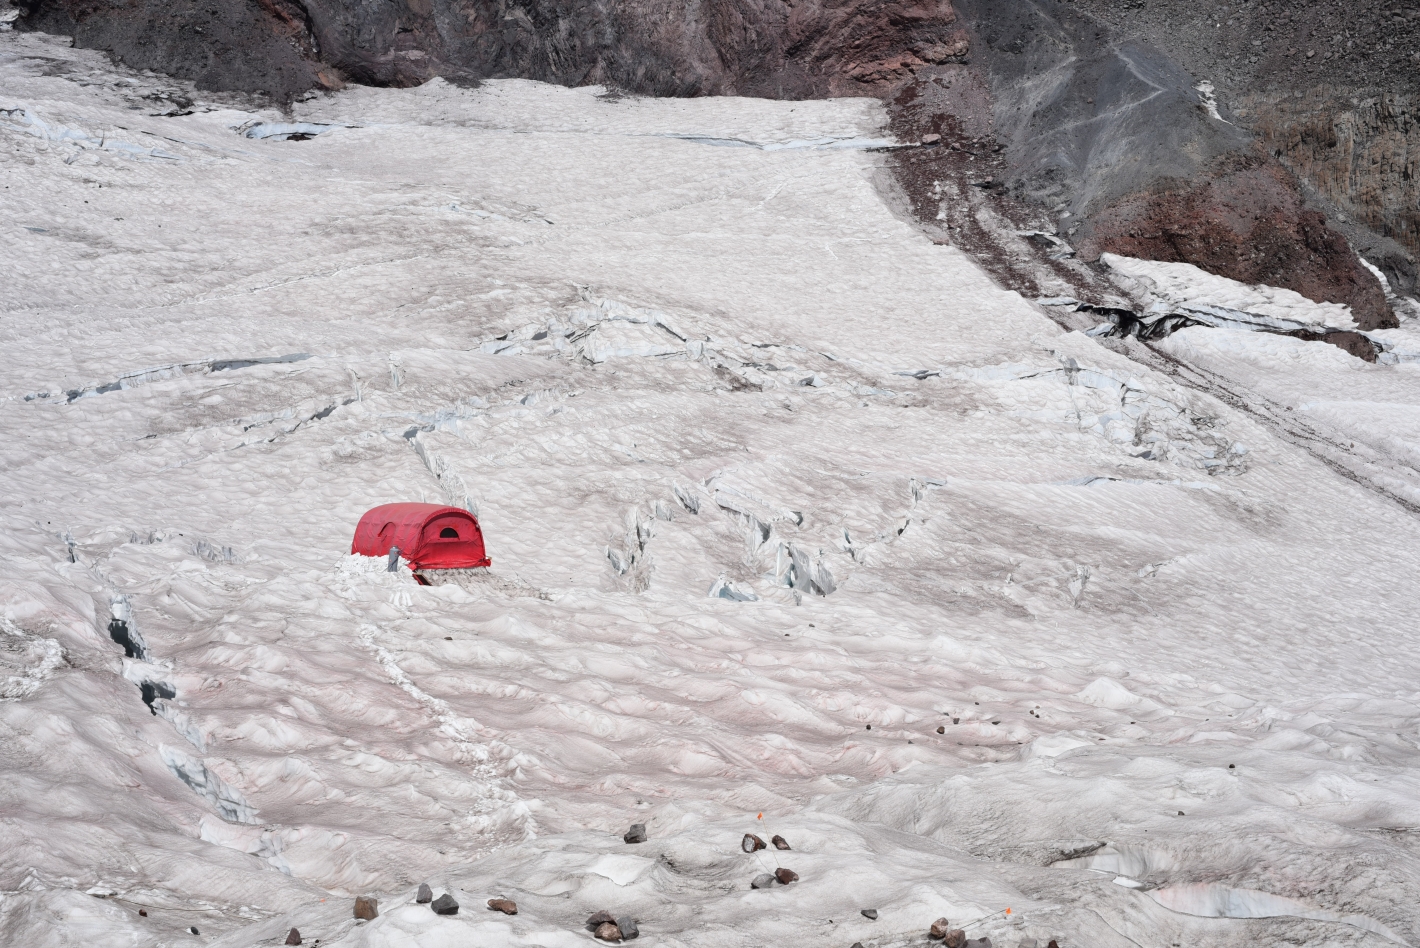
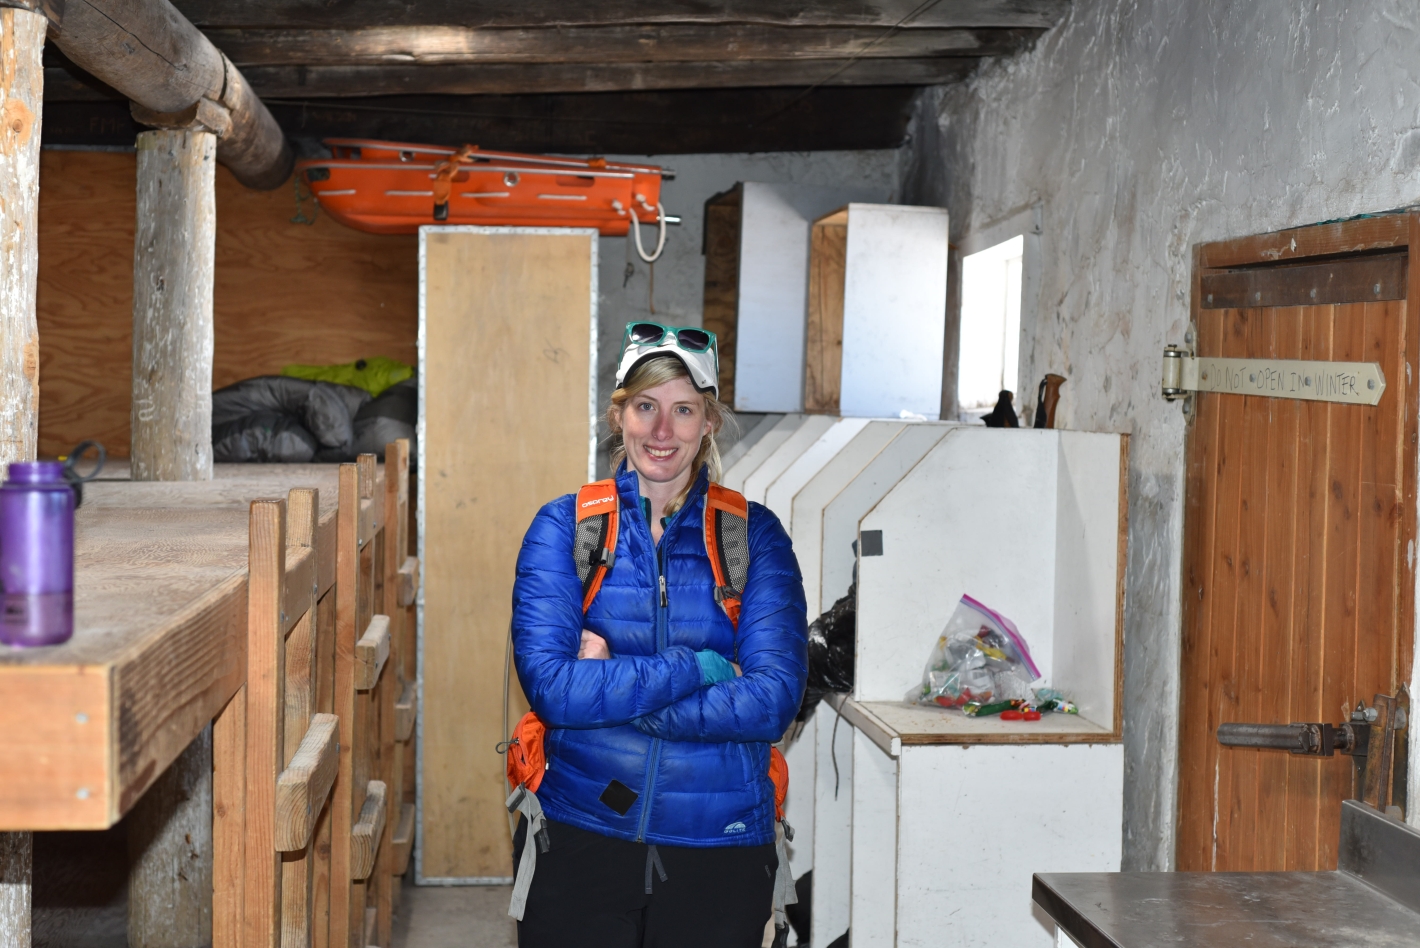
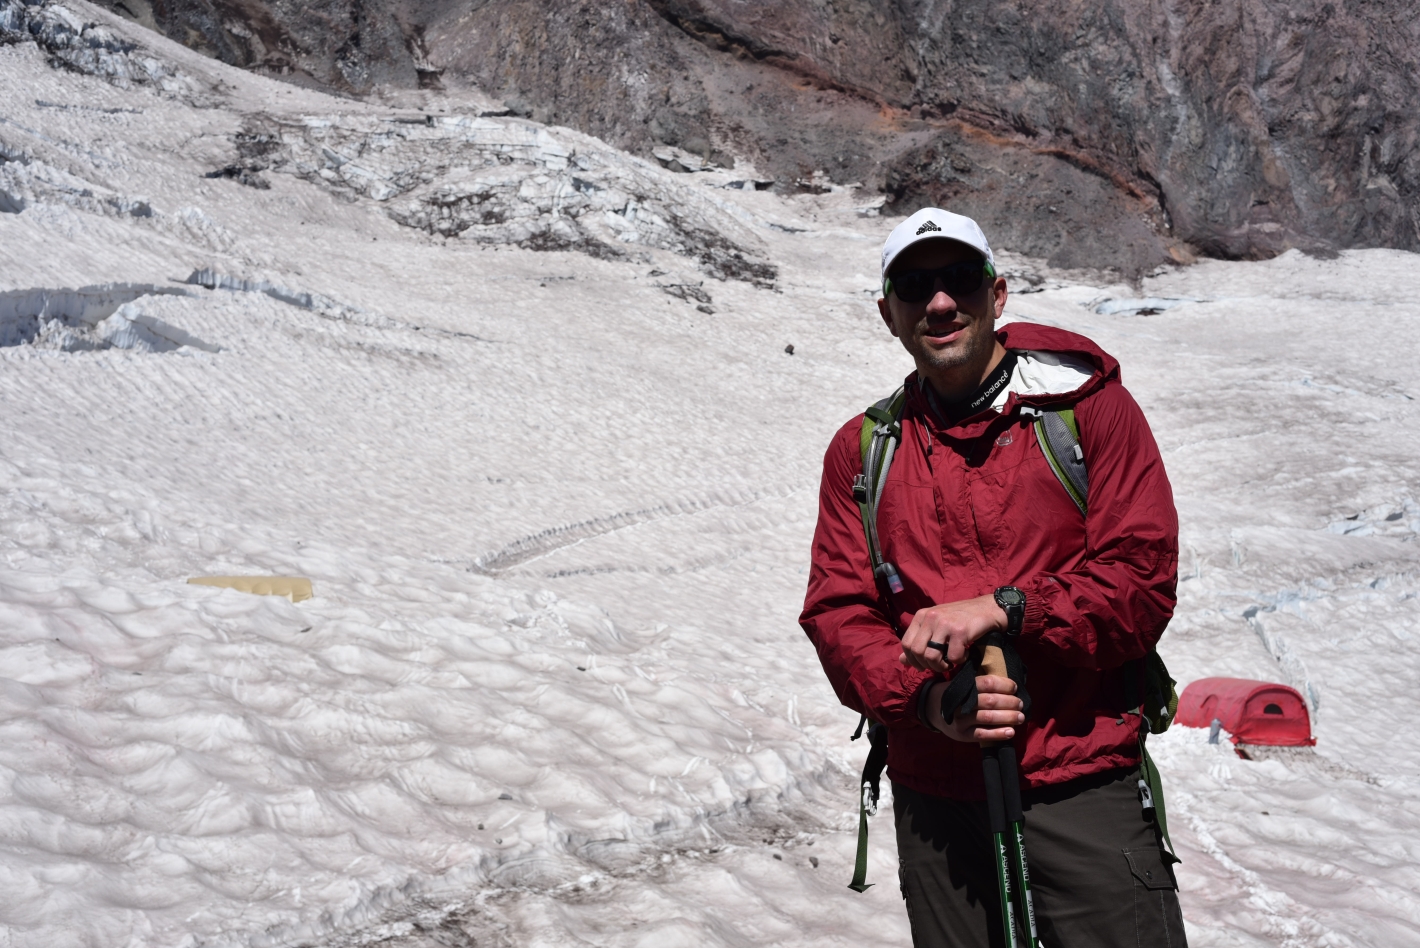
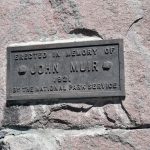
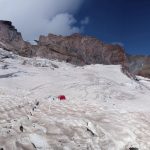
Camp Muir was originally called Cloud camp, and aptly so. The small camp sits above the Muir snowfield on the edge of the Cowlitz Glacier seemingly floating above the world below. After John Muir made the 6th recorded ascent in 1888, the name of the camp changed. Excitement ensued as we began to get our first glances of the camp. The first structure that camp into view was actually the guide hut. Only the famous stone structures would come into focus as we got much closer. We followed the boot pack and continued upward. It was a bit farther than it looked. The blue tint of the glaciers were quite apparent now, and finally we touched of our feet on hard rocky surface. We had made it to Camp Muir. While we were only sitting slightly above 10,000 feet, the hike was not too unlike many of our treks up to 14,000 feet. The elevation gain was intense. The camp was full of life and busy just before noon on a pleasant Friday. There were several guide groups and camps already set up on the Cowlitz glacier. Half a dozen or so day hikers were already perched at the front of the stone sleep shelter. We spent almost 45 minutes at the camp, eating some food and relaxing in the beauty of our surroundings. It was interesting to see tents pitched on the edge of 6 foot wide crevasses on Cowlitz Glacier. There were several warning signs in place stating that unropped travel past this point was not advised. As we looked south, we could see very clearly Mount Adams and Mount St. Helens. Mount Hood was slighlty visible between these two mountains.

The Descent
It was finally time to return to the world below, and we reluctantly put our spikes back on and began our descent. It was afternoon now, and the snow had gotten quiet slushy. Even in spikes, we were slipping and sliding. We eventually determined that the most efficient route down the mountain was via running/sliding down the mushy snow in our boots. There were several glissading paths that we saw on the way down, but at this point, unless they were steep, it was very hard to gain any speed. Scarily, we noted that one glissade path led straight into a crevasse. Though it was only 1 to 2 feet wide, it was still a scary prospect to think that a joyous slide might land you in a deep ice pit. On the way down, we saw several guide-led groups heading up to Camp Muir for a night’s rest prior to the summit push. Many of them looked a bit miserable to be honest. Though one day, we may be returning and participating in that march, today we were free to frolick down the mountain. On the final section of steep snow before reaching Pebble Creek, there was a short but very steep glissade. Several groups gathered here, and we all took turns gleefully sliding down it. There was even a bump that allowed those of us with enough speed to catch some air. Pure Joy.

Paradise Mount Rainier
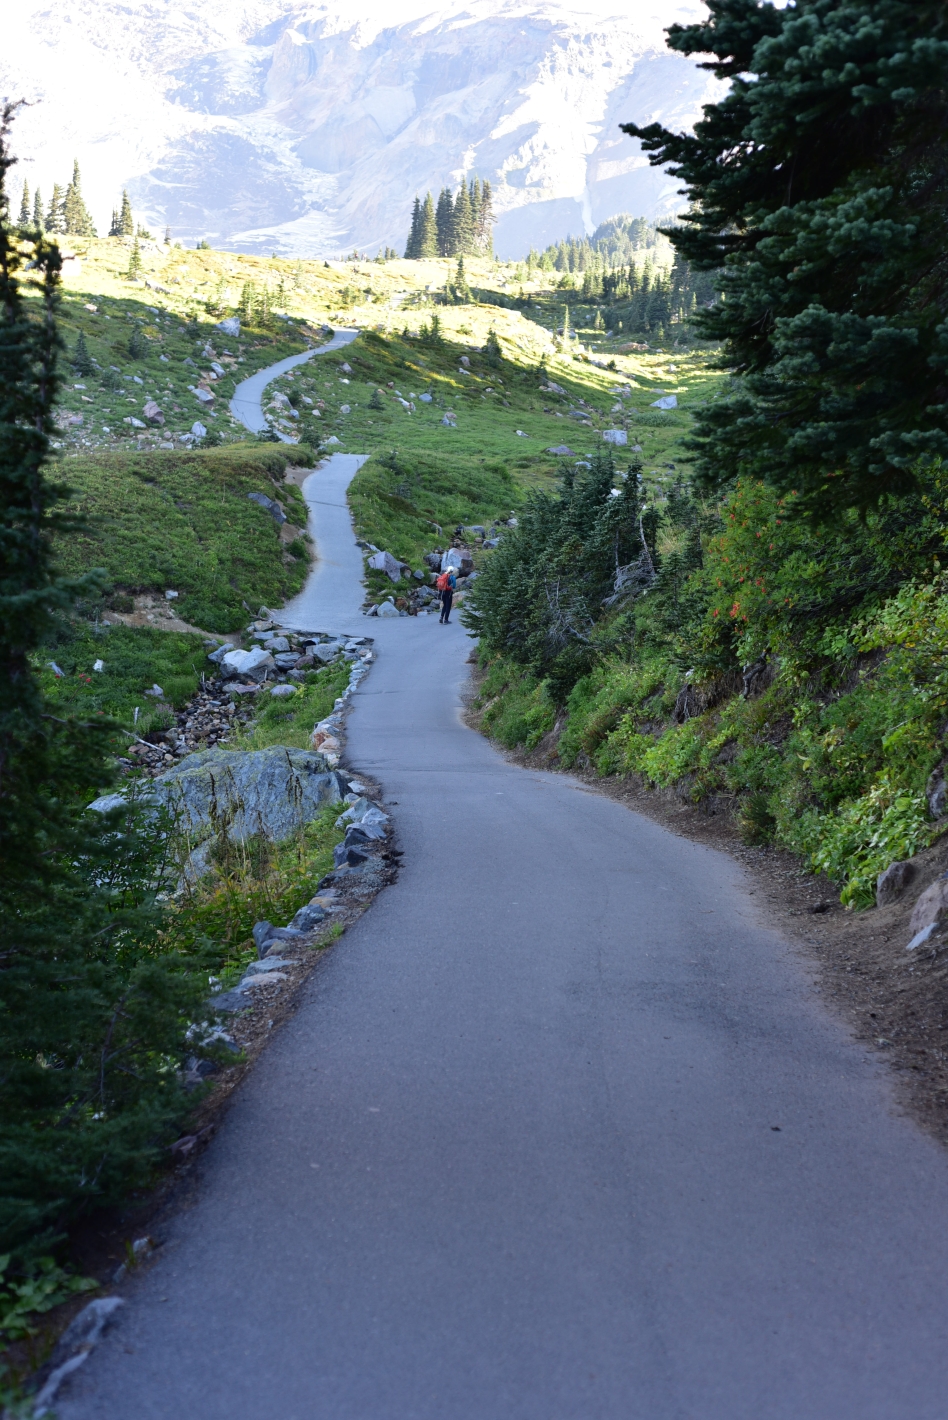
Once on dry, snow free ground we took our time enjoying the Skyline Trail. We took the loop that looks directly over the Nisqually Glacier this time. There were now hundreds of people out on the trail enjoying the bluebird day and exquisite surroundings. We returned to the Paradise Visitor Center and enjoyed the small but interesting display they had on the stratovolcano and then determined it was time for some real food and a soak in the hot tub at our Cabin. On the drive out of the park, we made one extra stop at Narada Falls for some beautiful waterfall pictures. This requires just a short hike down a steep path.

Parting Thoughts
The hike to Camp Muir was strenuous but rewarding and fun. The scenary was breathtaking virtually the entire hike. Prospective hikers to Camp Muir should remember that part of the trail is on a long snowfield covering nearly 2.2 miles and very steep at portions. While we had a safe fun day, weather can and does often deteriorate quickly and can turn the snowfield to a blanket of white leaving hikers with no sense of direction. This is particularing harrowing here, because there are cliffs and crevasses surrounding the snowfield. Compass/map and GPS are critical for this trek.
Side notes: Verizon had some cell reception at Camp Muir and a bit near Pebble Creek. AT&T had none…anywhere. Also there is a cafeteria at the Paradise Visitor Center. We got small snacks here and they were tasty but expensive. We ask the cashier why the prices are so high. He replied ” that’s the high altitude tax” of which we replied “hey man, this is the elevation of our living room!” To put things in perspective, Paradise is only 5,400 feet above sea level, close to that of our home in the Mile High City. Sigh. Everything is relative. And lastly, eat dinner at Copper Creek Inn Restaurant right outside the park. It was amazing!


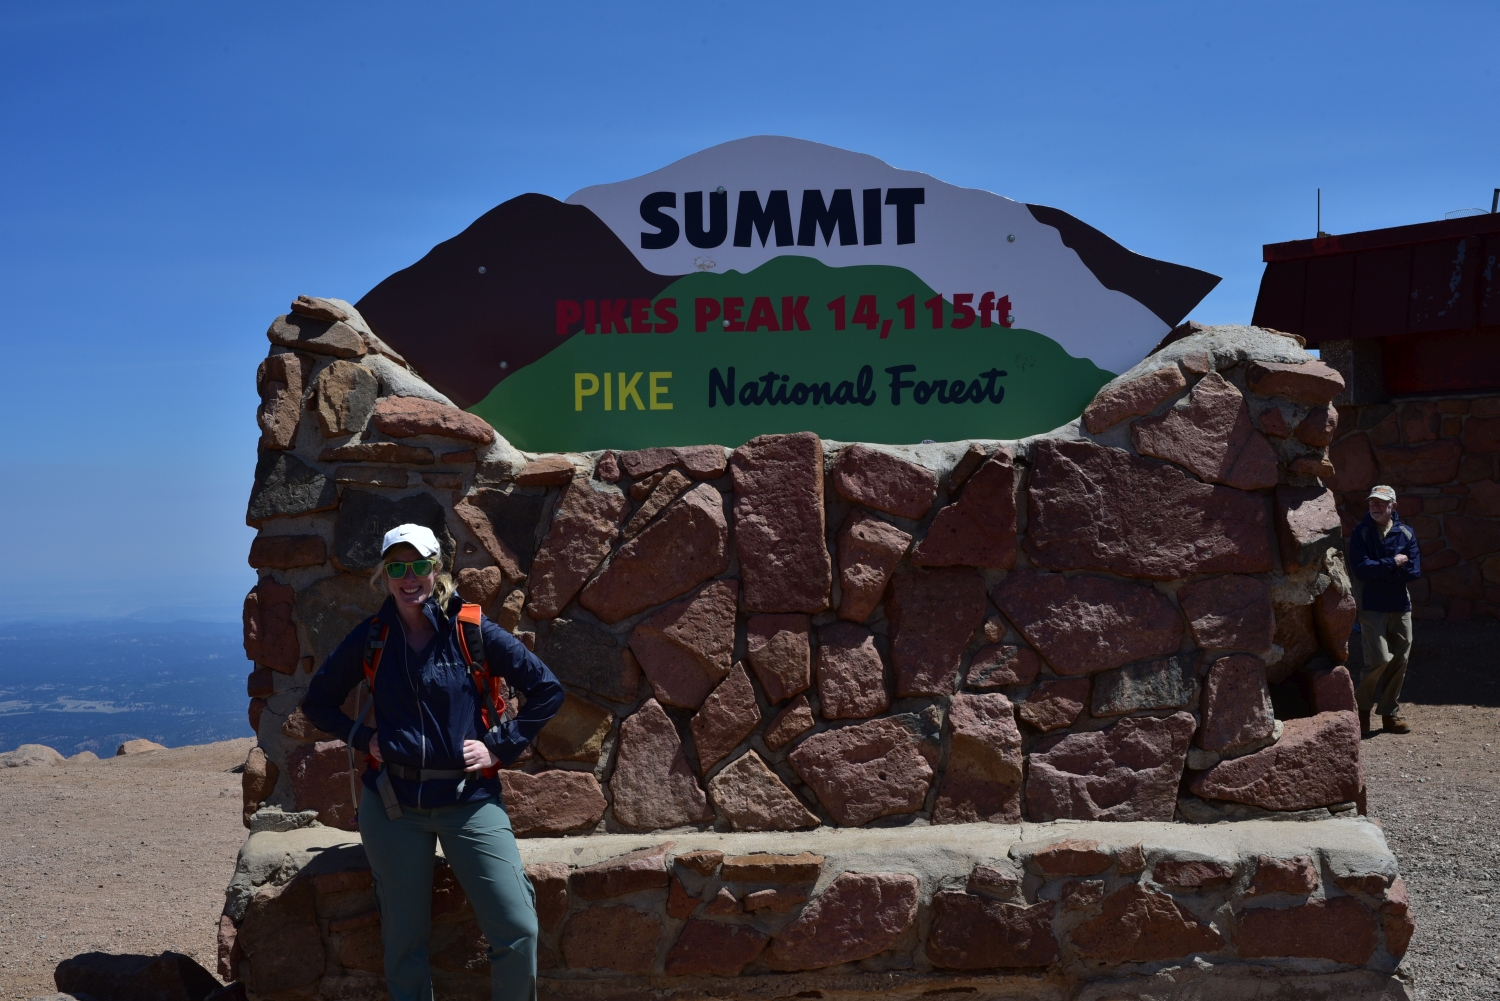
Pikes Peak via the Crags 14,115 feet

Data from the Garmin
Distance: 14.59 miles Net elevation gain: 4,418 ft Date of summit: 7/2/2018
It was the Sunday evening before the 4th of July, and we were itching for another 14er to summit though we weren’t particularly eager for a long drive or car camp the night before. In our peak “bagging” project, we only have Longs Peak and Pikes Peak left in the Front Range, and for some time have contemplated letting our 14er finisher be Pikes Peak so that family and friends can drive up and meet us at the top. Well plans change, and we figured this was the only reasonable peak to get in this time while allowing us a little more sleep in the comfort of our own home. Bright and early…or should we say dark and early on Monday July 2nd, we awoke and made the 2 hour drive to the Crags Campground TH for Pikes Peak.
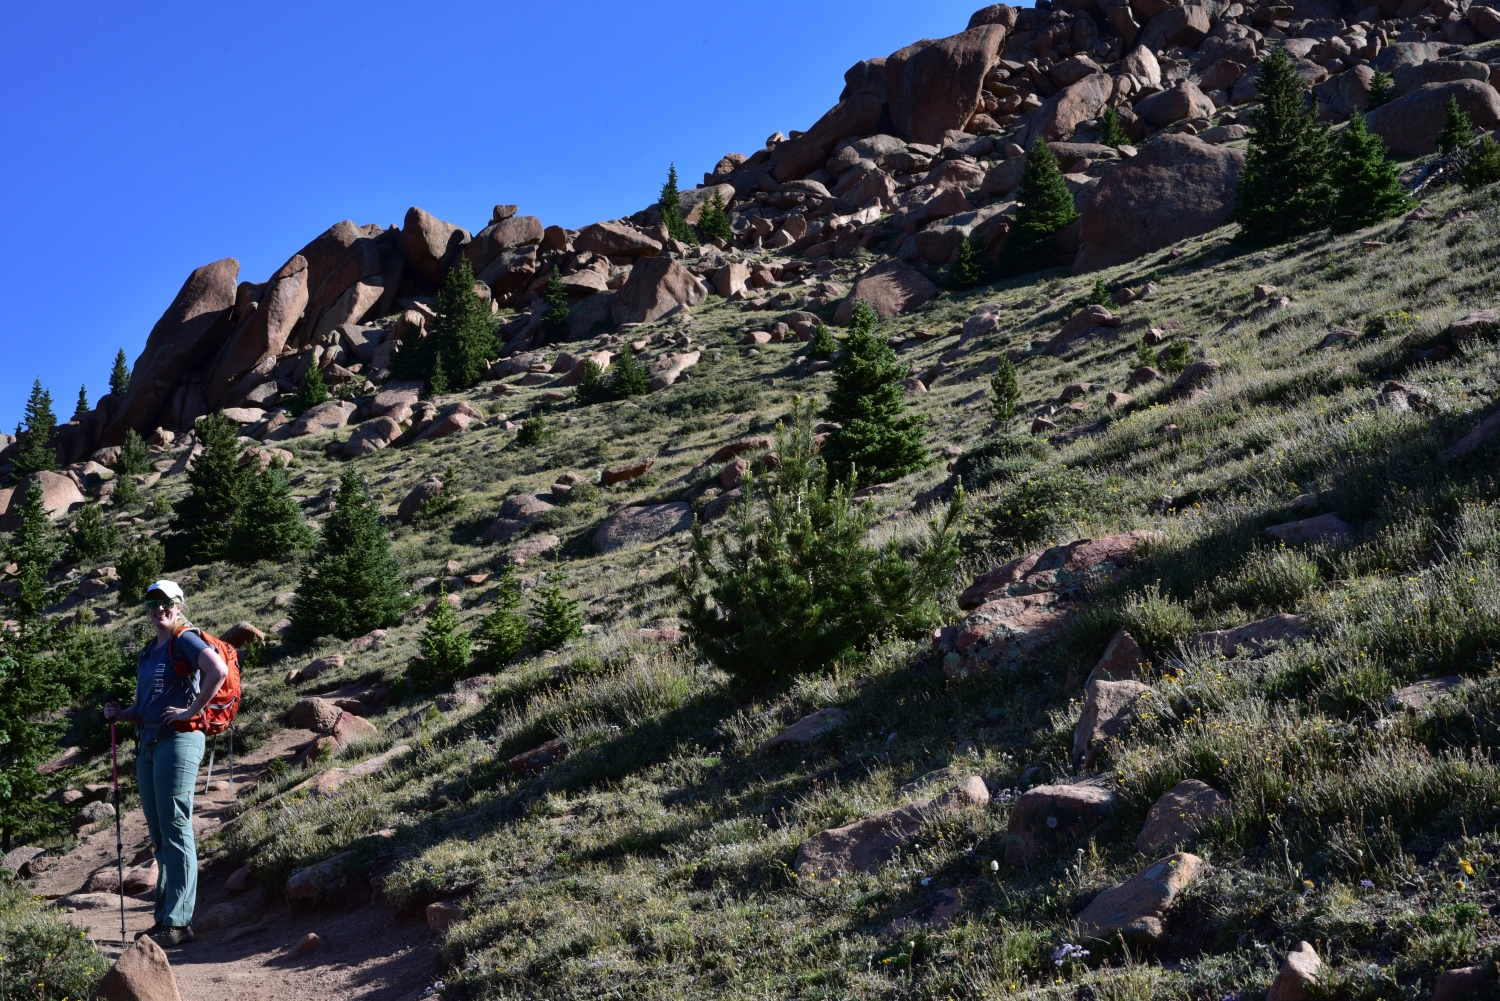
For those of you familar with Pikes Peak, you’ve probably heard of the famous Barr Trail that leads 13 miles up to the summit with over 7,000 feet of elevation gain. This is the standard iconic route that most people take and usually involves an overnight stay at Barr Camp about half-way up the peak. However, there is an alternative for those seeking to gain the summit of Pikes without such a long slog. Less popular and less traveled is the Crags route, which begins near the Crags Campground located near Divide, Colorado. Round trip this route is a litte over 14 miles and gains roughly 4,100 feet of elevation. While still long, this route saves a lot of time compared to the standard 26 mile walk up. To reach the moderately sized parking lot and the start of the trail, we turned off of Colorado 67 near a ranch and drove for about 3 miles on a 2wd dirt road. The parking lot was nearly empty and there were vault toilets there as well. We began our ascent at about 7:20 am. Though we had hoped for an earlier start time, the distance to reach the Crags TH from our home in Denver took much longer than expected. Plus, one of us needed a coffee/breakfast stop on the way there.
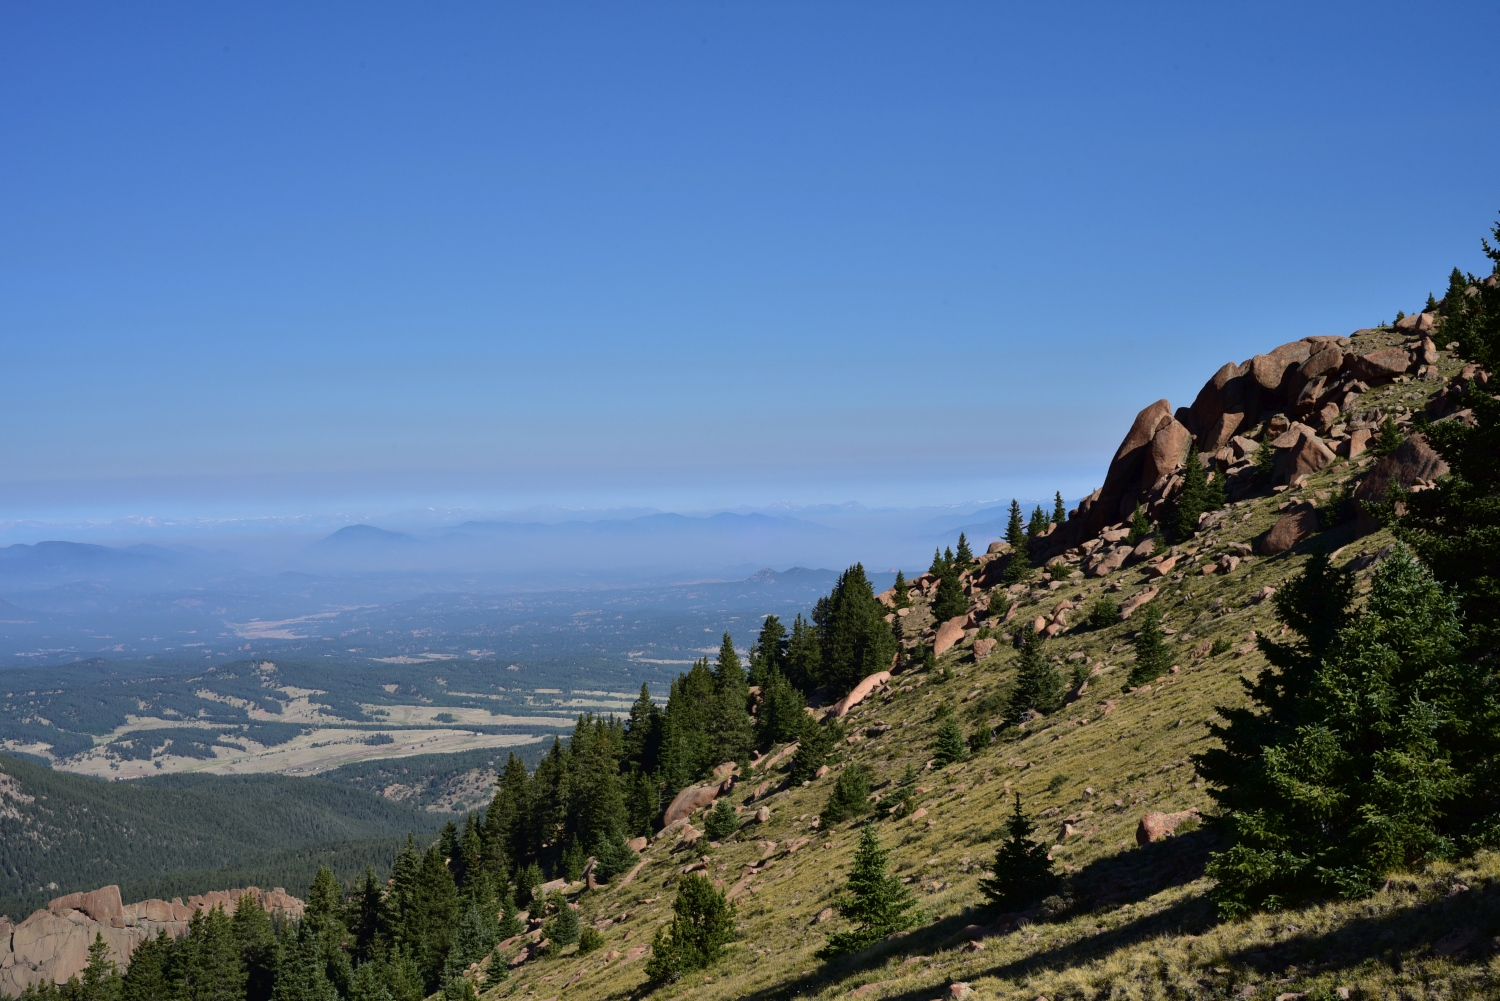
We immediately crossed Fourmile creek on a nice bridge and began our trek through some dense forest. After about half a mile of moderately gaining elevation, we reached a trail junction. After reading trip reports, we were on the lookout for three “pipes” sticking out of the ground to mark the upcoming junction. We easily found the pipes but there were also nice signs indicating the junction. We followed the signs to Devil’s Playround towards the right. This portion of the hike was quiet, and peaceful. We passed two parties hiking up which always makes us feel great about our pace and accomplishment, however a trail runner later passed us quickly humbling us. The hike became much more interesting as the trees started to thin, opening up views of the exquisite valley below us. Close to 11,000 feet, we encountered a small meadow before ascending a steep hillside that exited the trees completely. Seen below are photos as began to leave treeline.

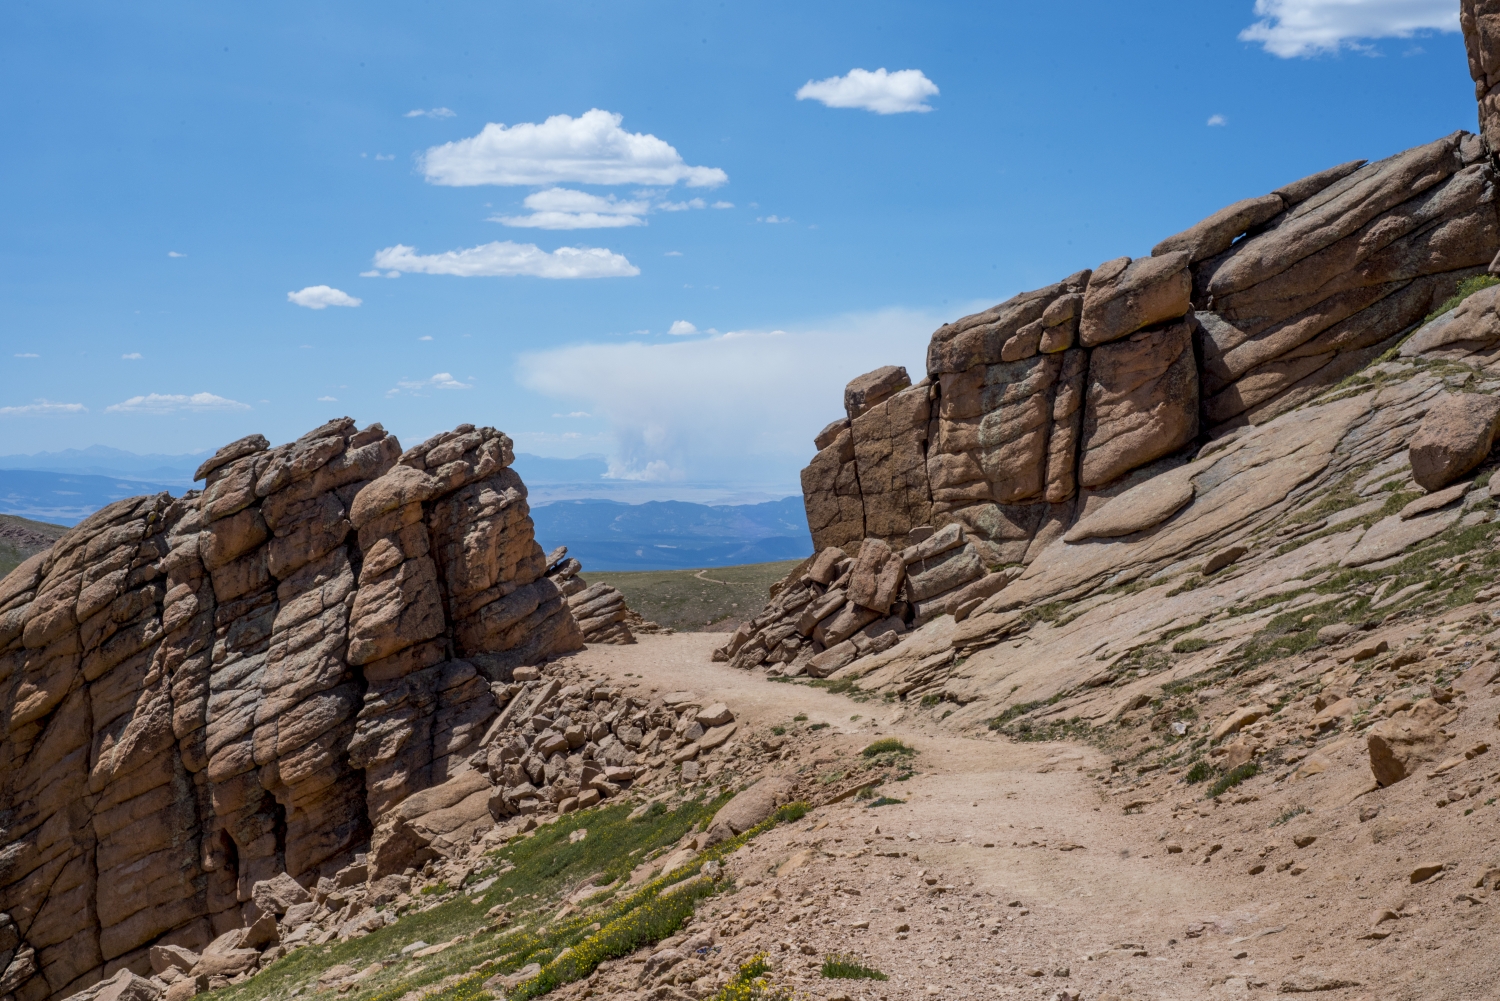
After ascending another steep hillside, we gained a ridge, and the trail leveled off a bit. This portion of the hike was very reminiscent of the Mount Flora hike off of Berthoud Pass for those familiar. This is the quintessential alpine environment that we seek so frequently. At the top of this slope, we were near 12,800 feet. We had gained close to 3,000 feet of elevation after about 3.5 miles. While beautiful, there were some steep sections in the first few miles of the Crags route. The trail widens here, and we followed it northeast towards Devil’s Playground and the Pikes Peak road. As we approached the “Playground” named for the frightening lighting storms that take place here frequently in summer afternoons, we came upon a large gap in a strip of rocks that we passed through to get to the Devil’s Playground parking lot. This entry point to the remaining route was quite dramatic. For our fellow Tolkien fans, we imagined Gandalf shouting “you shall not pass!” We passed though and were greeted with the first signs of civilization, and were reminded of why we have been putting off climbing Pikes Peak. Because of construction at the summit house, there is currently limited parking on the top of Pikes. Shuttle bus operators were asking people without kids or disabilities to park at Devil’s Playground and ride up with them to save parking. It was still relatively calm this early in the morning, and there were bathrooms which is rare for a 14er adventure above treeline. Nonetheless, the remaining route would be devoid of the privacy we were afforded in the first few miles.

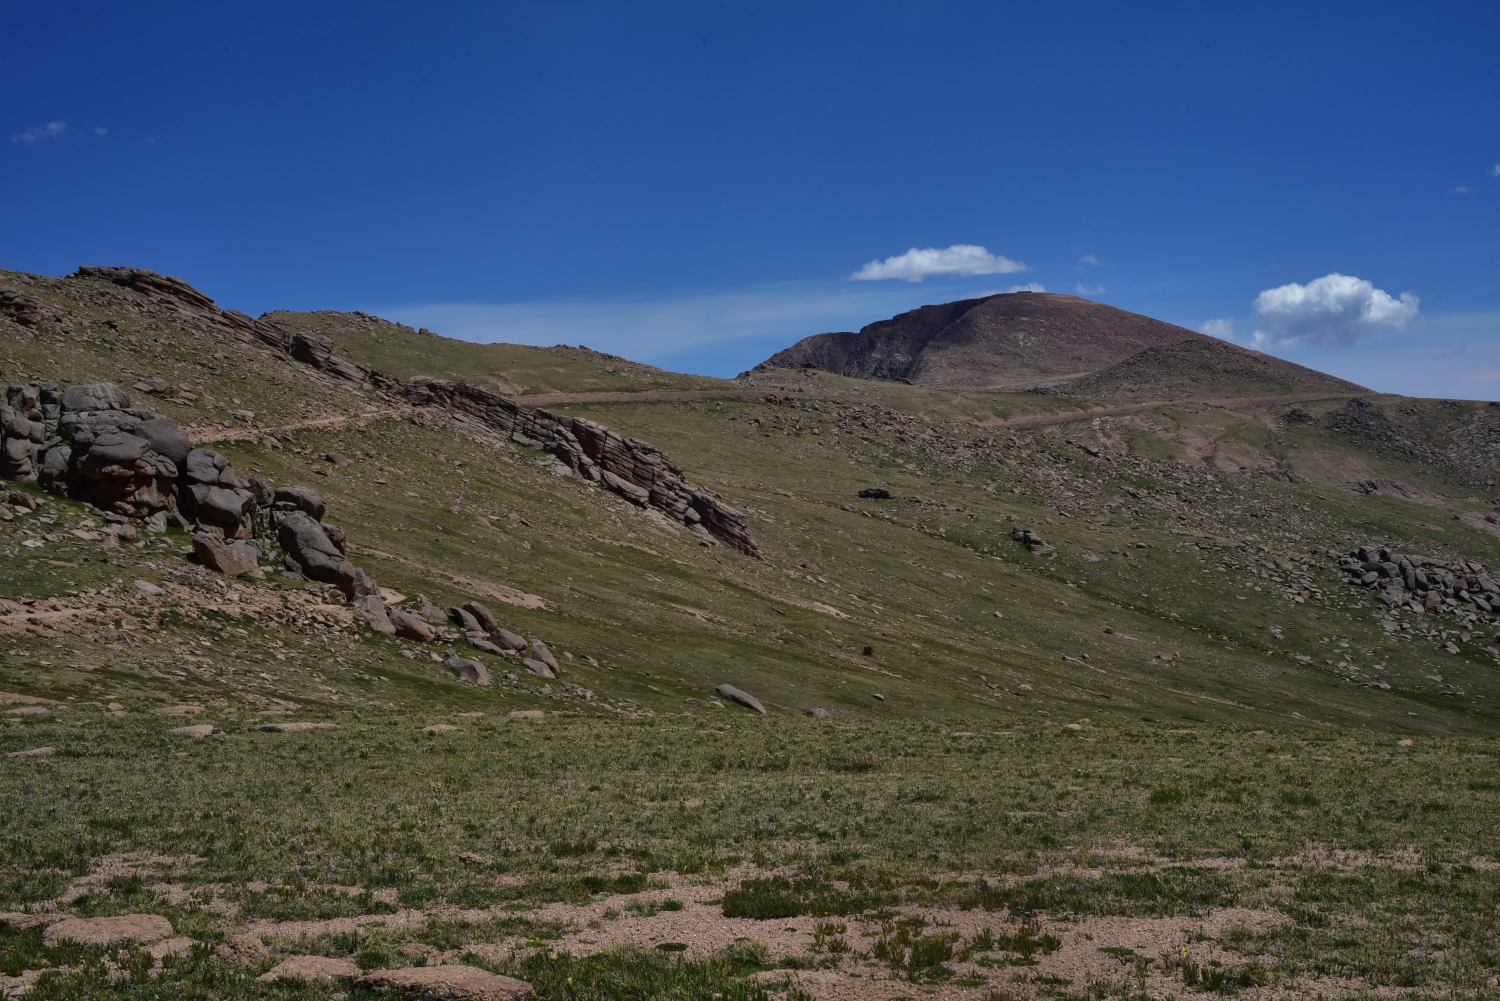
We crossed the Pikes Peak Road for the first time at the Devils Playground parking lot. Hiking along the road is prohibited, and if you are caught then you are likely to get a ticket. Instead, the trail follows the road for a portion, which in our opinion is much preferable to hiking up concrete next to vehicles flying by. We were now about 2.25 miles from the summit, and the trail was gentle until the final push. There were a few more hiking parties that had joined the trail for the abbreviated version at Devil’s Playground, but most people we saw were boarding the shuttle busses for the top. We enjoyed the mild terrain as we got closer and closer to the summit. Seen below are photos.

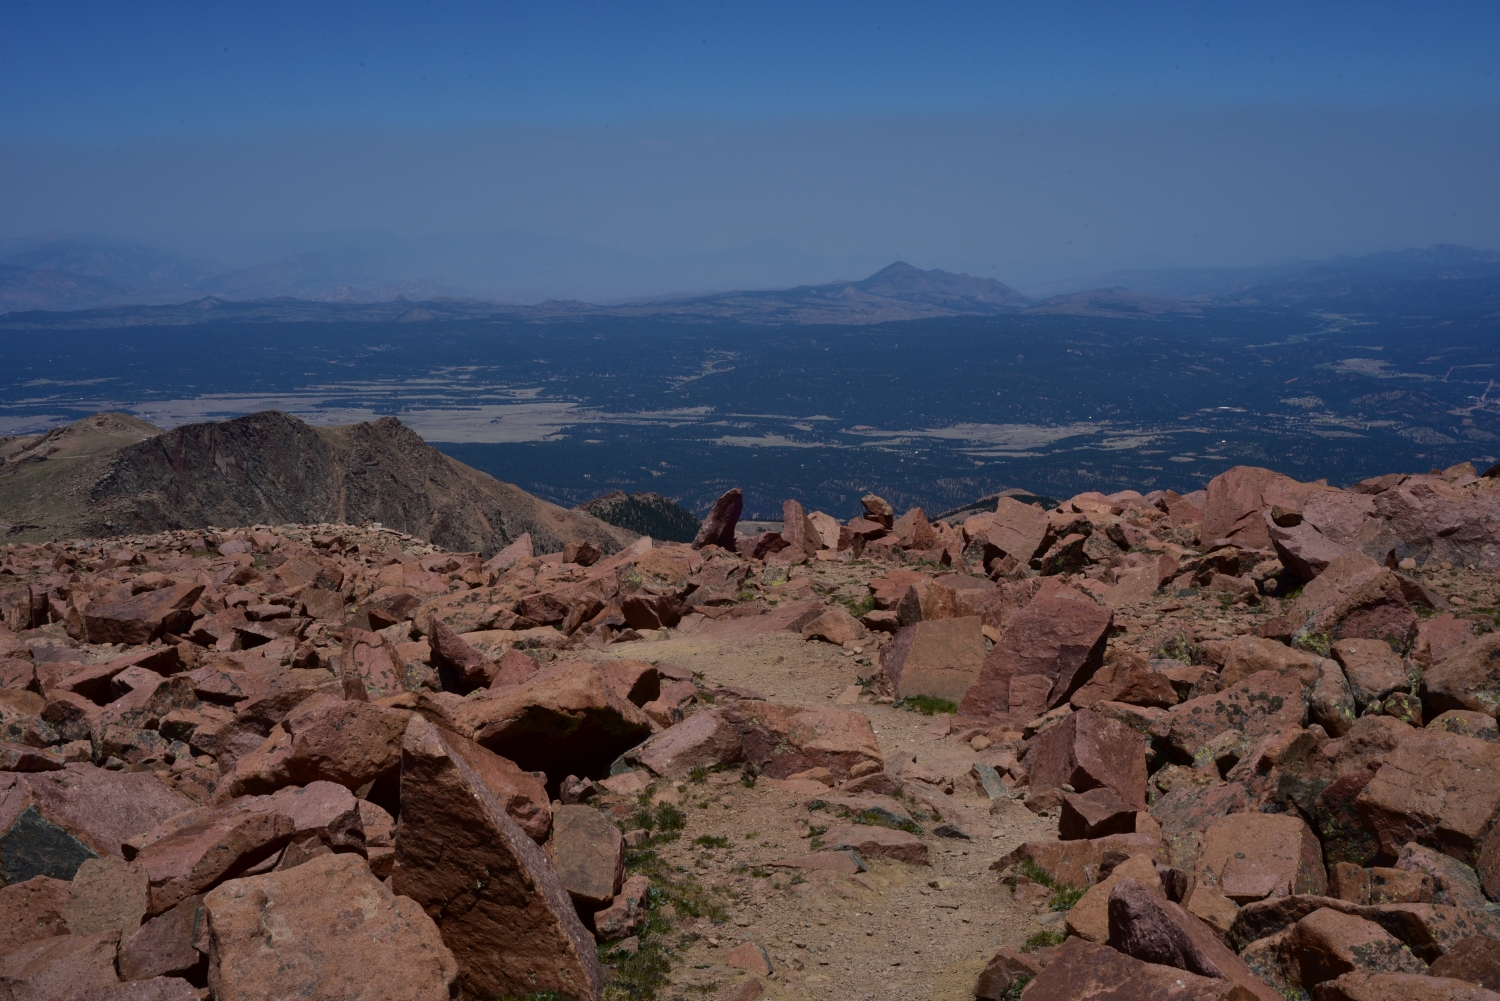
The final push to the summit was much more entertaining than most of the hike. There was some easy class 2 scrambling fun as we picked our way up the remaining 500 feet. Once again we felt emersed in the wilderness as we hopped from boulder to boulder, the air feeling almost thinner we each new step. It was almost unnerving as we gained the summit and approached a large parking lot, hordes of people, and the summit gift shop and restaurant. Nonetheless, we knew what kind of trek Pikes Peak would be and embraced the opportunity to refill our water, buy a few gifts for nieces and nephews, and eat some of the famous donuts and a grade school cafeteria style cheeseburger. We spent about an hour on top, eating, shopping, and taking video and photos from America’s mountain. It was fun to see so many families of all ages together enjoying themselves at 14,110 feet. Or is it 14,115 feet…The summit sign states 14,115 feet, but through the years the elevation keeps getting changed. Originally measured 14,110 feet in 1929 and then there were some strange hundred feet increases from that when people tried to count the height of the summit house. When Congress adoped the “National Geodetic Vertical Datum of 1988” in 2002 and recalcuated peak measurements, it changed to 14,115. As far as we are concerned, it’s well over 14,000 feet but not close enough to contest the tallest peak in Colorado, Mount Elbert, so..who cares! Seen below are more summit photos.


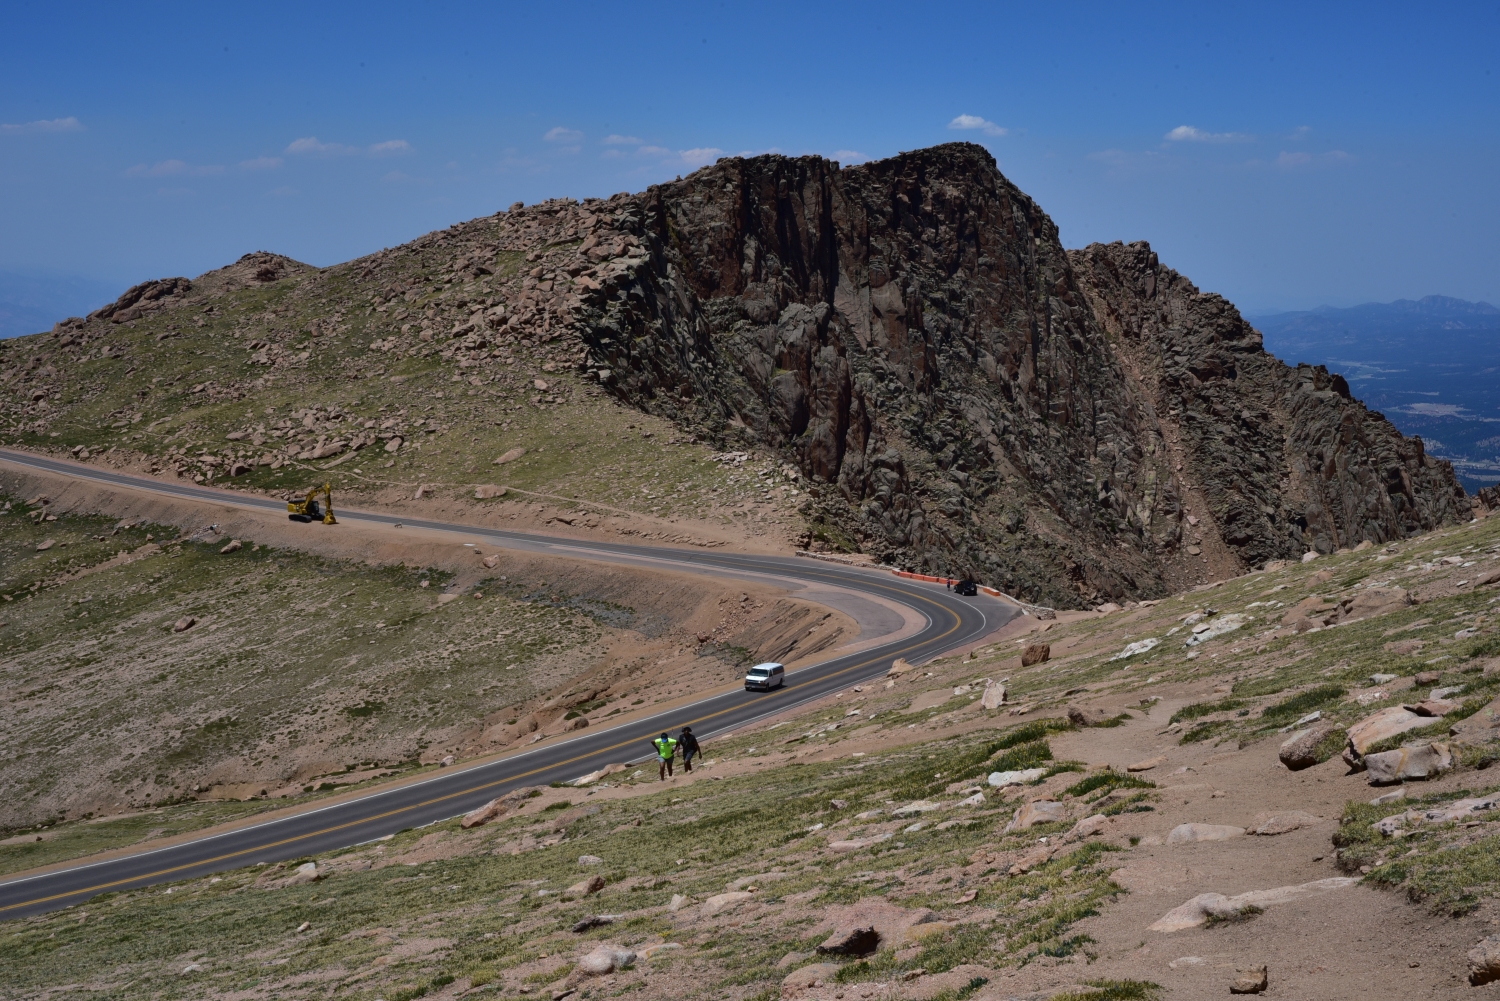
It was noon now and time to go back down. The weather was perfect, with barely a cloud in sight, however we understand how quickly this can change in the alpine. We followed our path back through the boulder field and headed for the gateway to solitude once again at Devil’s Playground. And we do mean gateway. At around 1:00 pm, there were hordes of people. We estimated probably 100-15o people were in line to ride the shuttle to the summit. There were more people here than on the summit. It was very satisfying to just keep walking away from the crowds back to the alpine splendor, even if it meant we had another 5 miles to the car. Seen below is the “gong show” at the Playground and some views from the way back down. Of note, there were several mountain goats near the roadway on the way down. They stared us down intently as we hike down, and it was unsettling. We were a couple hundred feet away. Several cars coming up thought it was a great idea to pull up right next to them and shout at them from the windows which is not too cool.
As we began the steep descent to the car, we noticed several large plumes of smoke from nearby fires. There is not enough moisture this year, and fires are sadly burning all over the state. The descent proved more challenging than the ascent on the remaining trail. There were steep scree slopes that reminded us of hiking on a bunch of marbles. In fact, as we were resting and snacking near treeline, we encountered a member of the Colorado 14er’s Initiative. He had been scoping the trail all day and noting trail quality for future grants and improvement projects. He pointed out that many areas of the this trail were in need of modification, and overall the trail was in poor condition. The remaining hike was uneventful, and we reached the car at about 4:00 pm after about an 8 hour day on the trail. We thoroughly enjoyed the day and hike much more than we expected too. Prior to beginning this peak, we had some negative thoughts about the crowds and summit house and cars. But, it turned out to be a fun and unique high alpine experience. Not everyday do you get to enjoy a cafe on a summit.
We finished the day in Woodland Park enjoying dinner at the Ute Inn which was quite satisfying after a long day. Rather than battle traffic in the Springs, we opted to take a scenic route home on 67 through Deckers and along the Platte River. It was quite tranquil, but took us way longer than expected. A detour ended up leading us up a steep dirt road with hairpin turns. Despite the long adventurous drive back we were happy to be together and thankful for another great day climbing and hiking in this amazing place. We are now getting close to the halfway mark of the CO 14er peaks. Until next time….enjoy some more photographs from the day.


Mount Princeton 14,197 ft, Sawatch Range

Though the hike up Mount Princeton will be described in better detail as we go along, the photographs above provides a fairly accurate summary of this mountain for those seeking to summit this summer. Talus hopping, navigating steep scree- filled slopes, and dodging the apparent infestation of spiders spinnning their intricate webs among the maze of rock were interwoven into our day. In between the scree surfing and selecting our next boulder step, we drank in the views of the bright blue sky above us and the exquisite alpine around us.
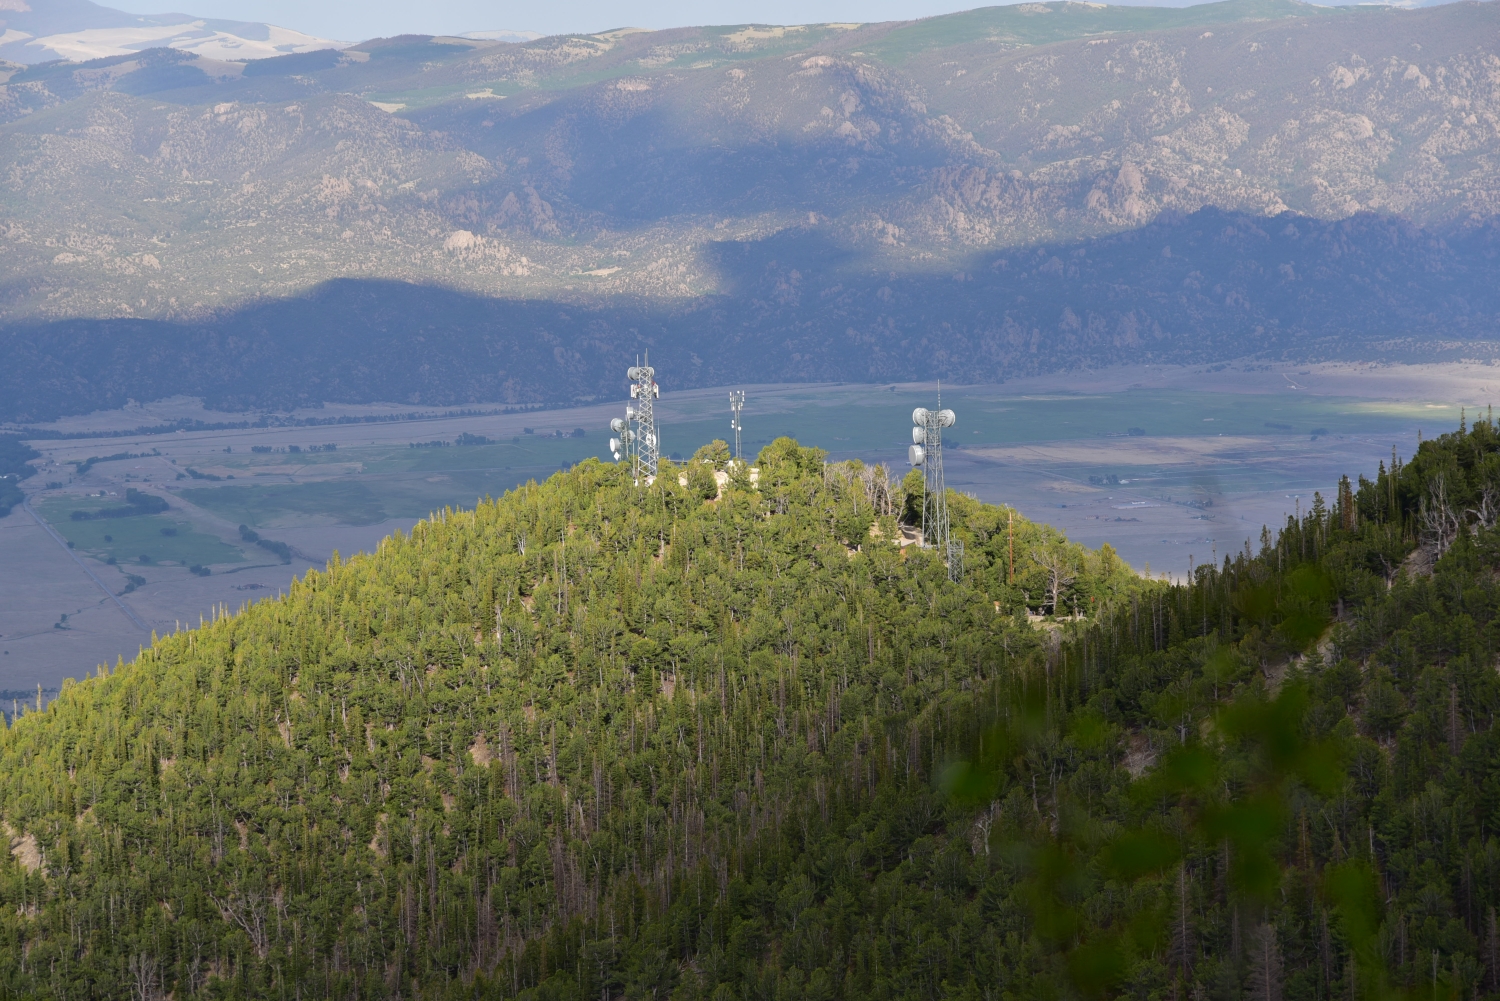
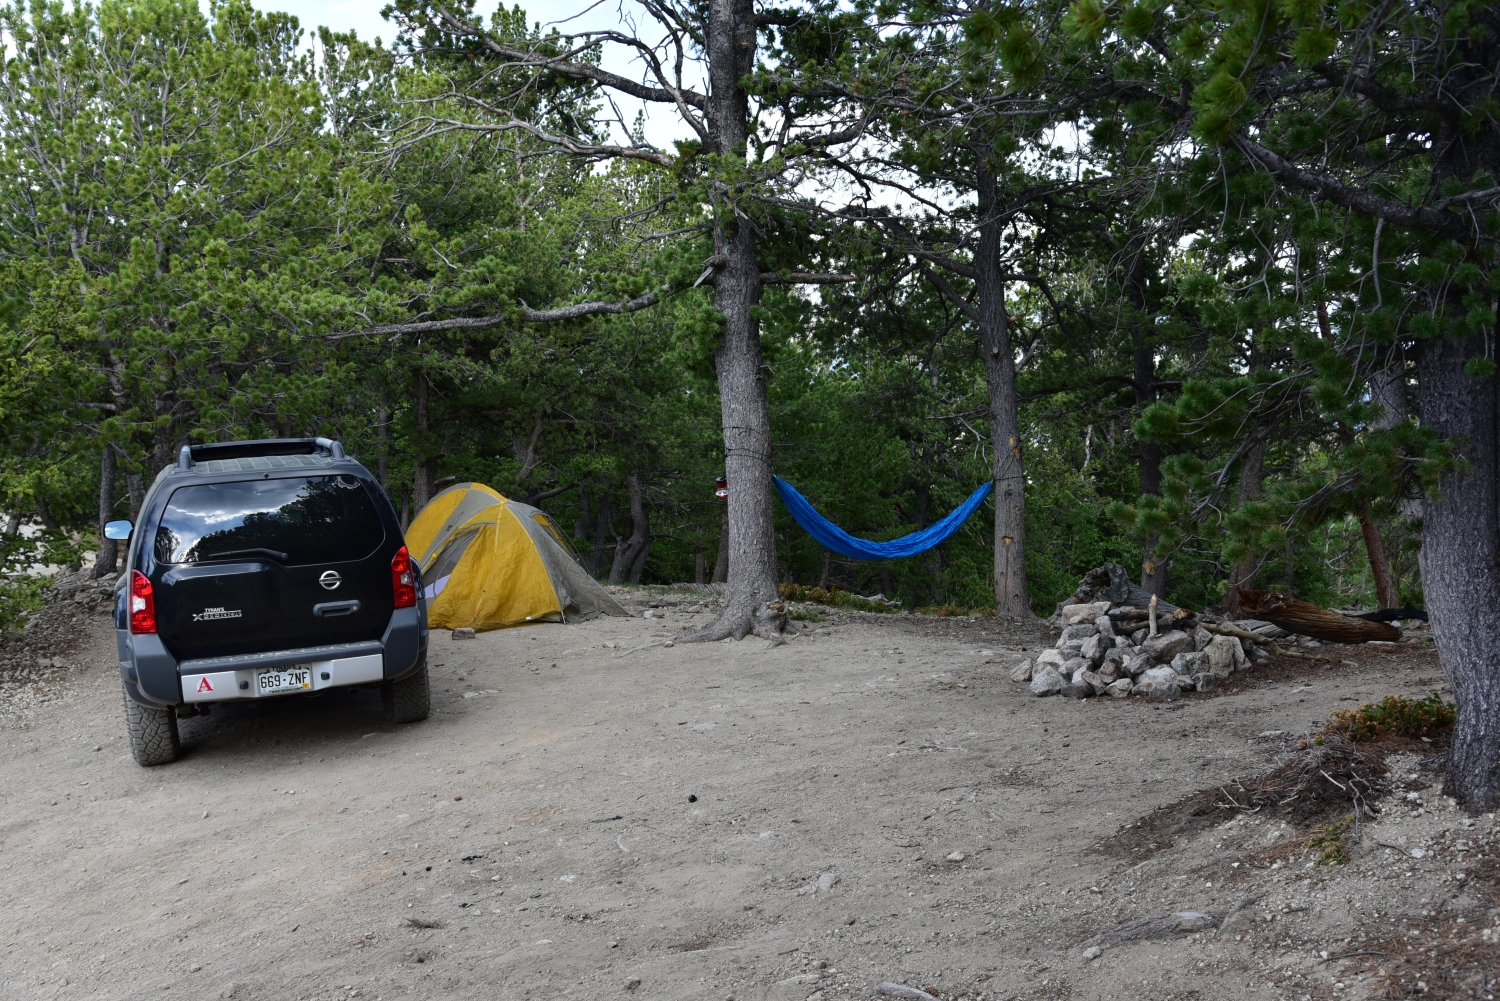
Mount Princeton is one of the Collegiate Peaks located in the Sawatch Range. It’s 14,197 feet above sea level and prominently sits above the small mountain town of Buena Vista. The lower TH is easy to get to, with a large parking area, but be warned, starting from here makes for a much longer, more strenuous day. Hikers will need to gain 5,400 feet of elevation and hike a total of 13.25 miles. We chose to take the X-terra with brand new all-terrain tires up the narrow 4WD road to reach the upper trailhead and camping spots located just past the radio towers. This reduced the gain and round-trip mileage to around 3,200 feet and 6.5 miles, respectively. Almost immediately, we encountered large dips and steeps gains along the road. However, the biggest challenge of the road is how narrow it is. There were several long stretches of the road in which there was no way for two-way traffic. We headed up around 4:30 pm on a Thursday afternoon hoping to not encounter any down hill traffic. Unfortunately, about half a mile up, three large suburbans/trucks were heading straight for us. While uphill traffic has the right of way, there was a small pull-out about 500 feet below, so we carefully backed down the road to let the others pass. The rest of the drive up was fairly uneventful, with the exception of some very large drop-offs as the path became a shelf road. It was slightly unnerving to have the truck lean slightly while skirting the edge of a cliff. Once we reached the radio towers, we continued on the road for another 0.2 miles and found a lovely campsite with room for our tent, two trees to tie our hammock, and spot for the truck. Seen below is a set-up of our camp, the radio towers, and wandering around the area prior to our hike the next day.
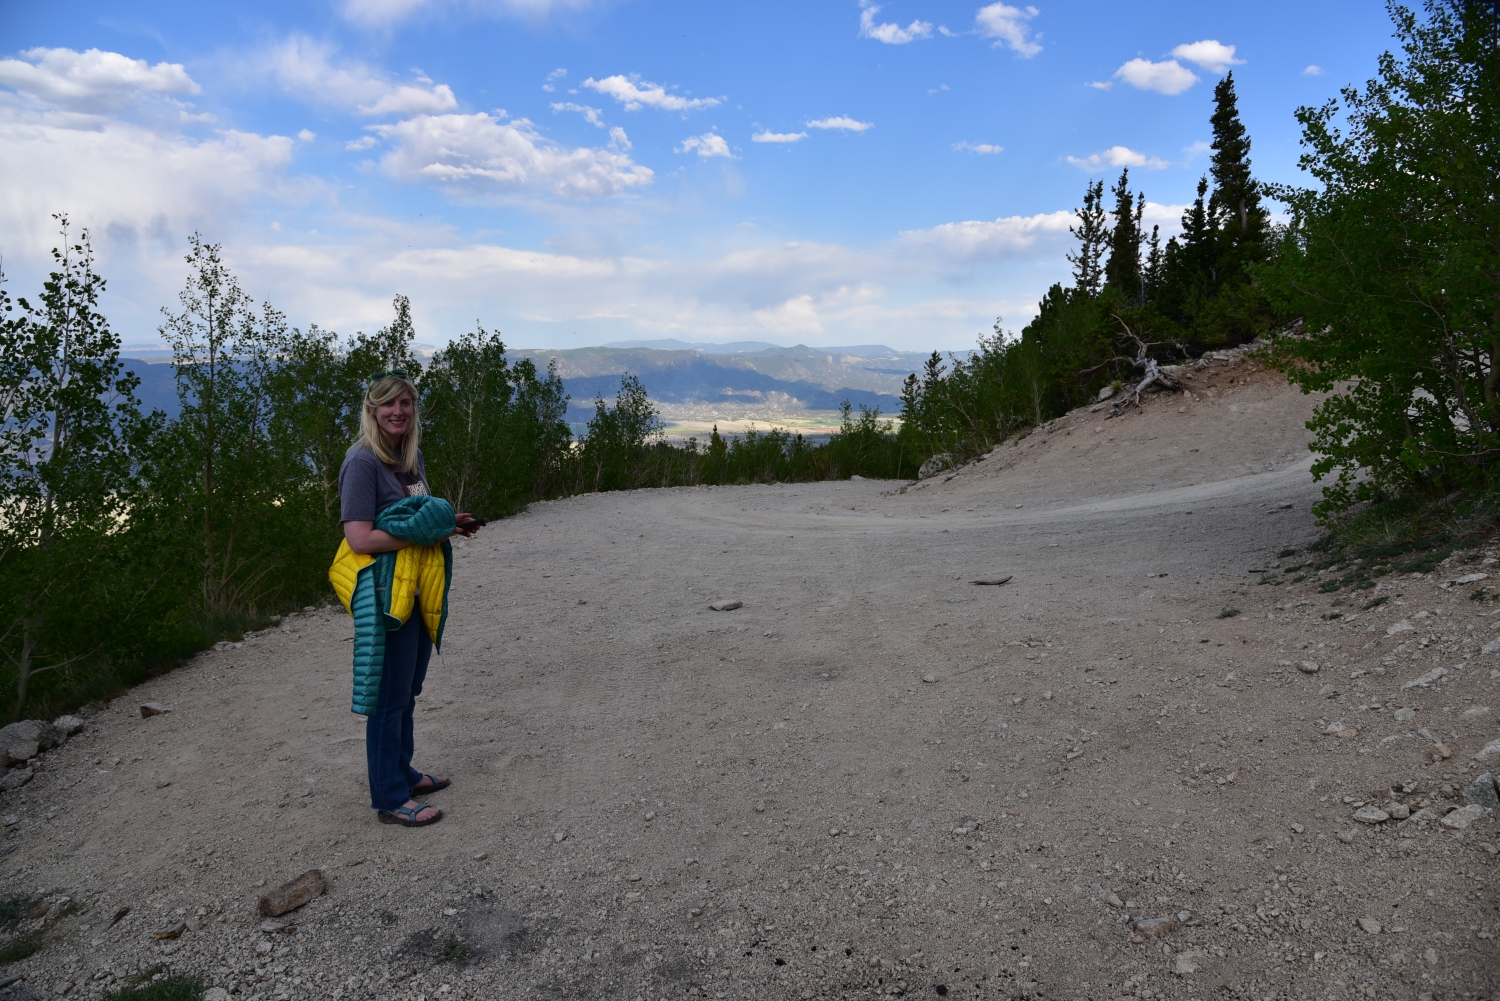
The temperatures were cool, but not cold as the sun began to set. We hiked up the road a bit further to enjoy the sun setting. Several spots had openings among the trees that offered views of the town below. As we hiked a little further, we also gained our first views of the summit of Mount Princeton. As it got dark, we retired for the evening. It was mostly a quiet night, with the exception of some strange noises at 3:00 am. At first, we thought it was the Colorado 14ers Initiative group perhaps working on something for the next morning. Their group was camping near us. However, as the noise got louder, it sounded as if it was coming from the car. We quickly flipped on the lantern, and made some noise, and the scrapping/grinding noise stopped. We never figured out what the noise came from, but we think some forest creature was attempting to get into our vehicle. At least this disturbance gave us a glimpse of the night sky. The inky black sky was dotted with a plethora of stars. The views were brilliant and such a amazing treat when coming from the city lights of Denver.
A short two hours later, the sun began to rise. It was time to get moving. All ready we could hear the few other hikers and CFI workers getting ready to start their day. We began our hike at 6:20 am. The morning temperatures were in the upper 40’s, but we quickly ditched our jackets as we made progress up the road. We continued to follow the 4WD road up for what seemed like close to a mile where we reached around 11,800 feet. As views of Tigger peak appeared, we began looking to our right for the trail turn-off for Mount Princeton. There is a large stone staircase that marks the start of the Mount Princeton Trail, and we didn’t have any trouble locating it. Online forums mentioned it can be easily passed by if snow is covering the steps or if you aren’t paying close attention. Missing the turnover will take hikers up the road to the top of “Tigger Peak” and then down the connecting ridge to Mount Princeton. This is the winter route to Princeton, and will add some distance and elevation gain to the day. Seen below are photos of the hike up the road and the turn-off to the Mount Princeton TH.


We were thankful to ditch the road and continue our journey on an actual trail, even if that trail became a talus field soon. We crossed the north side of “Tigger Peak” on relatively smooth trail for about a quarter of a mile until we reached the gullies. The trail crossed through mostly stable rock, and the elevation gain through here was modest. There was one remaining snowfield to cross when we summited on June 8th, but the section was well-boot packed and we had no trouble crossing. It was truly astonishing how little snow is left in the high country this early in the year, and also a bit concerning. As we hopped and skipped our way over boulders, we could see the remaining route in front of us and the summit of Mount Princeton. Compared to some of the other 14ers, we thought it honestly didn’t look too far away. Seen below are photos of the start of the Mount Princeton Trail and the fun gullies we had to cross. If you look closely, you can see the faint path through the gullies leading towards the summit.
Shortly past the snow drift, the trail veers left to gain the ridge. We followed the series of steep-switch backs up the ridge and were greeted with some cold wind, but also striking views of the nearby 14er, Mount Antero. We could still see some remaining snow hanging on to the nearby slopes. We paused for a moment on the ridge to enjoy the views before carefully picking our way along the talus ridge towards the summit. The terrain and elevation made the hike slow going once we gained the ridge. We were now above 13,000 feet for the first time in several months. Despite the heaviness in our legs and strain on our lungs we could see the summit, and it looked so close. We continued to weave through large spider-webs and subequently pass large spiders that looked to be Mountain Spiders (Aculepeira carbonarioides). They were out in the bright sun, basking. Seen below are views of Mount Antero from the ridge, and the slog up the steep rock leading to Princeton’s summit.

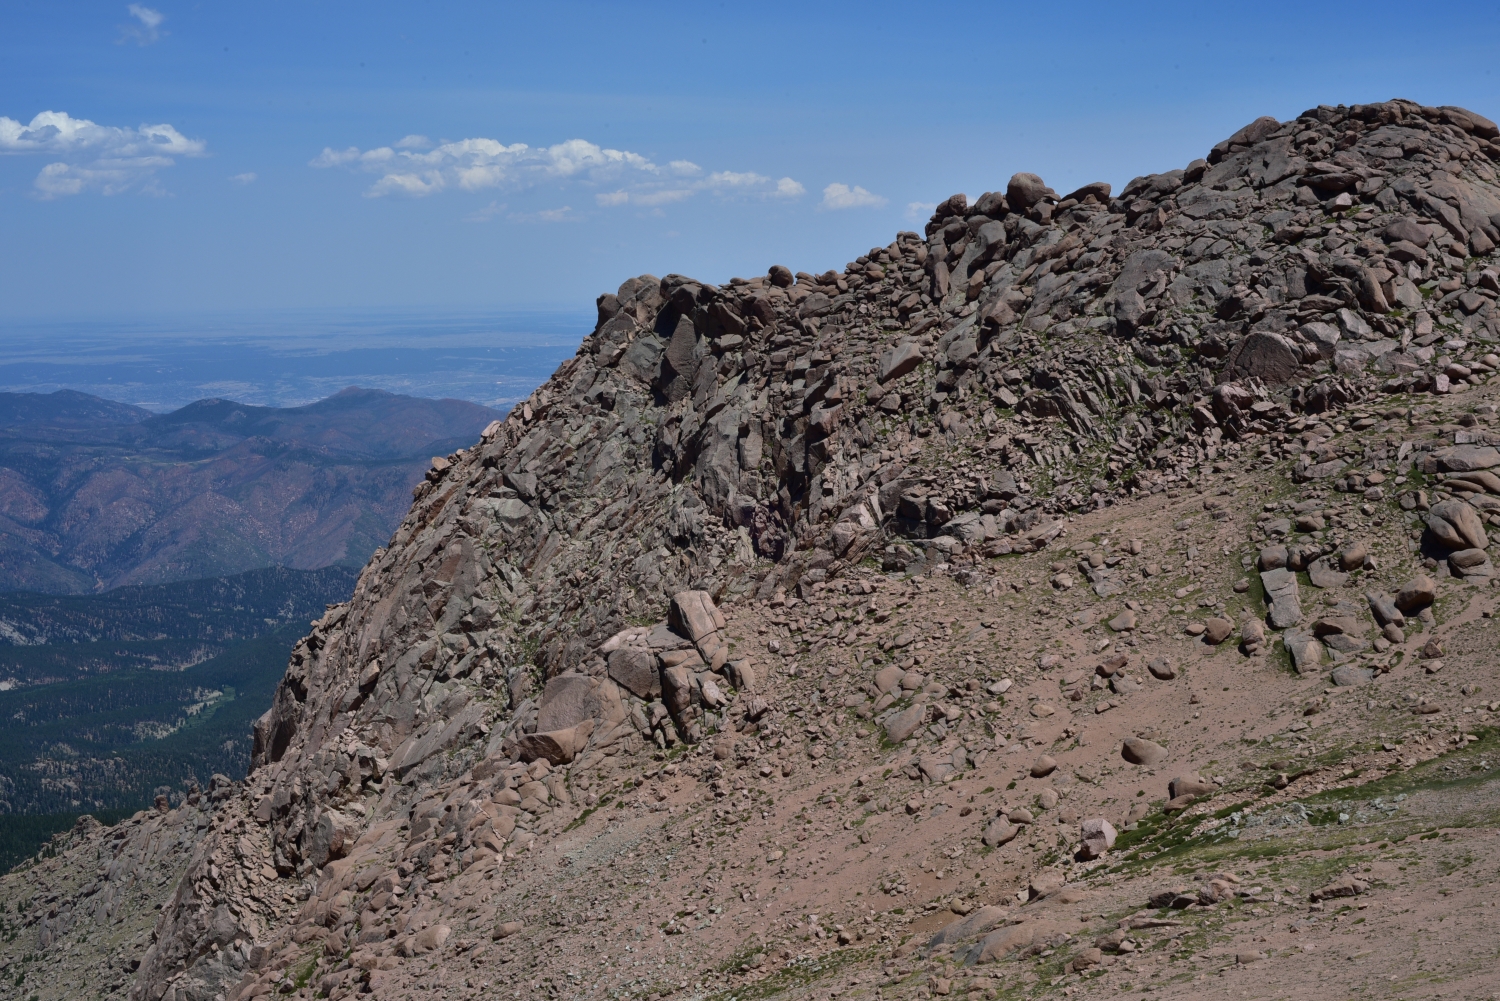
The final 900 feet (elevation gain) or so to the summit were tough. The trail turned to loose scree and dirt and was very steep. It took more energy to balance and gain elevation at the same time. Despite looking close by to us earlier, at this point, it seemed just out of reach with each additional step. At around 9:30 am, we finally topped out. The sky remained a perfect hue of blue and clear. We could see for miles in all directions. There were nice views of much of the Sawatch range including Mount Antero and Mount Yale and to our east we could see all of Buena Vista below. We took reprieve from the sudden gusts of wind in one of several rock shelters built on the summit for around half an hour. Seen below are photos from the Summit.

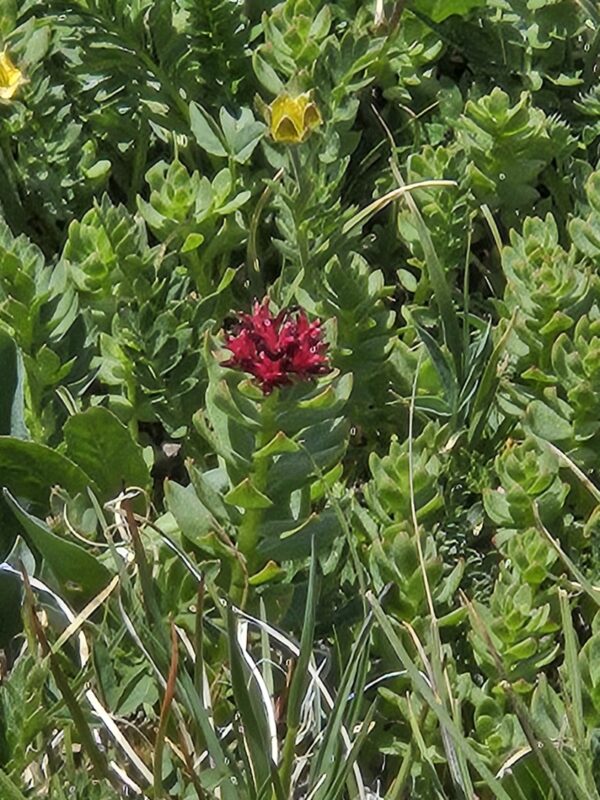
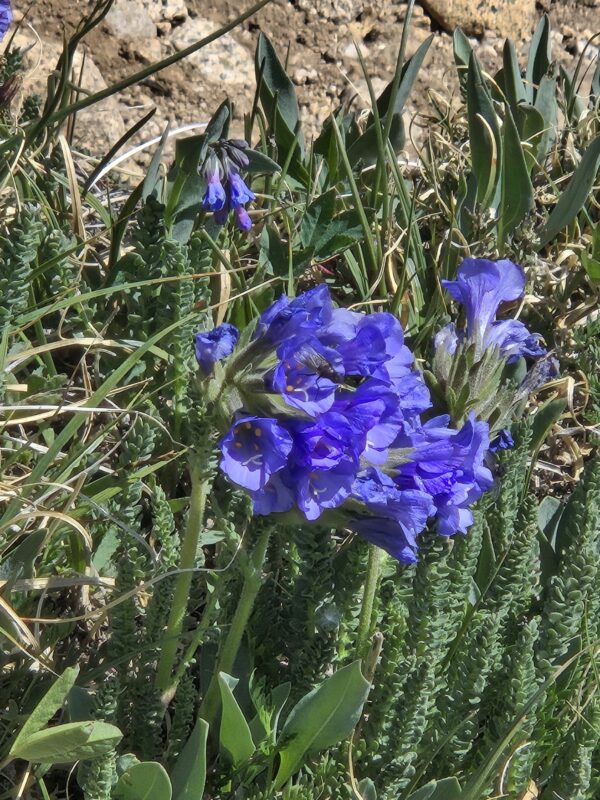
Interestingly, the descent from Princeton’s summit was not as fast as normal. The loose dirt and scree and series of boulder hopping across the gullies made for slow going for most of the journey back to the road. We took our time and ensured good footing, and also admired much of the alpine flora. It’s always amazing to see the brilliant display of flowers that manage to survive the harsh conditions of this environment. Seen below are a view of the many varieties that dotted the grassy slopes and the crevices between rocks on our descent.
We reached our camp around 12:30-1:00, roughly 6 hours after we began. Though this hike can be done much faster, we took our time with footing and let ourselves adjust to the workload at high altitude since we haven’t been to 14,000 feet in a while. As we drove back down the 4WD road to the lower parking lot we had the road to ourselves, which was very nice. We stopped by the Mt. Princeton Hot Springs Resort — only a few miles from the trailhead — and had a nice lunch. It was far too hot to want to soak in hot springs for us, but we did walk the grounds, and we want to come back when the weather is cooler.


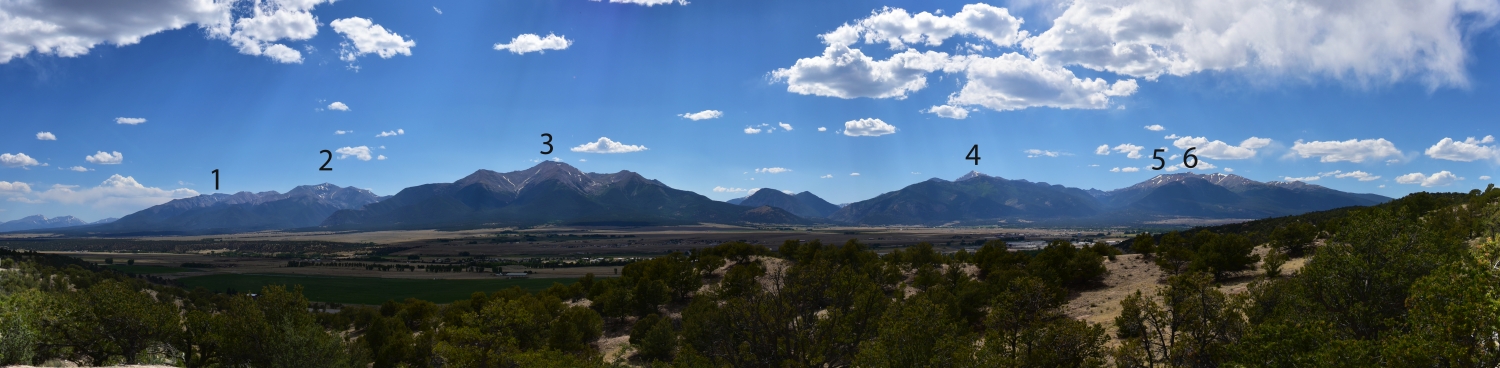
It was a quick drive back to highway 285 and as we passed Johnson Village we stopped briefly to look back at what we had just done. Even from miles away, Mt. Princeton stood prominently over the entire range. We could make out the trail to the summit and see the small snow field we crossed. Shavano, Antero, Princeton, Yale, Columbia, and Harvard were all in view (see below). It was a humbling end to a great trip and we look forward to coming back for more adventures.

Mount Audubon (13,223 ft)

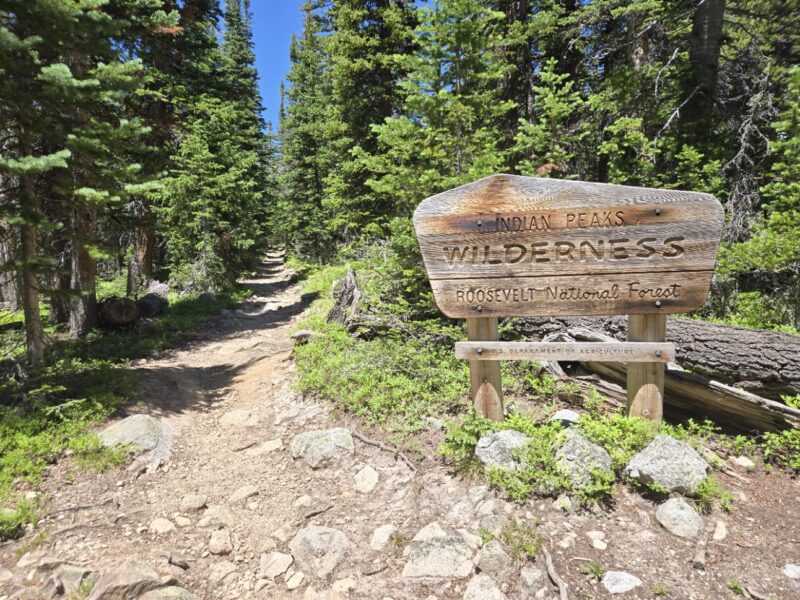
We are gearing up for Mount Whitney and headed out to climb a peak we’ve been interested in for years but have never made it around to climbing — Mount Audubon. This peak is in the Indian Peaks Wilderness and while we have been to this Wilderness area, the parking for Mount Audubon at the Mitchell Lake Trailhead is highly sought after and it can be hard to get reservations. This year, we reserved our spot in the parking lot and paid our fees many weeks ago, and committed to this excursion.
I’ll start by saying that the Indian Peaks Wilderness Rangers and staff were really friendly. We started hiking right at 7:00am from the Mitchell Lake Parking lot up the Beaver Creek / Mount Audubon Trail. There were only a few other cars in the parking lot at this time, and everyone seemed to be going to the lakes.
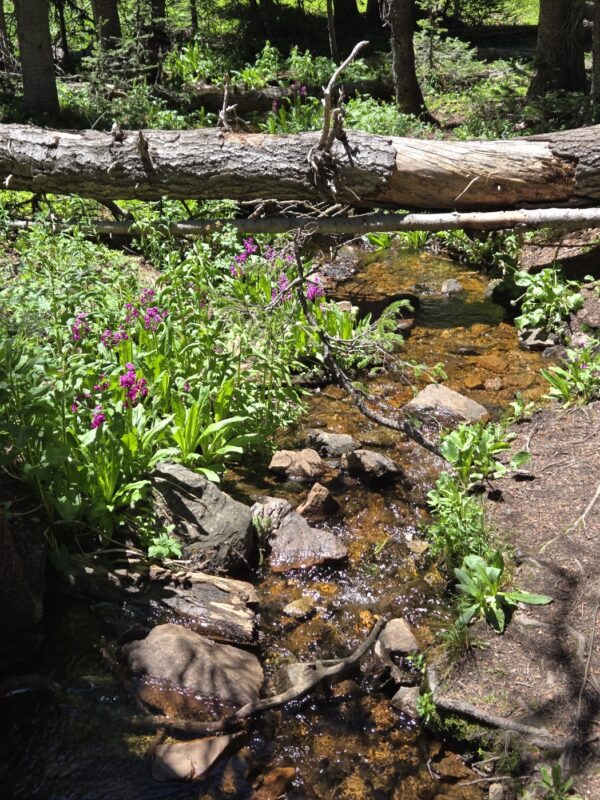
The trail was very nice and we enjoyed the hike through the pine trees. The smell this time of year just makes me feel calm and happy. The weather was amazing and we made good time up to treeline. We did not see anyone on the trail for quite some time. Below are some images from that early section of hiking.
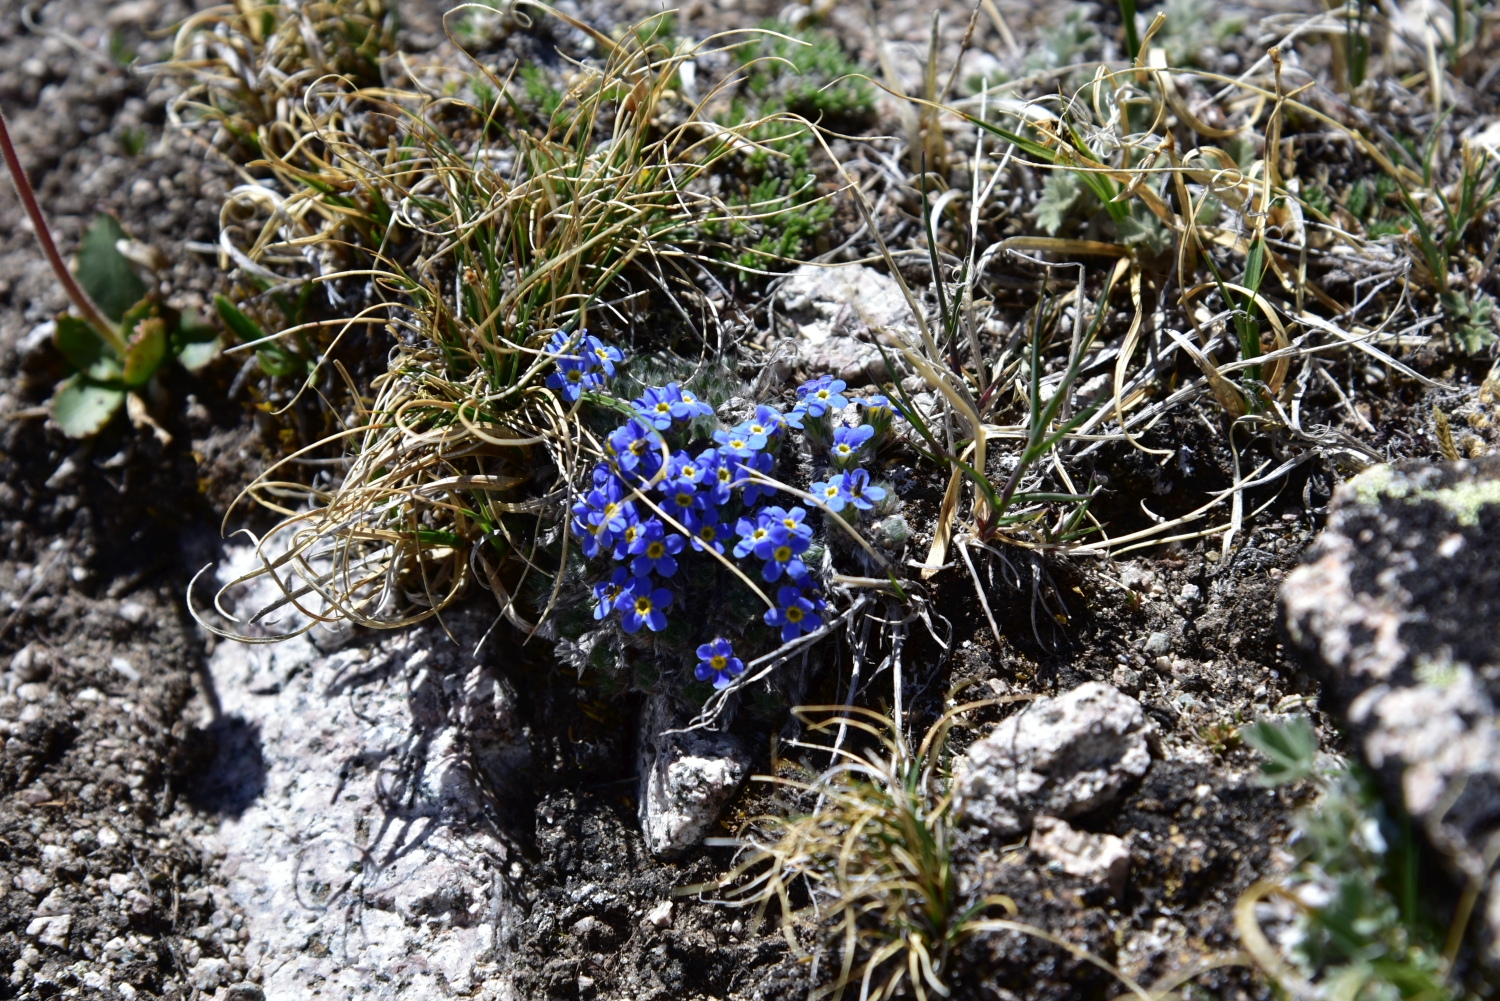
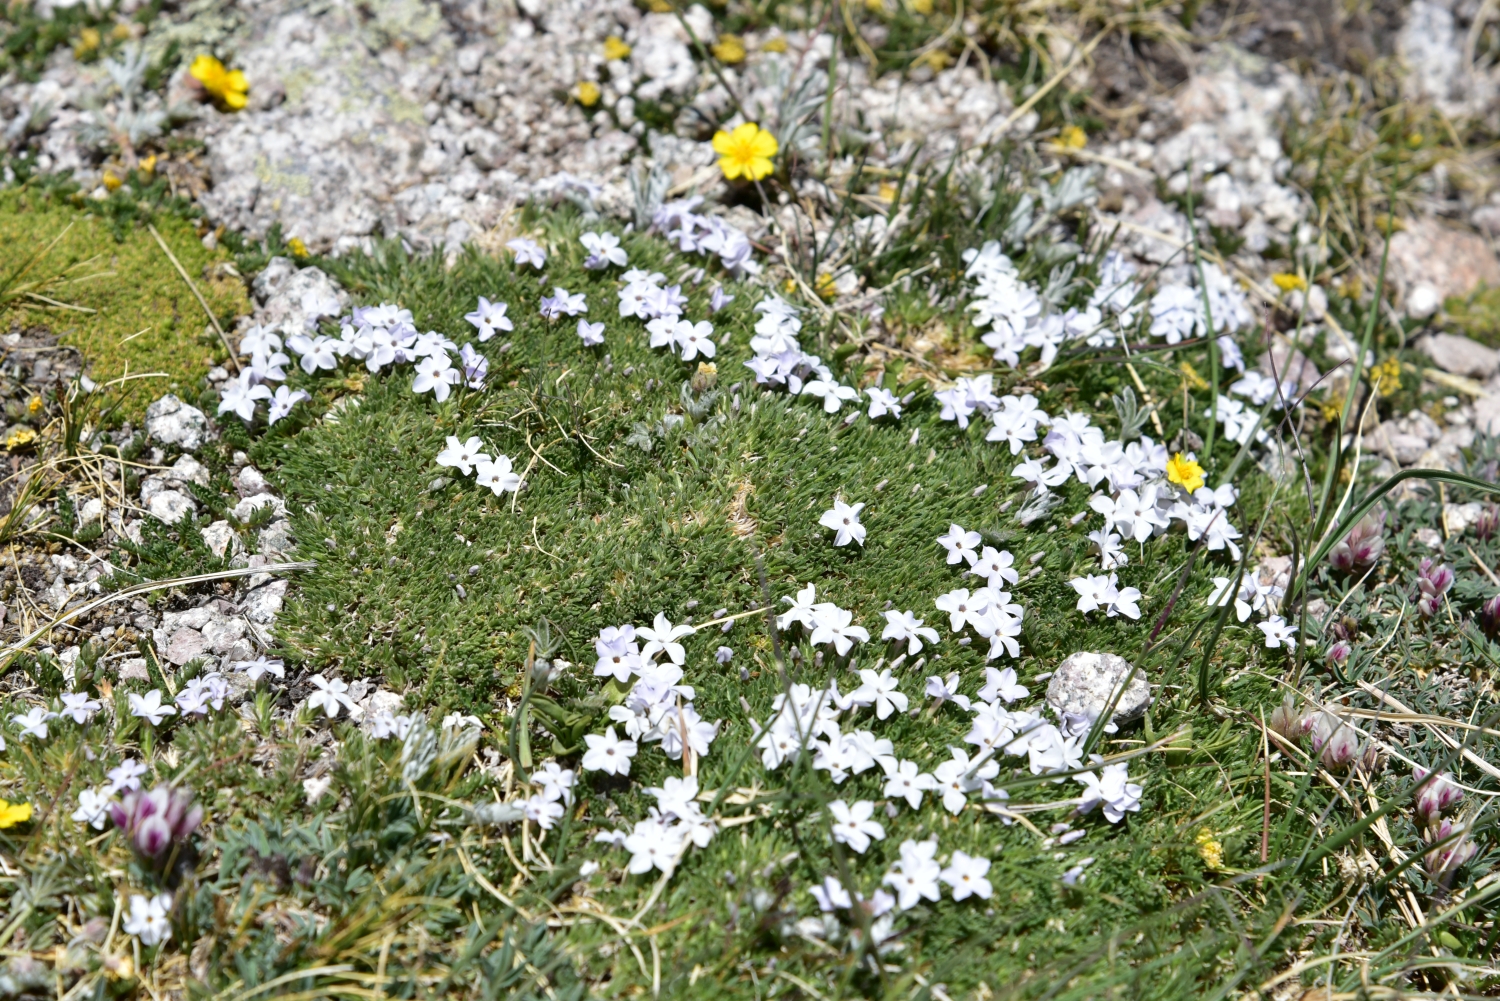
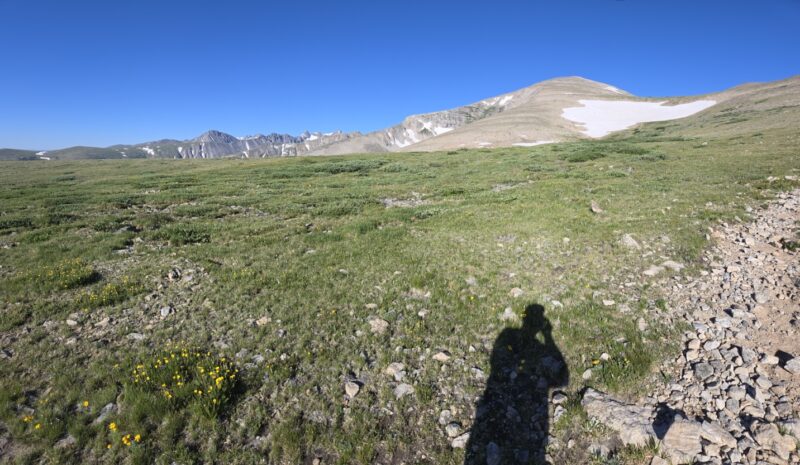
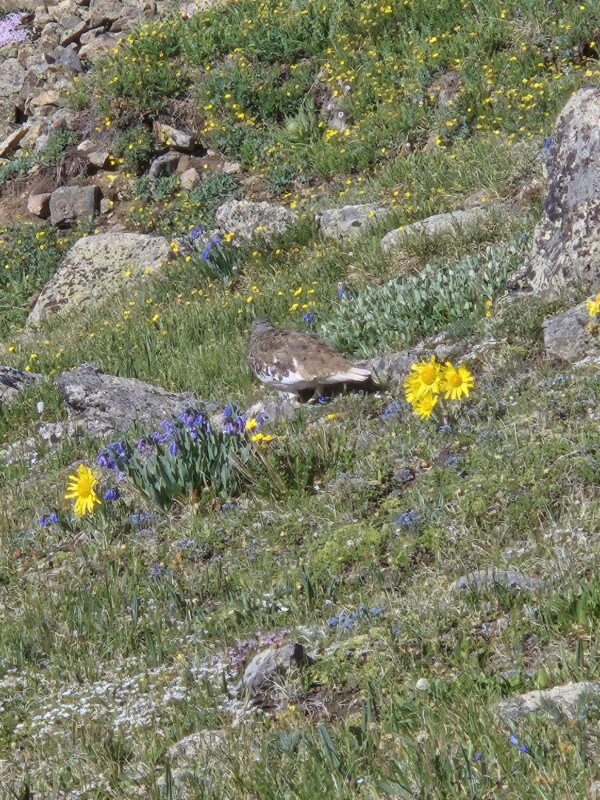
As we moved above treeline, we began to notice all the wildflowers. What was most impressive, was the diversity of life on this trail. We must have seen dozens and dozens of species of wildflowers and we also had multiple animal encounters. Now back to the hike itself. The trail takes you northeast and around a more gentle climb up to a “saddle” between an unnamed point to the east and Mount Audubon to the west. Because of this, you can’t really see the impressive views until you get higher up. You only get glimpses of the ridge with Mt. Toll and Pawnee Peak. See below.
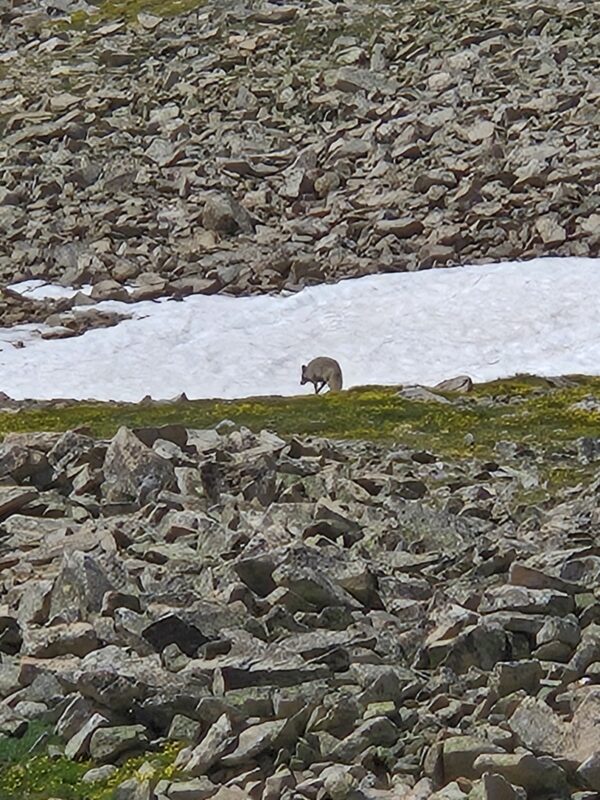
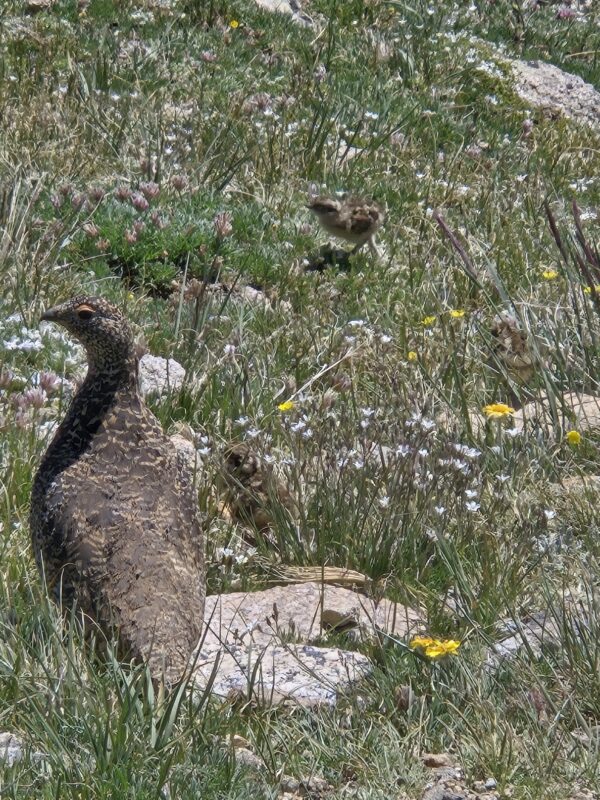
We did find two ptarmigan on our climb, and one was a mamma who had multiple chicks. They were very cute. We also saw a coyote, which was a neat find. There were lots of butterflies (and actual flies).
As you climb higher, you do get some glimpses of Long’s Peak, which is pretty cool.

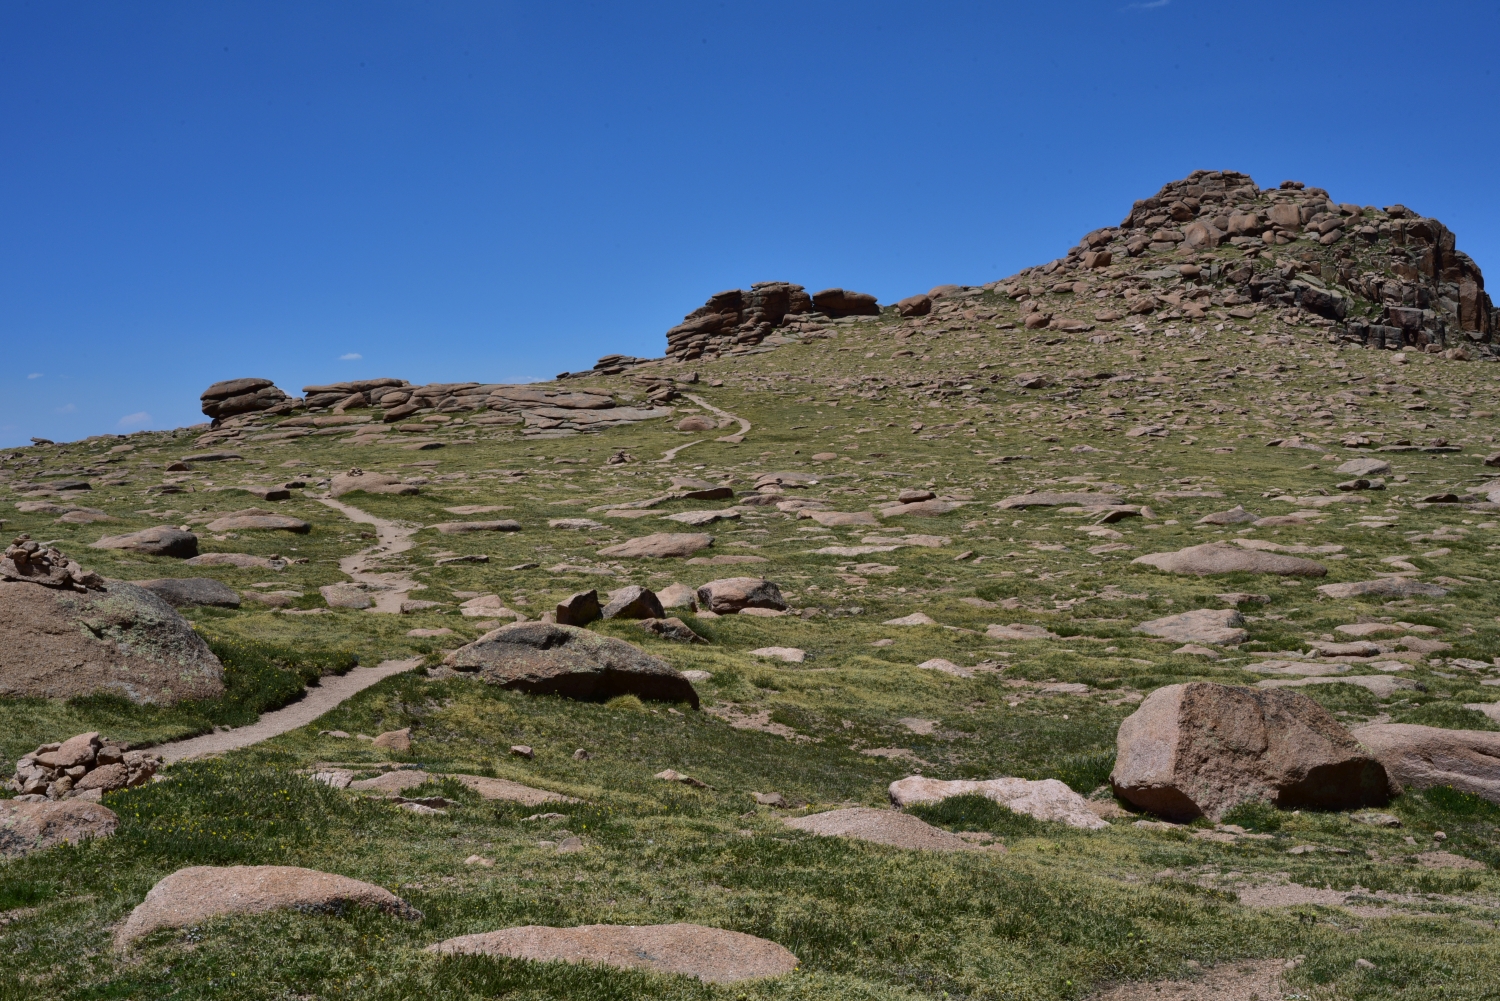
Then, as you crest the ridge, you get a really amazing view of the Front Range with Long’s Peak taking center stage (see images below). From here you turn left and begin the climb up to the summit. There are multiple trails, which can be a bit confusing, but generally speaking, you just go up. You would be hard pressed to get yourself into any trouble by taking one path or another. You can get into some boulder hopping if you get off one of the trails. We took a trail on the climbers right and then the opposite side coming down. It does get a little steep here and it is rocky with some scree/loose dirt and possibly boulder hopping.
In the image on the left, you can see the trail below that you hiked up, and then a small trail veering to the towards the camera; there isn’t an obvious trail in the image, but it’s there. In the middle image you can see a large cairn in the bottom-right of the picture; the trail is visible in the middle-left of the picture. The image on the right is taken from a small flat area on the way up to the summit.
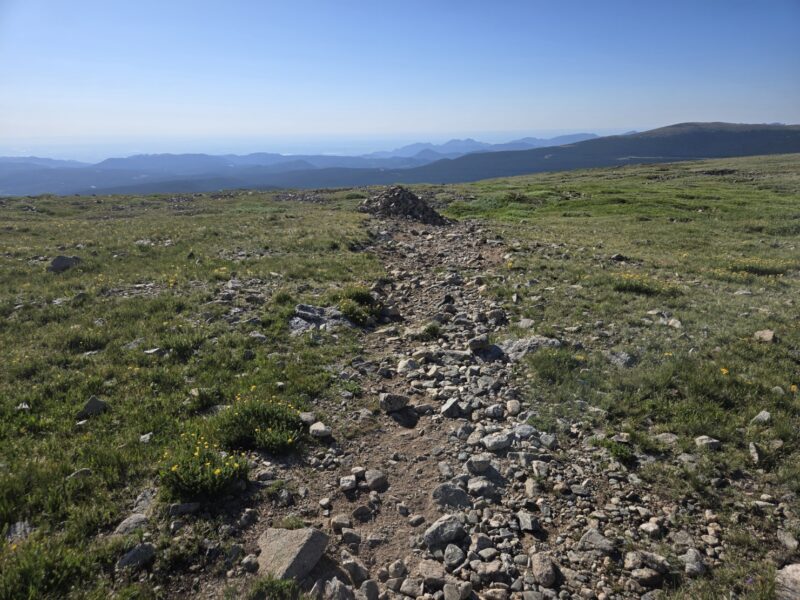
We felt like we probably had more hiking, but we crested a small ridge and were at the summit. It’s a long summit and you can keep going to Paiute Peak if you are so inclined. We weren’t interested in the loose scree and called it a day on Audubon. Due to the permit system, it is not too crowded and we only saw a couple people on the summit. Below are some images and a pano.

After giving Paiute some consideration, we headed down, which we found was easier than going up in terms of finding a good trail. Once back on the grassy saddle we took one more look out towards Long’s Peak and the Front Range and then started descending down and around towards the trees. The flowers were amazing and it was really beautiful.
Once we had returned to the parking lot, we actually opted to go on another trail out to Mitchell Lake, which was very short, but gorgeous. Mitchell Lake is about 2.0 miles round-trip from the parking lot (the Mitchell Lake Parking Lot) with maybe 220 feet of gain. The only thing I didn’t like about the lake was the mosquitoes! We probably would have stayed longer if they hadn’t been biting.
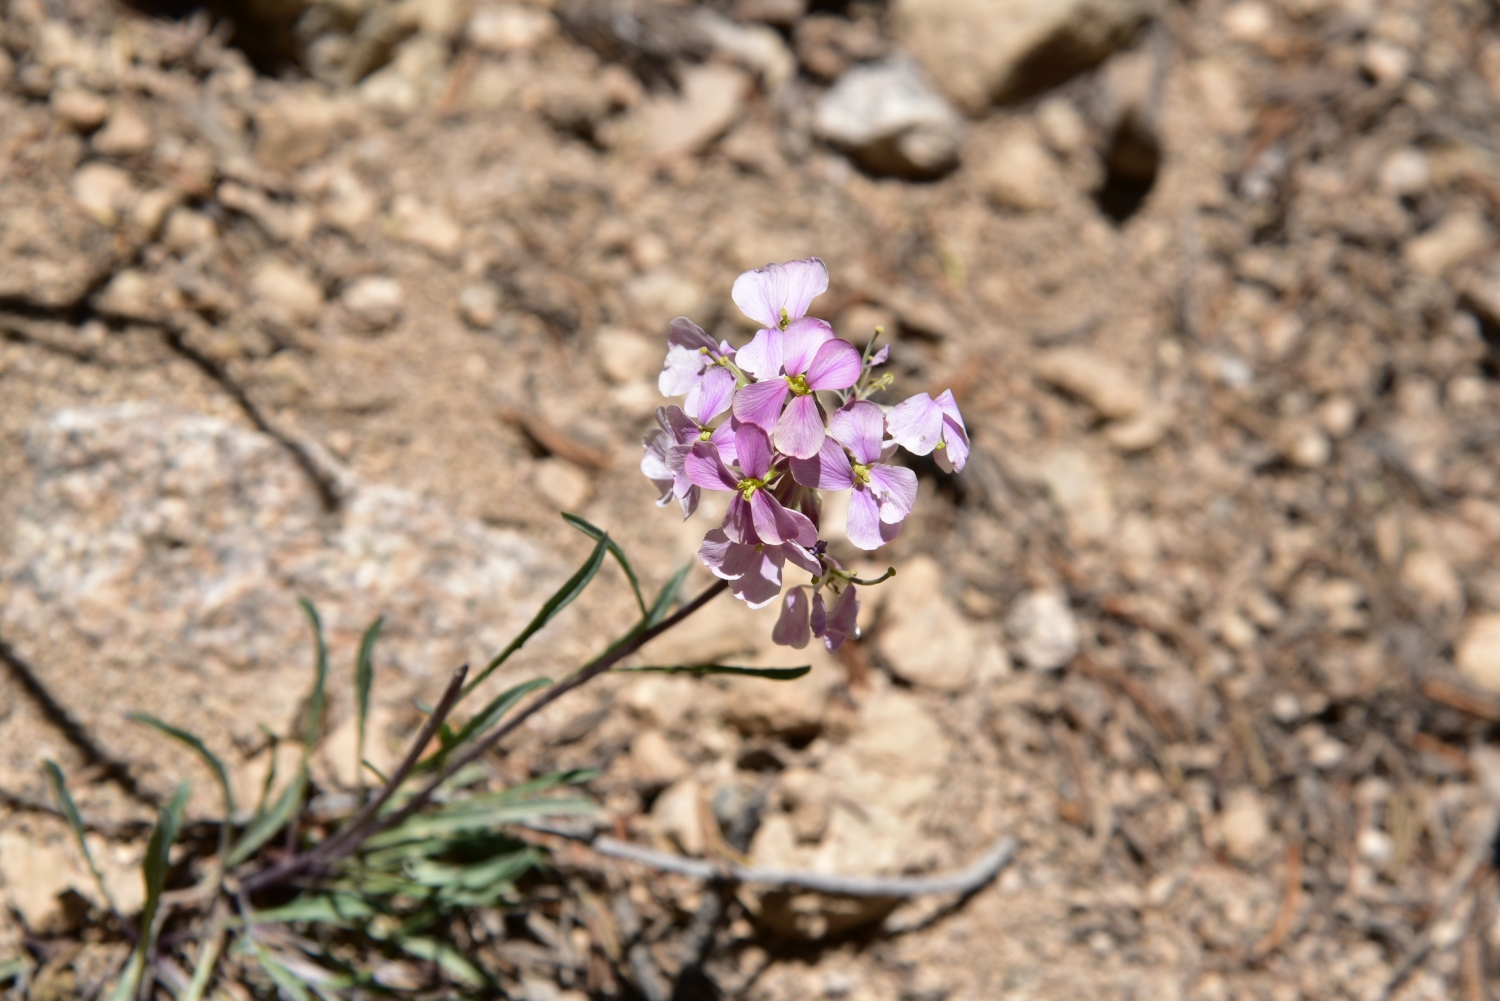
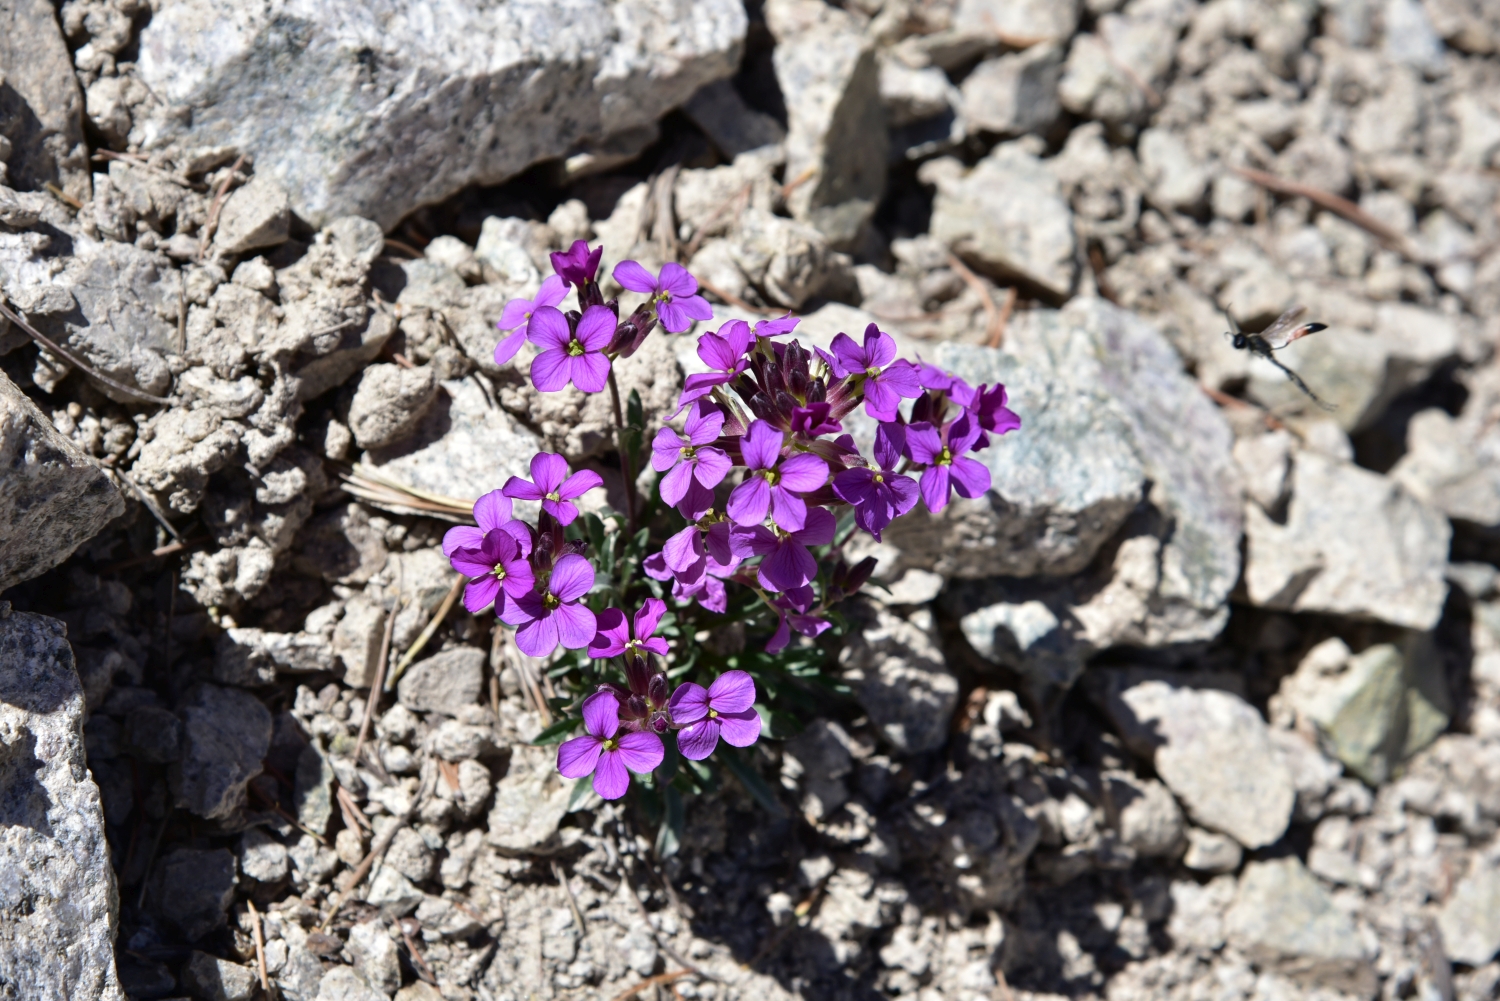
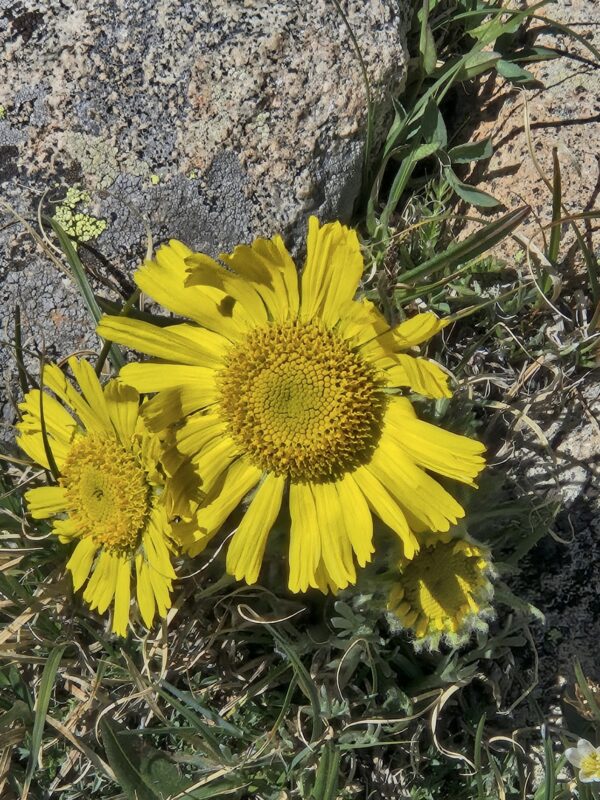
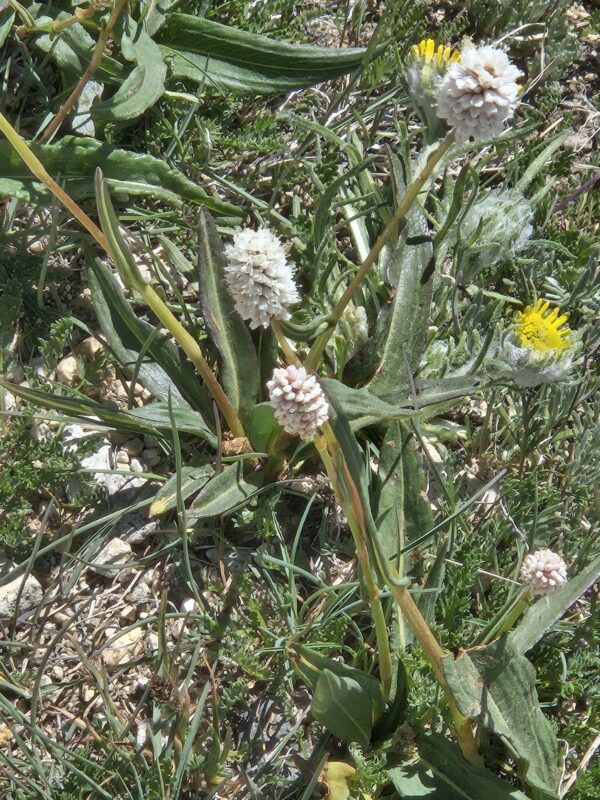
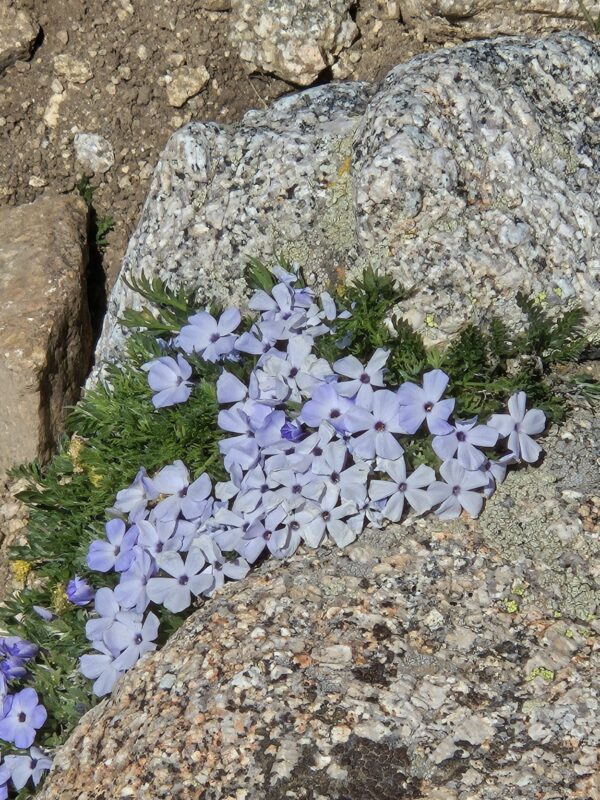
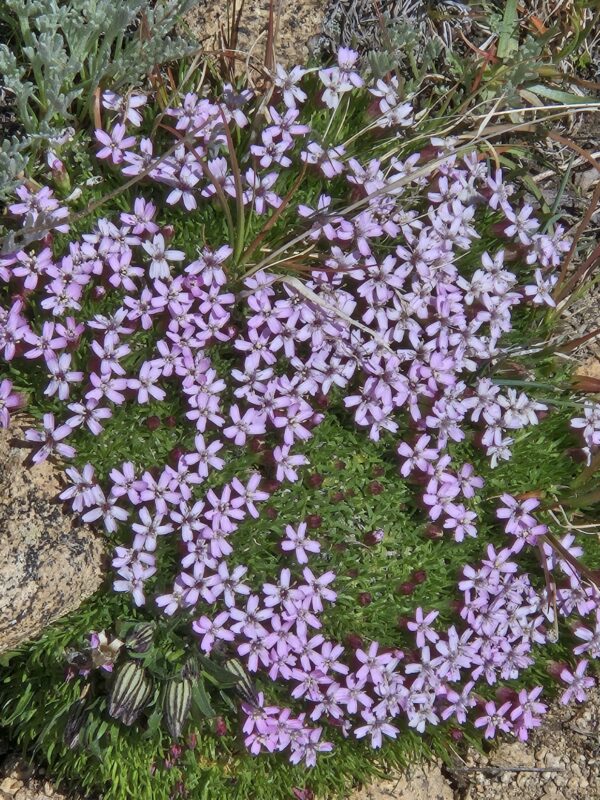
Below are some images of Mitchell Lake as well as a collection of wildflowers we saw on the hikes.
Golden Bear Peak and Hagar Mountain

Round Trip: 8.1 mi with 3,271 ft of elevation gain
Golden Bear Peak Fast Facts (13,005 ft.)
Trip Type: Hike, YDS Class 1 with some easy 2
Distance to Peak: 3.4 mi
Hagar Mountain Fast Facts (13,246 ft.)
Trip Type: Climb, YDS Class 2 mostly with a short section of 3/3+ at the summit block
Distance to Peak: 5.0 mi
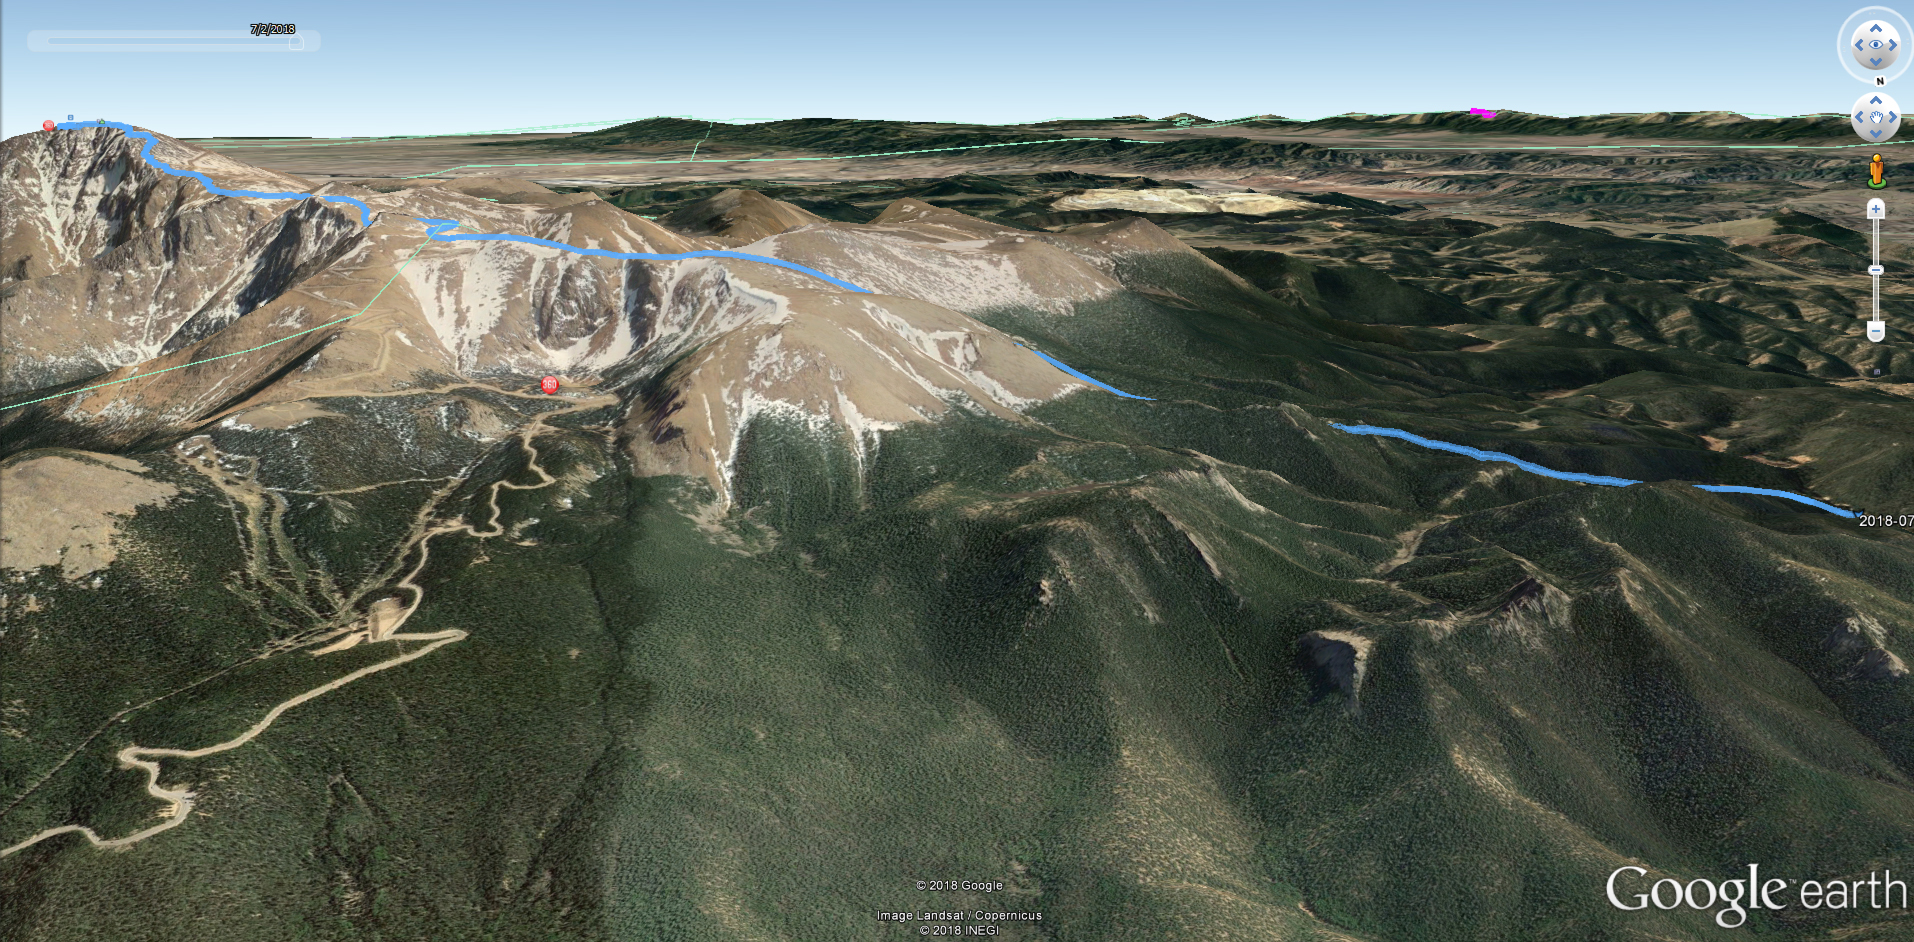
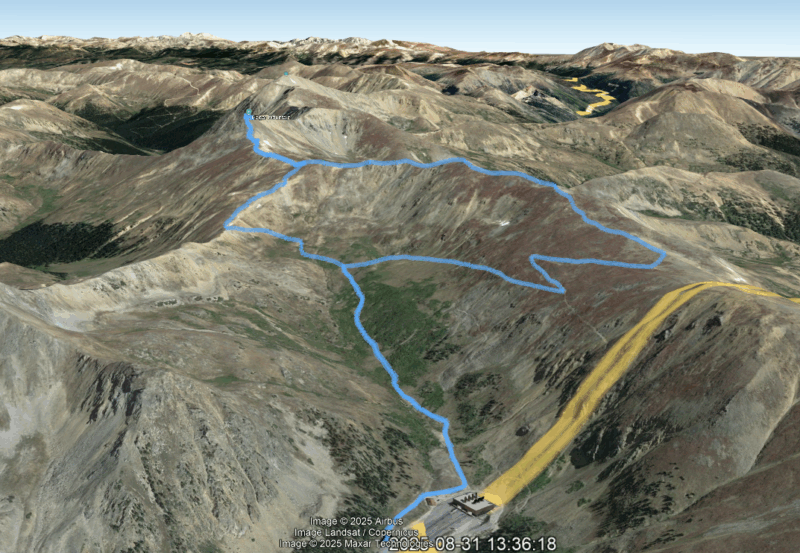
We decided to go explore a less well known entry point to climb Hagar Mountain as well as explore the area around the Eisenhower Tunnel. That is correct, if you look at the Google Earth image above, you will see we started just outside and off the road from the Eisenhower Tunnel and worked our way into the mountains from there. There isn’t a ton of parking, but it was less full than Herman Gulch. Our targets were Golden Bear and Hagar and to take a look at the Citadel.
The first part of the trek to Golden Bear Peak, which is a cool name for a peak, is on a road, which isn’t tons of fun, until you realized you are hiking next to the amazing engineering feat. But it quickly turns into an ATV road and then singletrack. There are numerous options to get to Golden Bear, and we opted to take the trail that winds back across the face Golden Bears west face and then switchbacks up to the ridge (see basecamp screenshot). There is a fork in the path at about 1.3 miles and to take the route we chose you go right. See below.

Now, this does take you quite a ways out of your way if you have no interest in Golden Bear; but who wouldn’t want to snag this cute 13er? Keep in mind that you add almost 2 miles by not staying straight at the fork above. But anyhoo, the trail is very nice up the side of the ridge. Honestly, I barely felt we were gaining elevation. You cut across the face for quite some time, and have pretty unique views of Summit County and the tunnel, not to mention the Front Range and Mosquito Range. Below are some shots of the path from the morning, and also from later in the afternoon shot from the ridge across from it.
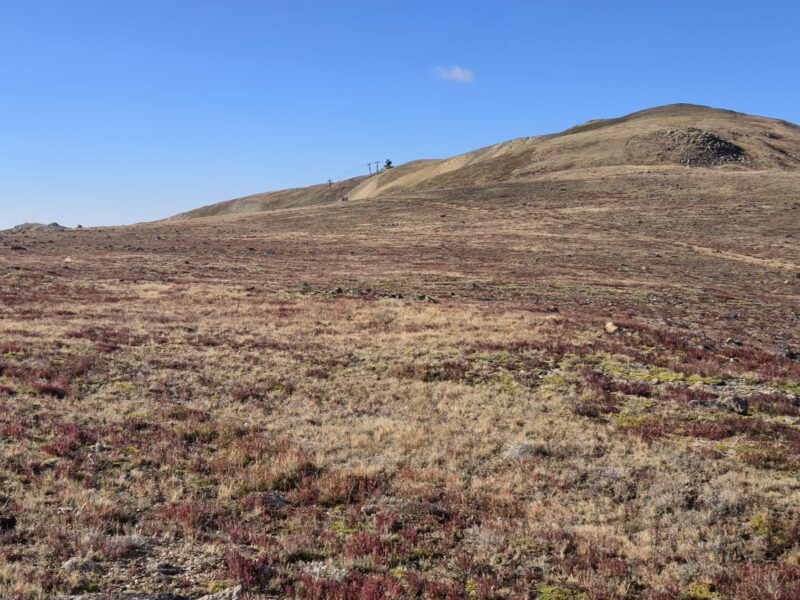
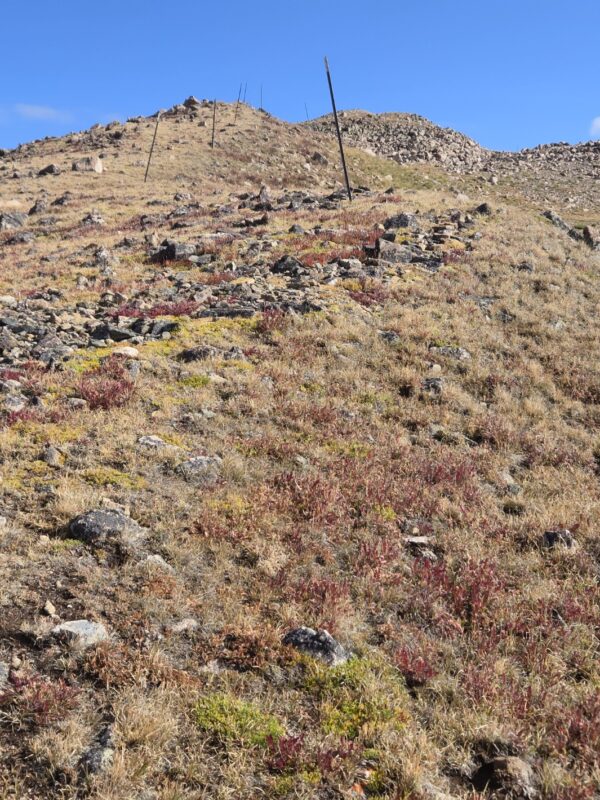
That shot above really shows you what you’re doing really well. Alright then, so you pop out on the ridge and you can see Loveland Ski area and all the fun lifts. Well, you can see quite a bit up there including Dry Gulch (which is not dry). The ridge is gorgeous and you can follow the poles stuck in the ground by ski patrol which I am guessing set the boundary for Loveland Ski Area (maybe?). After a short and relatively uneventful jaunt you arrive at the summit of Golden Bear. Actually, it’s about a mile along the ridge with a little over 500 ft of gain, but it felt brief. Below are some pictures including a very worn geological marker.

So onwards toward Hagar! It is 1.7 miles and almost a 1,000 feet of gain from here to get to Hagar, so, not nothing. You have to go up and down 6 very distinct times to get to Hagar from here, which you can see below. Pretty much all the little summits are rocky, but one of them in particular tricked us, and we just went straight over it and didn’t notice we were supposed to skirt around to the right. So, we ended up getting a little bonus class 3 on this section. You will also notice that at almost the end it gets quite steep. That is the worst section with an average grade of around 45% according to the Garmin, but that was with some traversing around.
I have some pictures below of the ridgeline and of that final push to the top just before you drop down for the final push up the summit block of Hagar.
Okay, so you have made it to the last up before dropping down to the base of Hagar’s summit block (above). You have lots of options. You can choose to just observe the summit as some folks did, you can also choose to try and make it as hard as possible, which some other did as well. Regardless of your decision, it’s a neat spot. There are some class 3 routes up and it’s only about 50 ft. of climbing. So, choices.
1. There is an immediate obstacle once you drop down right in front of you. You have to either go over the block of around it. If you go over it there may be a couple different options, but one obvious one. It is class 3 to go straight over it and the rock is solid. The path around looks loose and didn’t look “fun.”
2. Next, you have to make a decision as to how you want to take the line up the main block. We decided to try and keep the as much to the ridge as we could and honestly stayed pretty close to the line the couple in the first photo took. There are a few decisions to make here still, but for the most part the rock is good and just take your time.
3. Near the summit block if you go right you can end up in a situation where you have to make a class 4 move, but if you keep to the left and on the ridgeline you avoid this (although the exposure can feel intense).


Now, I’ve read of folks doing the Citadel and Hagar together, and so I wanted to go a little further and see the ridge a bit. But, I ran into a knife edge pretty quickly and decided that was the turning around point for today since Allyson was still waiting for me on the summit. After thinking about it, this isn’t likely the best way to combo Hagar and the Citadel since you’d have to do both of them twice. Most folks do it from Dry Gulch as a loop. Perhaps we’ll do the Citadel from Herman Gulch next year.
And then it was time to head back. But wait, we weren’t going to go all the way back to Golden Bear, so how are we going to get down? As you are hiking over to Hagar, you will notice on the ridge across from Golden Bear a trail going down that looks accessible from the ridge between Hagar and Golden Bear, and it is. You can see it below.
So what you do is this. You head back over and do some ups and downs again, but, once you get to a point where you can see a nice route down to that ridge, you start working your way down. There is actually a nice little trail you can find that leads over to that ridge. This is the path you’d have taken if you’d stayed straight at the fork at 1.3 miles. From there it is just a pleasant class 1 walk back to the car. Just don’t miss that trail on the ridge as it can be easy to miss.


Thanks for reading, hope it was helpful or at least interesting 🙂
Mt. Blue Sky from Summit Lake
Stats: RT distance 5.75 — Elevation Gain: 2,159 ft — Summit Lake Parking Lot — Hiked: July 13, 2024
We started out our 14er season this year with Mt. Blue Sky from Summit Lake. It now requires a permit to park and it is a timed entry. But it is pretty easy to get a permit (not like the lottery systems for peaks like Mt. Whitney). The link is here: https://www.recreation.gov/timed-entry/10087438. One issue is that the first timed entry is 8 am and you may want to get an earlier start; what you can do is enter and park and put your permit that you printed at home in the window. Make sure to get the correct permit.
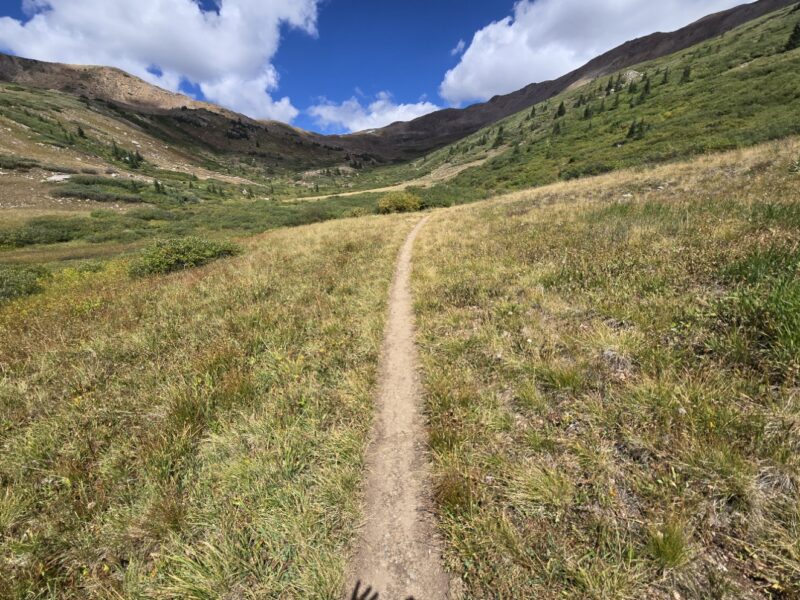
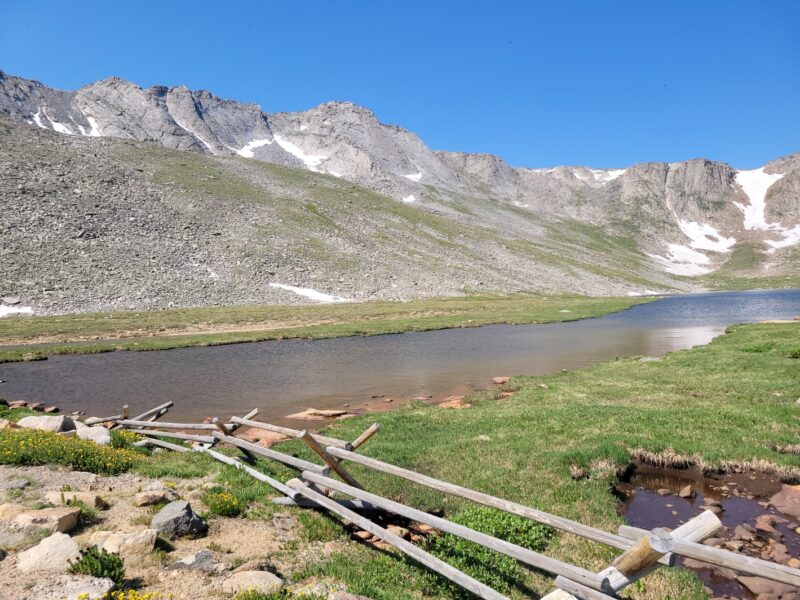
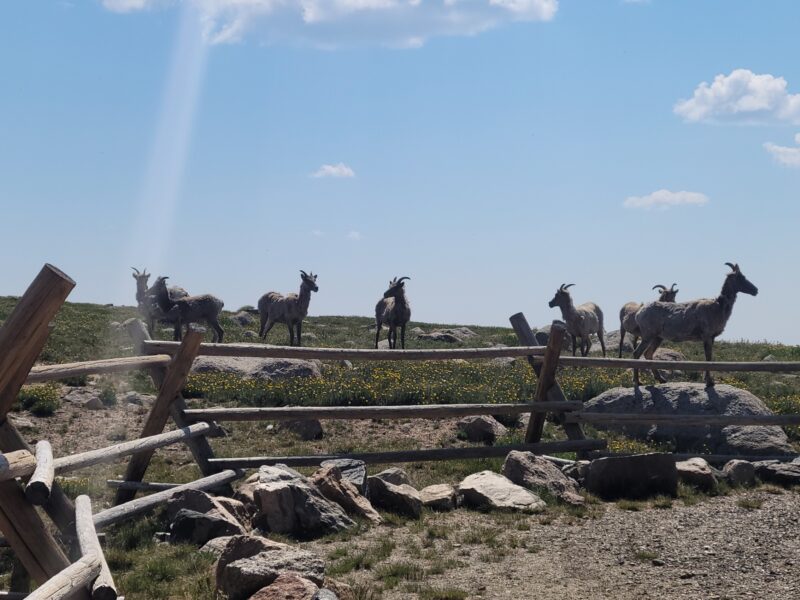
This was not our first time hiking Mt. Blue Sky, but it was our first time hiking it from Summit Lake. The area is really pretty and there were some goats hanging around and park rangers giving educational lessons on the area at a table. It was very busy and many many tourists around. The trail begins just north of the parking lot and is obvious and very nice. There are bathrooms and some side trails to go to the lake. I want to post a few shots below and one in particular from Google Earth that I marked up.
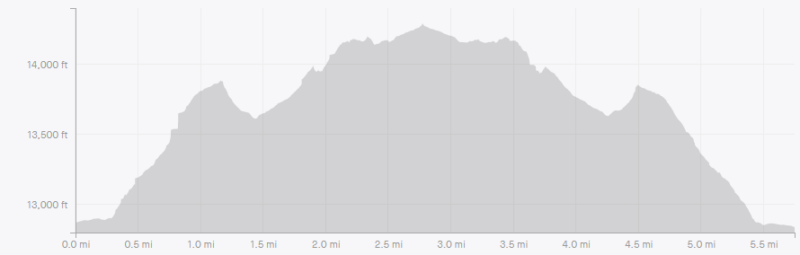
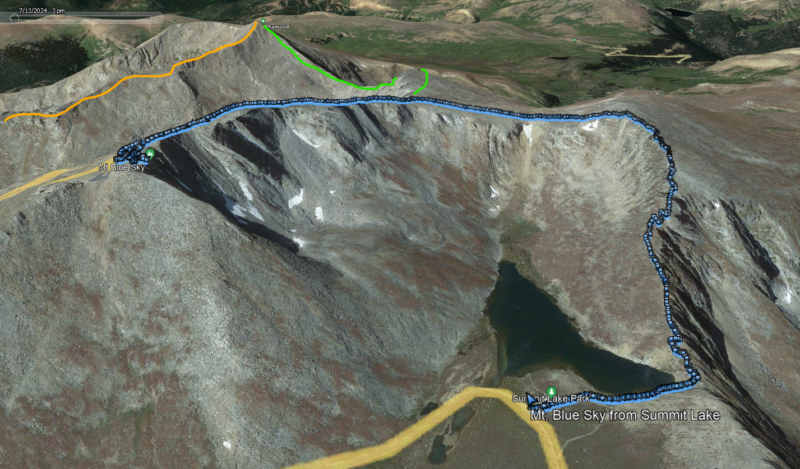
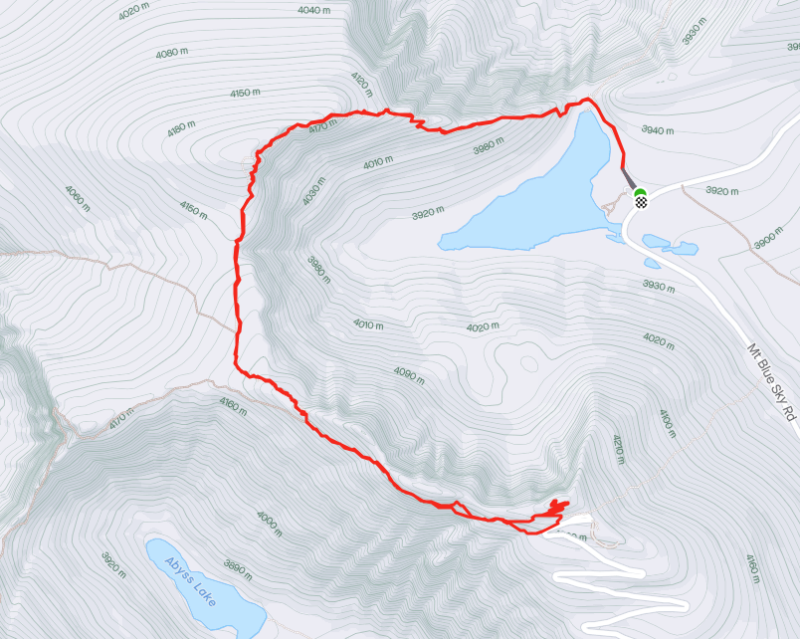
The first image is the elevation profile, and you’ll likely have to open it to see the full profile. But generally you have a nice little walk over to the actual trail, and then start a steep hike up to Mt. Spalding (a 13er at 13,863′). From there you lose about 200 ft. of elevation before hiking up to a little spot where you make a left hand turn onto the southwest face of Mt. Blue Sky. The last section is what throws people off and I’ll provide some tips down below. I marked up the middle image to shows some other popular routes. The green is the Sawtooth route and the orange is the Bierstadt’s East Ridge route. We plan on hiking the East Ridge soon as part of the Tour de Abyss (named for Abyss Lake which you can see in some pictures below). Let me post a few pictures of the first section up to Mt. Spalding.


I want to make a brief-ish plug about hiking this trail. We saw multiple groups of hikers who really weren’t prepared for the hike. While it is a “short” hike and you can do it one way and have a car meet you at the top (making the entire journey a little over 2.5 miles), it is not easy. We ran into a few people who said they weren’t prepared for the “scrambling” on the first section of the hike and who had very little water (they were going to run out). First, there is no scrambling on the standard route up to Mt. Spalding from Summit Lake. If you’re actually scrambling, you’re off route. Second, unless you are accustomed to hiking across mountain terrain, hiking a mile here is not hiking a mile at your local hike and bike trail in the city. I sincerely hope the individuals we ran into made it safely to the summit, since they did not want to turn around. But this is part of the issue with having a summit you can drive to. Short version, be prepared.
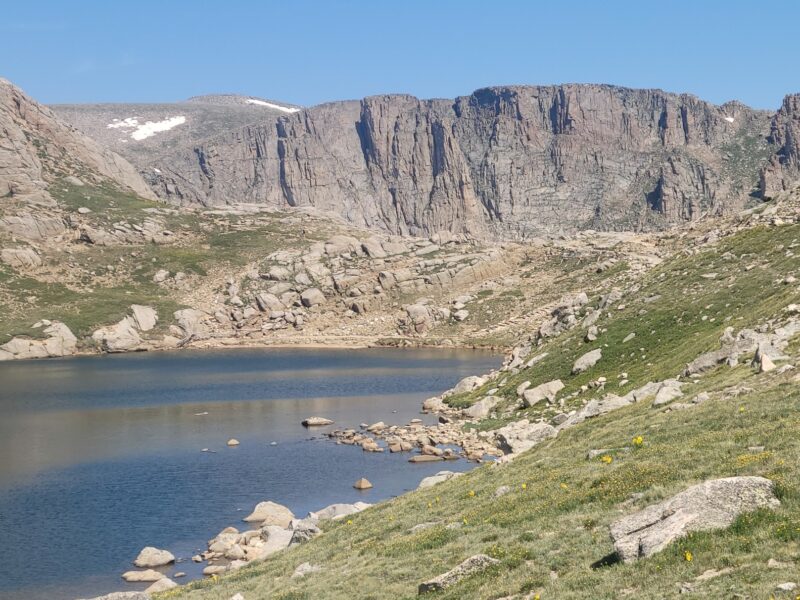
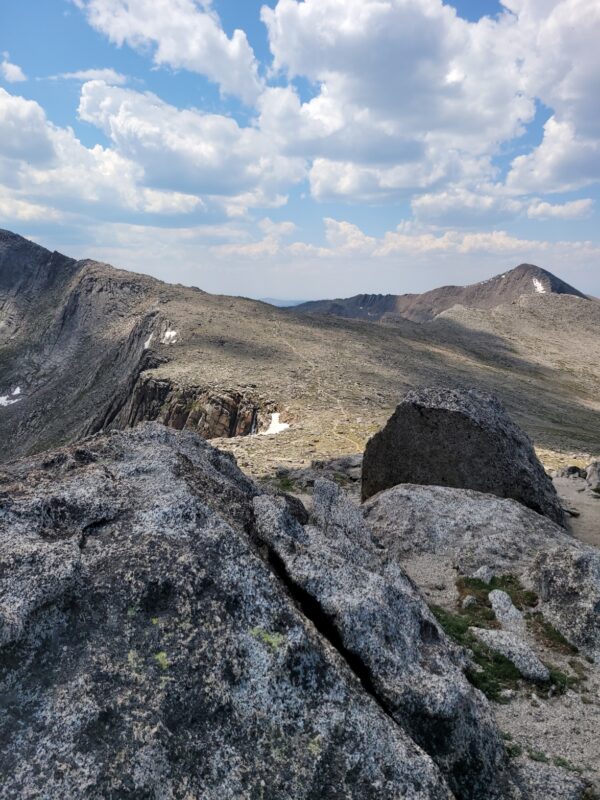
Anyways, once you are to Mt. Spalding and drop down those 200 feet you get to that left hand turn I mentioned and the class 2 climbing begins. Up until this point it should have been class 1. You can almost see where I’m talking about in the second to last picture above (you can follow the trail up and see where it kind of vanishes behind the face. Let me put some pictures of this area below (you can see Abyss Lake in the first picture below Mt. Bierstadt).
Alright, so here’s my biggest tip and I offered to groups who requested it. The easiest trail and the one that will keep it to class 2 stays low pretty much the entire time. You may be temped to climb up to the ridge, but don’t unless you want class 3 climbing or, and this is a big or, you want to tag West Mt. Blue Sky. Yup, that’s right, there is a second, unranked peak at about 14,250 ft. There are cairns that lead to this second peak, and if you follow them up, you’ll be led to class 3 scrambling and have to downclimb to avoid being cliffed out. This can tire you out quickly, as I learned when I did it myself when I did the Bierstadt-Sawtooth-WestBlueSky-BlueSky route. So, stay low and the trail should stay pretty nice. Don’t worry about missing the peak, look at the last picture, it shows that as you hike you eventually will see the observatory while on the trail. Not having good route finding skills in this area can lead to an extra 30 minutes to over an hour of extra hiking (depending on various factors).
Keep hiking towards that observatory and you’ll see the the parking lot and the mass of humans all milling about. Hike up the last few switchbacks to join the gong show at the top. Luckily, it is a big trail and a large rather accommodating summit. I didn’t actually take any pictures at the top of Mt. Blue Sky this time, but I have more images in the Bierstadt-Sawtooth-Evans post (the name hadn’t changed yet when we hiked it last). Some people catch a ride down from here, but the return hike is the same as going up but in reverse. Take some pictures and mosey on back down to the trail to find some solitude.
I will say that this really actually is a lovely hike. You have Abyss Lake on the west side and Summit Lake on the east side of the hike, many wildflowers, critters running around, and generally speaking people are friendly. You get great views of Mt. Bierstadt as well as the Sawtooth and the East Ridge. I’ll post a few more pics I did snap along the way in a gallery below. But I hope this helps a little bit on navigating the route.