Take a Walk
A Quest into the Wild
Mills Lake and Black Lake: RMNP
Distance: 10.6 miles (out and back and exploration)
Elevation Gain: 2,367 ft (total gain) Max Elevation: 11,007 ft Min. Elevation: 9,224 ft
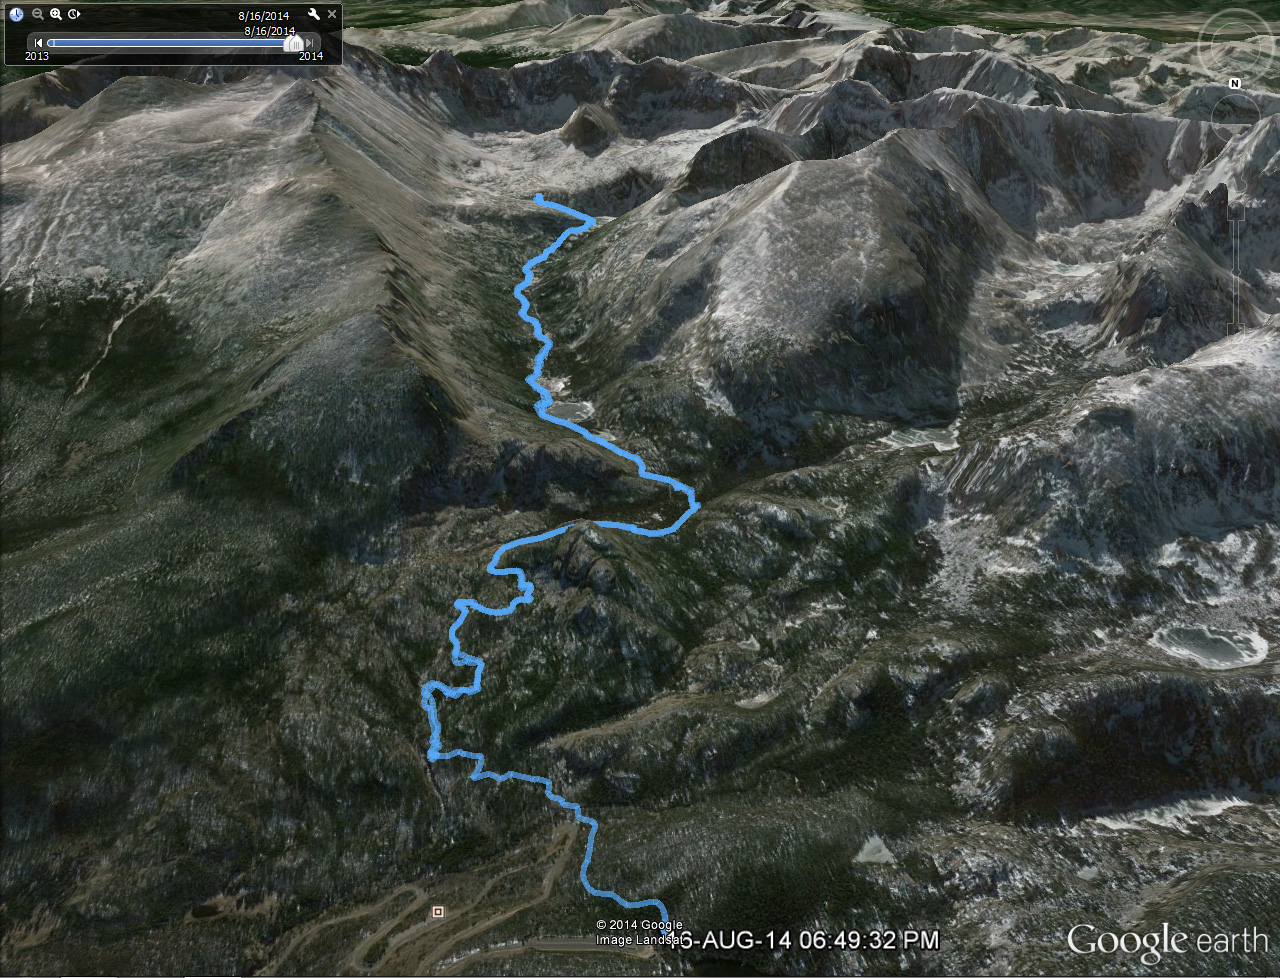
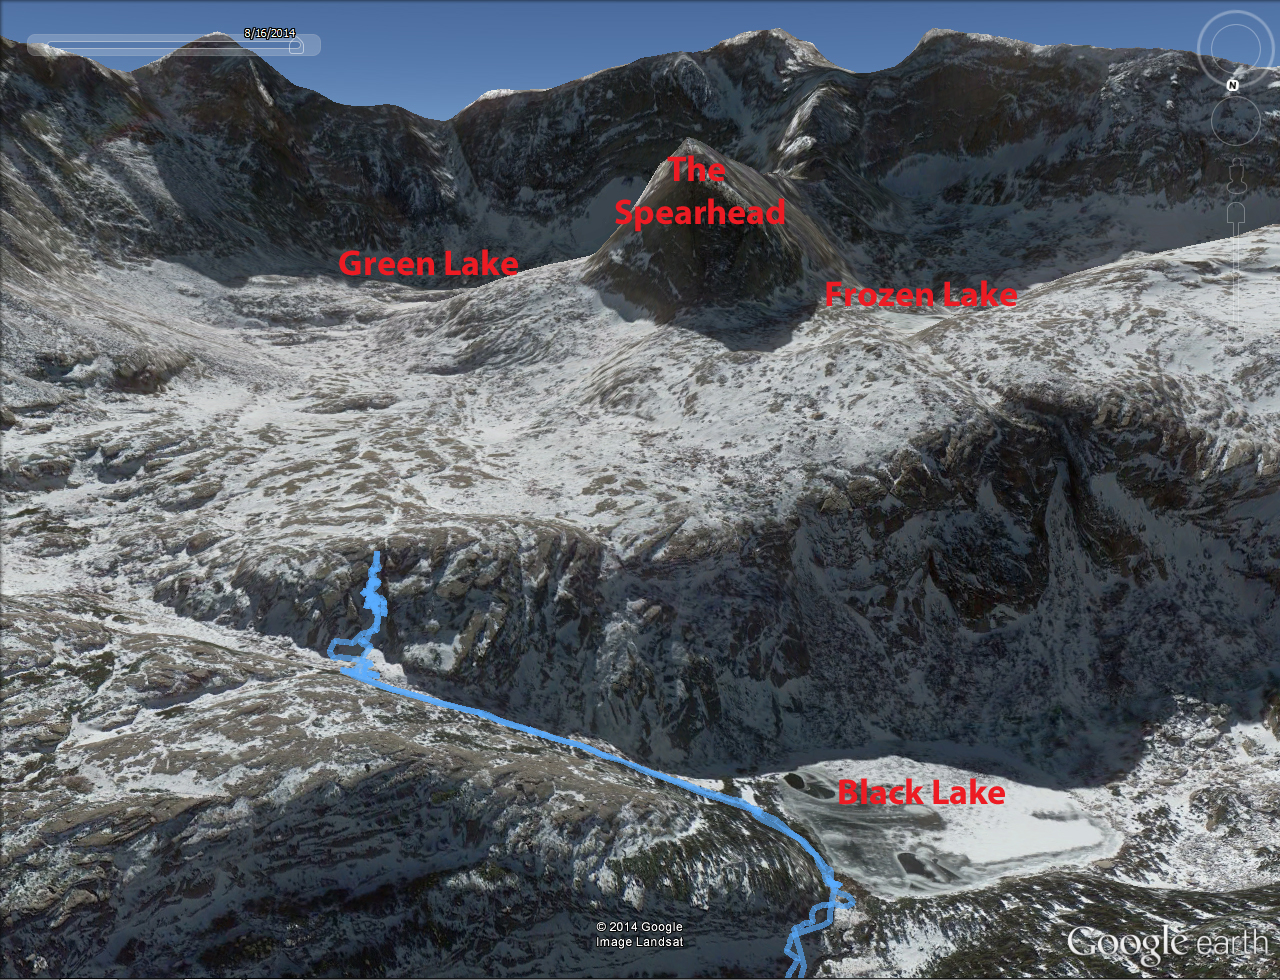
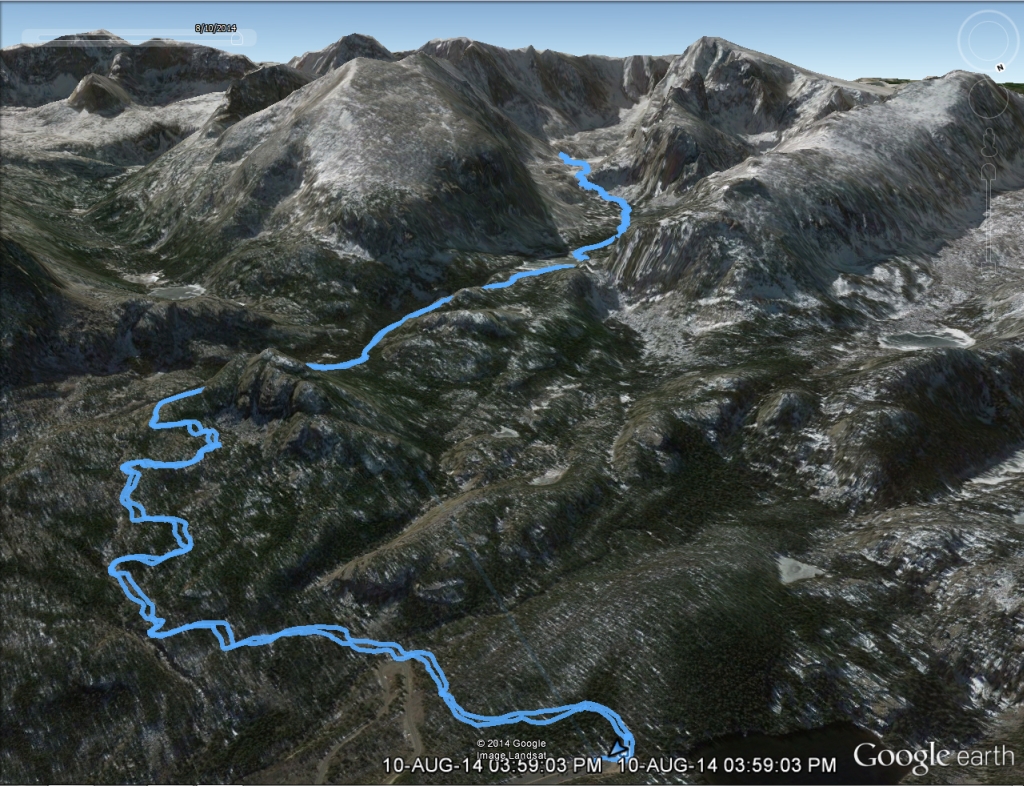
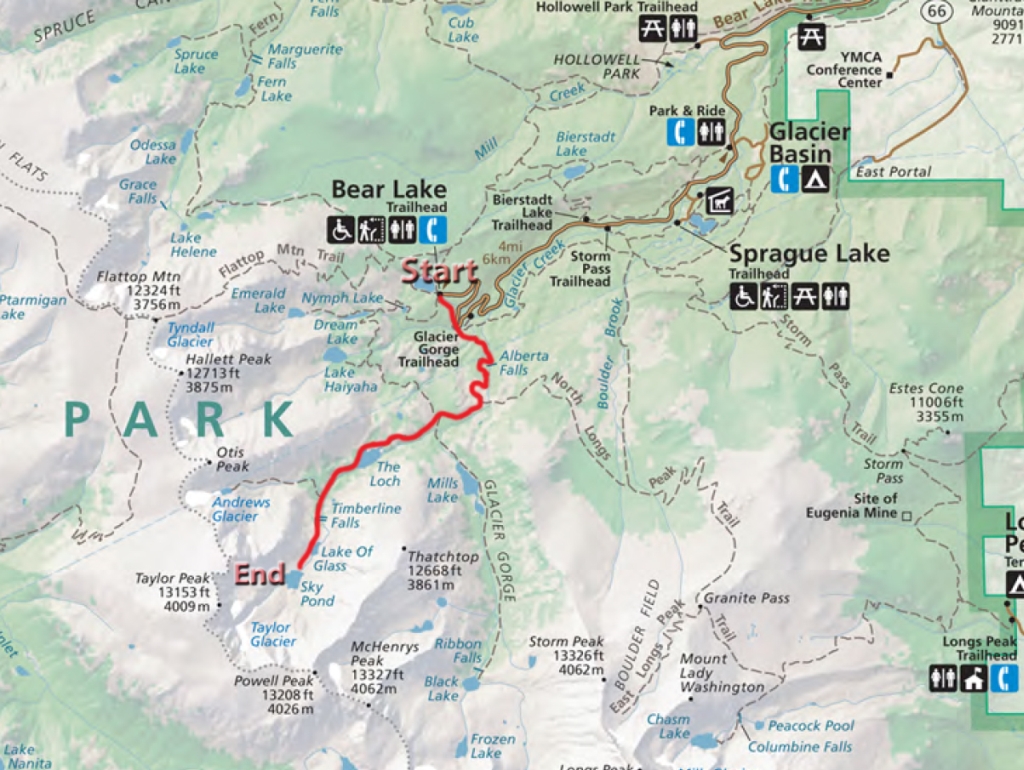
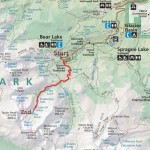
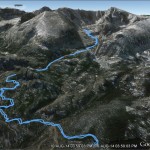
The map on the left is our route from TH to Black Lake. The map on the right shows our route past Black Lake and displays relative locations of Green Lake and Frozen Lake with respect to the waterfall and The infamous Spearhead.
Rocky Mountain National Park is the quintessential mountain playground of the summer. After just renewing our annual RMNP park pass for the year, we couldn’t resist spending our second weekend in a row at adventureland. The work week had taken quite a bit out of us so we lounged around in the morning longer than usual for a Saturday and then hit the road about 10:00 am. The forecast called for perfect weather, and our planned hike would keep us under treeline for the majority of the day just in case a sneaky thunderstorm came through. Traffic proved to be very difficult in getting to the park. When we finally approached the Beaver Meadows entrance station, there was a long line of cars waiting to pay and get in. Luckily, they have an express lane for pass-holders, in which a quick swipe of a card allows access of the park and hence, no waiting in line. We breezed through. As we drove toward Glacier Gorge TH and Bear Lake, numerous signs said all parking lots were full (even shuttle routes) and to turn around and come back after 2:00 pm. We continued on to Bear Lake anyways, and for the second time in a week we got lucky. Someone was leaving as we pulled up, and we got a spot! If you plan to go to Rocky Mountain National Park in late July or August on a weekend, be prepared for this craziness. Ideally, you should arrive at the park around 8:00 am or earlier to secure a spot or a least by 10:00 am to get a spot in the shuttle lot. We really just took our chances. (Wild Basin fills up by 7:30-8:30 am most summer weekends and there is no shuttle service).
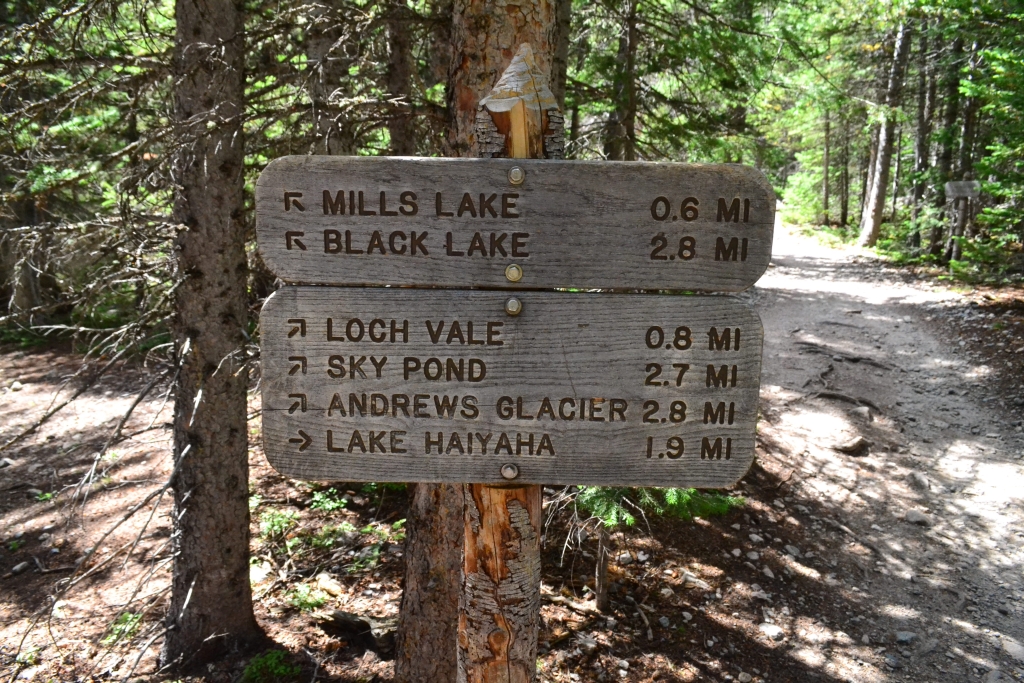
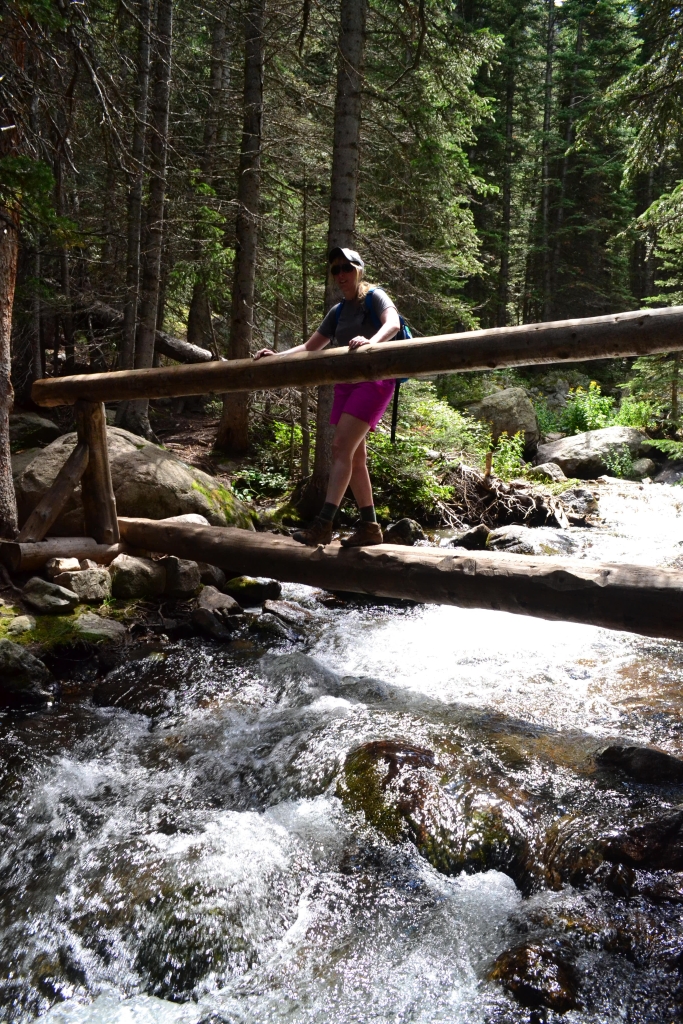
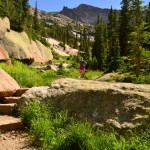
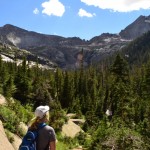
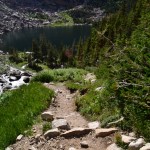
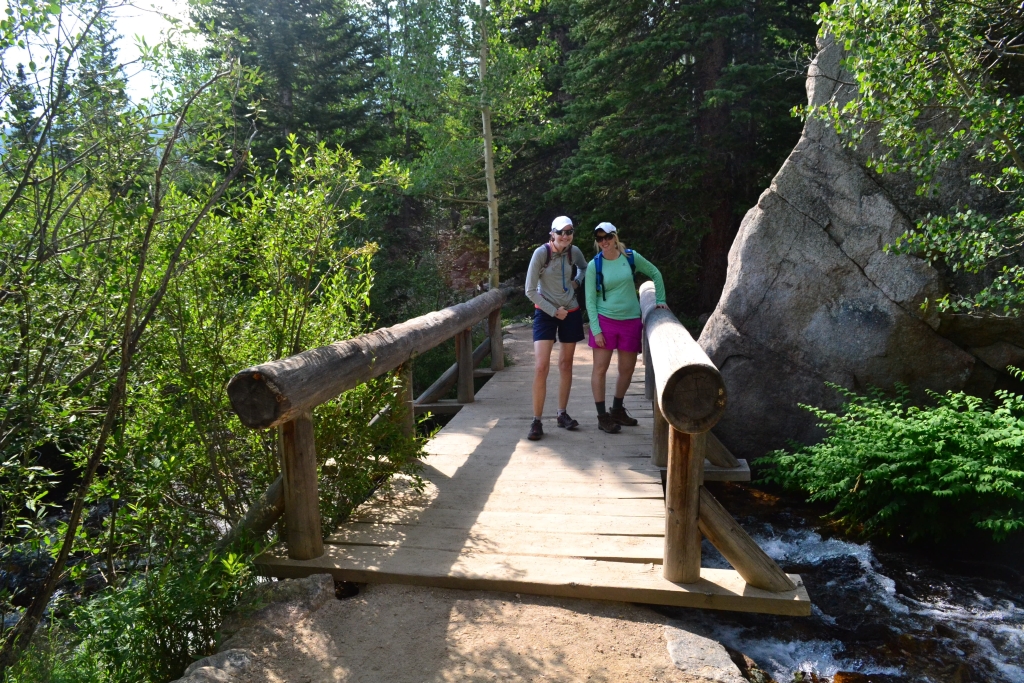
We quickly set off on the trail that heads to Alberta Falls in order to connect up with the trail to take us towards Mills and Black Lakes. Thus, the first portion of this hike was a repeater from last weekend (the normal trailhead is the Glacier Gorge Trailhead, but the Glacier Gorge parking lot is small and there was no chance of parking there). We powered through the first two miles of the trail, averaging 15 min. miles mostly uphill. Quickly we reached the trail junction that splits, optioning this time for the southeast trail towards these new lakes. Seen below are overlooks, waterfalls, and foot bridges that led us to Mills Lake.
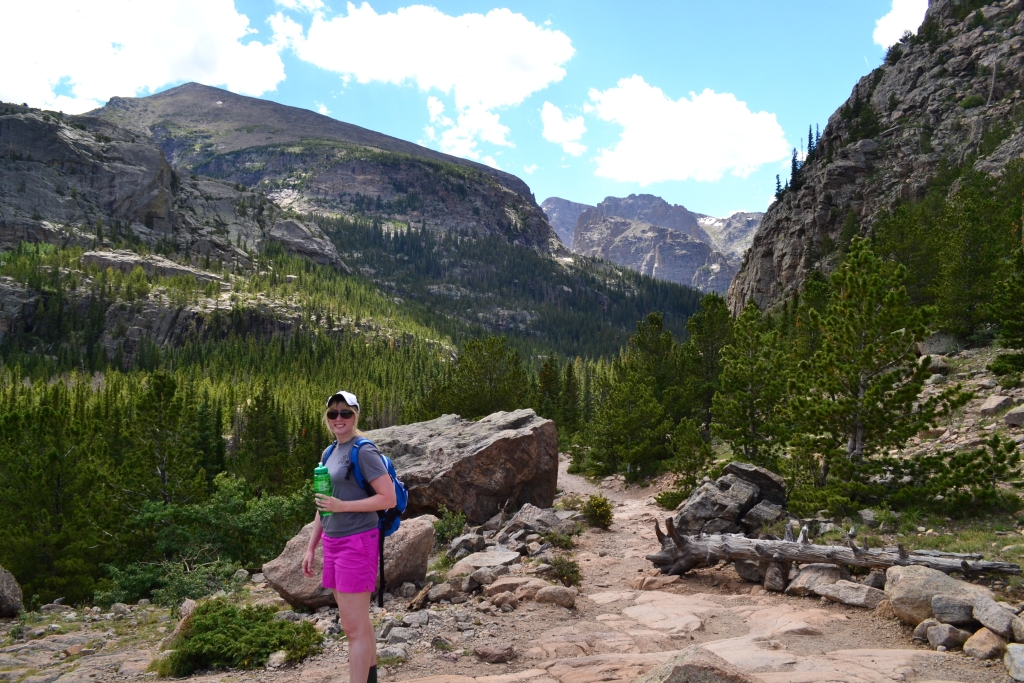

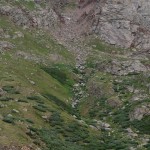
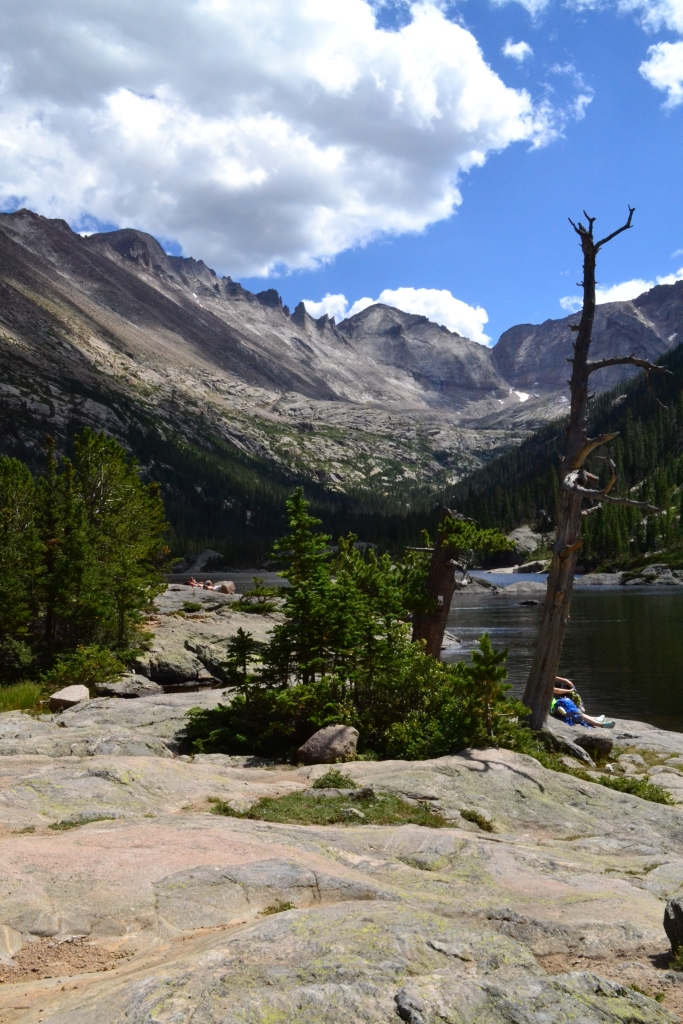
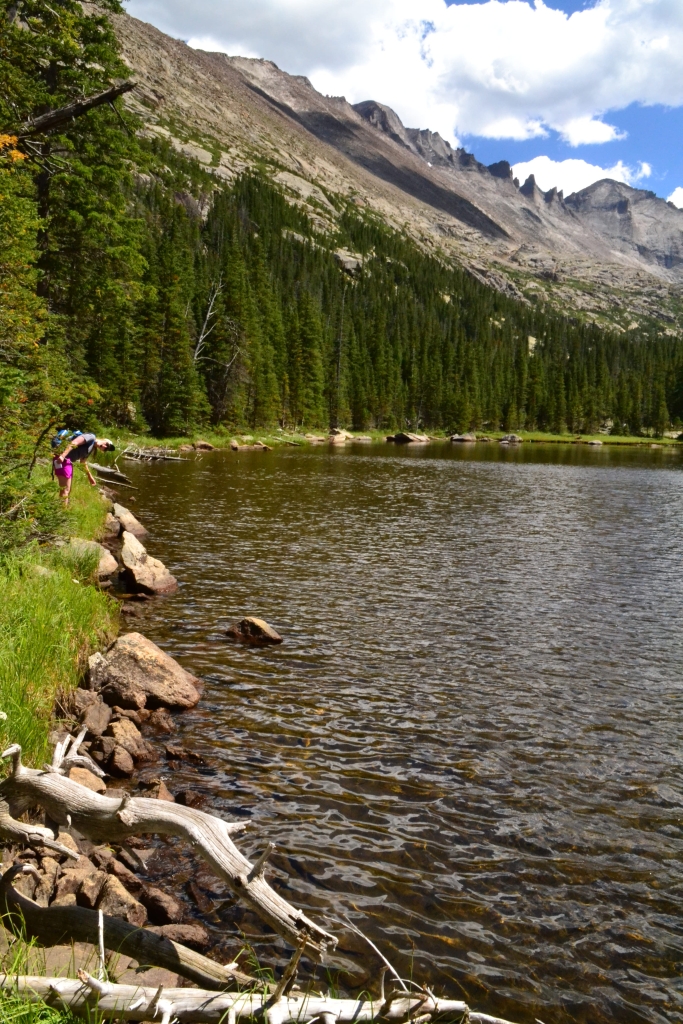
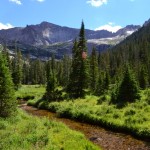
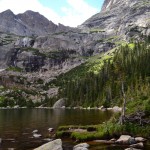
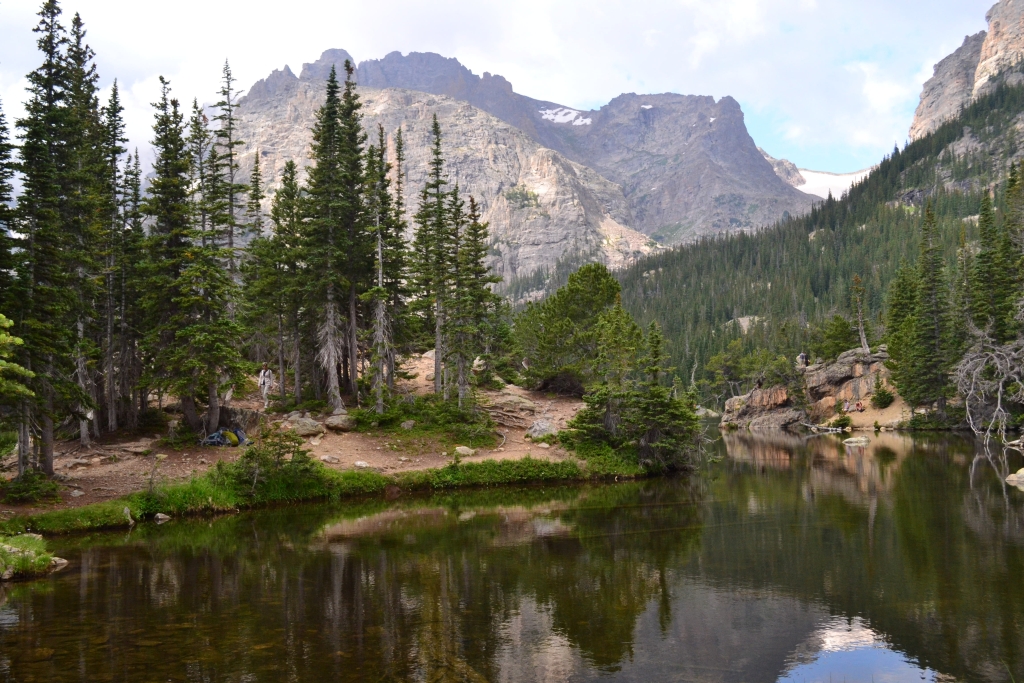
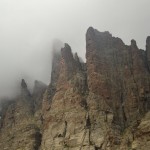
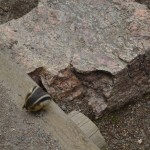
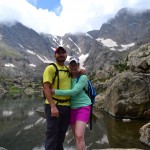
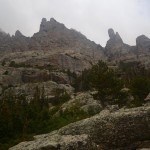
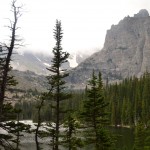
Mills lake is about 2.8 miles from Glacier Gorge TH but we started at Bear Lake which made the distance about 3 miles. It feels like a very quick hike with all the visual delights along the way. The only downside was people dodging until we reached the trail junction. After this point, the trail thinned out a bit, and we very quickly reached Mills Lake. It was a fabulous lake to visit, and we were quite surprised we had not made an effort to get here before (the lake is almost half a mile long). Interestingly, Mills Lake is named after Enos Mills, “the father of Rocky Mountain National Park.” He spent years lobbying Congress to help create this park in 1915. In addition, this September begins the 100 year anniversary celebration of the park. All year long there will be special events and programs commemorating RMNP. The trail turns to granite slab as it reaches the lake and disappears for a moment. It then reappears and skirts the eastern shoreline, providing many adequate spots along the way to set up a picnic on rocky outcroppings. We paused for a moment to relax. Chipmunk friends quickly came over to scope the area and our bags for food. Unfortunately, two hikers near us thought it would be a good idea to feed the critters. This resulted in one member of the party subsequently getting bitten by the “cute” rodent. Working with rodents had already taught this lesson for our group. Needless to say, don’t feed the wildlife. Seen below are photographs of Mills Lake with the majestic cirque off in the background; a preview of where we were heading. The peaks in the background are Chiefs Head, Pagoda and Thatchtop Peaks.

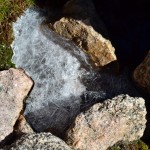
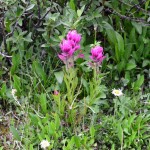
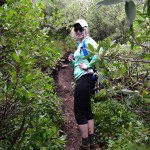
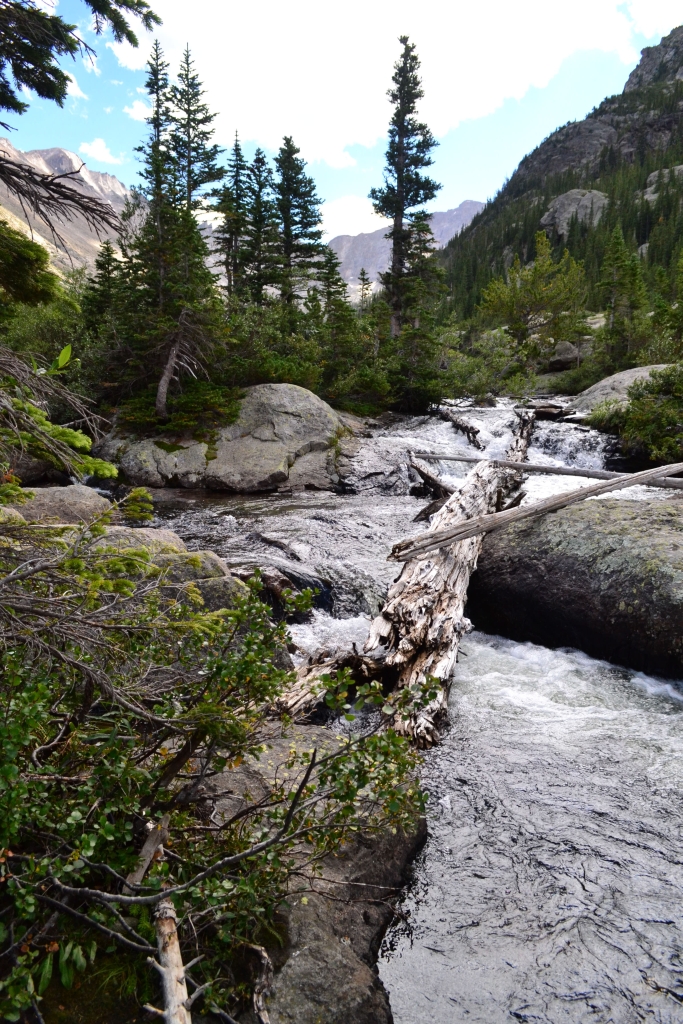
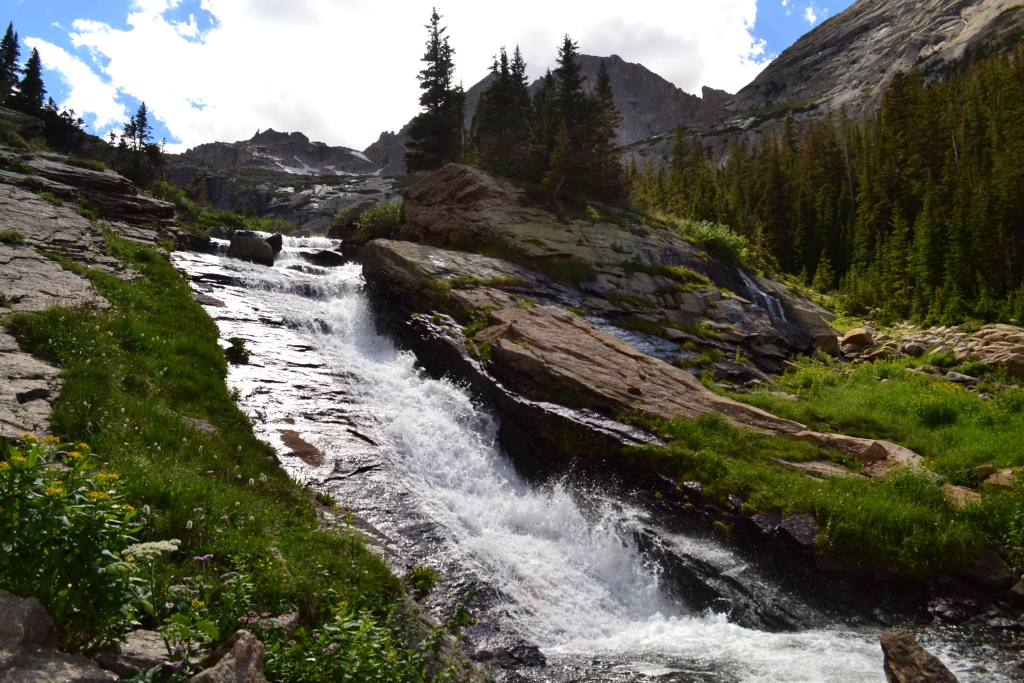
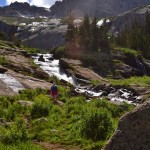
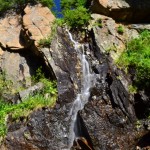
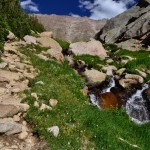
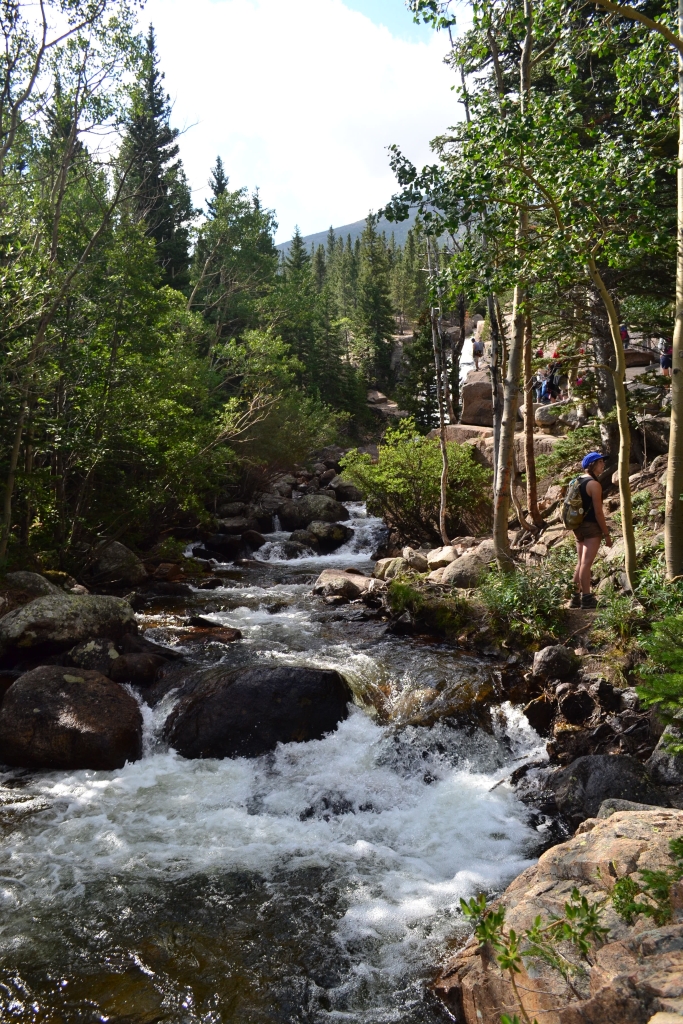
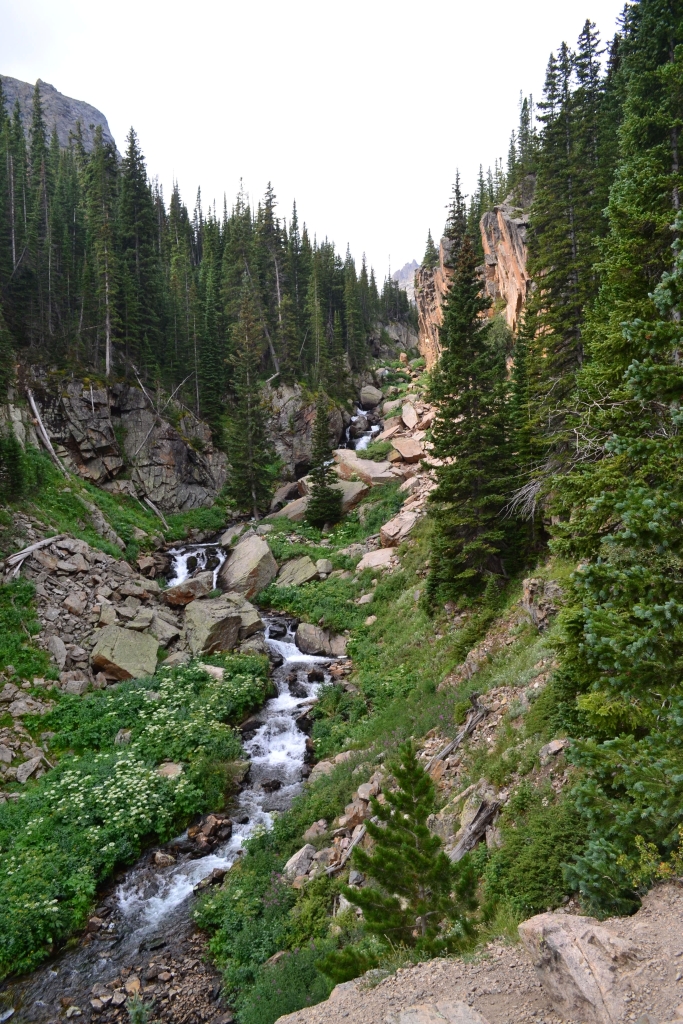
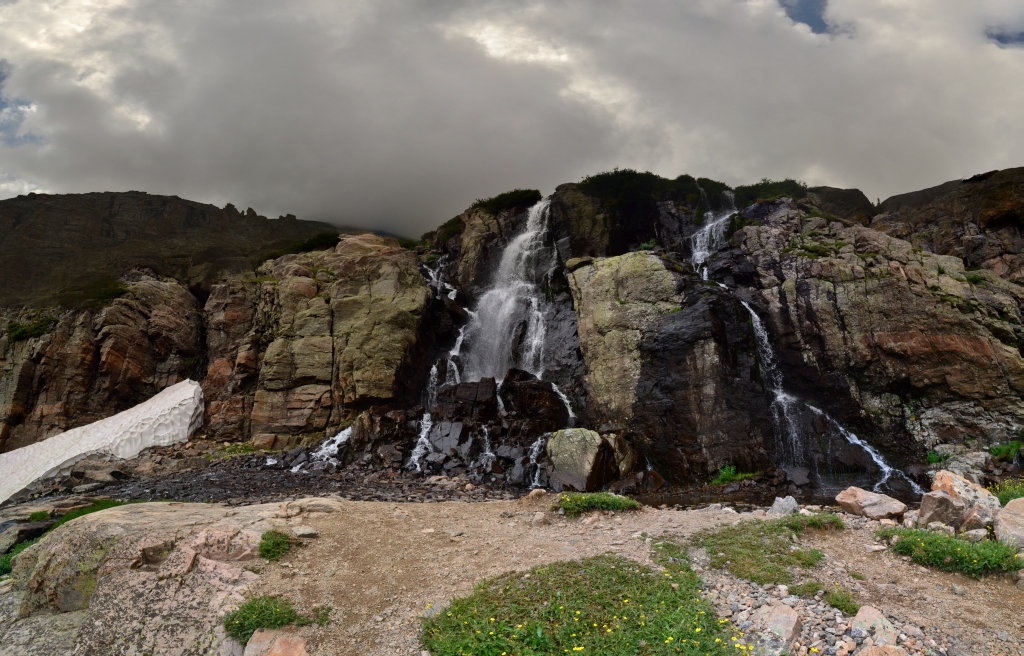
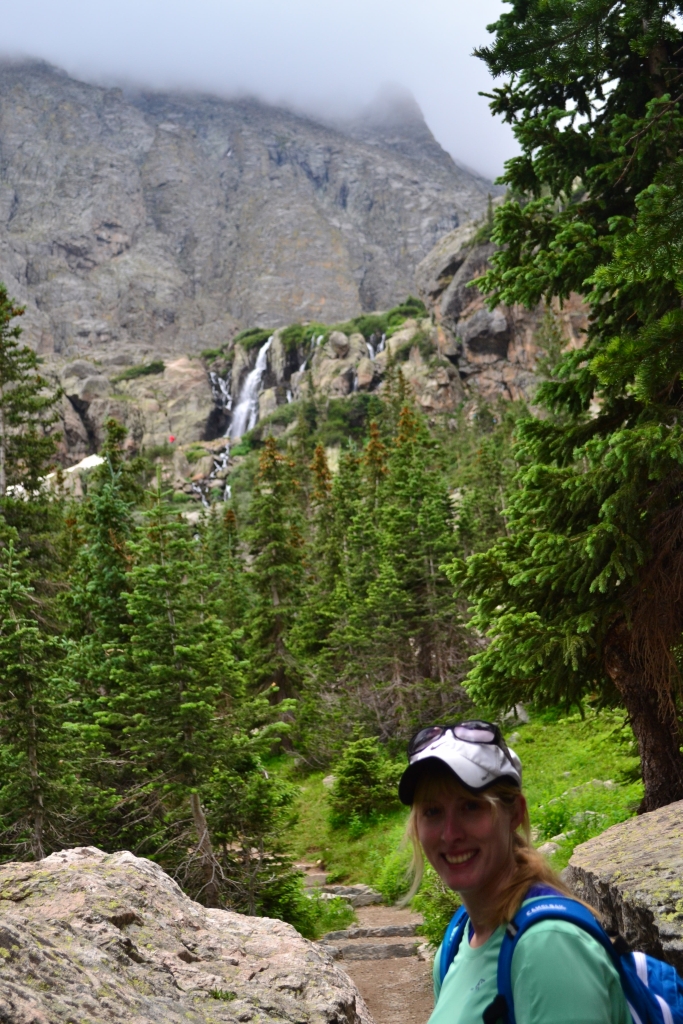
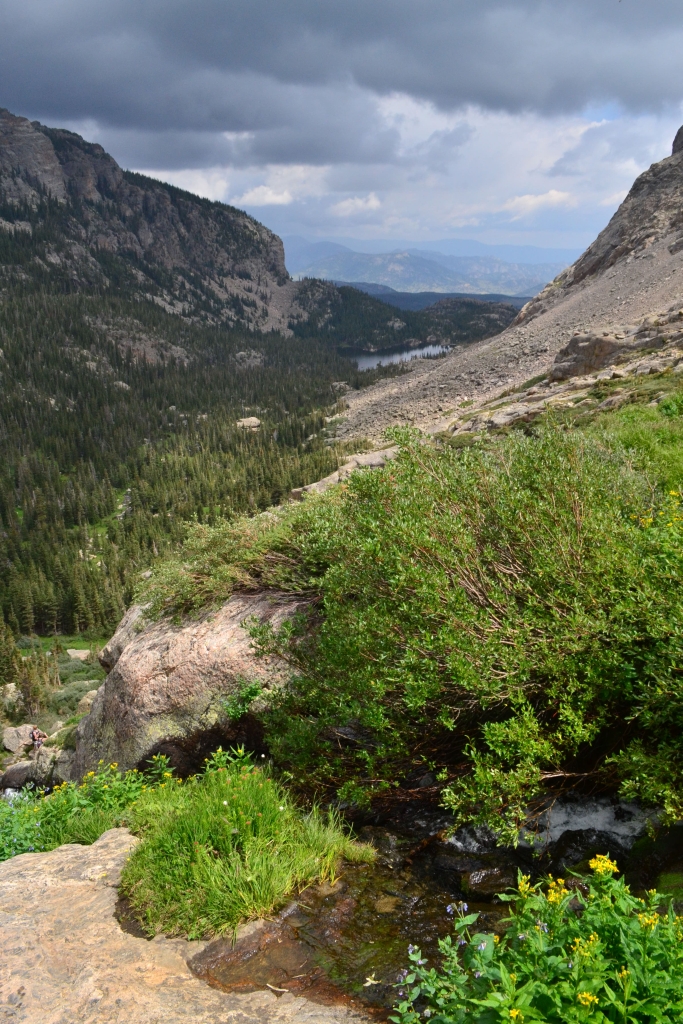
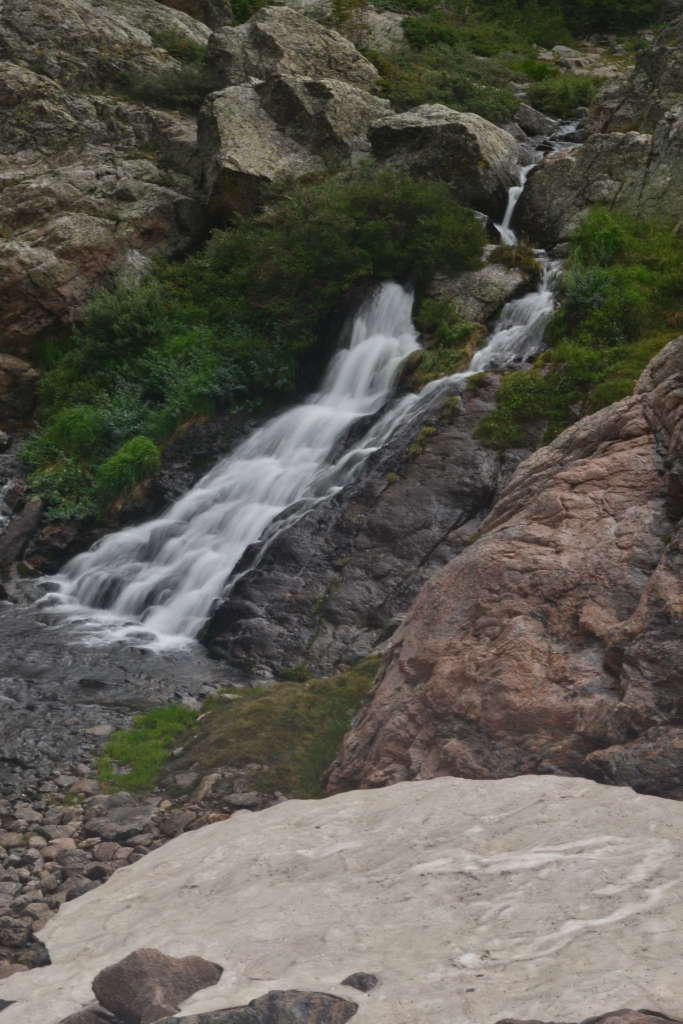
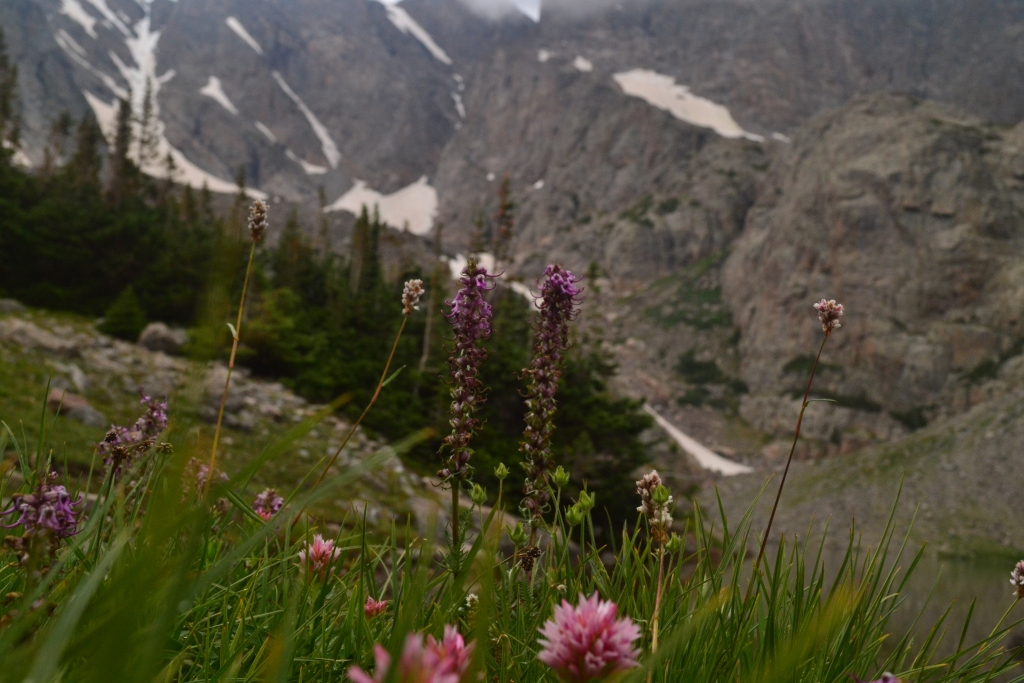
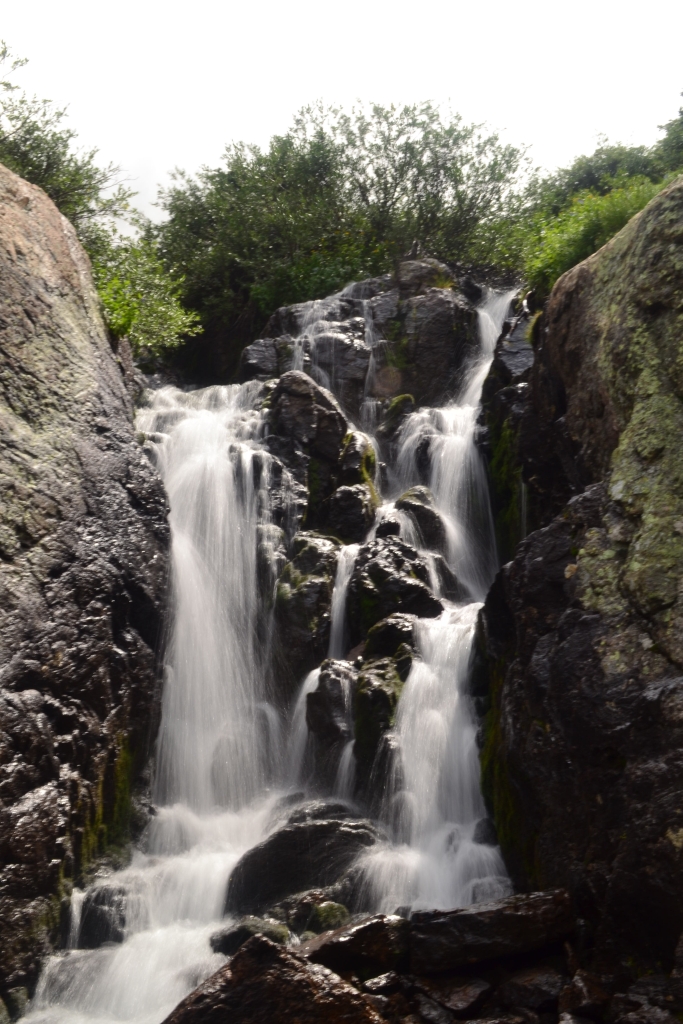
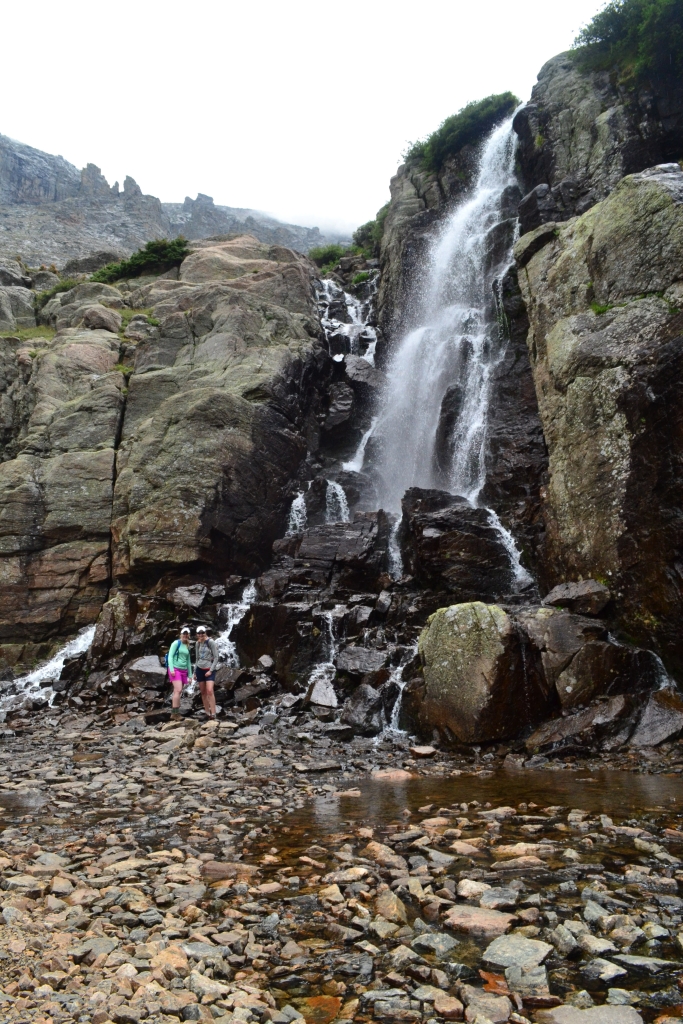
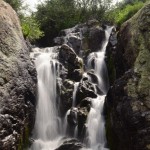
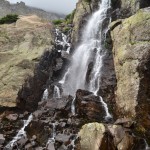
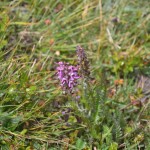
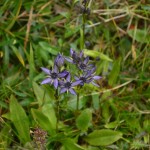
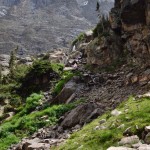
As you continue on along Mills Lake it eventually thins, disappears, and then a smaller lake, Jewel Lake, appears. The trail continues to follow close to the shoreline of Jewel Lake. Everything is so green in the area in August. Plants and flowers are abundant. Several wooden planks connect on the trail, elevating hikers a few feet above a green marsh. We weren’t touched by mud here, but the vibrant blue and yellow flowers dusted our sleeves as we walked by. If only words or still images could truly capture the moment. It is a hope and dream of ours and mission of this site that everyone makes the effort to go out and have these experiences outdoors. We continued to follow Glacier Creek fairly closely on the trail and steadily gained elevation (well sometimes not so steadily). After about 4.8 miles, we reached the amazingly beautiful Ribbon Falls which spills from Black Lake. Seen below are photos of Glacier Creek and the Falls. Notice what a great slip n slide Ribbon Falls would make…

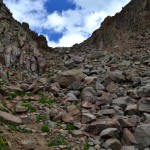
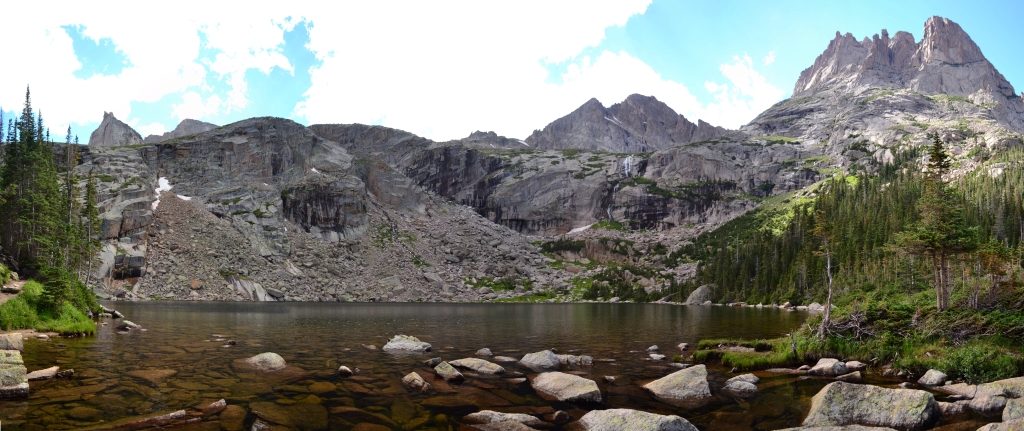
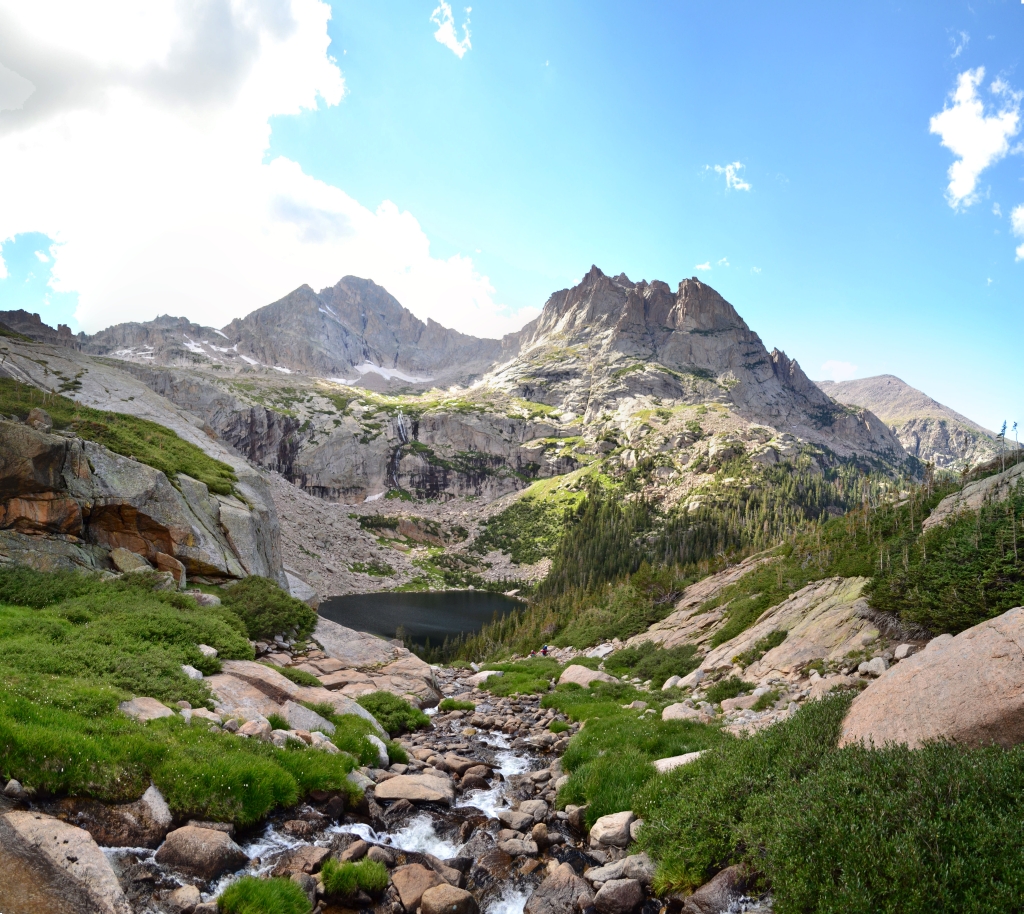
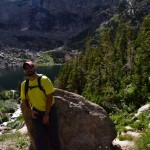
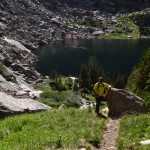
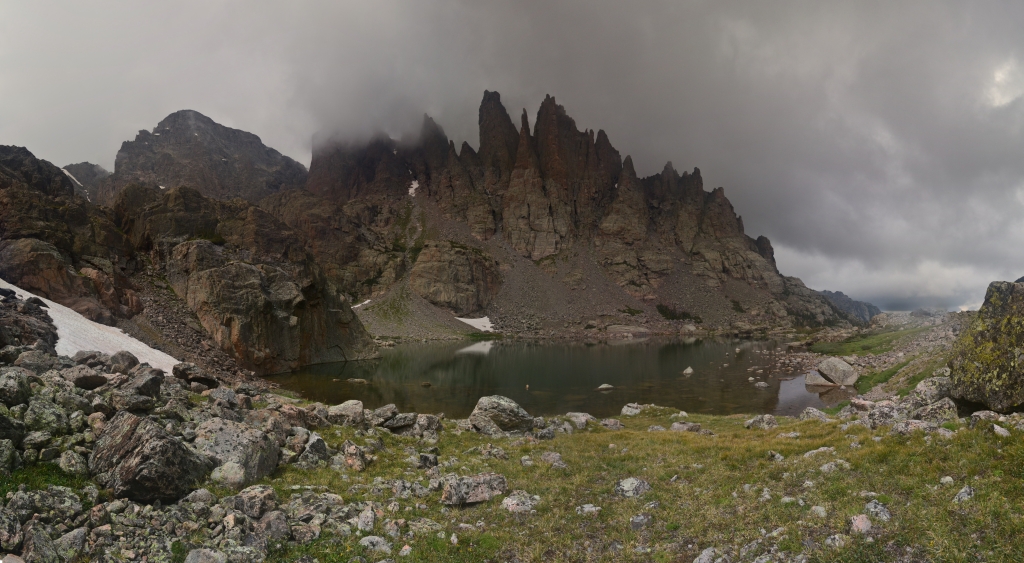
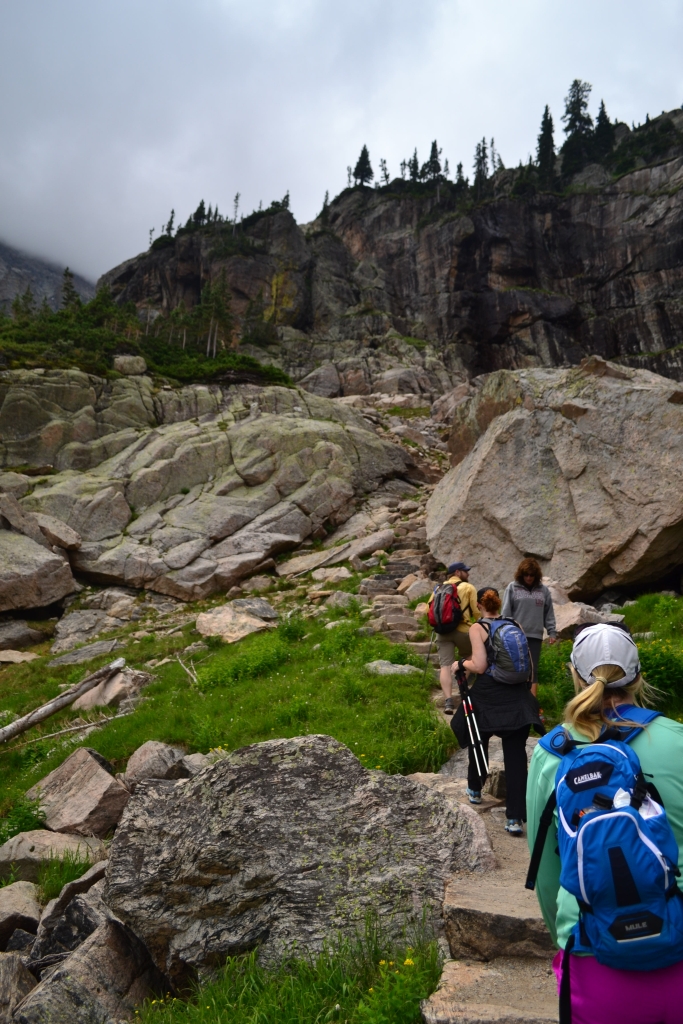
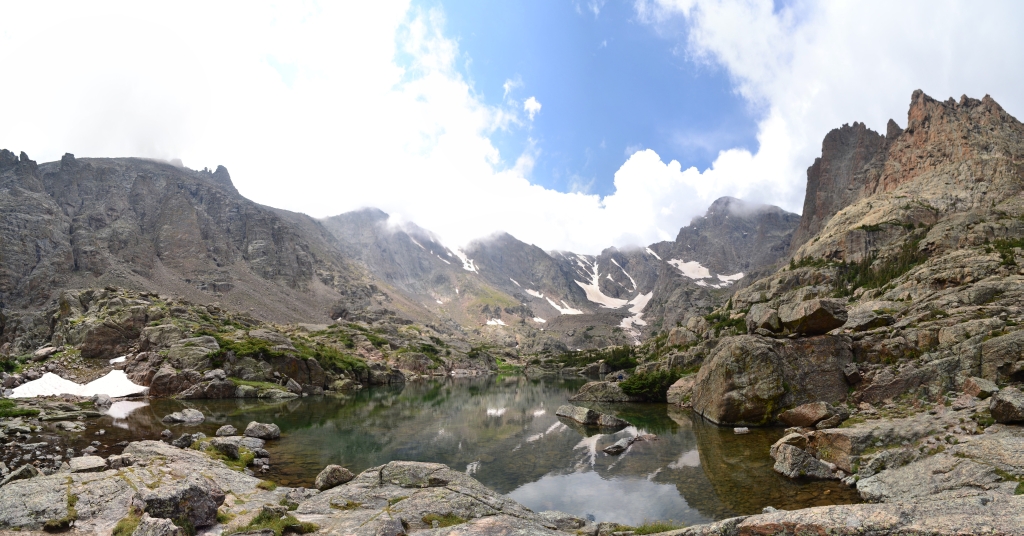
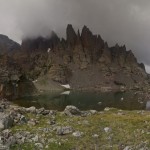
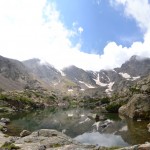
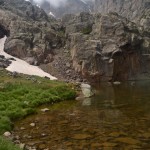
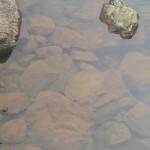
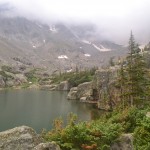
A series of rocky steps on her eastern side led us upward until we reached a small boulder field and the first signs of Black Lake. A few skips and hops over and we were at her northeast bank. The water was a dark green matching the name quite well. We sat on a rock and admired the trout splashing around. Unfortunately mosquitos the size of dragonflys began to attack, and we had to get on the move again. Seen below is a pano from the shores of Black Lake.
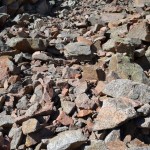
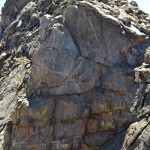
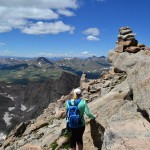
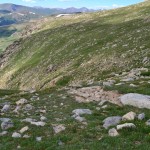
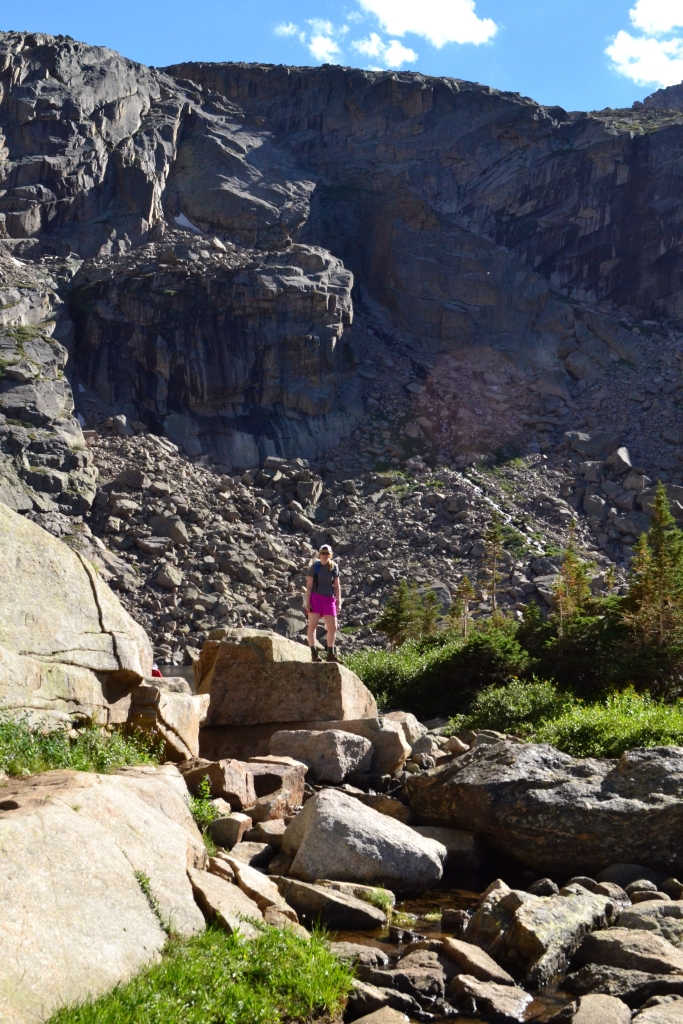
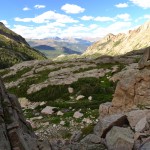
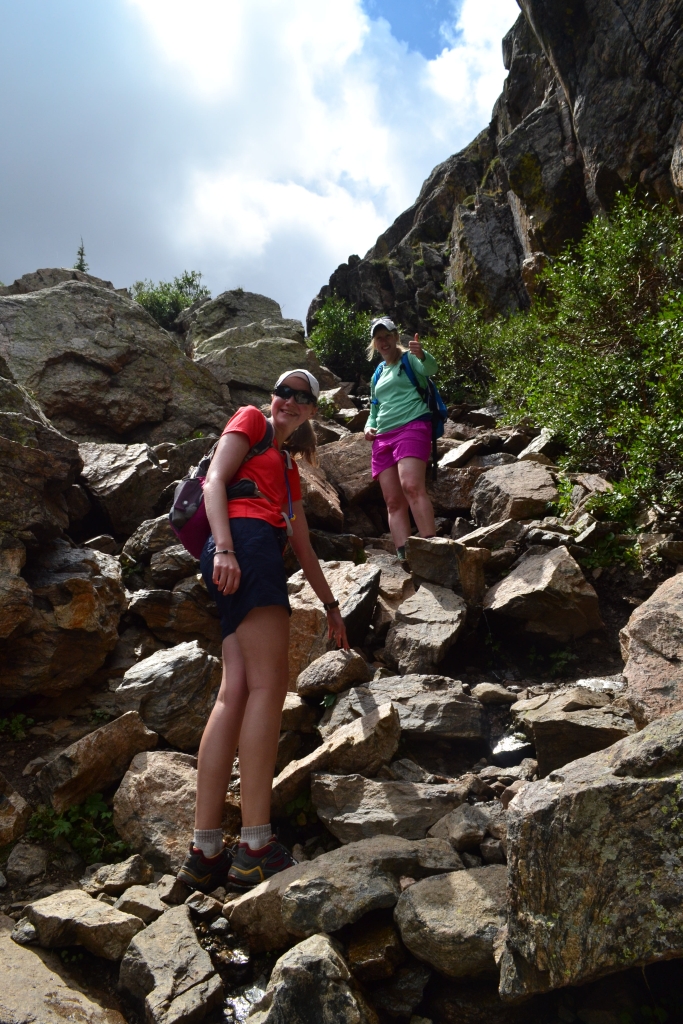
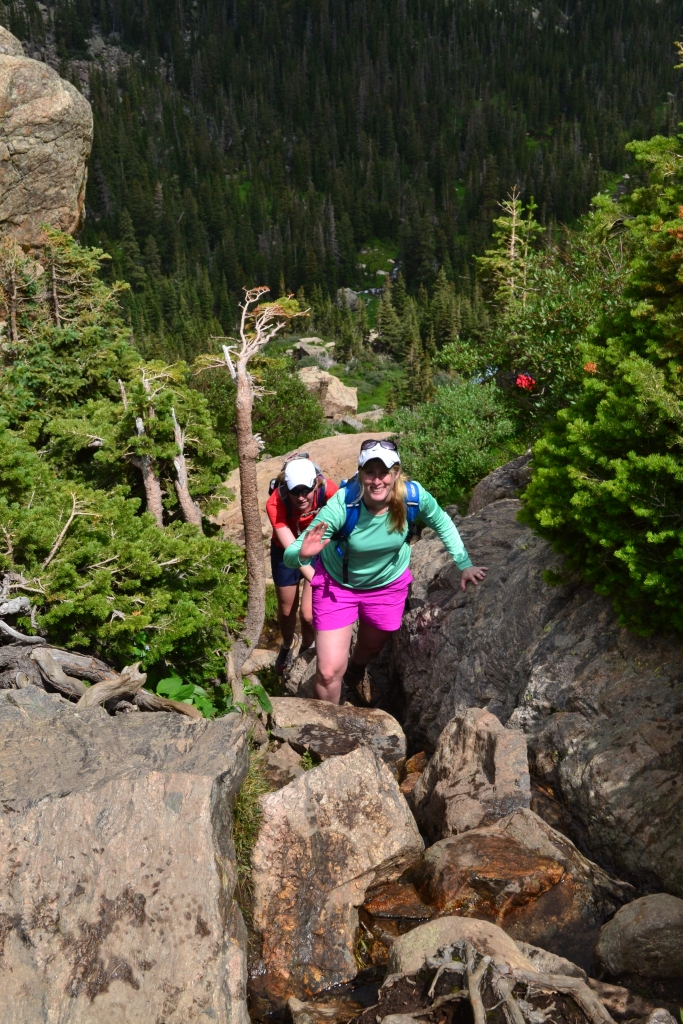
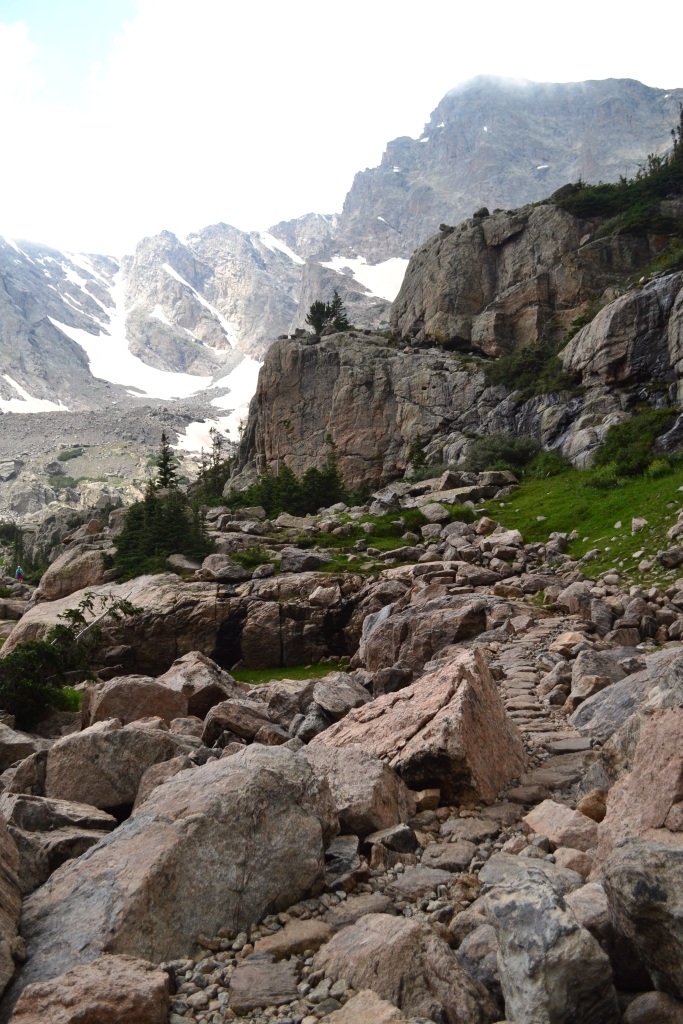
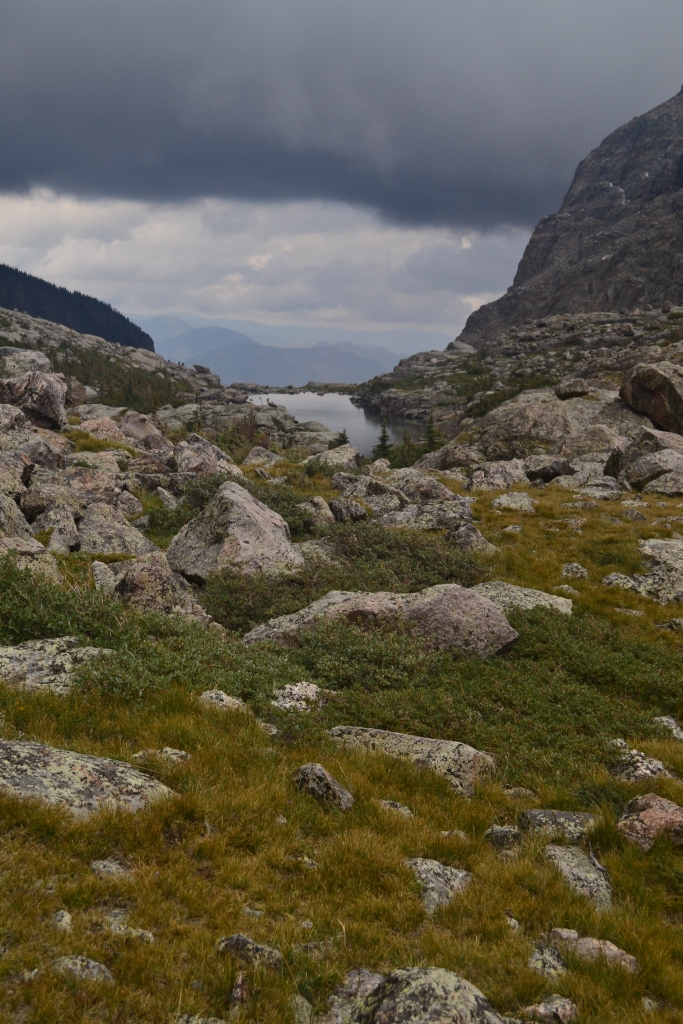
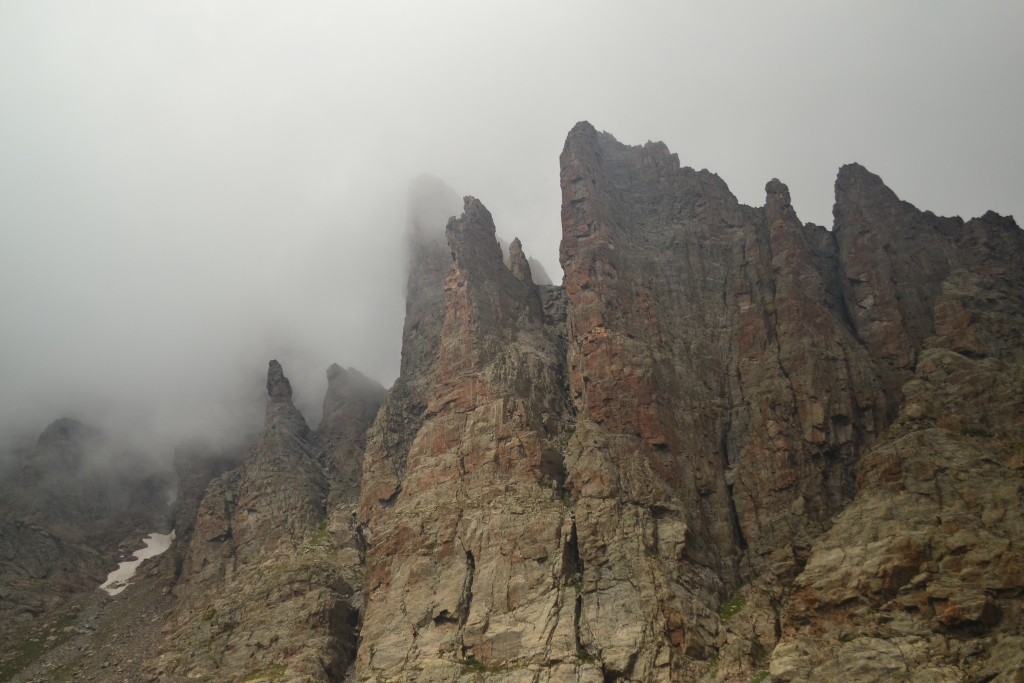
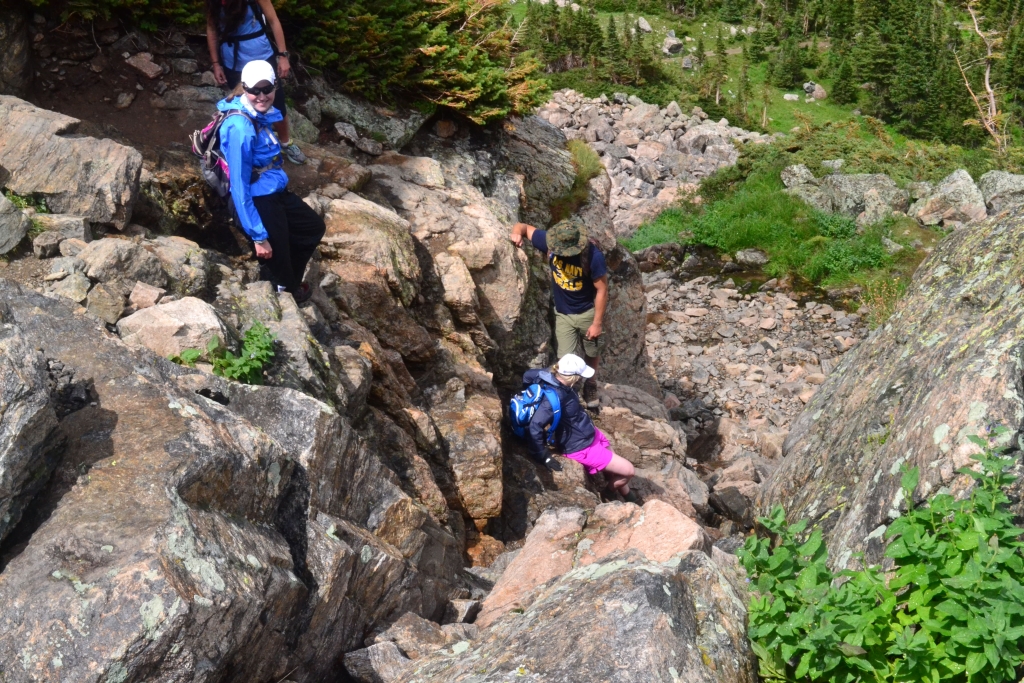
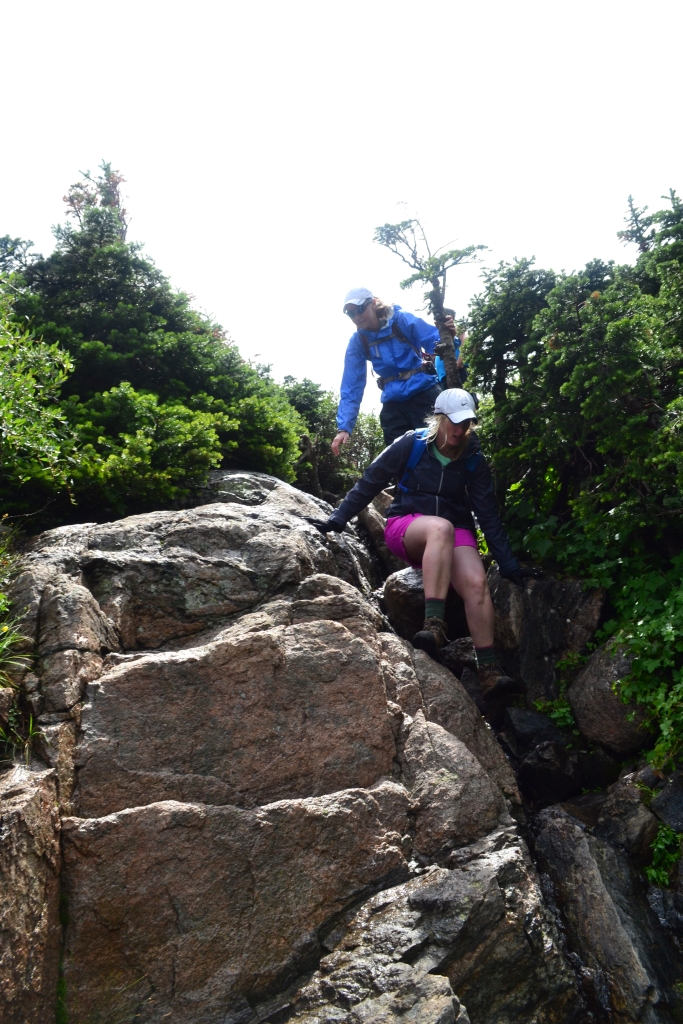
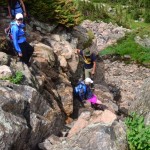
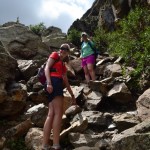
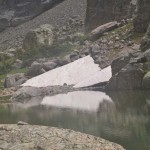
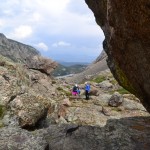
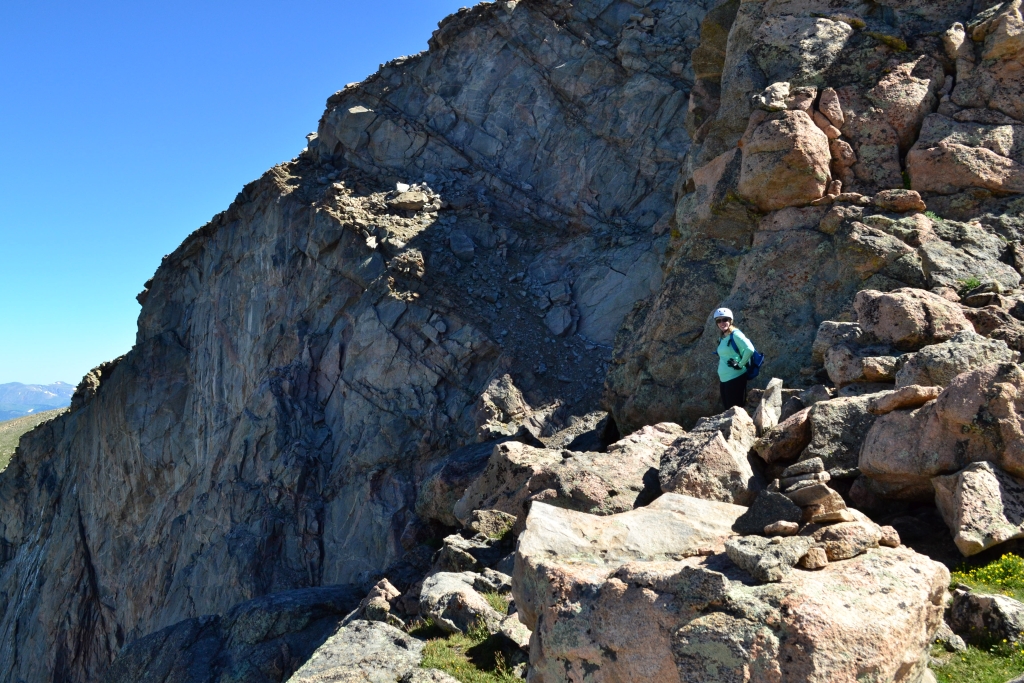
We then headed east and followed the trail into a thick forest. It quickly opens up and heads sharply east and up along side Black Lake’s primary inlet. The trail here is very uneven and abundant in loose rock. It climbs straight up until opening up to wild tundra and several unmaintained routes leading various ways to Green Lake, Frozen Lake or many of the surrounding peaks. Since we got such a late start, we didn’t continue on to Frozen Lake and simply used our time here to explore and scramble a little on some nearby rock. We crossed the creek and headed south. Seen below are photos looking back down at Black Lake and of our exploration.

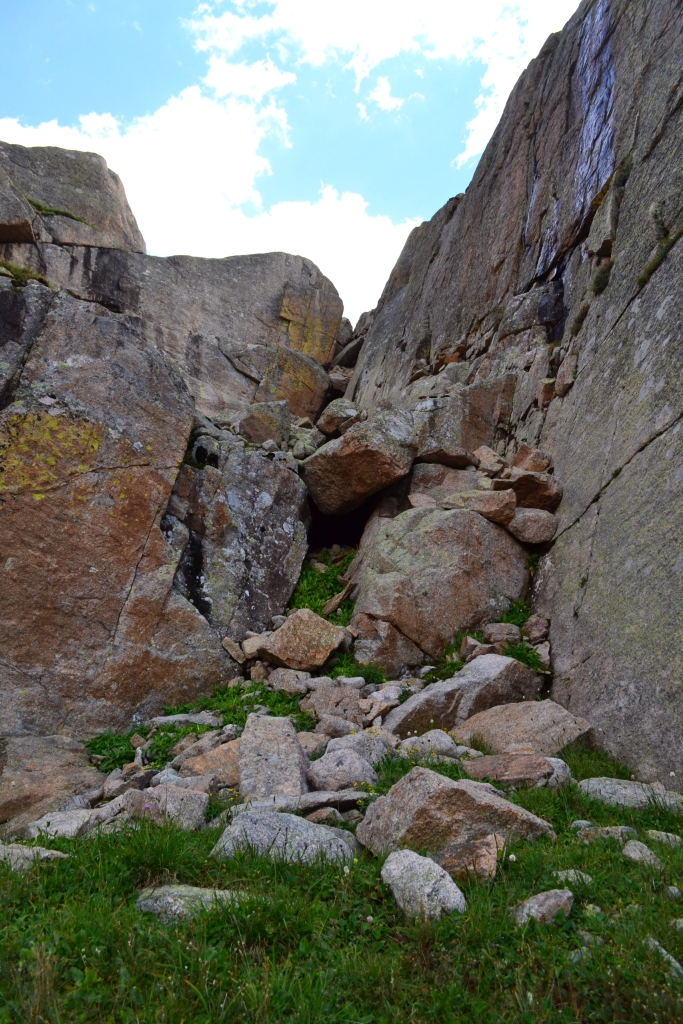
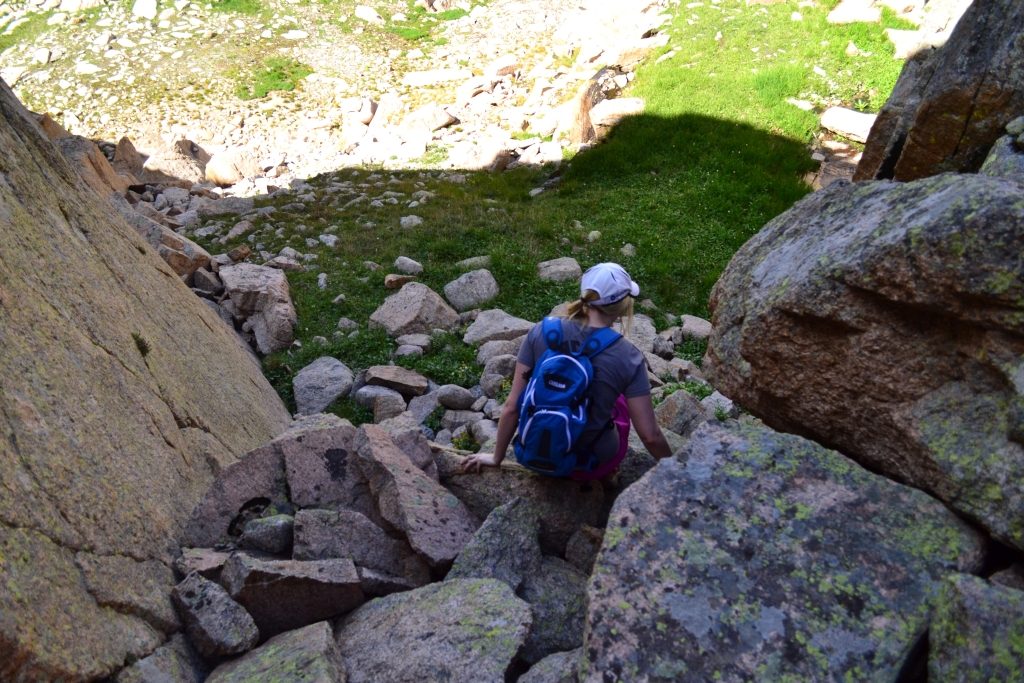
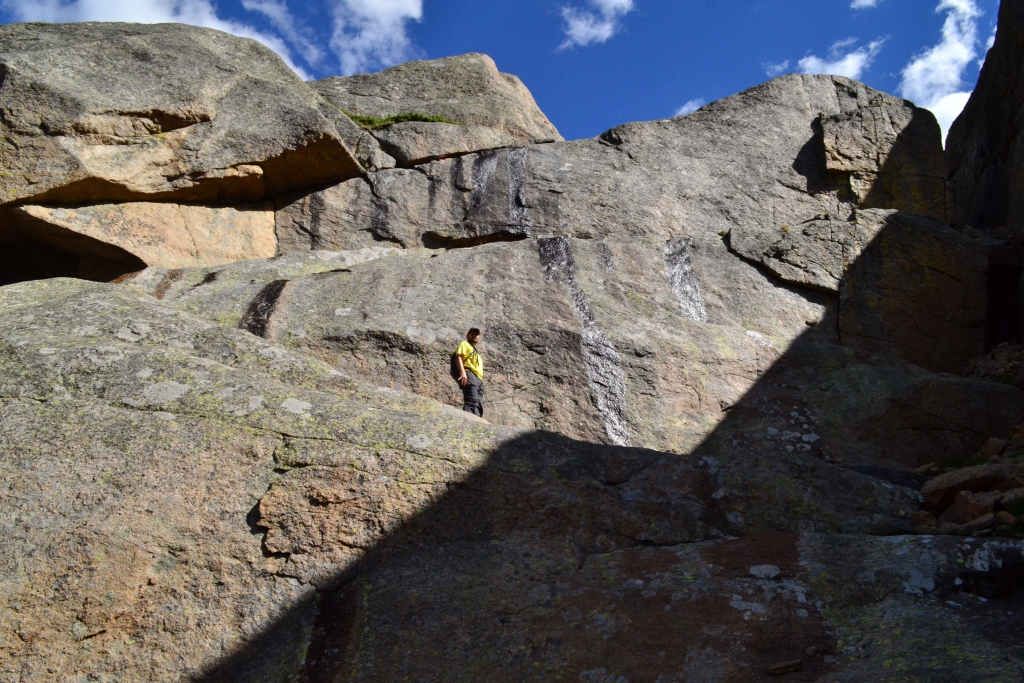
With the sun giving the first hints of retiring, we reluctantly turned around and headed back down the gully and the route upon which we came. The area has some excellent off trail routes to explore and nice climbing options. We can’t wait to come back here with more time. The trip back was relatively quiet and calm. Mills Lake was still and peaceful as we enjoyed water and a snack on her rocky bank. We reached the car famished and ready for dinner. The night concluded with a delicious Mexican Dinner in Estes Park and a little window shopping.
Side notes, stories and closing remarks from this hike:
1. During the hike, a funny remark from an older hiking couple on the trail encouraged and resulted in our record speeds reaching and returning from Black Lake. Just past Jewel Lake, a lady says “I wouldn’t go further if I were you! It’s only one more mile, but it took us an hour to get here and that’s going down!” We politely asked what was wrong with the trail and why we shouldn’t continue. She looked flustered and said that it was simply a rough trail and to think hard before continuing. She shook her head at us as we continued on anyway. Well, the trail isn’t a perfectly smooth path, but it was pretty good in our opinion. There were some steep sections, some roots, and mud in areas but nothing out of the ordinary. From that point, we made it to the Lake in about 32 min. 😉 We got all the way back to Mills lake in about 45 mins. Just for completeness, it took 1 hour and 57 minutes to get from Black Lake to Bear Lake (but that was us). So, take others advice on the trail with a grain of salt, know your own abilities and be confident in them. It would have been a shame not to see the gorgeous lake and cirque.
2. Get an early start so you won’t be disappointed when you don’t have enough time to get to Frozen Lake or climb more. Also, bring a helmet. Unfortunately, we didn’t have our helmets, thus we didn’t feel comfortable completing a couple of moves with loose rock around.
3. Bring some bugspray. The mosquitos were huge and scary at Black Lake.
Cheers,
Allyson & Thomas


Sky Pond and more: RMNP
Distance: 9.73 miles (out and back) Elevation Gain: 2,405 ft (total gain)
Max Elevation: 11,926 ft Min. Elevation: 9,212 ft
Last summer we enjoyed a nice, long hike that led us to stops at Nymph Lake, Dream Lake, Lake Haiyaha, The Loch, Timberline Falls, Alberta Falls, and Bear Lake, all spectacular highlights showcasing the many wonders of Rocky Mountain National Park. The link to that hike from 2013 can be found HERE. Unfortunately, last year our hike was cut a little short due to a sudden and dangerous downpour of rain and hail at Timberline Falls, and we weren’t able to see Lake of Glass and Sky Pond, with the daunting Sharkstooth in the backdrop. With hiking season in full bloom, we headed up yesterday to Rocky Mountain National Park to complete this portion of the hike and stand at the rocky banks of the wondrous pond in the sky. We brought our good friend Liz along; the views are so spectacular on this hike that it would be selfish not to share.
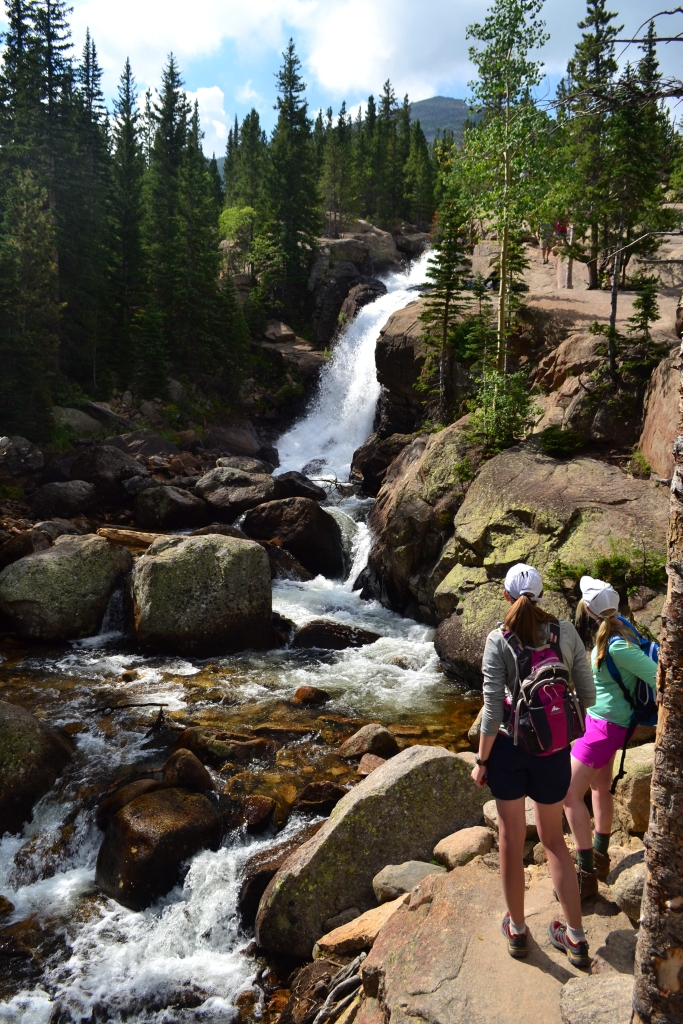
Since we had already completed the lollipop loop last time to see many of the other lakes, and Liz had seen them already too, we opted to jump onto the Alberta Falls Trail. This well groomed wooded trail immediately drops down into a valley. It winds through a pine forest and a few large aspen groves before flattening out for a brief moment to cross Chaos Creek. Once past the creek the climb starts along a ridgeline with Glacier Creek to the left, but a quick reward awaits hikers in the form of Alberta Falls. The powerful waterfalls are a really cool sight and extremely popular due to their close proximity to the trailhead (~0.9 miles from trailhead). We paused a few moments to enjoy the sounds and sights of the rushing water. Below are pictures of the fork at the trailhead, images of the hike to Alberta, and an image of Alberta Falls.


Past Alberta Falls, the well-groomed trail continues to climb through more pine forests occasionally opening up to scenic views of Glacier Gorge. As we continued to hike, we followed Glacier Creek until it creates a fork with the Icy Brook. The pleasant sounds of rushing water or simply a gurgling brook traveled with us for most of the journey. It is amazing to think that these valleys where creeks and streams now flow were once massive glaciers. At Icy Brook, we headed up steep switchbacks and followed the Brook toward The Loch, a famous RMNP landmark. Below are a of couple images from that section of the hike and a map for reference (with starting and ending points noted along with the route in red).
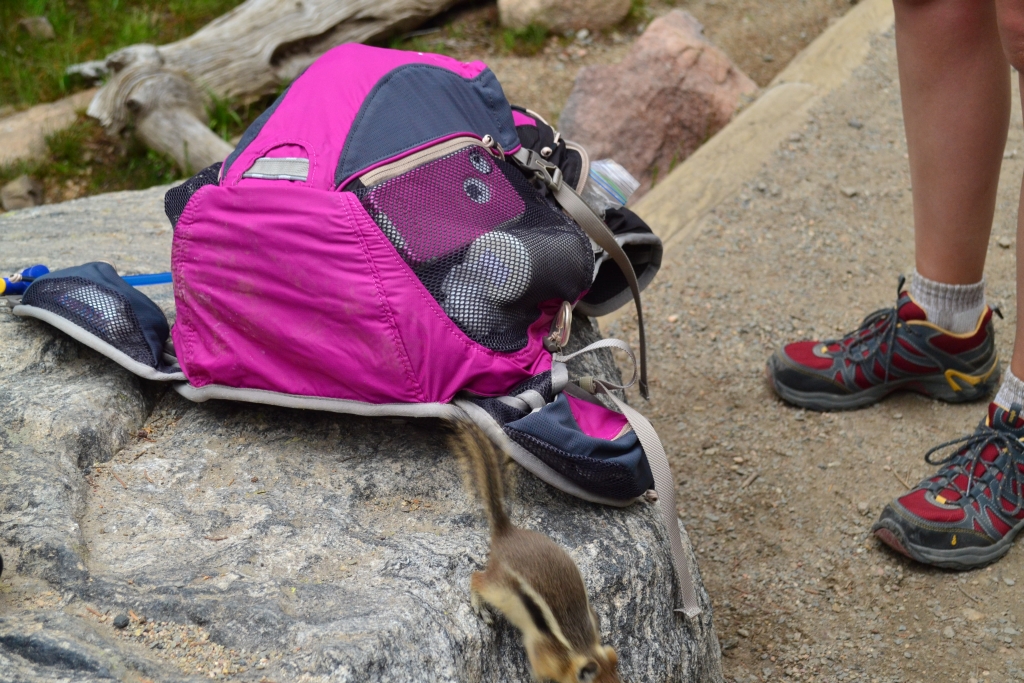
Once we arrived at The Loch, (~3.3 from trailhead), we took a short snack break enjoying the serenity of the calm lake. We sat down near a couple of anglers and saw healthy amounts of trout in the water which made us really wish we had carried some fishing gear along. While we were eating, an extremely bold chipmunk approached Liz and climbed on her shoe. It then proceeded to climb onto the rock where we were sitting and subsequently onto her pack. It was a very cute little critter, and we kept trying to explain to him that it is illegal to feed wild animals, but he just didn’t seem to get it and kept looking at us all cute like. Below are some images from The Loch and of our chipmunk friend.

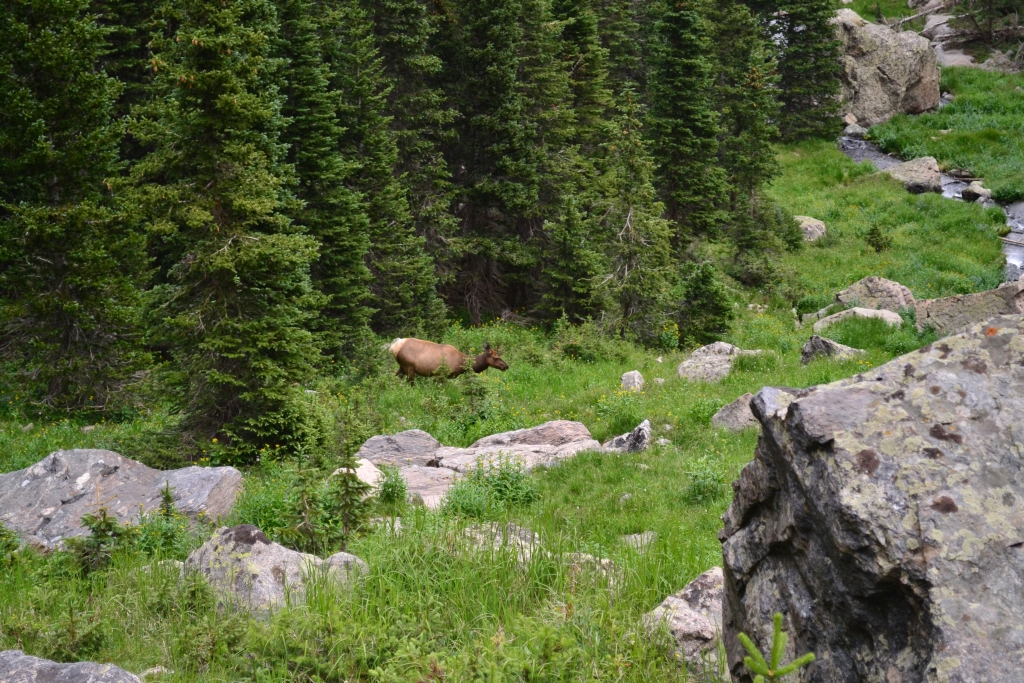
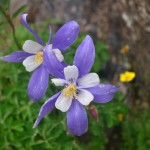
After we successfully ate our snacks, we headed up and over to Timberline Falls. Lush green grass and wildflowers line the gorgeous route. After a creek crossing, the trail splits. The path heading west (right) leads to Andrew’s Glacier. The original path leads to Timberline Falls. In the last mile to the falls, a series of boards connected to one another provides a dry crossing of a small alpine valley pond. The hike from The Loch to Timberline Falls is quite easy with very moderate elevation gain until tree-line. A short, steep climb takes hikers on the final push to the falls. Just as we were coming out of tree-line we saw two elk eating grass just off the trail, so we stopped for a moment to admire them.
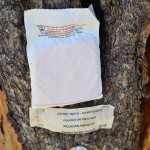
The first part of this section of the hike is groomed trail, but then it becomes something akin to a staircase. Just before the falls, the trail fades away and a bed of rocks is the only route in which to take towards the rumbling falls. A small wooden sign labeled Sky Pond with an arrow is the only acknowledgment that the path does in fact lead up and over the rushing water. Water is constantly spraying from the falls and running down and over the bed of rocks, making good footing and stability essential to maintain balance. Below is a panorama of Timberline Falls and some shots of the hike up to it from The Loch.
After pausing at the falls, we were now excited to tackle the short class 3 route up and over the waterfall. The route up is relatively clear to pick out just to the right of the waterfall. The biggest challenge is finding dry rock to make stable moves. If not confident in scrambling ability, then don’t attempt it. The scramble is only about 0.1 miles long, but can be challenging for some. After this short, fun climbing section, we popped up and over the falls and were immediately greeted by the Lake of Glass. Pictures of our climb up and of the Lake of Glass are below.
The trail continues on towards Sky Pond, which is about 0.5 miles away from Lake of Glass. This trail passes over grass, rocks and boulders disappearing and reappearing as the terrain changes. There is some minor exposure at times and some opportunities for practicing scrambling, but all avoidable. It’s almost impossible to capture the wonder, mystery and beauty of the area above Timberline Falls. We each enjoyed our time here in a different way. Liz, serenely gazed at the glassy water (probably contemplating her next scramble or climbing move). Allyson “frolicked” from rock to rock. Photos below can only partially portray the beauty of what we were surrounded by.
Sky Pond is truly a stunning sight. The “pond” is actually more of a lake and surrounded by jagged peaks. The gnarly Sharkstooth provides a powerful backdrop on the northwest side of the lake. There are many options for exploration around the lake. Heading northwest towards the Sharkstooth, rock overhangs and a small cave provide shelter. Heading southwest (left) across Icy Brook allows exploration of some hills, and there are nice spots to set up lunch as well. Unfortunately, without ropes and climbing gear, it is tough to circumnavigate the lake safely.
When we were climbing up to Sky Pond, the sun had come out on what had turned into a cloudy day. Unfortunately, once we reached Sky Pond clouds came over the Continental Divide and a storm rolled through. It began to rain just as we reached the lake so we headed for cover, and took that opportunity to eat lunch. In fact, our cave was so nice a little mouse came to hang out in there too. There was some ferocious thunder, made scarier by the fact that we were essentially surrounded by large walls of rock creating an amphitheater that reflected the sound back and forth and around us (technically we were in a cirque). We hunkered down for about 10 or 15 minutes until the storm passed and the sun came back out — that’s mountain weather for you during rocky mountain “Monsoon Season.” During July and August, the mountains typically get an afternoon thunderstorm every single day. Another reminder that starting early is the best bet for a safe climb or hike but still no guarantee (we started early and were still stuck in a storm).
Once the storm had passed through we headed around to the other side of the lake to get the famous view of Sky Pond with the Sharkstooth in the background. It is an easy hike to get mostly around the lake, but it does add about 0.4 miles to the total trip distance. However, it is worth it. Clouds still lingered in the Sharkstooth and gave it an ominous and almost devilish appearance. On good days this rock feature is great class 5 climbing (or so we hear). Below are images from the jaunt around Sky Pond and a video we made at Lake of Glass just as we started to head back.
We were wary that another storm might roll through, so we decided it was time to head down. We hiked back through the alpine and sub-alpine scenery until we reached the scramble. It was crowded here, and we ran into a few larger groups, some coming up and some going down. We managed to get down just fine, but unfortunately, the wet rocks caused an accident for another party.
I (Thomas) was taking pictures of Allyson and Liz down climbing and ended up behind a group of 5. This was fine with me since I had a great view and was in an incredible mood from great company and beautiful nature. So while I was sitting on a ledge watching their group climb down I saw one of their party take a vicious fall. The climber fell backwards, tumbled, and I saw the back of their head hit a rock. I climbed down very quickly to get to them and respond.
The fallen climber was quite naturally a bit shaken up and felt faint and had a nice cut on the back of the head. But the bleeding stopped and somehow there didn’t appear to be any broken bones or severely sprained joints. Just a really bruised up hip and a bump to the head. After resting for a little bit and getting a little cleaned up, the climber was able to stand and hike out of their own power. Although the climber will almost certainly be very sore, they appear to have been very lucky. This climber assured us that they are going to be checked out by a doctor when they get back into town, which is the smart thing to do.
This was a humbling moment on our hike and indeed in our hiking history. The fall that the climber took could have happened to anyone. It could have easily been far worse, resulting in a broken bone, severely sprained ankle, or concussion. The incident is a reminder to take safety seriously. Had she been wearing a climbing helmet she likely would not have cut her head, and it would have minimized the risk of concussion. Although, no one, including none of our party, were wearing climbing helmets. Carrying a helment for 0.2 miles of scrambling in a 10 mile hike is hard to make oneself do.
The incident also displayed the camaraderie of hikers. We responded as did other groups to the injury. Between all of us we had a physician, an RN, a Red Cross professional rescuer, and some good Samaritans! Quite a response, it would probably take hours in an ER to get anything close to that!
After the climber was able to get up we helped her down the rest of the way and said goodbyes. Our party stayed at Timberline Falls a little bit longer and took some group pictures, which are below.

After we finished taking pictures, we hiked down and out relatively quickly. Though, the sights and sounds of Icy Brook and The Loch ever so often drew us back in for a few moments of serenity. We were rained on once more on the way back but nothing too extreme. When we reached the car, we were thrilled to throw on our Tevas, Keens, etc. and give our feet a rest. The hike was successful, and we highly recommend it. While a great workout, it was a nice break from some of the strenuous mountain climbs we have been doing recently. On the way back we stopped for cherry pie, and some delicious Oskar Blues food and brew. Until next time…hike on!
-Cheers!
Allyson & Thomas


The Sawtooth (Mt. Bierstadt & Mt. Evans)
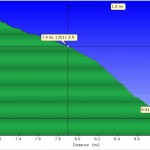
Distance: 11.2 miles (out and back) Elevation Gain: 4,335 ft (total gain)
Max Elevation: 14,265 ft Min. Elevation: 11,473 ft
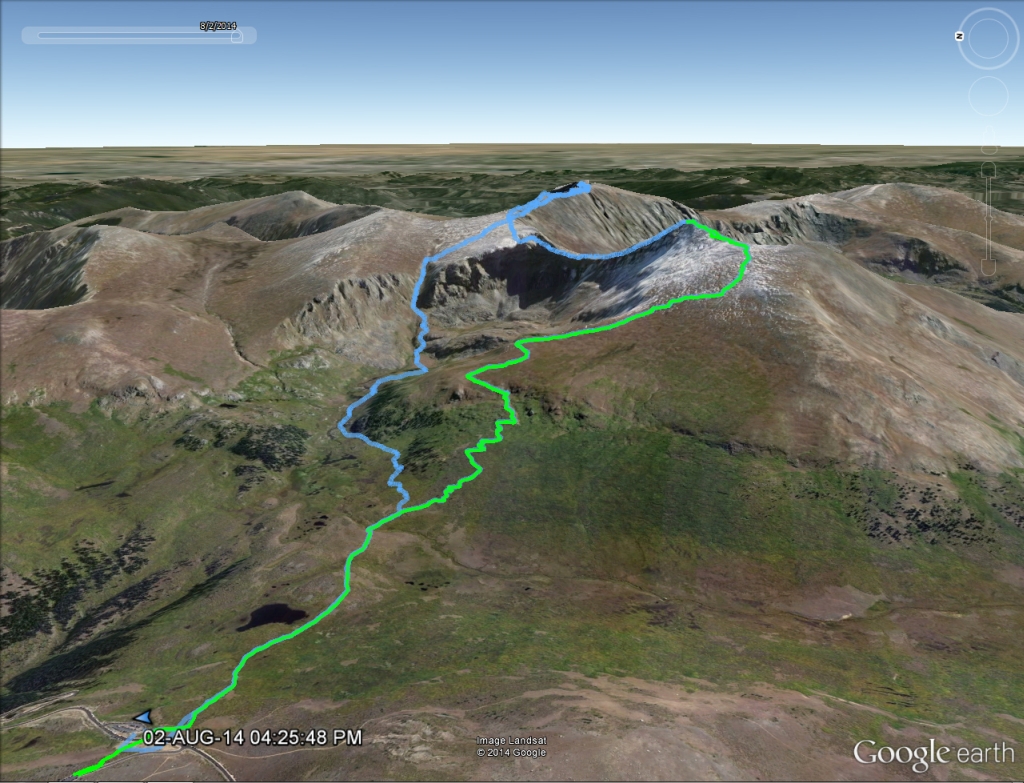

We did Mount Bierstadt last year, that route is shown in green in the above Google Earth maps. The blue shows the new route we took to do the Bierstadt-Sawtooth-Evans combo. On the right is a closer look at the Bierstadt-Sawtooth-Evans combo.
After repeated checks of the weather on Mountain Forecast up until 4:00 am on Saturday morning, we determined it was the perfect day to attempt the infamous Sawtooth route that connects 14ers Mt. Bierstadt and Mt. Evans. Nice weather is critical for a successful trip across the Sawtooth and neither of us were willing to take a chance being stranding on jagged rocks above 13,000 feet in a thunderstorm. With a green light on weather, we left the house in the dark shortly after 4:00 am and began the drive to Georgetown and up Guanella Pass. We approached the trailhead for Mt. Bierstadt about 15 min. to 6:00 am and already several cars and groups were prepping to go up Mt. Bierstadt which is one of the easier 14ers on the Front Range. We enjoyed a climb up this mountain last September. This time we had a much longer, intense day planned.
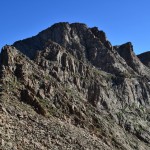
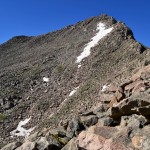
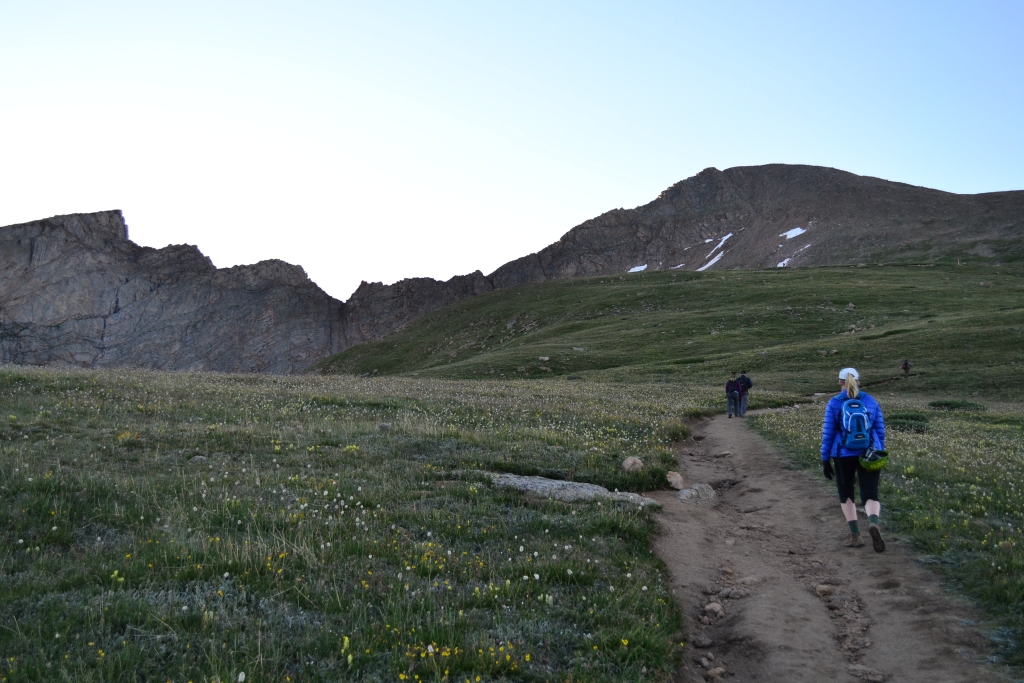
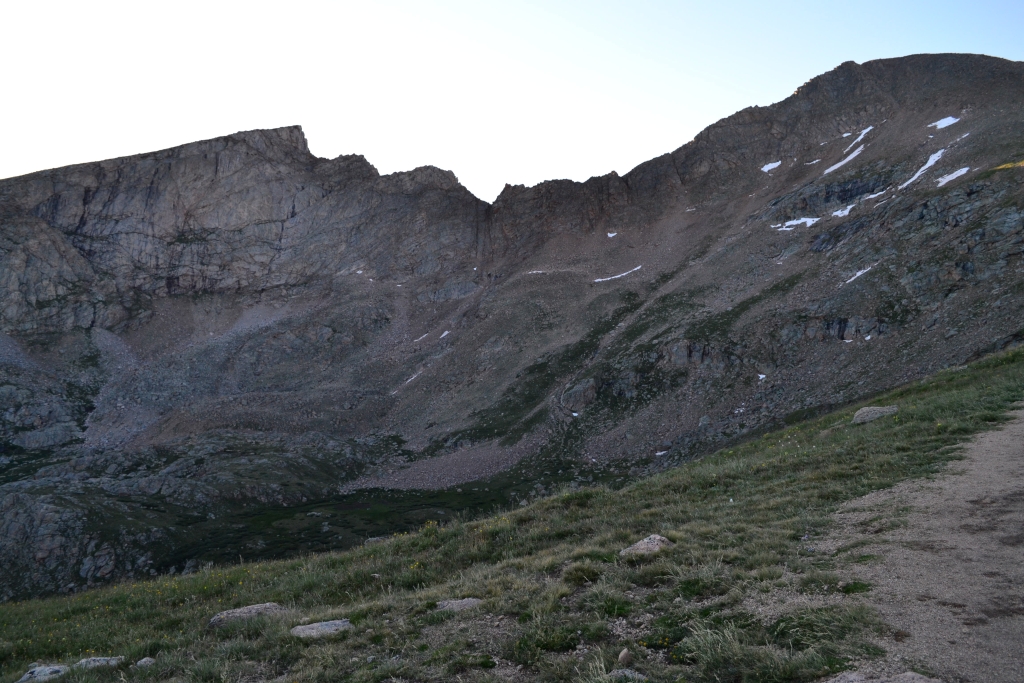
The Sawtooth is a great traverse that connects Mt. Bierstadt to Mt. Evans (after quite a bit more hiking). It gets its name from several aretes (jagged knife-like rock formations) that line up to look like the teeth of a saw. The traverse is a class 3 route with some class 2+ scattered throughout. The route can be crossed either direction, but most people, including us, opted to start at the summit of Mt. Bierstadt so we had fresh legs for the traverse. Our early morning climb up Bierstadt was a warm-up hike for what lay ahead for the rest of the day. Frost blanketed the ground and a chill hung in the air as we began. We paused for a few photos, but managed to summit in two uneventful hours. Seen below are early morning photos of the Sawtooth as we made our way toward her.
When we reached the summit we paused for 15 min. or so to rest, take photos, and snack. There were several people on the summit already. We found a quiet spot towards the north side of the peak that looked down towards the traverse to mentally prep. Seen below are photos from the summit before we started the Sawtooth. Notice the Sawtooth in the background.
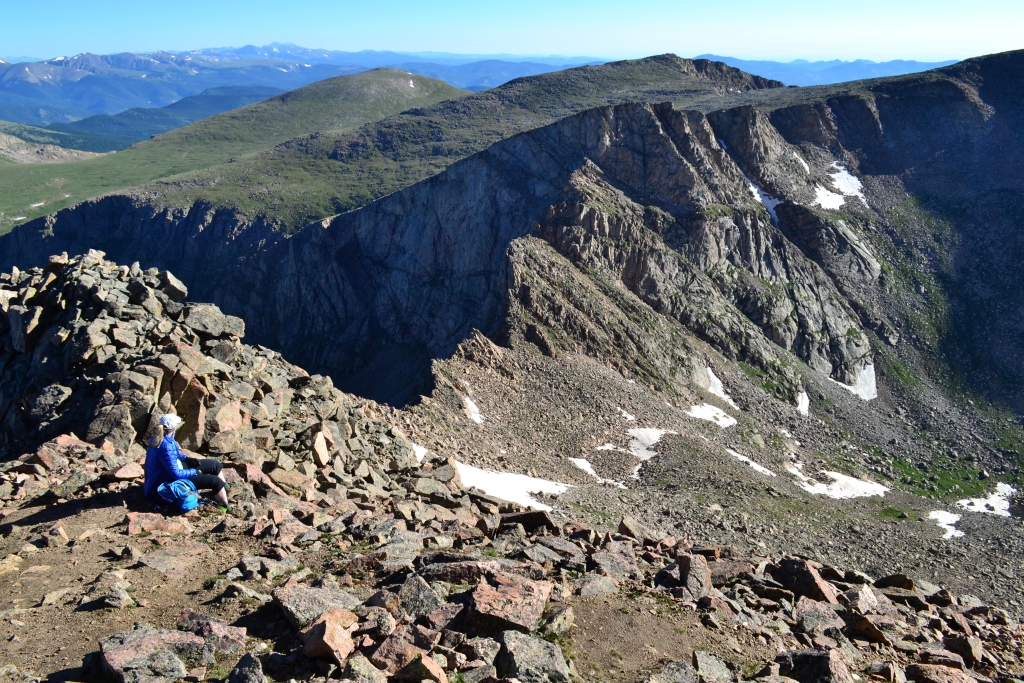

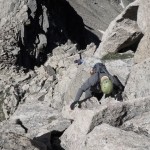
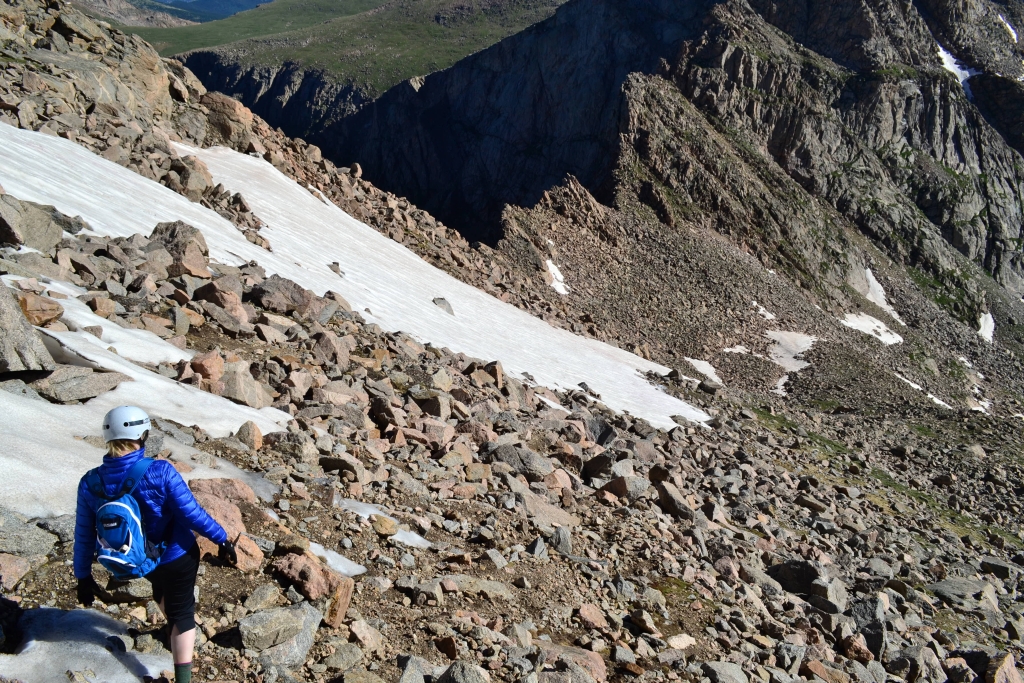
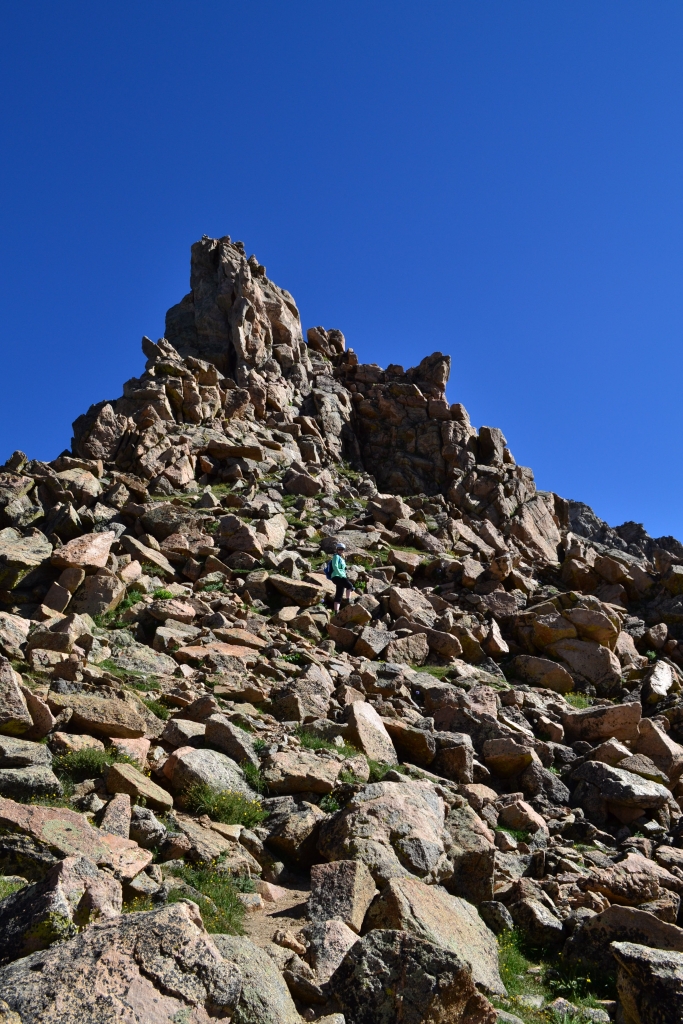
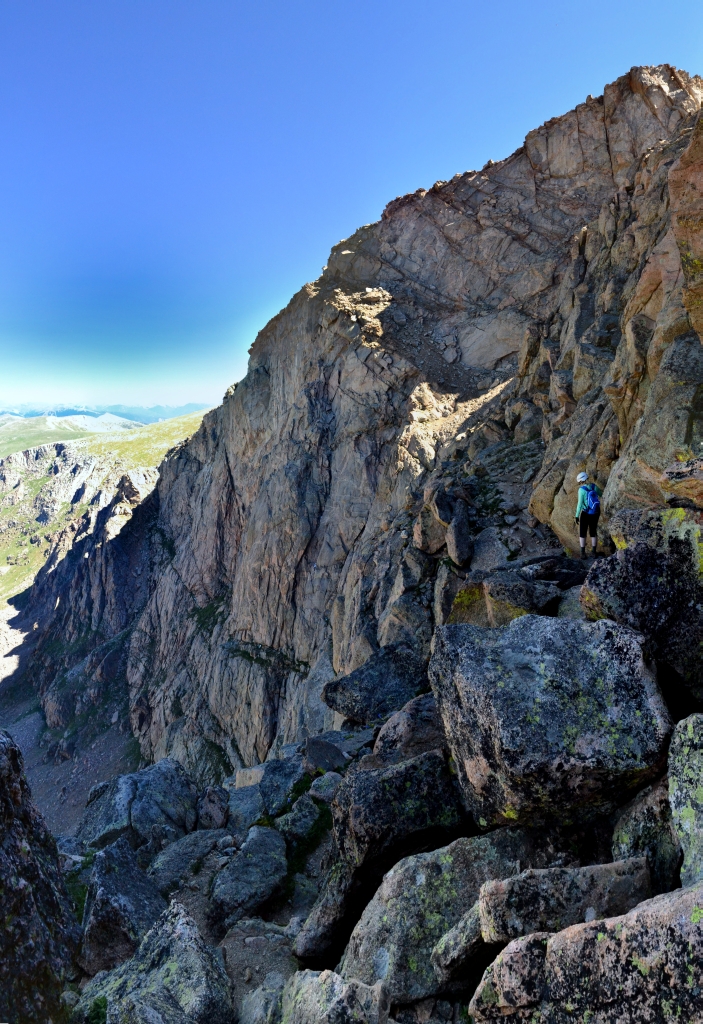
We donned our helmets and proceeded with our next task of down climbing the steep incline towards the saddle. There was much screw and loose dirt until we reached the boulders. Many sections here required us to lower ourselves waist level down to reach the next rock. While the scree was annoying, bouldering was a rather fun challenge. Unfortunately, due to a very large snow drift located higher on the traverse, we were forced to downclimb a little lower than we wanted to on the route. Not a huge deal, but it meant having to climb back up a bit more later. Seen below are photos of the initial descent of the traverse looking downward as well as back up to the summit of Mt. Bierstadt.

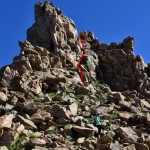
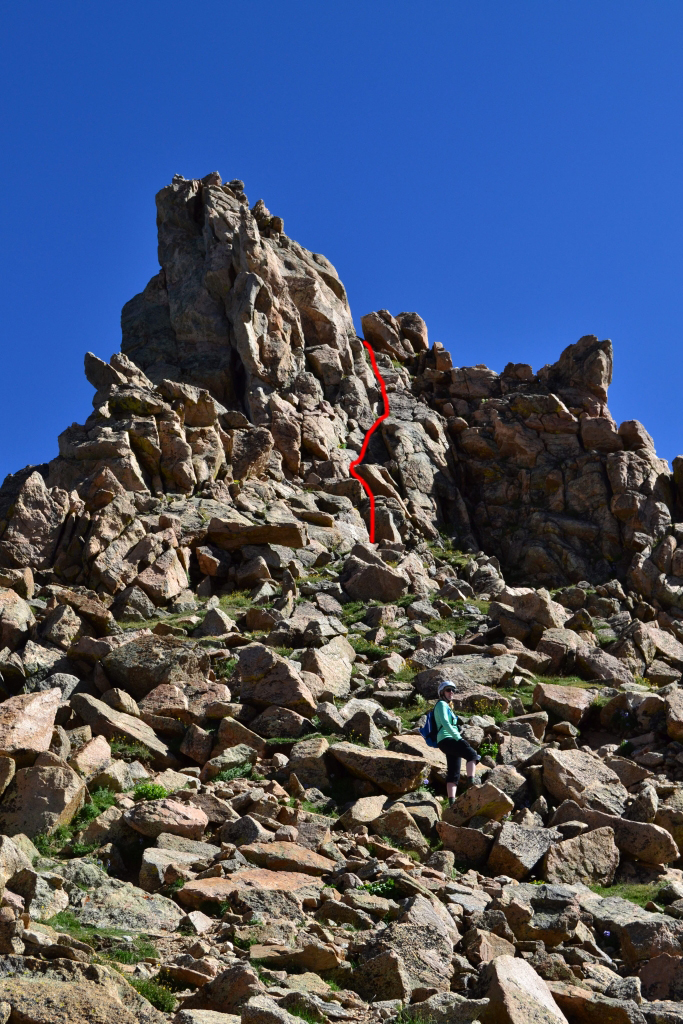
Once we reached the saddle, we faced our next obstacle. Midway between the traverse, climbers are greeted with a large gendarme (spike rock/isolated spire found on a ridge). It is the most challenging portion of the climb requiring solid class three (a fall would hurt very badly) moves to get up and over the top. Nonetheless, if you are not in the mood for the challenge there is an alternative route that goes along the right side of the pinnacle that is just class 2. We wanted a nice challenge, so opted for the direct up and over climb. The moves required good balance and arm strength, but this climbing portion was short. Seen below are photos of the gendarme and climb up. Yeah…it was a bit steep…The last photo displays the remaining route on the east side of the traverse.


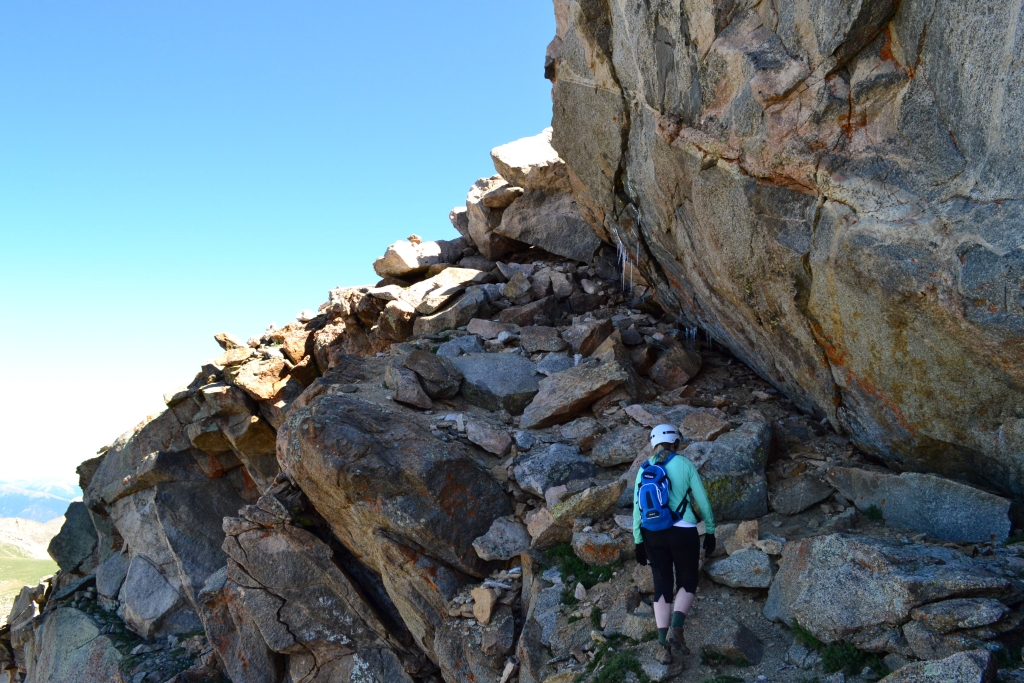
We were excited to have gotten safely through this crux and were ready for the next challenge, the ledges. This was more of a mental challenge than a physical one due to the staggering exposure. After the gendarme, we followed the traverse to a notch that leads to the west side of the sawtooth. Yep, the side of the traverse that you can see as you hike up Bierstadt. The side that greets hikers and climbers with sheer cliffs that drop a thousand below to the valley. Luckily, there is a mostly decent path that follows along the traverse and steadily upwards. Most of the path was at least 4 feet wide. Seen below are photos of the west side of the traverse and a video clip.
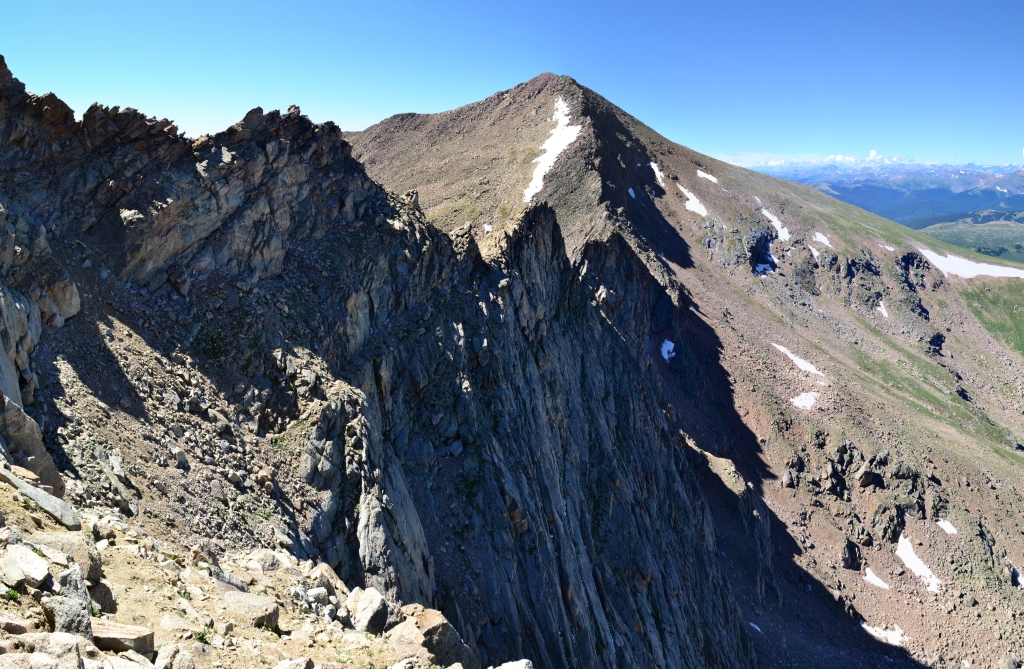
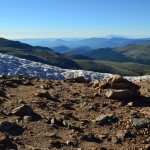
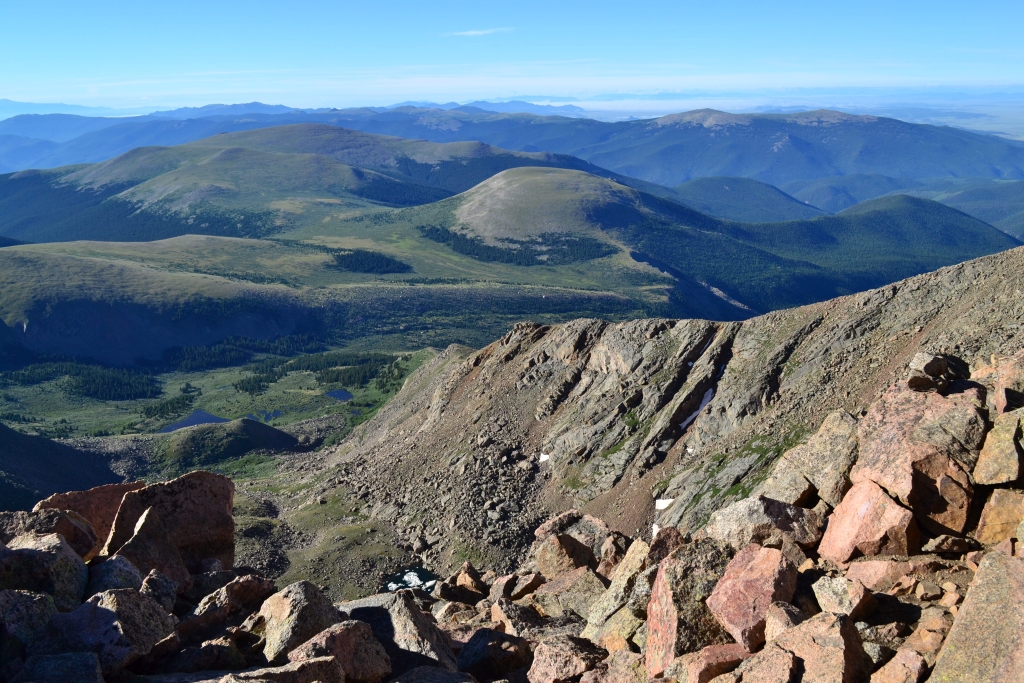
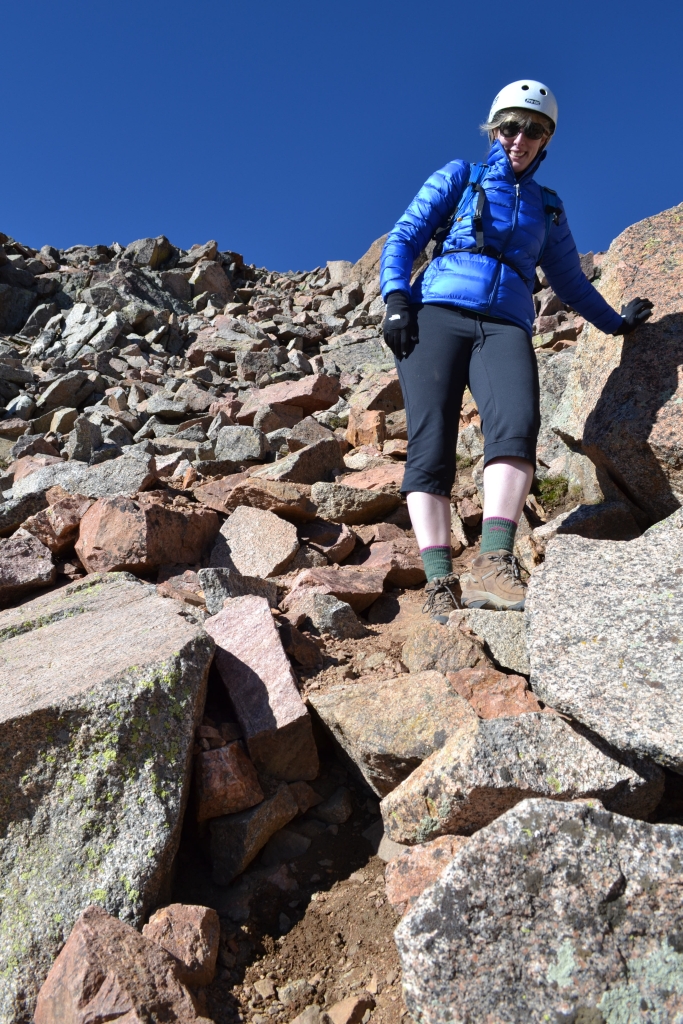
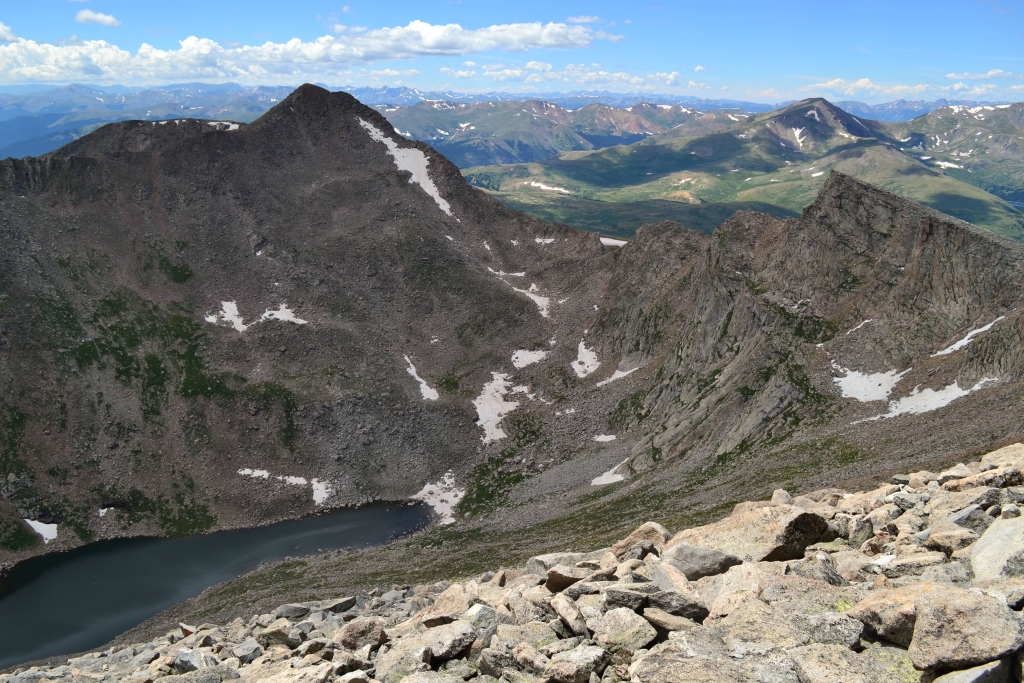
After traversing this narrow passage way, we began to climb back up via a narrow talus ramp. This was probably the most challenging portion because the beginning of the path was steep and full of loose rock and dirt. We were very anxious to get up and over at this point. Fortunately, as you ascend higher, the path gives way to another option closer to the wall that contains a bit more solid rock to grip on to. Overall, there isn’t any real danger to falling here if you are wearing proper footwear and taking it slow and steady. Getting over the mental hurdle is by far the most challenging, and probably the biggest risk to one’s safety. After this, we were home free on a wide open field. There is no trail here, but we easily wandered toward West Evans and weaved our way through the boulders interspersed throughout the mountaintop meadow. Seen below is a photo looking back on Mt. Bierstadt and the Sawtooth. We came from just above the snow drift. We felt a sense of accomplishment as we gazed back on our completed path.

We soon thereafter reconnected with a trail to West Evans and ran into several other hiking groups. Naively, we figured Mt. Evans (east, true summit) was just around the corner. Little did we know we had a long class 2 traverse over to the summit and observatory. Once the route reaches a notch after coming up from the end of the Sawtooth the trail drops down and moves alongside the West Ridge of Evans. We both decided to take what looked like a class 3 route that we thought would circumvent and then reconvene with the main trail without losing any elevation. So, we both took the high road and got some more practice scrambling. This route hits two more 14,000 ft. “peaks” before hitting the main Evan’s summit. Below is a look back from the summit of Evans at the West Ridge, the peak marked 14,252 ft is sometimes called “West Evans.”

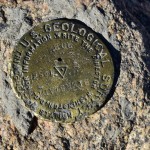
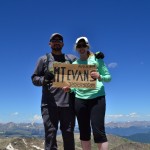
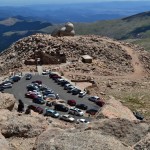
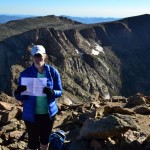
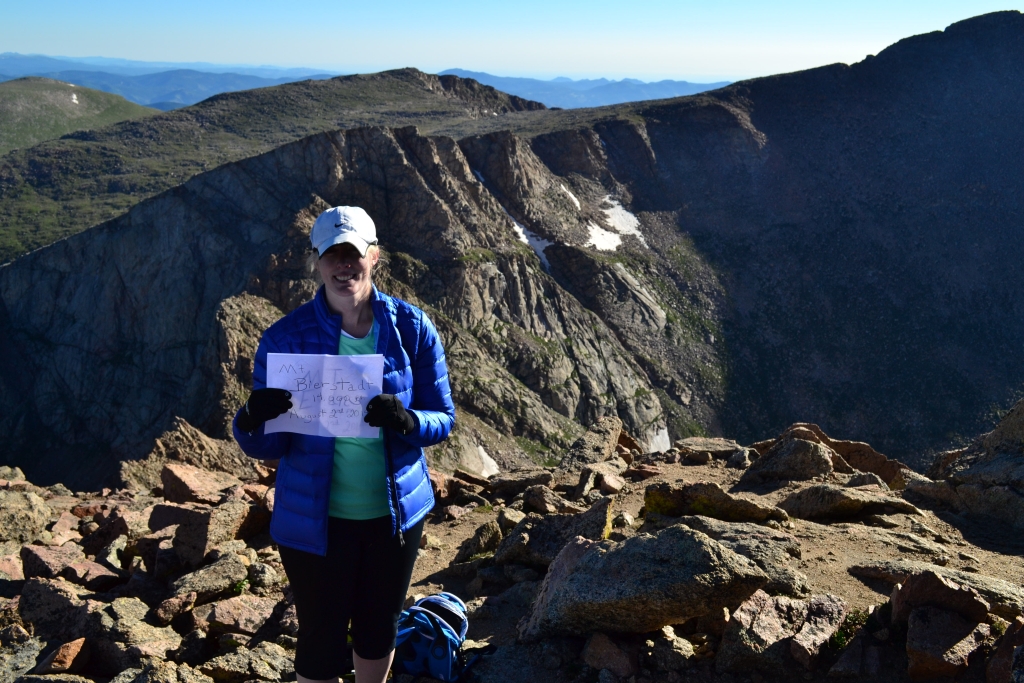
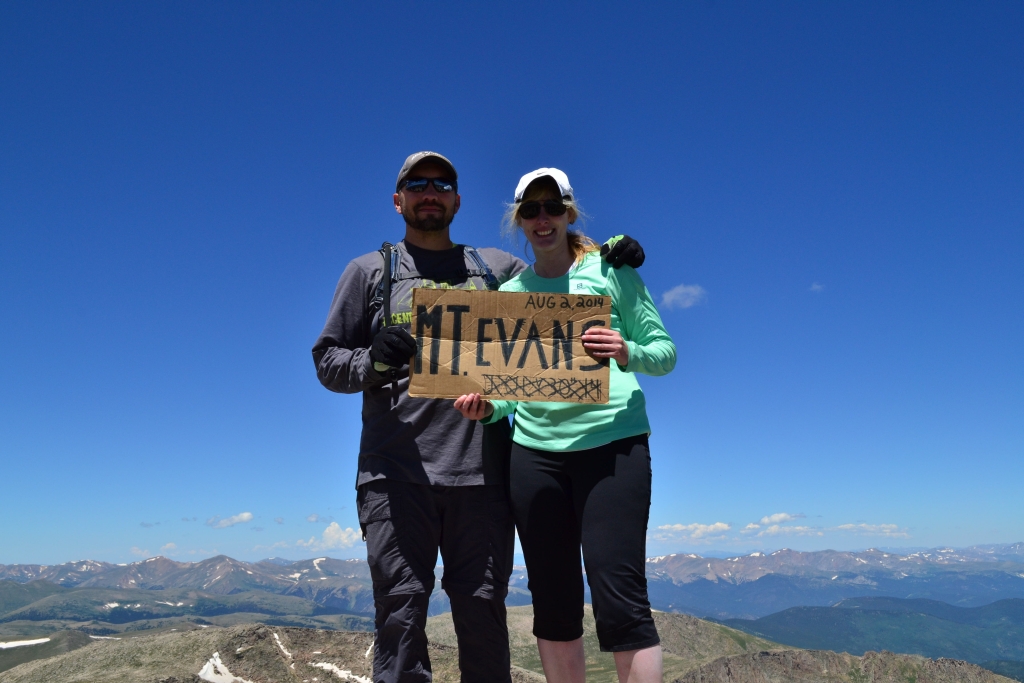
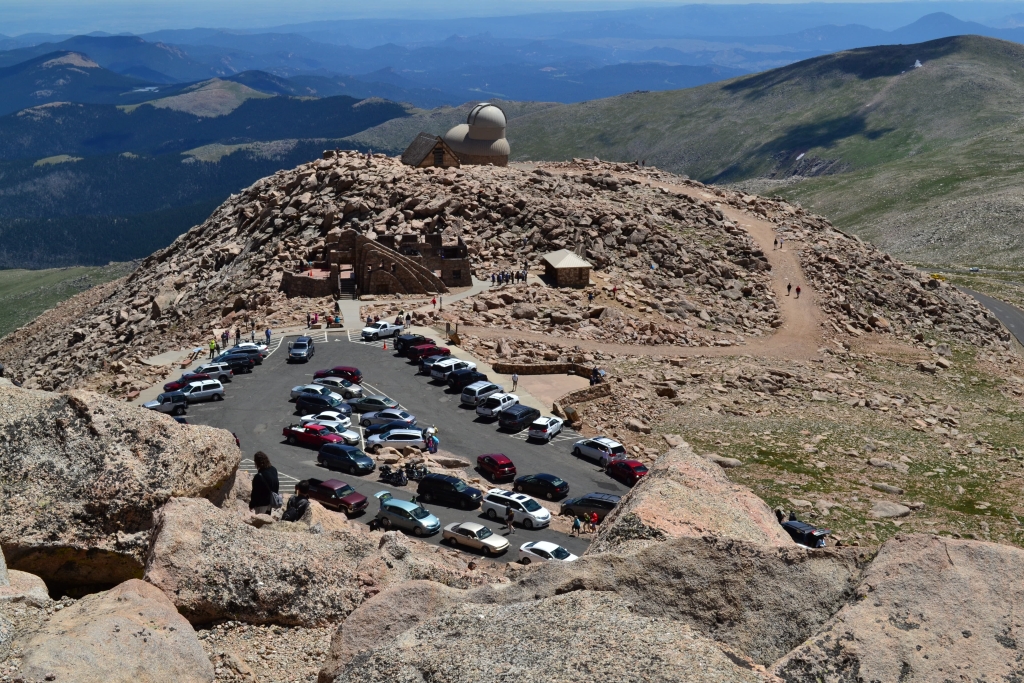
For those that are not familiar, Mt. Evans is accessible by car. In fact, it boasts the highest paved road in America. The summit has bathrooms, a storm shelter, observatory, large parking lot, and what looked to be a gift shop. It was quite overwhelming to be honest, when we reached Mt. Evans. Tourists were everywhere. The summit was quite crowded. It was weird to have worked so hard to get there, and then be surrounded by tons of people who walked 200 feet from their cars. However, it was the first time we had ever gotten to have our picture taken together on a summit. Some really nice people offered to take our photo and even lent us their summit sign. Seen below are photos from Mt. Evans.

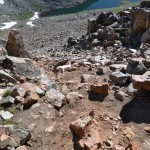
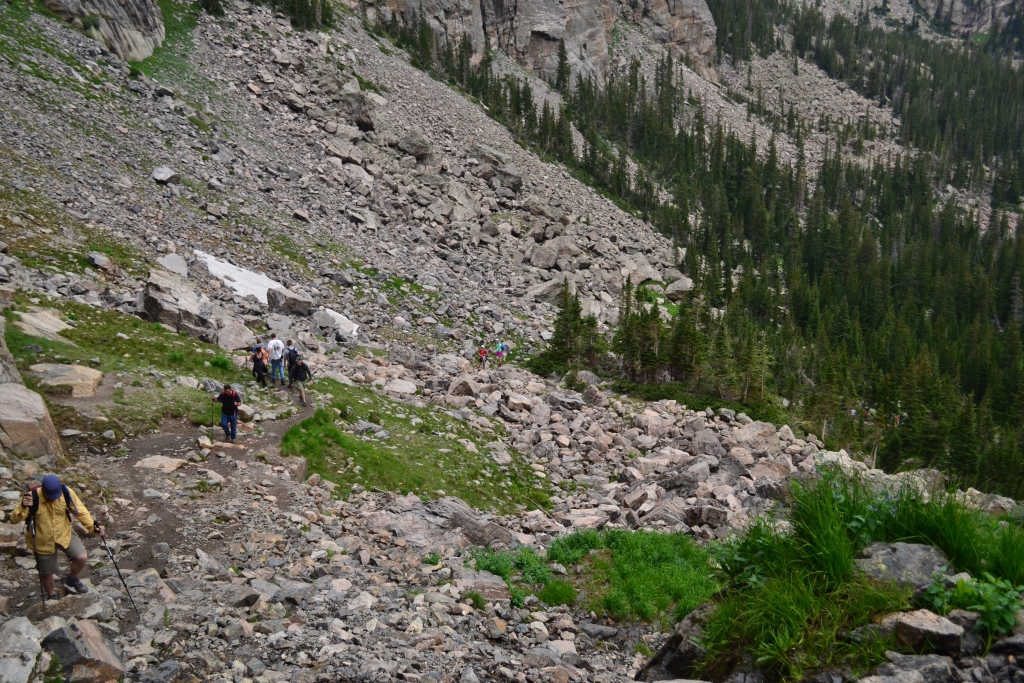
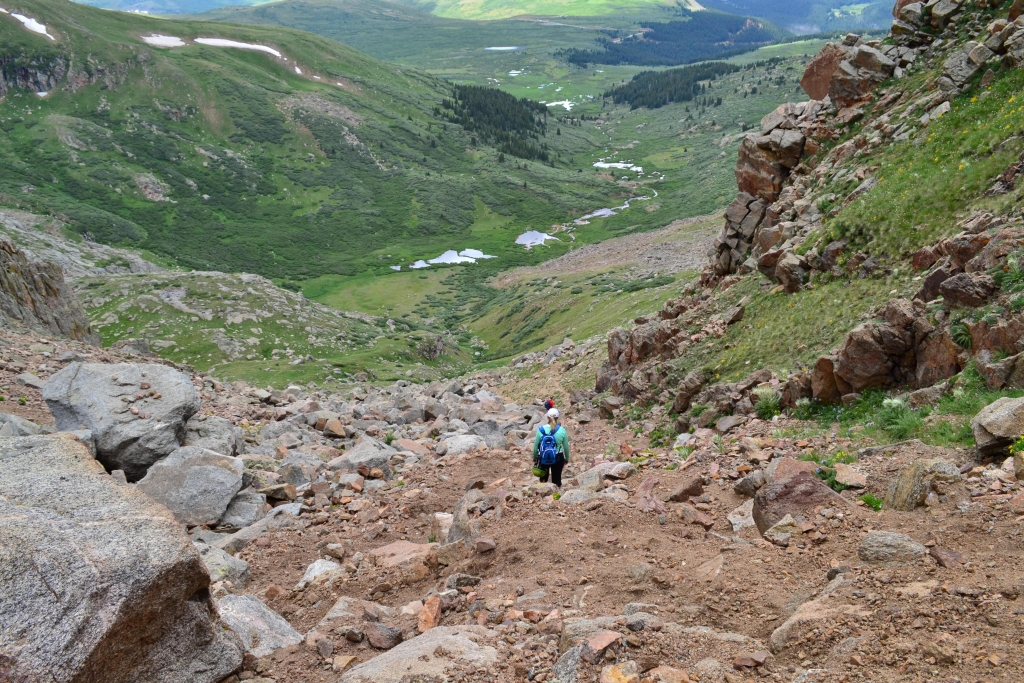
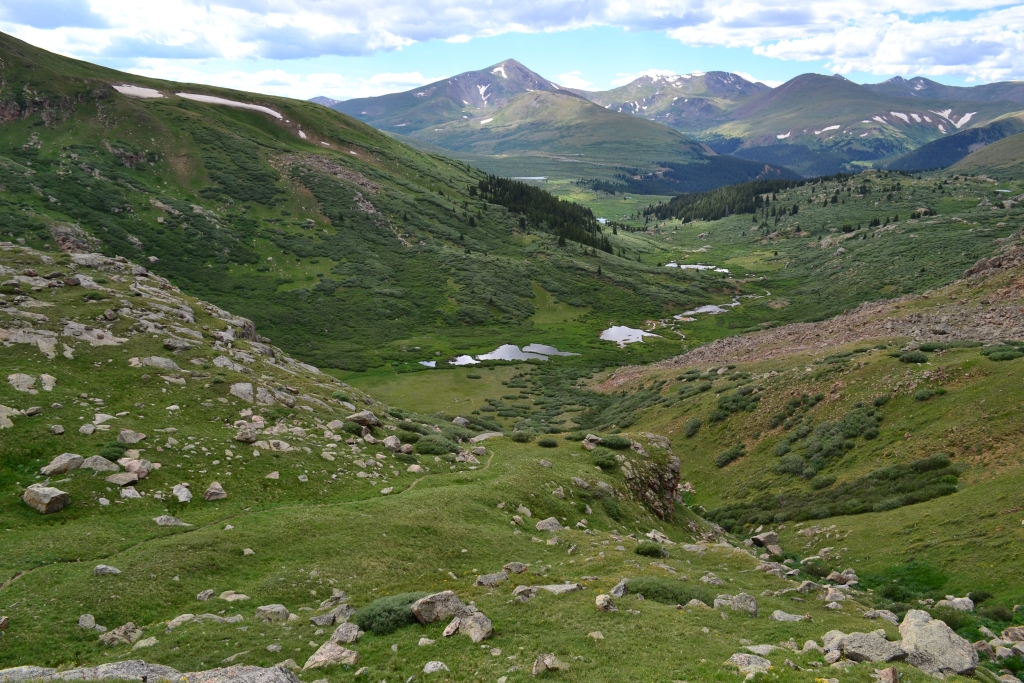
We then began the long slog back across the traverse to the original meadow right past the sawtooth exit. We had previously placed waypoints into our GPS that led us right to the gully. We thought we were home free at this point, but soon realized getting down the gully was no easy task. There was a trail, but it was very steep and loose (average 43% grade). We picked our way slowly and carefully down the chute through the dirt and scree. It honestly seemed to take forever. The path loses 1,726 ft. in 1 mile according to our GPS. Trekking poles would have come in handy at the gully.
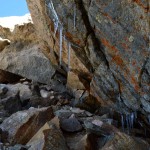
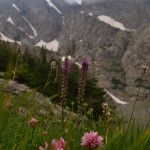
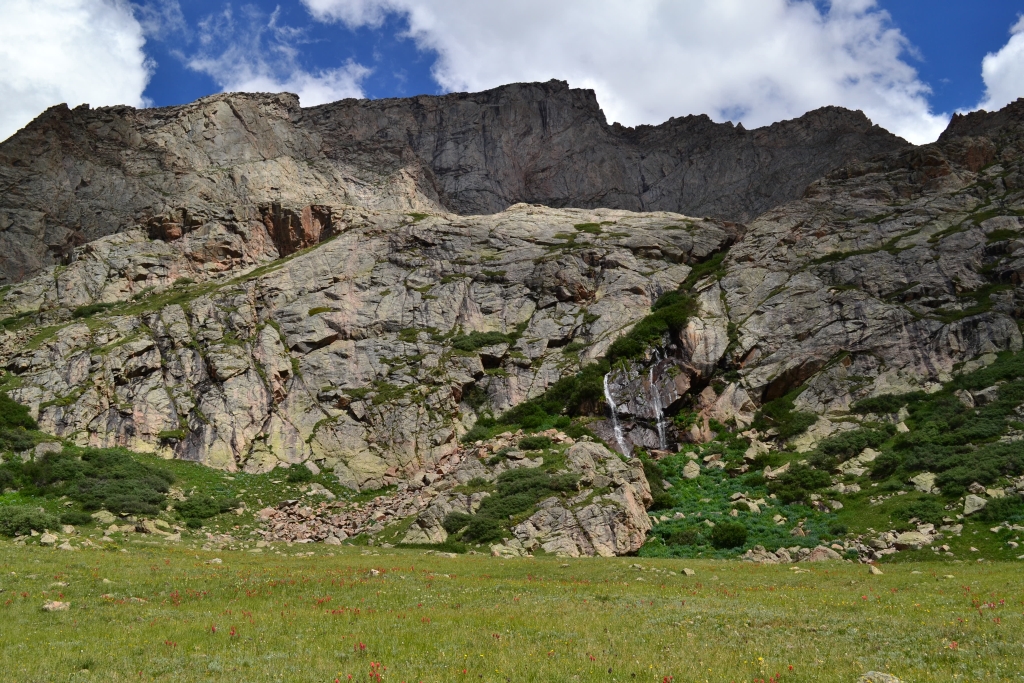
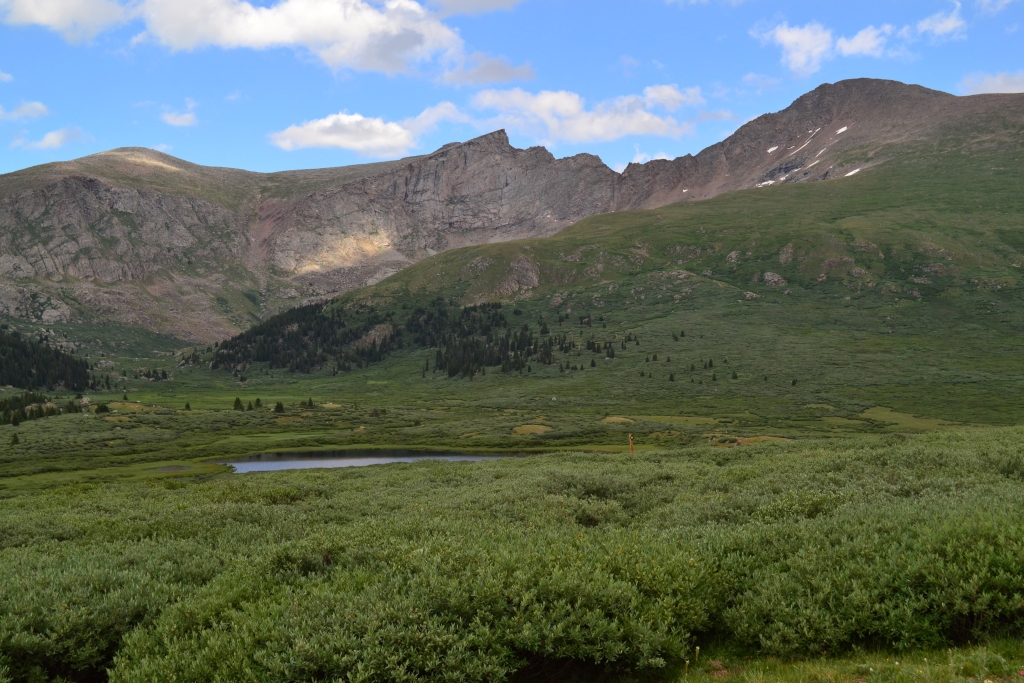
We finally reached the valley, and proceeded onto nice trail for a brief reprieve. We crossed a beautiful meadow. Flowers were in full bloom everywhere, and a gorgeous waterfall splashed the valley wall behind us. Things were right again in our hiking world. Seen below are photos of the gully and valley.
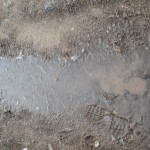
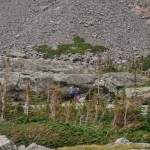
We paused for a pop-tart, since the visible parking lot looked extremely far away. The path led us now into the dreaded willows. There was a trail, but barely and it led straight through small ponds and smelly mud at times. The willows were often taller then we were. At times, we couldn’t see where we were or where we were headed. It made for an interesting adventure. If only the mud had not been there.
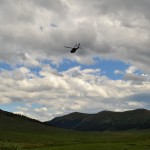
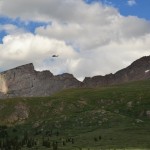
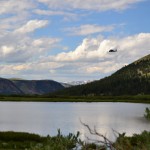
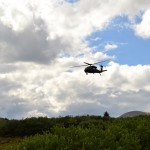
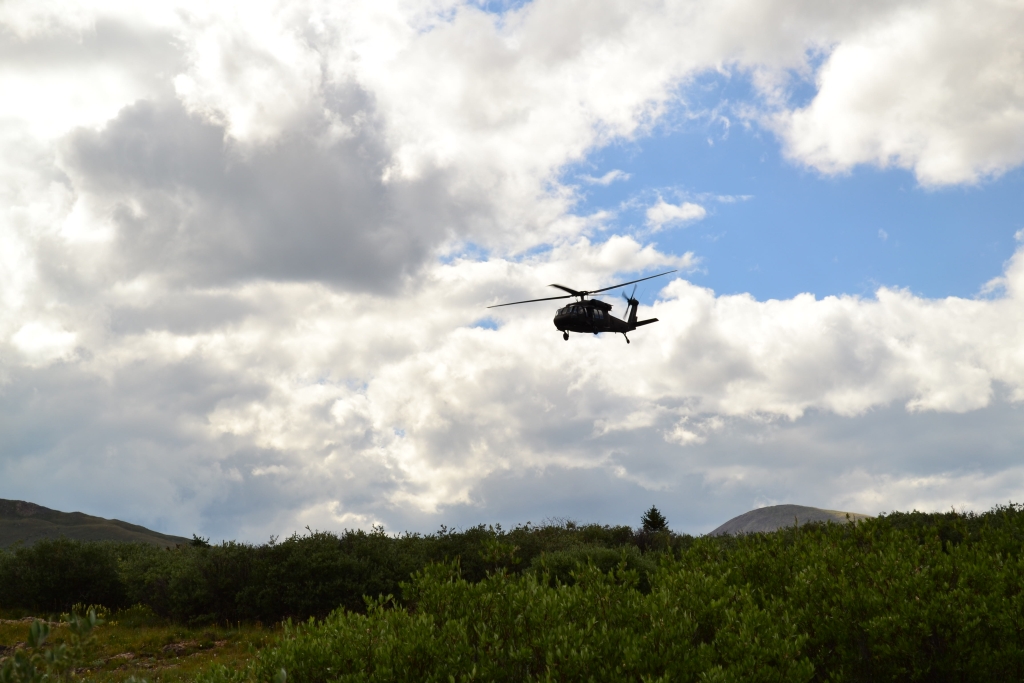
At some point in the willows, we looked upward in response to a loud noise. A blackhawk helicopter was flying right above us. (We felt like we were in Vietnam or some war zone for a moment.) The chopper flew towards the summit of Mt. Bierstadt, and we now knew someone was in trouble and needed mountain rescue. We found out later in the news that a women was having respiratory issues near the summit of Bierstadt. Seen below are photos of the willows and the chopper (check out the gallery for more pictures of the chopper).
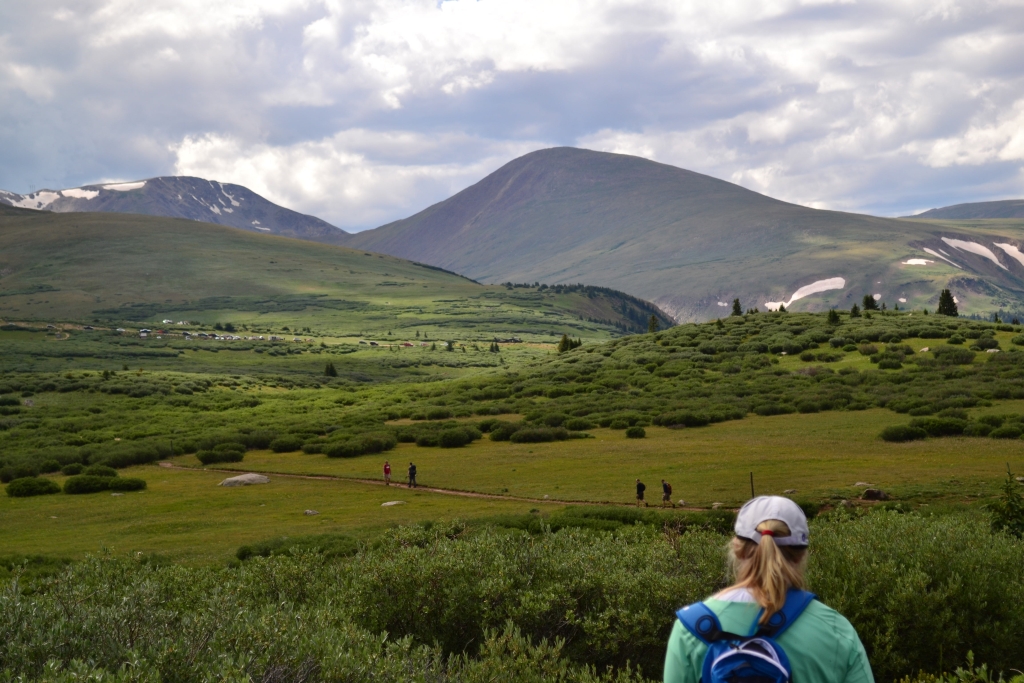
The willows lead back to the standard Bierstadt trail just east of Scott Gomer Creek, the creek you have to cross to get to Bierstadt. Thus, we made the creek crossing one more time and were about three-quarters of a mile from the parking lot. It had turned into a very pretty day and we were very happy to be back at the car. We looked back at Bierstadt, the Sawtooth, and the Gully and smiled at our accomplishment.
Major points and advice from this trip:
1. Start very early. The trip took us longer than we anticipated due to the long class two traverse to get to Mt. Evans and the slow going down the steep gully and mud filled willows.
2. Gaiters would be helpful in the willows, but aren’t necessary. The mud came up past our ankles at certain points and there are a few water crossings that you have to jump.
3. Trekking poles are very helpful on this hike in the gully and on the traverse to Mt. Evans. However, you need to have a way to secure them to your pack so your hands are free to climb if you plan on doing the Gendarme or on other class 3 segments. (They are also useful for icy segments.)
4. Go slow and take your time. It isn’t worth it to break something or fall. Many sections are slippery and steep, watch your footing.
5. Have fun!